Add audience
Overview#
The Add audience functionality enables the users to add new contacts to the audience database as well as add new attributes to the audience already stored in the database by manual entry or import from multiple data sources.
Users can add contacts by any of the following methods.
- Manually enter the data in specified formats.
- Store the data in files and import those files into the database. The file formats allowed are CSV and XML.
- Import audience data from a remote data source on the cloud.
- Import data via FTP/SFTP login.
Once the data is added, users need to map the attributes and define appropriate headers for the attributes. Once the mapping is verified and no error is found, the data will be successfully imported into the database.
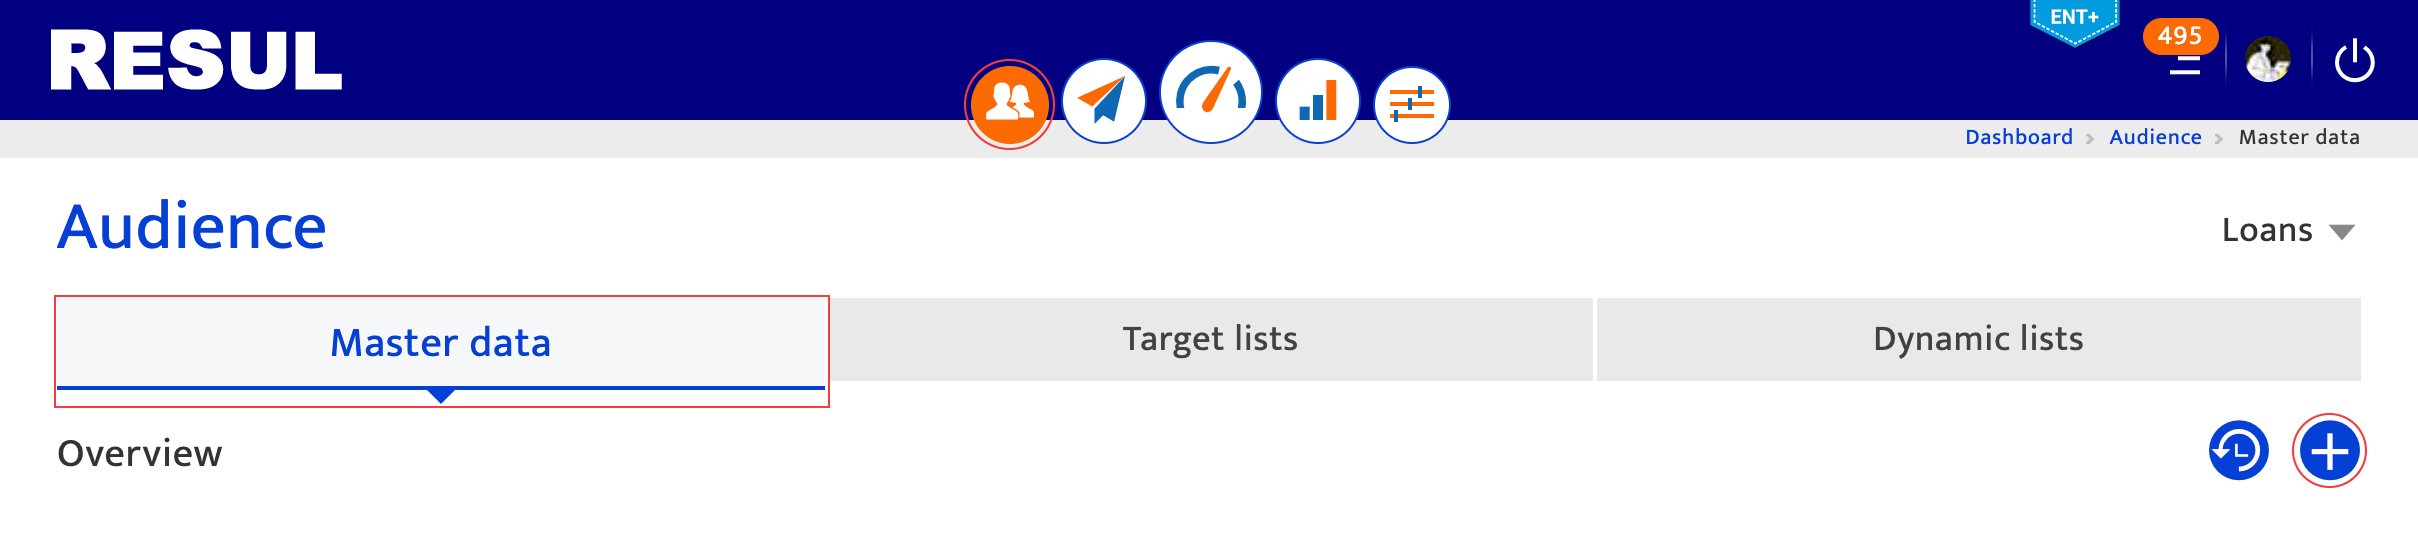
Navigating to Audience import#
- Click the Audience
 module.
 - Click the Master data tab. The Master data screen will be displayed.
- Click the
 icon in the Master data screen.
To add audience into the database, follow the steps mentioned below.
- Add the audience by one of the available methods.
- Map the imported data.
- Confirm audience import.
Adding Audience#
Users can add audience by any of the following sources.
- Manual entry
- CSV
- XML
- FTP/SFTP
- Remote data source
Manual entry#
This option is used to enter the audience information manually. The format to be followed is mentioned in the entry column.
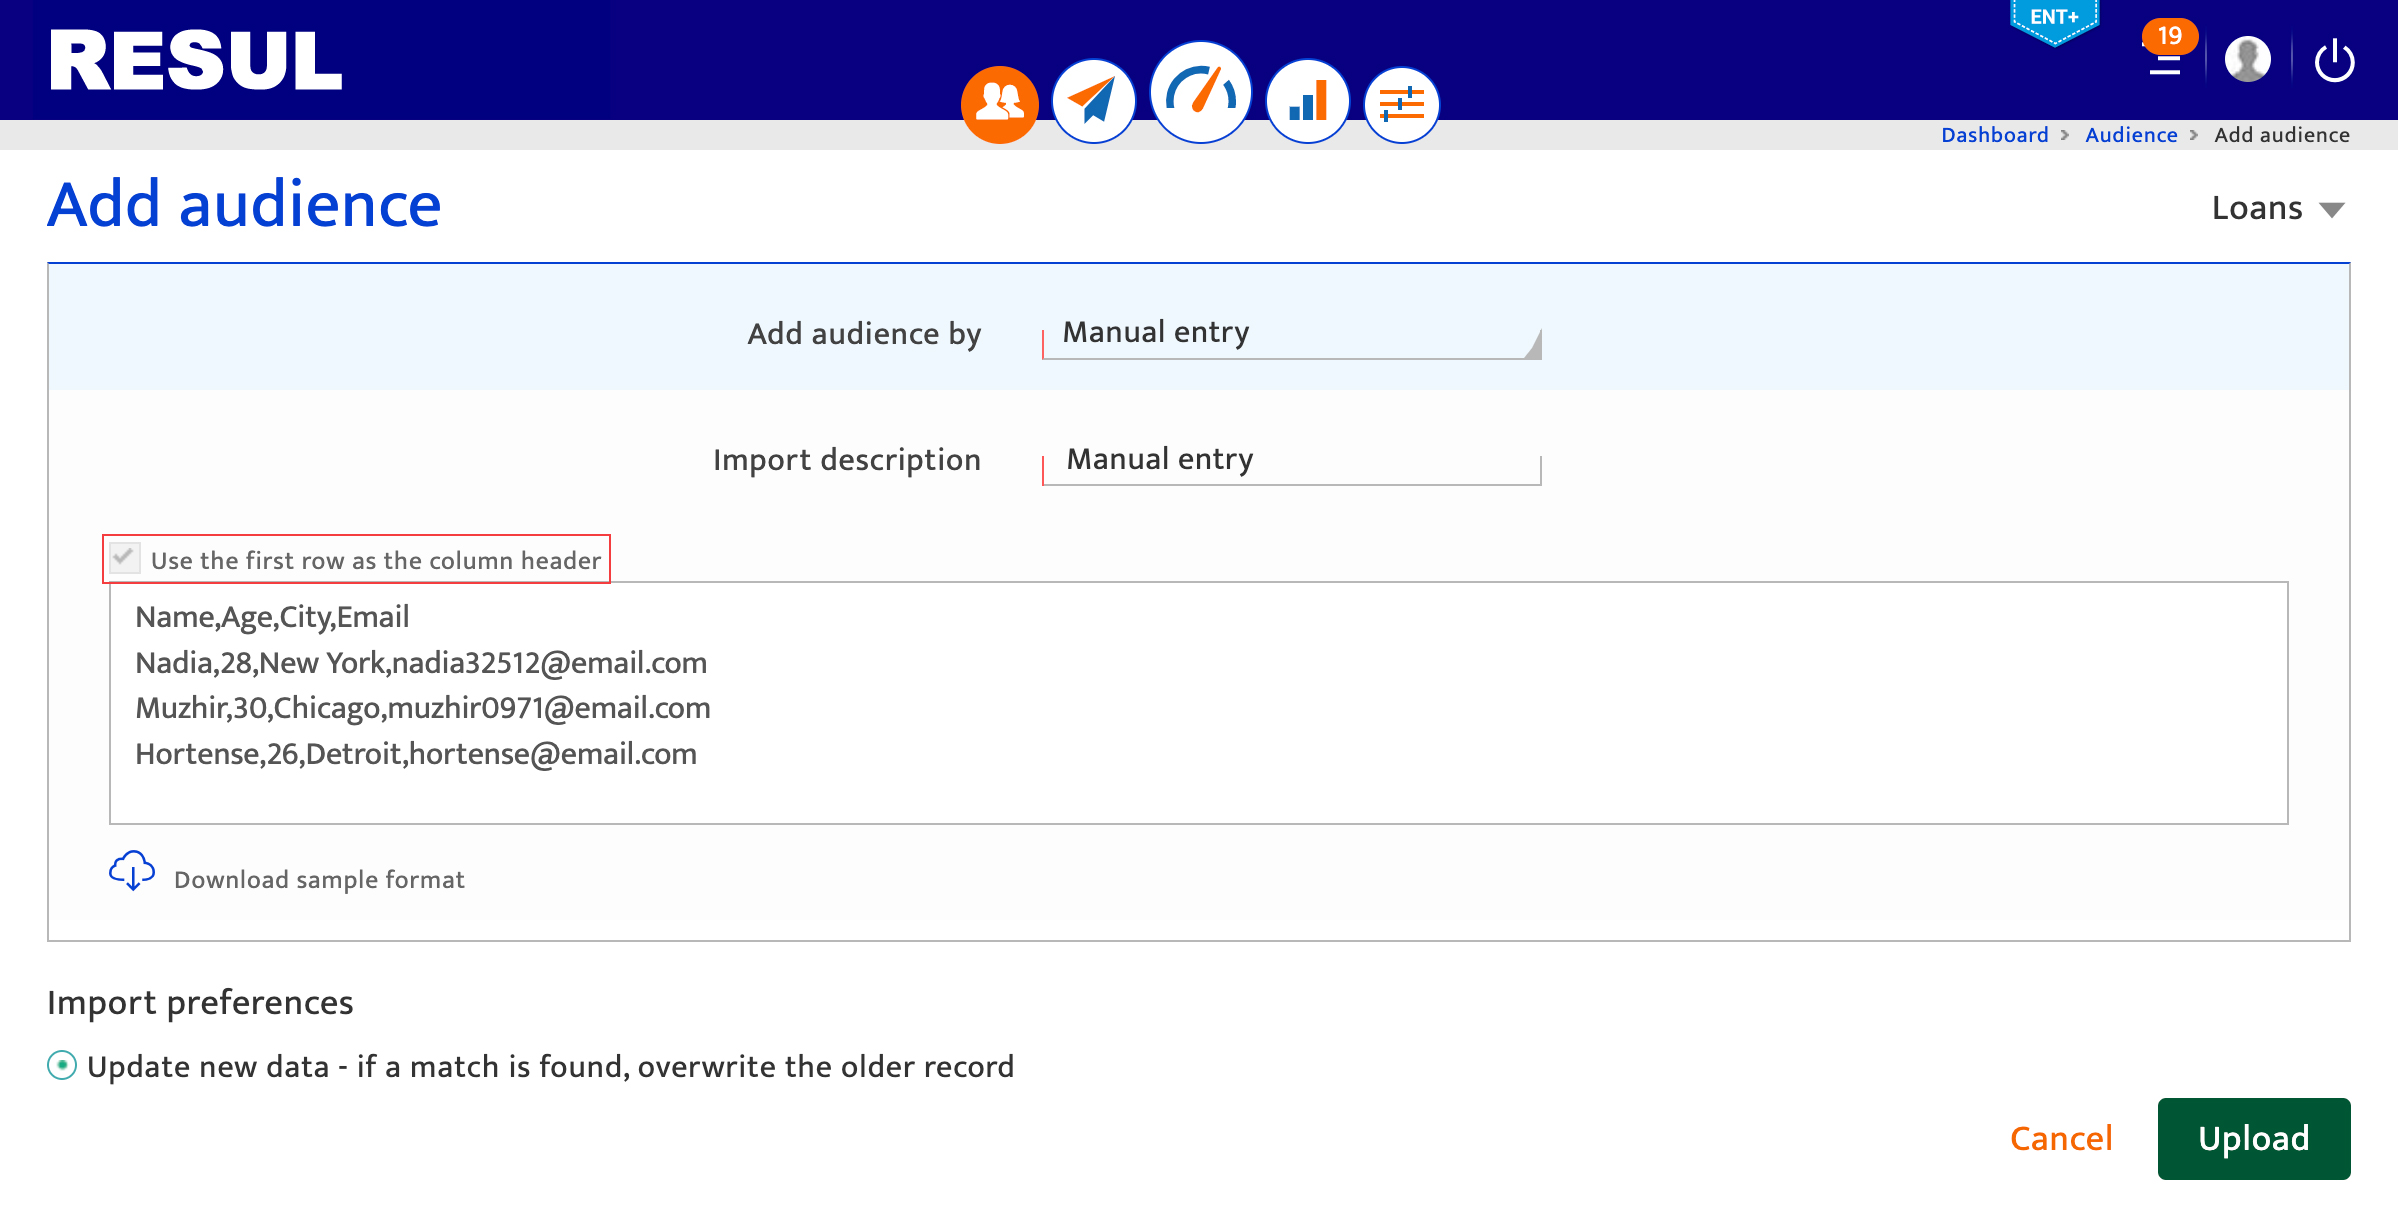
- Select Manual entry from the drop-down list.
- Enter the Import Description. This is a description about the import which is used to view the source of the audience record in the Master data import history . This can be combination of numbers, text, and special characters with a maximum of 50 characters.
- Enter the data attribute names for each column, separated using a comma.
- Select the Use the first row as the column header checkbox. The column header defines the data attributes. If not selected, the first row of data will simply serve as values.
- Click Download sample format to view how the audience data must be entered.
- Click the Upload button to upload the audience data.
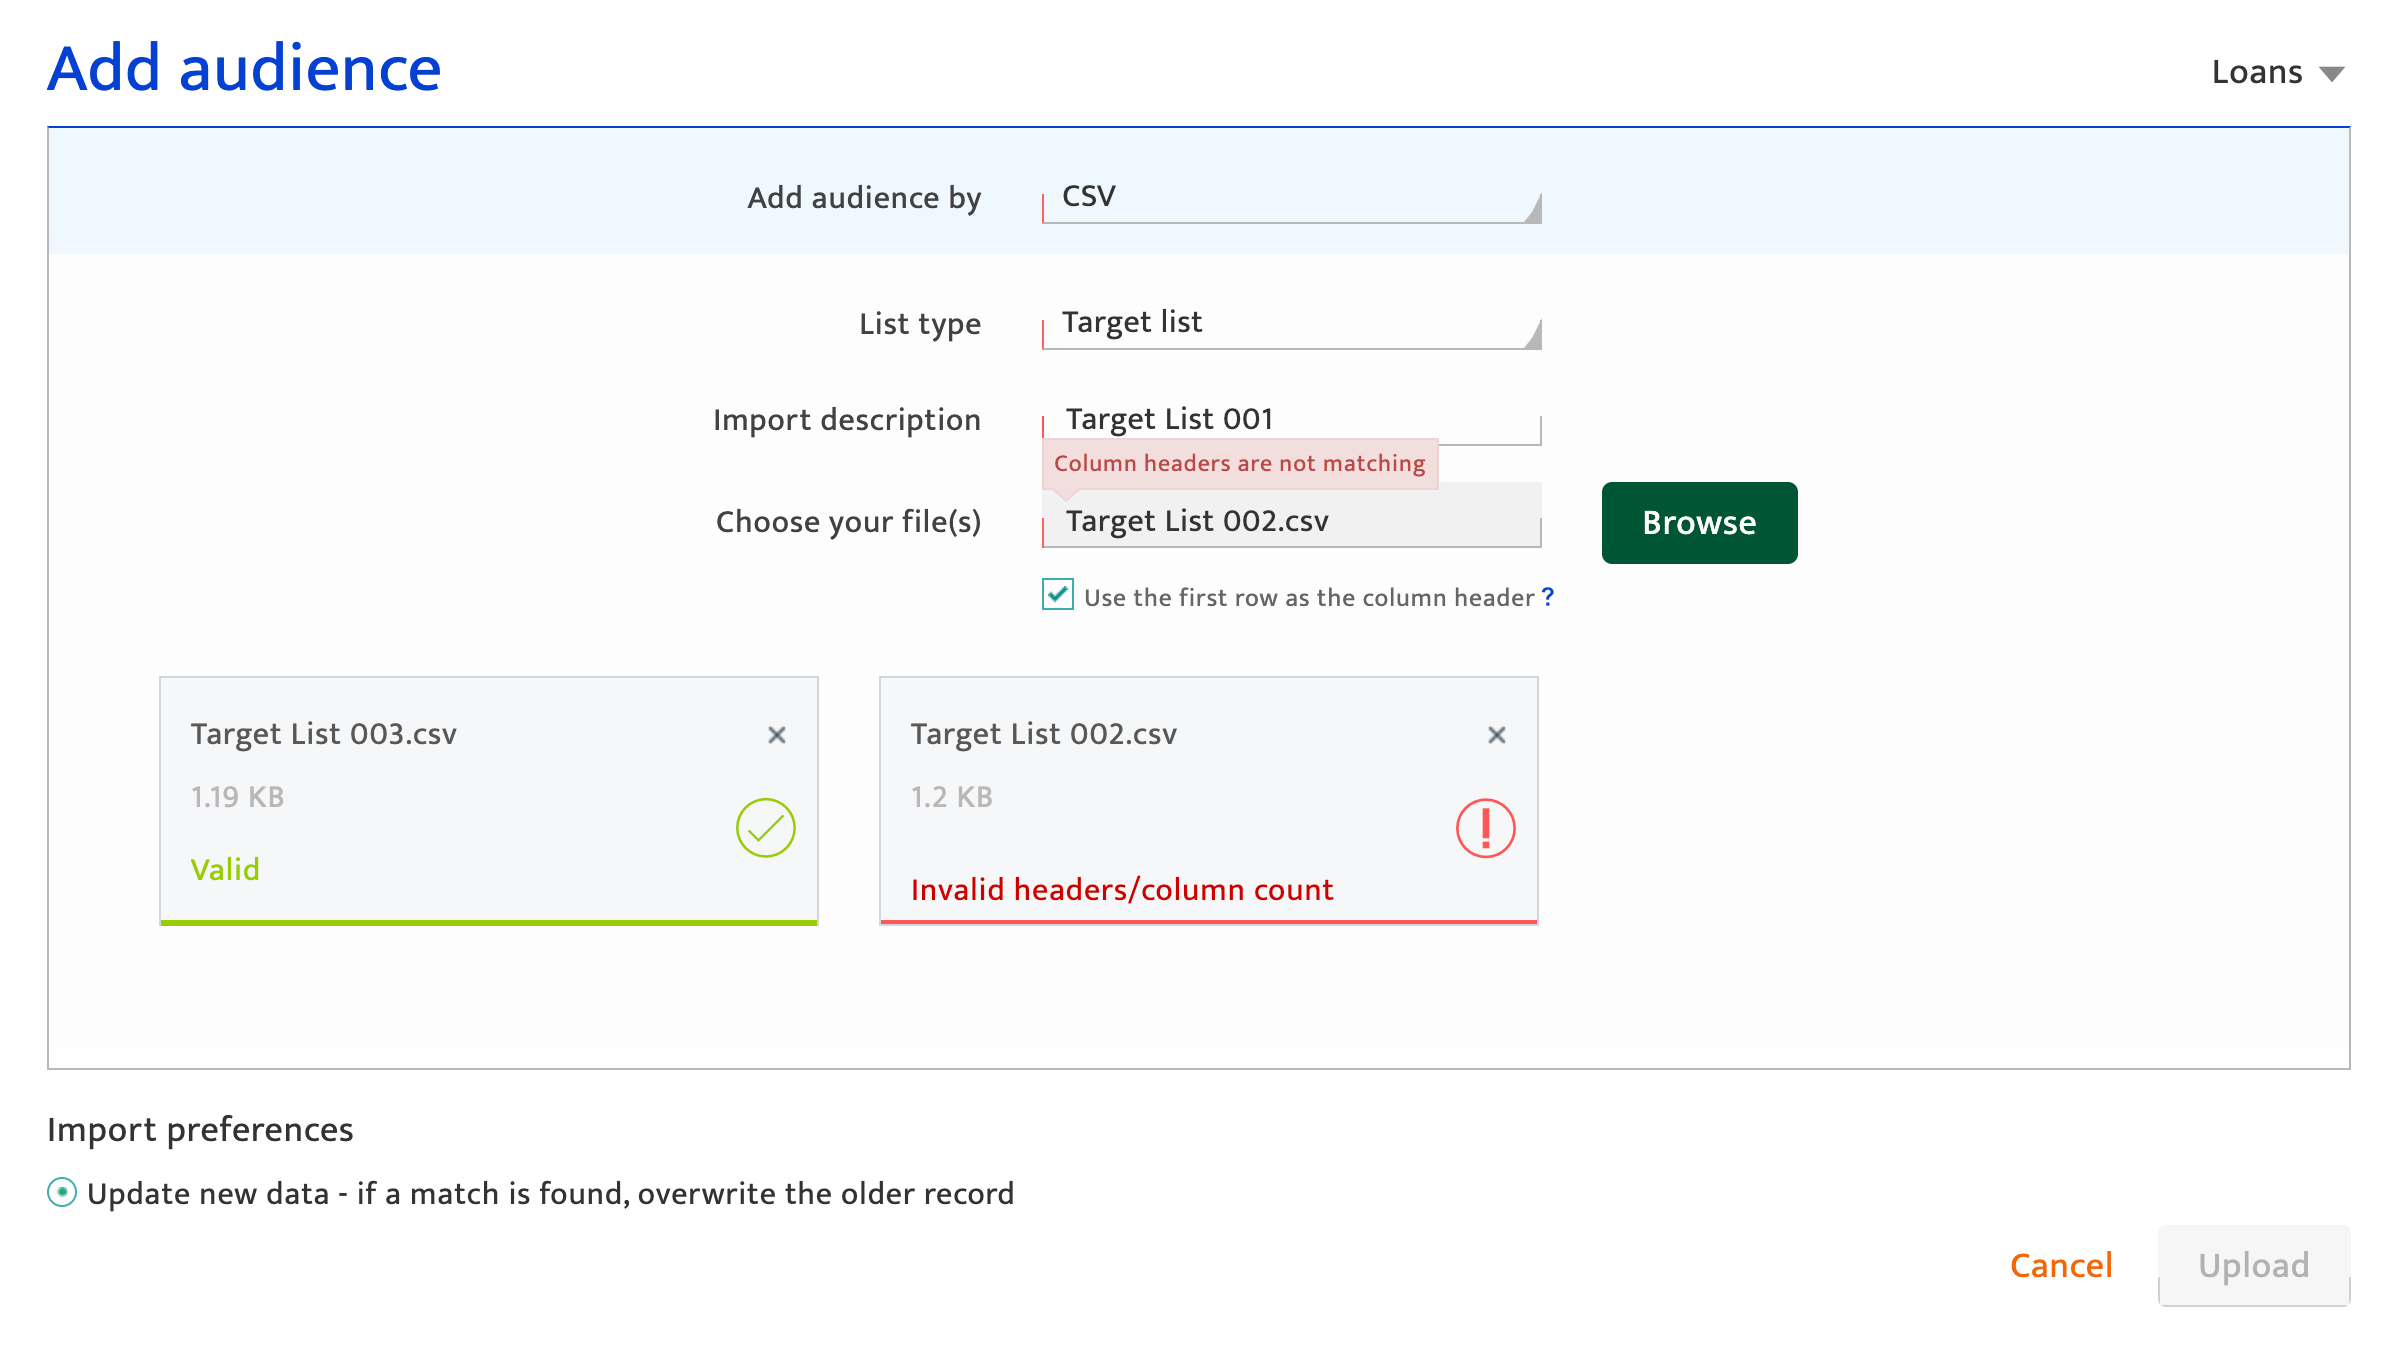
CSV / XML#
For CSV files upload, users can select any of the following list types.

- Select CSV from the drop-down list.
- Select List Type as Ad-hoc list, Seed list, Target list, Match input list or Suppression input list from the drop-down list. A pop-up message will be displayed based on the selected List Type
- Click I Agree & proceed.
- Pop-up message will not be displayed if target list is selected as the List type.
- For XML file import, List type selection is not applicable.
- Enter the List name. This is a description about the import which is used to view the source of the audience record in the Master data import history . This can be combination of numbers, text, and special characters with a maximum of 50 characters.
- Click the Browse button to select the CSV file.
- For CSV file import, a maximum of 5 files can be selected per import. Each file should not be larger than 10MB, and the overall file size should not exceed 60MB. The column headers should be consistent across the multiple CSV files.
- For XML file import, only one file not larger than 10 MB size can be uploaded.
- Choose whether the first row of the imported data to serve as the column header by selecting the associated check box.
- Click the radio button to overwrite the existing data with the new import.
- Click the Upload button to import the data. Verify the upload status of each CSV file using the status bar against each. The status could be:
- In progress: Still uploading
- Verified as valid: Successfully uploaded into the audience database
- Error with a summary message shown: The file was not uploaded due to invalid or missing data. Click the
 icon to view the error information and fix it.
Note:
FTP / SFTP#
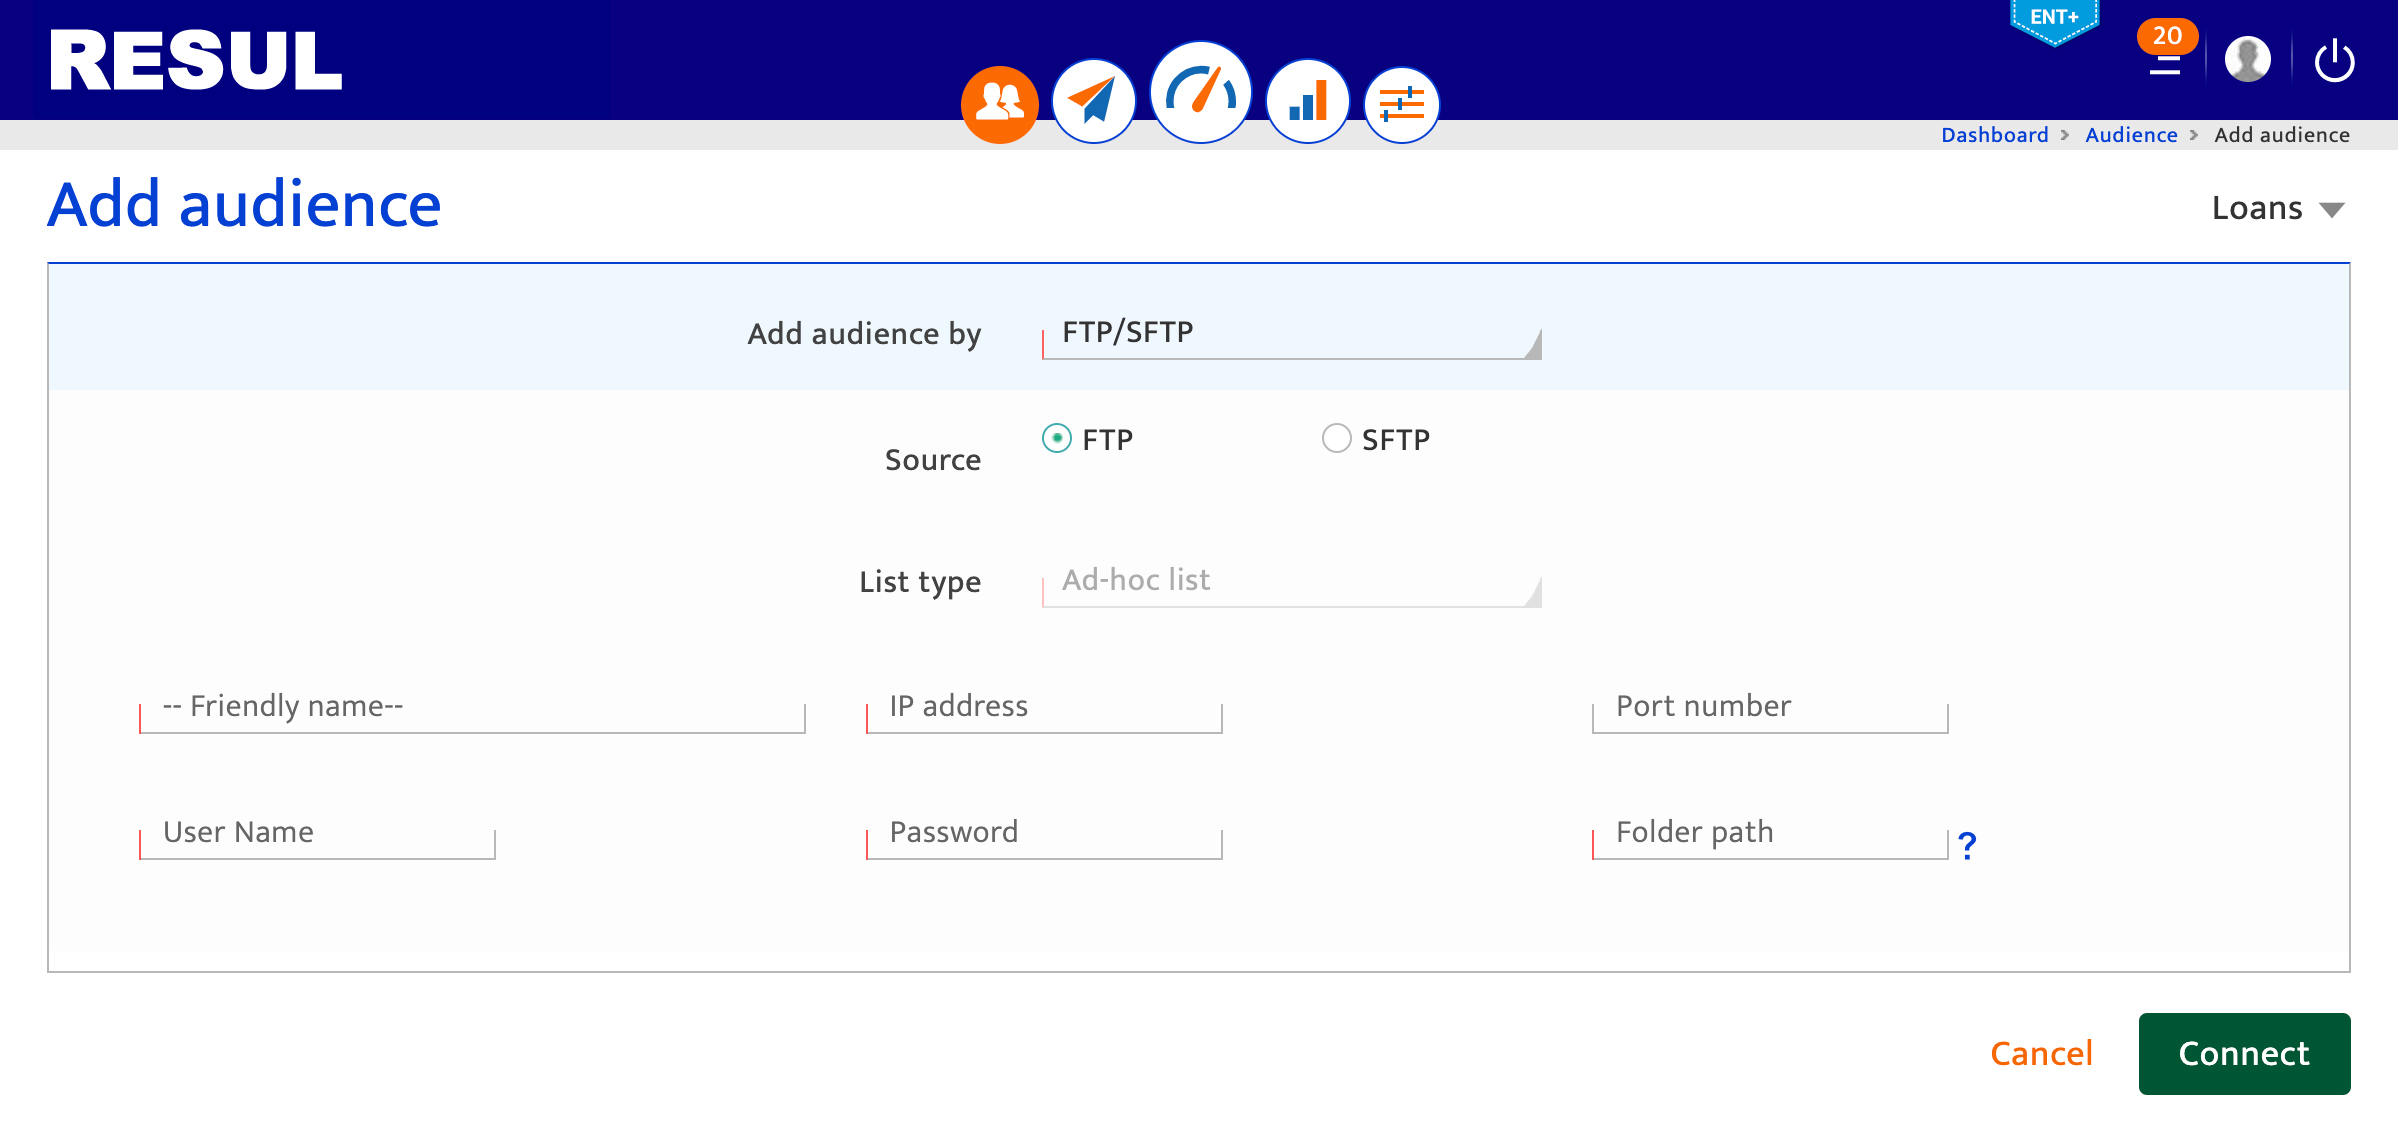
- Select FTP/SFTP from the drop-down list.
- Select the source FTP or SFTP.
- Select the List type as Target list or Ad-hoc list from the drop-down list. If Ad-hoc list is selected, a pop-up message will be displayed. Click I Agree and proceed to proceed further.
- Enter Friendly Name, IP Address, Port number, Username, Password and Folder path.
- Click the Connect button and import the data.
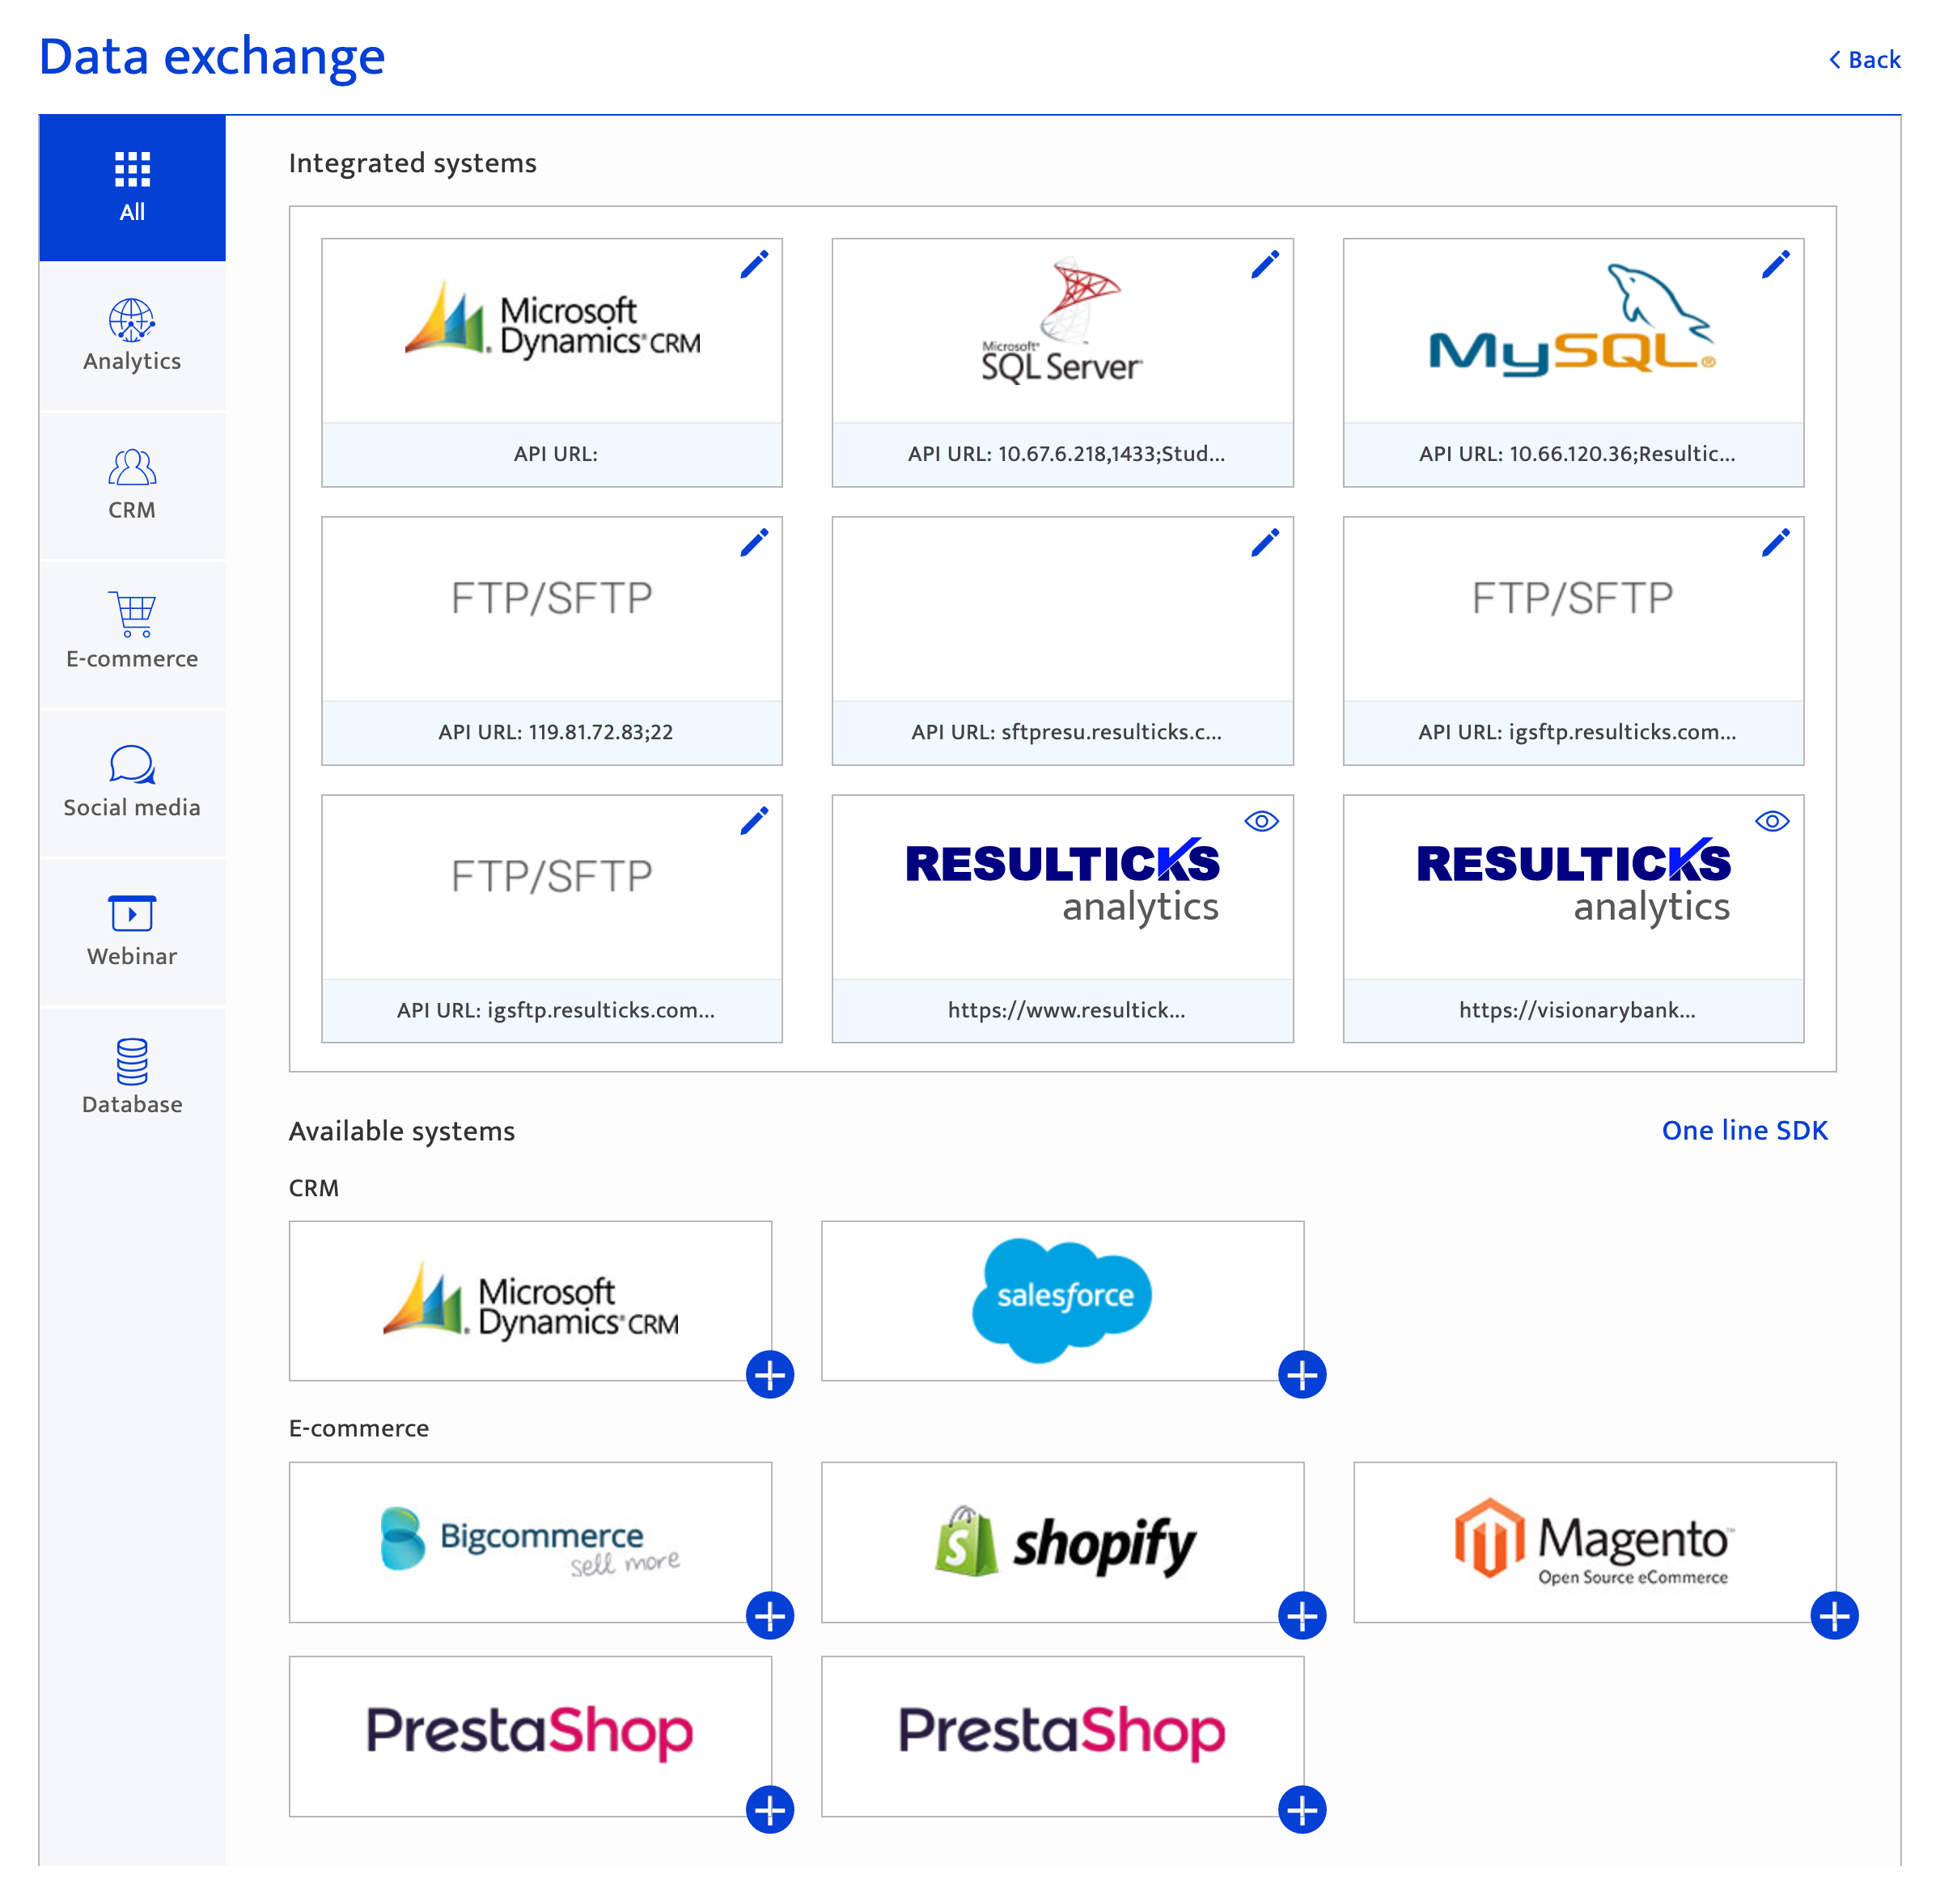
Remote Data Source#
- Select Remote Data Source from the drop-down list. The Data Exchange screen will be displayed.
- Select the remote data source from the Integrated systems panel on top or create a new data exchange connection.
- If an already integrated system is selected, click Edit and select the required tables and data fields to be mapped into the Resul platform.
Tip:
Users are recommended to seek Resul support when integrating a remote data source for the first time.
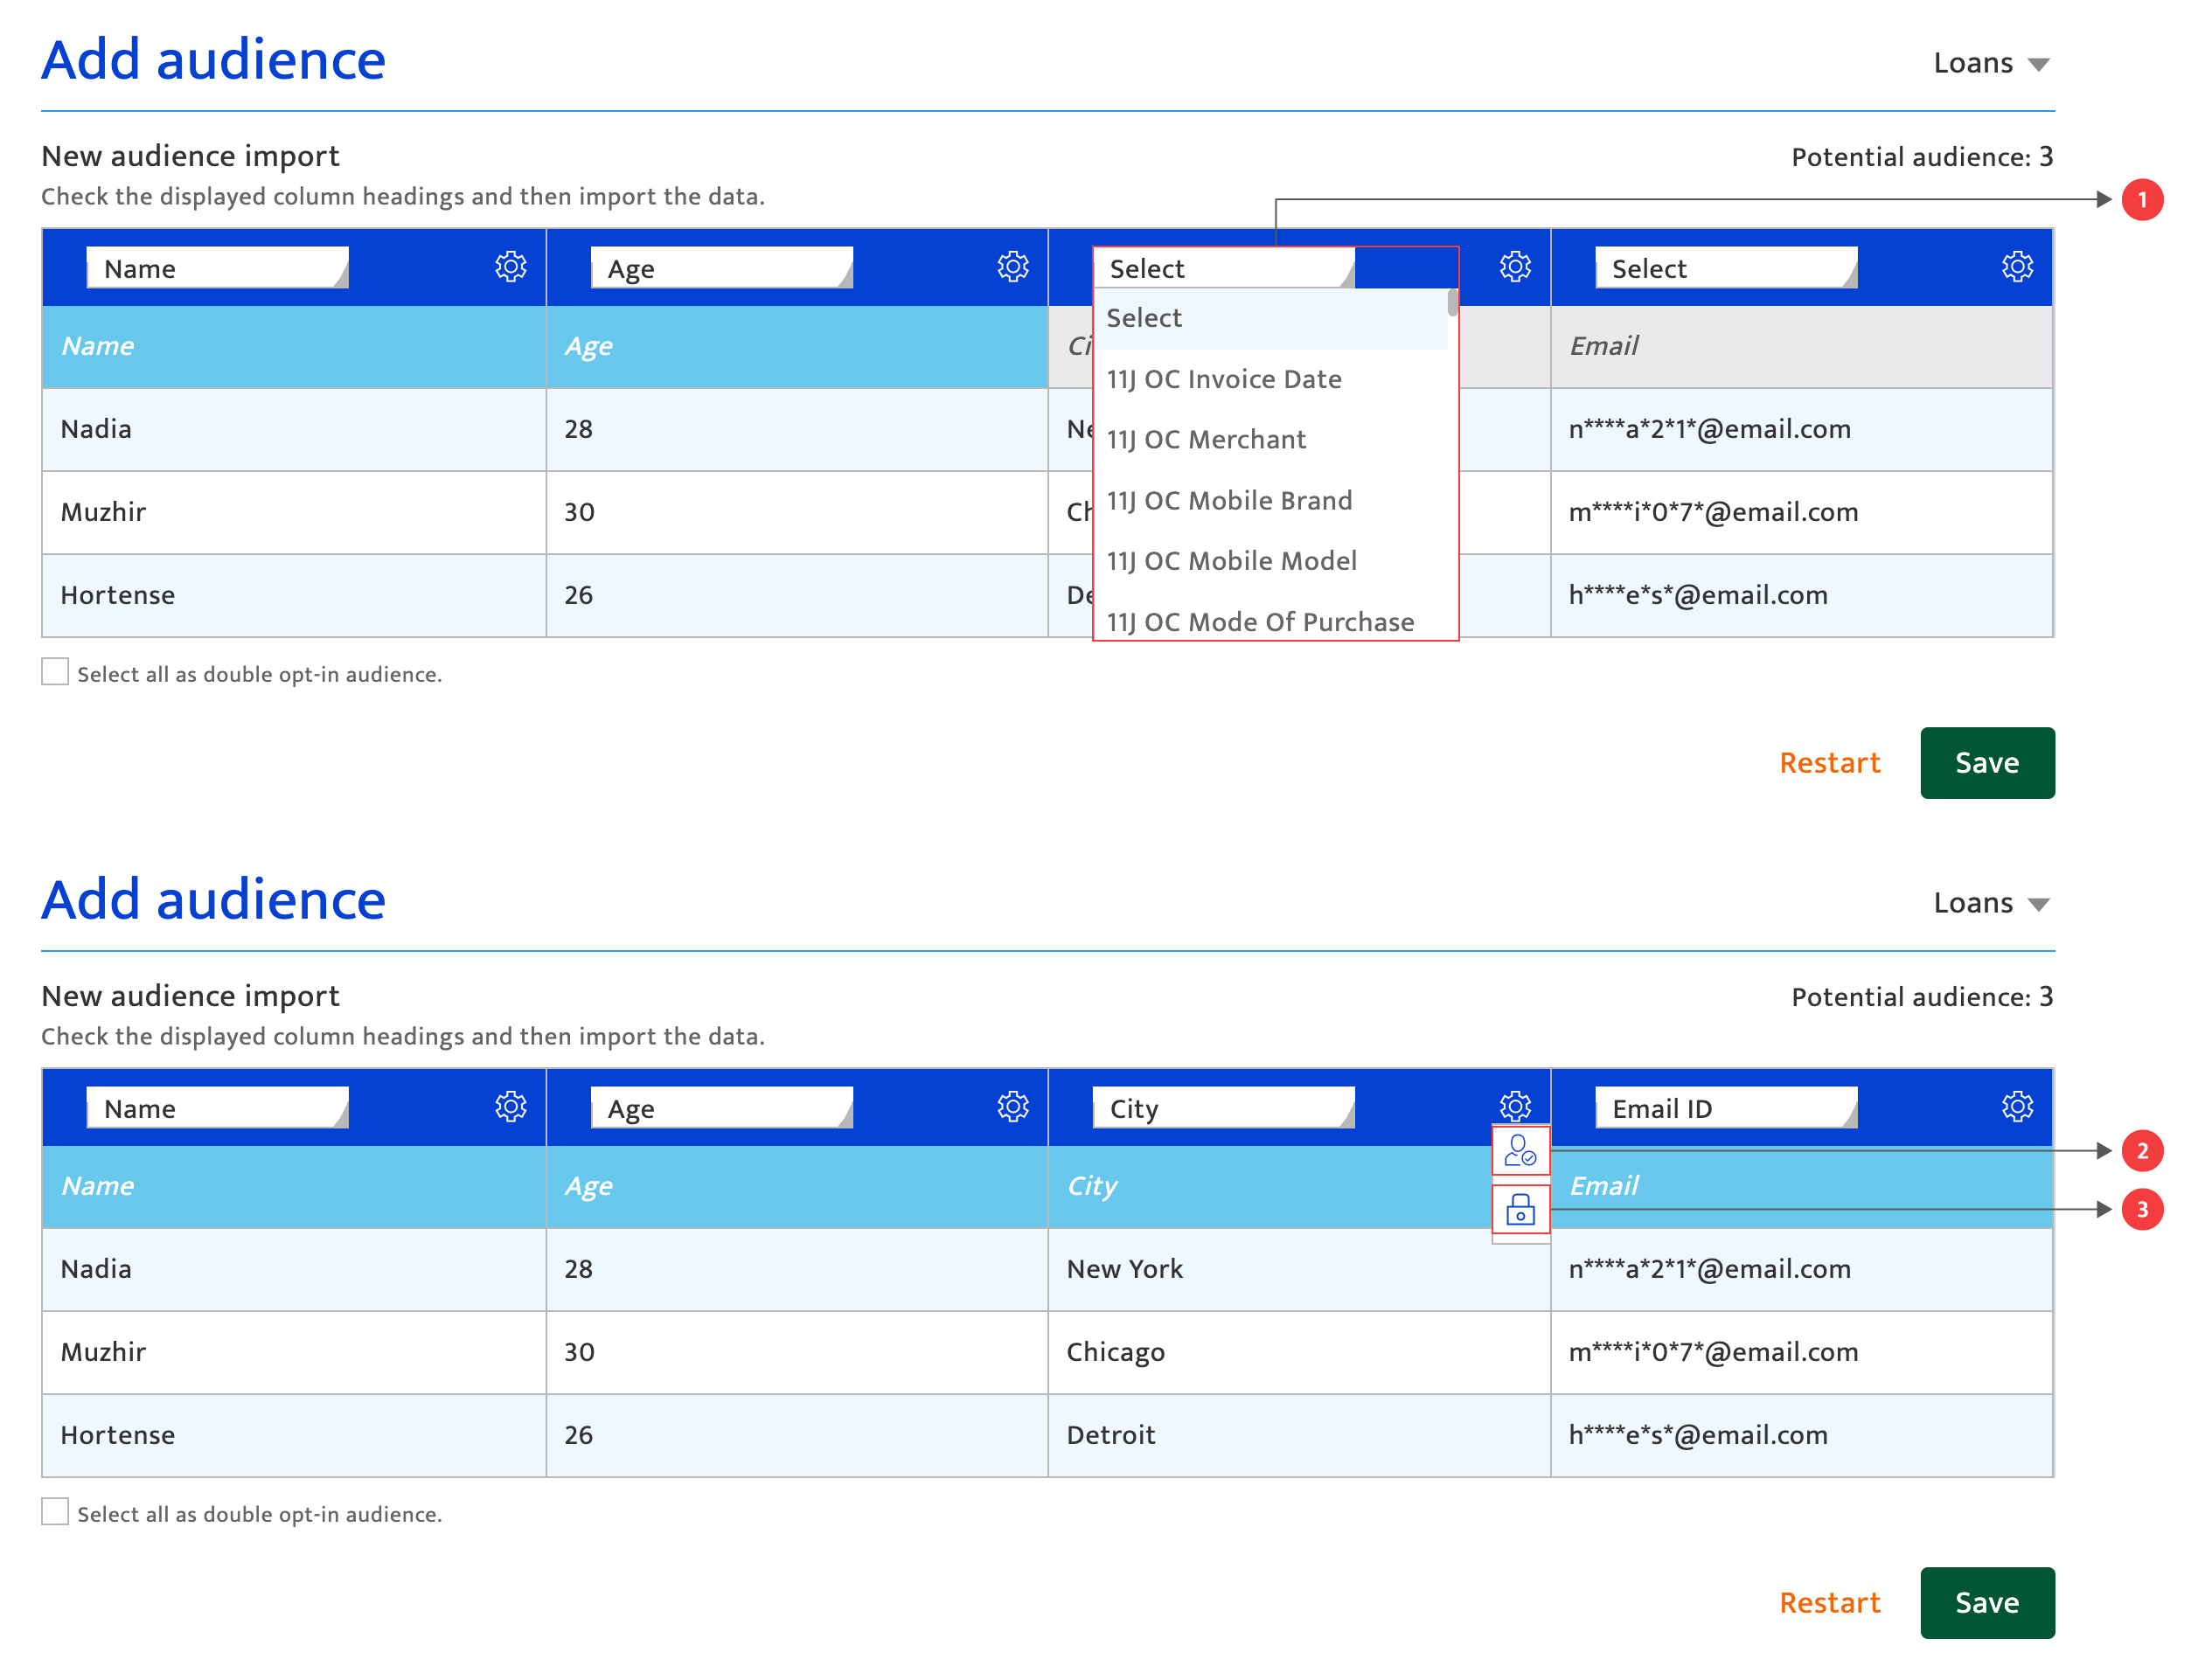
Mapping the imported data#
Before importing the audience data, users need to map the data attributes being imported using the following options.
- Map each imported data attribute (column header) to an audience data attribute from the platform using the drop-down lists.
- Identify an attribute as the unique identifier for the audience by selecting the highlighted icon.
- Identify an attribute as sensitive data by selecting the safe box icon.
- Flag double opt-in for the entire list by ticking the checkbox below the table. Note that if the box is checked the Resul platform will reject data during upload without contact consent.
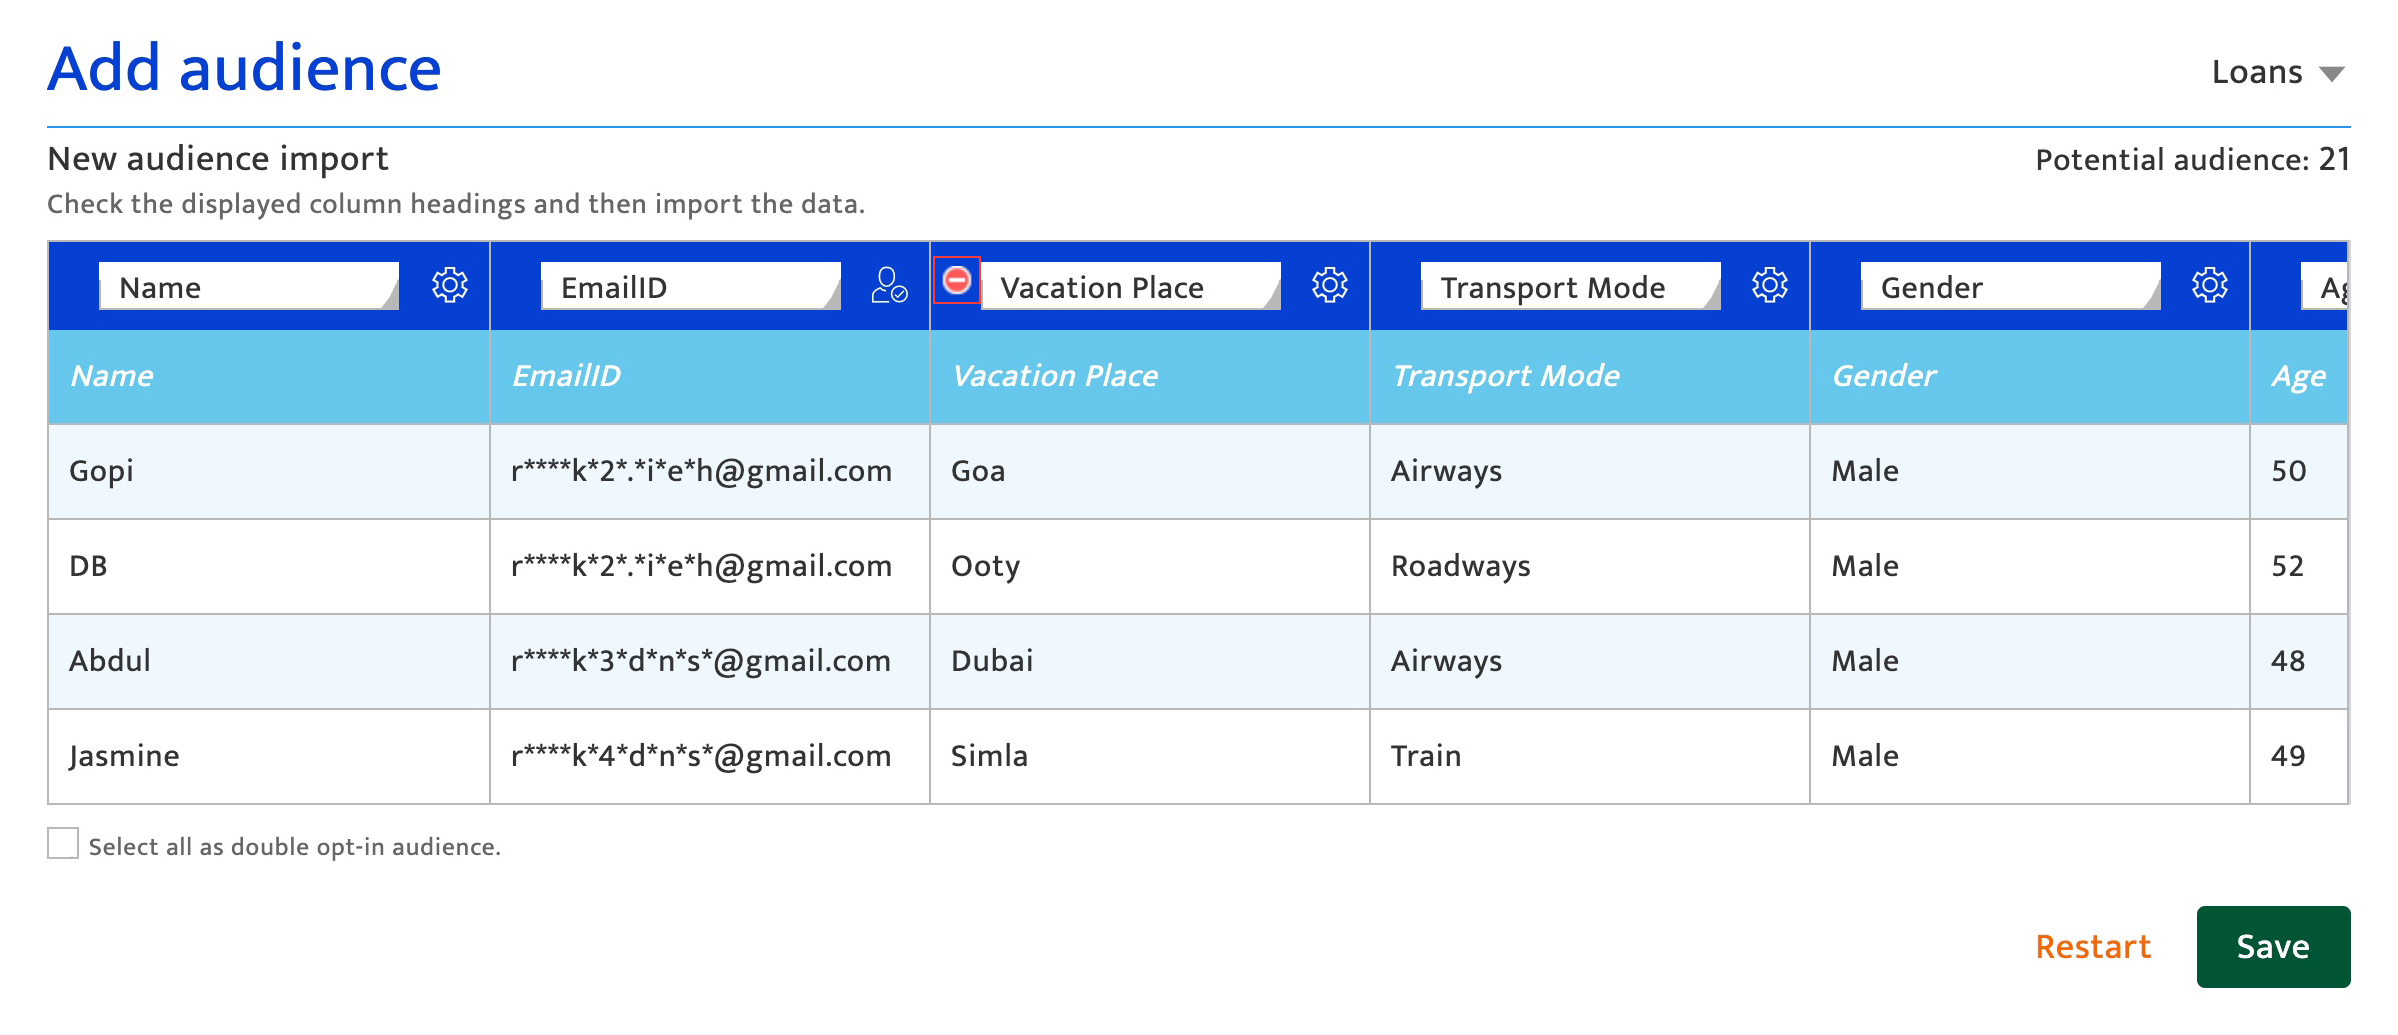
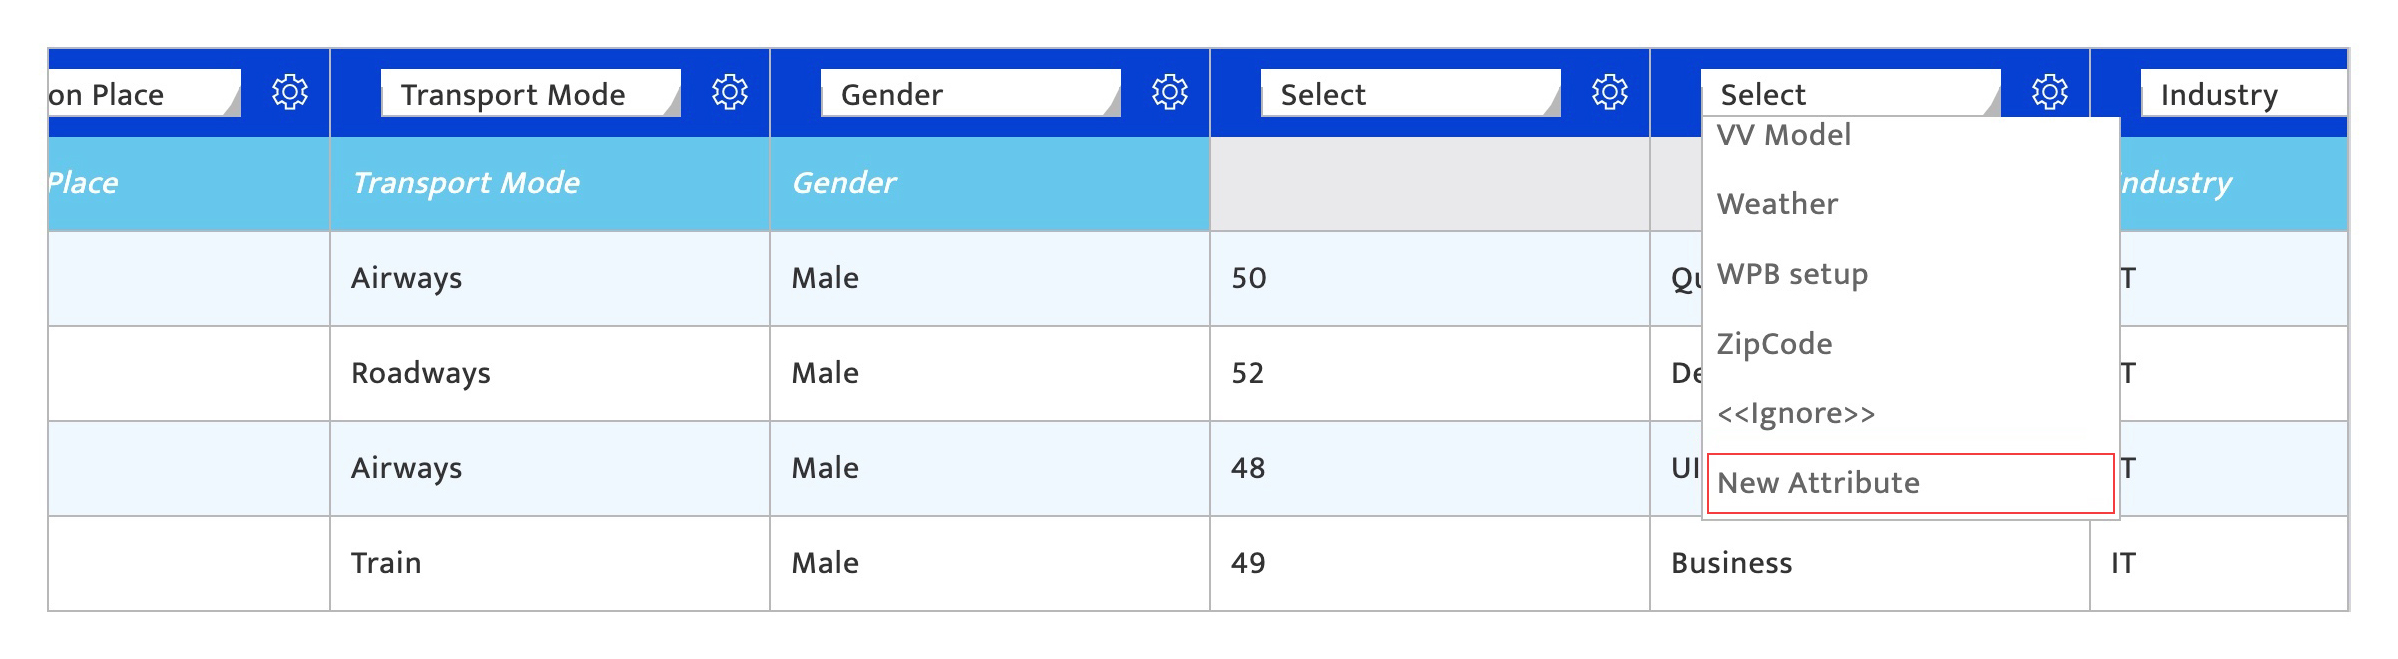
- Click the Delete
 icon to delete a column of attributes.
 - Click New Attribute from the drop-down list to add a new attribute.
Confirming audience import#
- Click the Save button to upload the data.
- Click the Restart button to discard the data import and return to the Add audience screen.
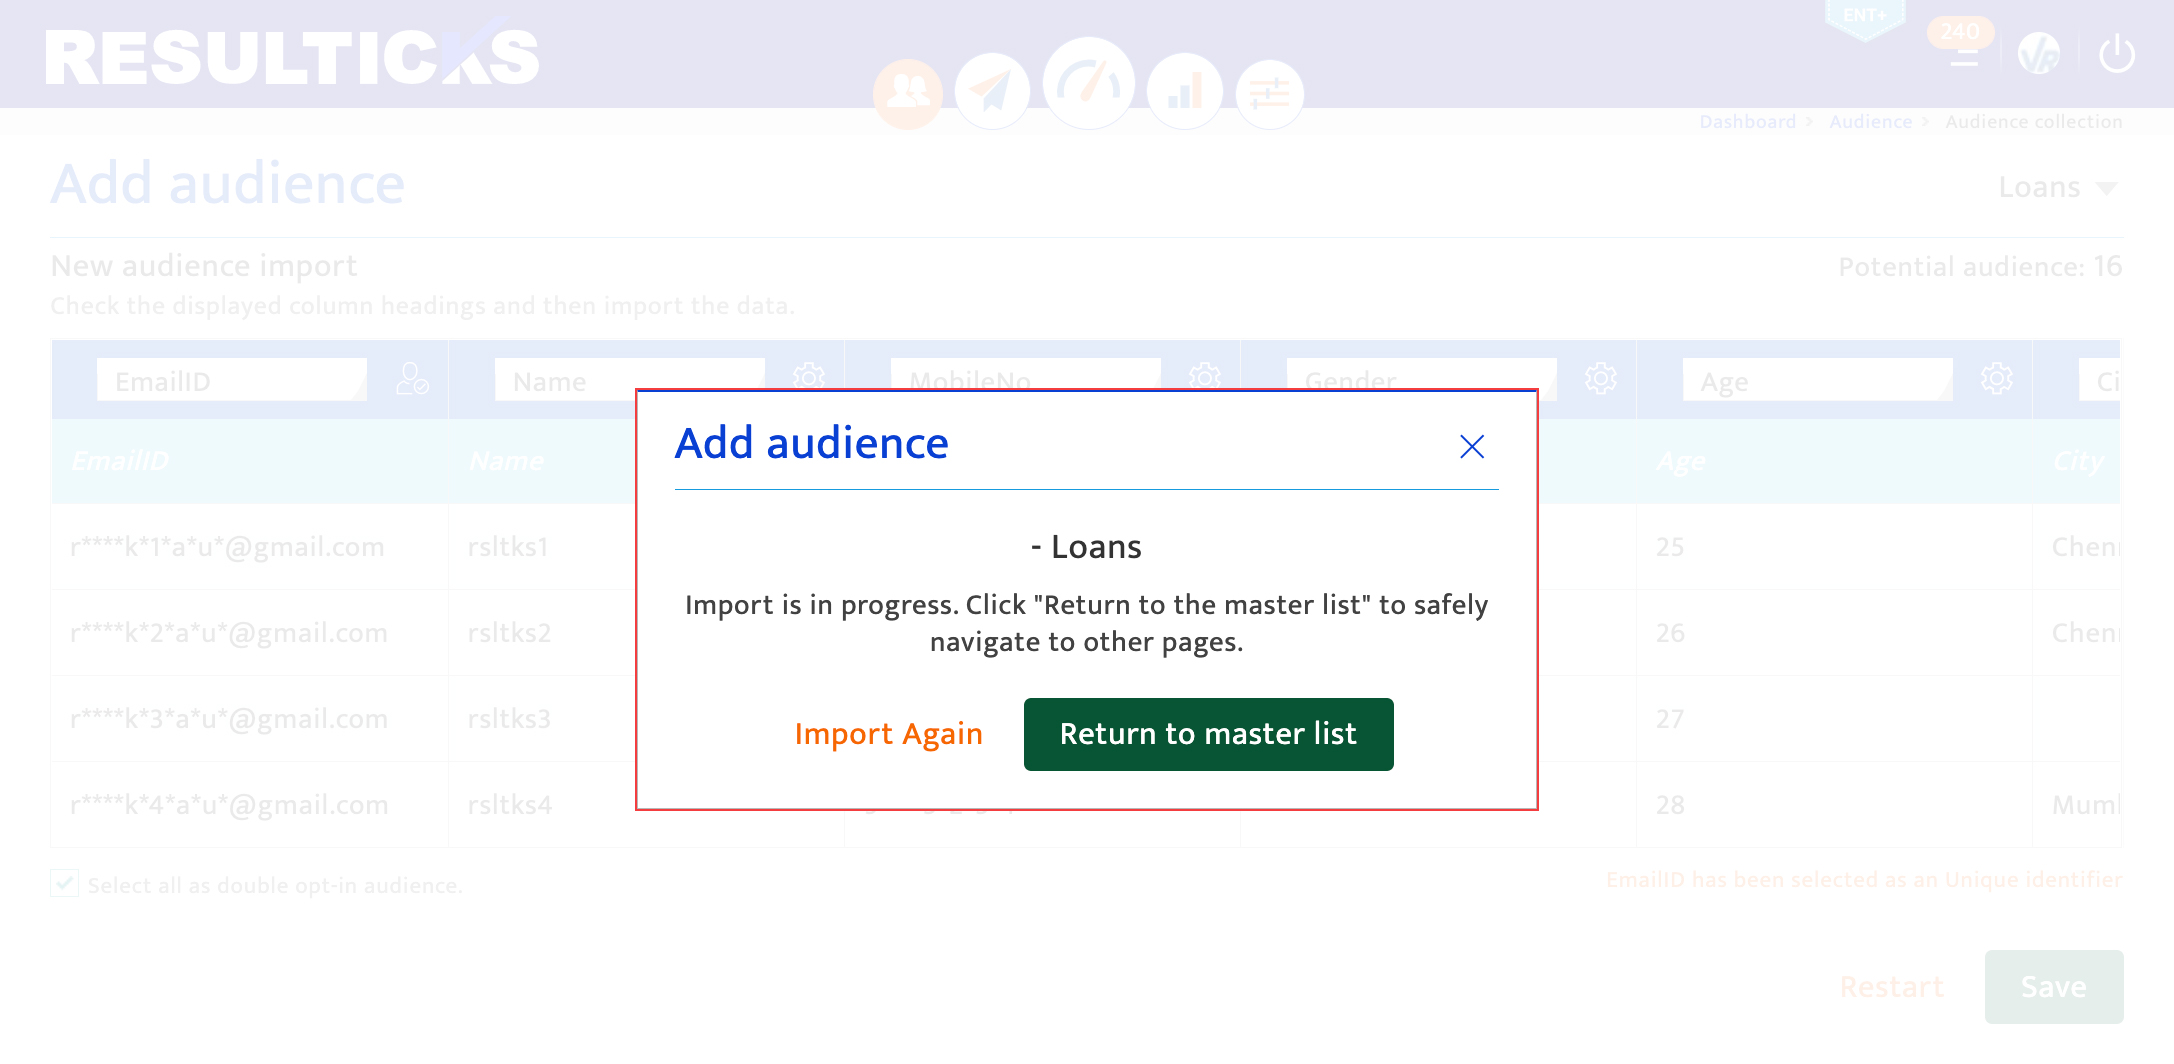
- Confirm the data import is in progress by viewing the in-progress pop-up notice. Validate the import status in Import History.
- Click Import again to add more audience data.
- Click Return to master list to return to the Master data screen.
Once imported, go to Master data import history to view the import information.