Master data management
Overview#
Master data is the entire audience database which contains the information of audience collected from multiple data sources. The Master data screen provides the following capabilities to the users.
- To view the information of the audience
- To add audience data
- To view the history of the imported audience data
- To download the audience list
Navigating to Master Data#
- Click the Audience
 module.
 - Click Master data tab in the Audience module. The Master data screen will be displayed.
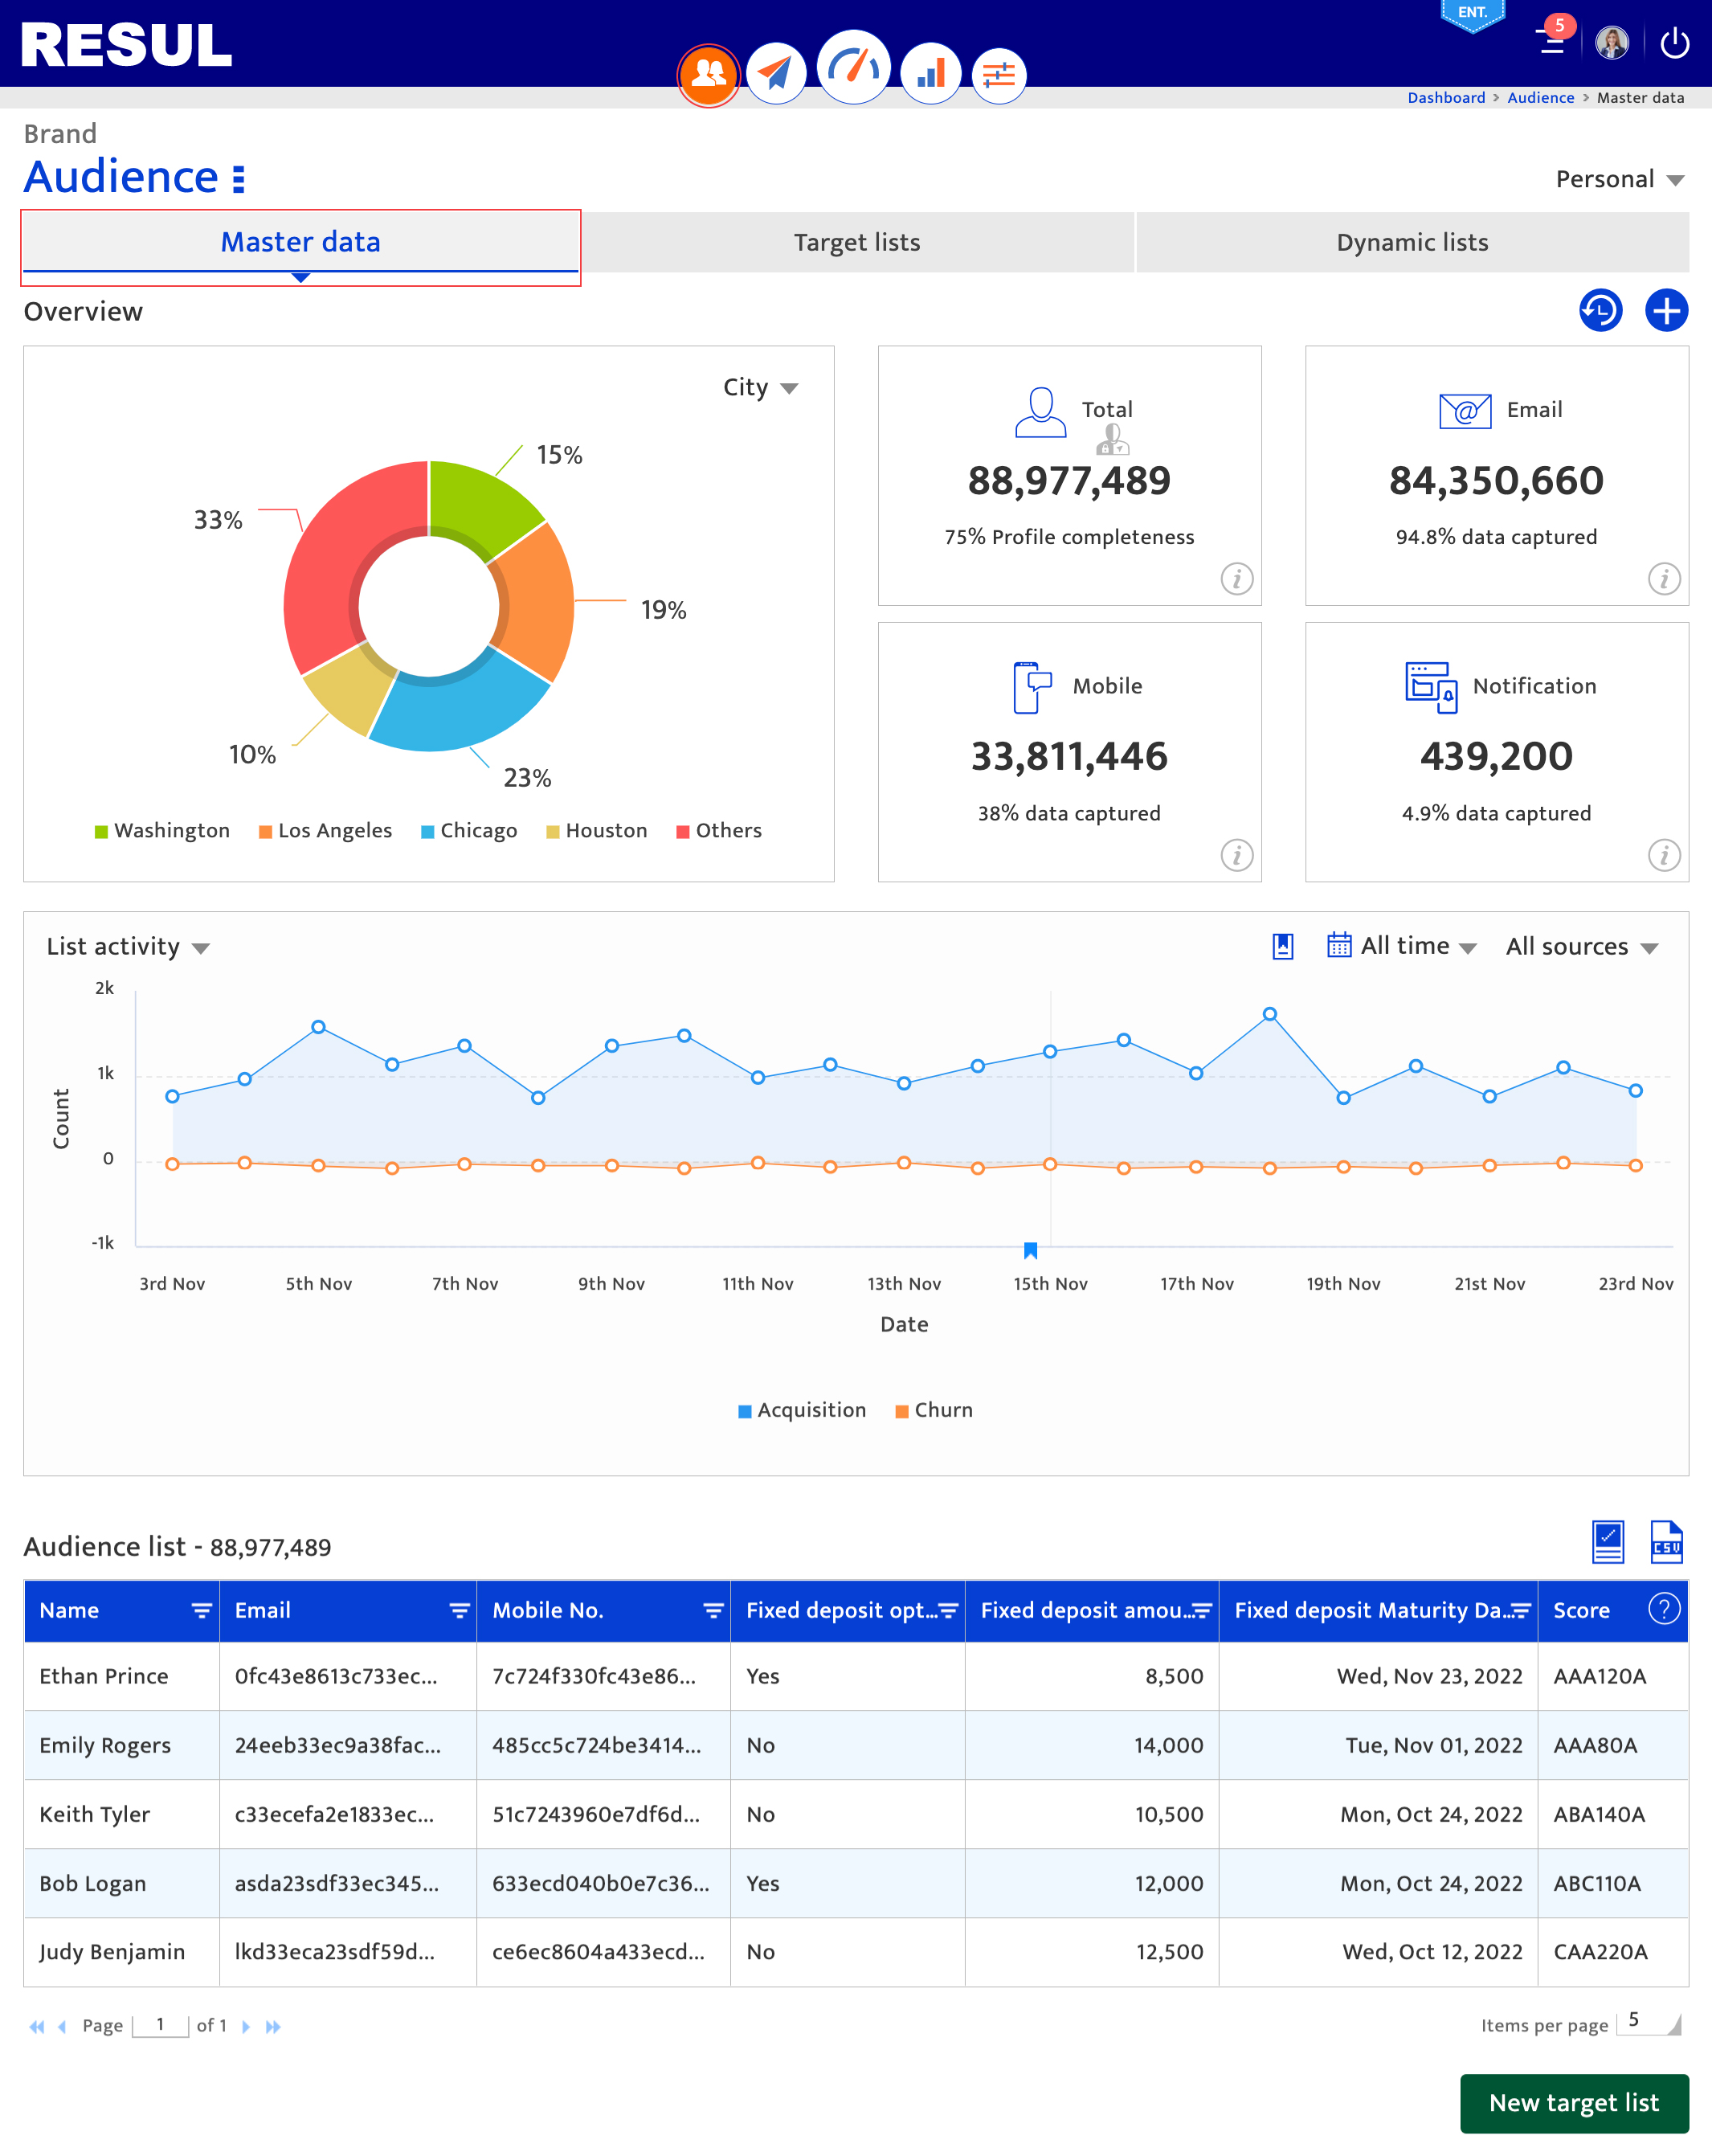
Components#
The Master data screen displays the following sections.
- Audience overview
- List acquisition
- Audience list
Audience overview section#
This section displays a pictorial representation of the total audience distribution on the left pane. The right pane displays the information of the total number of contacts available in the database, and the percentage of audience with valid contact details.
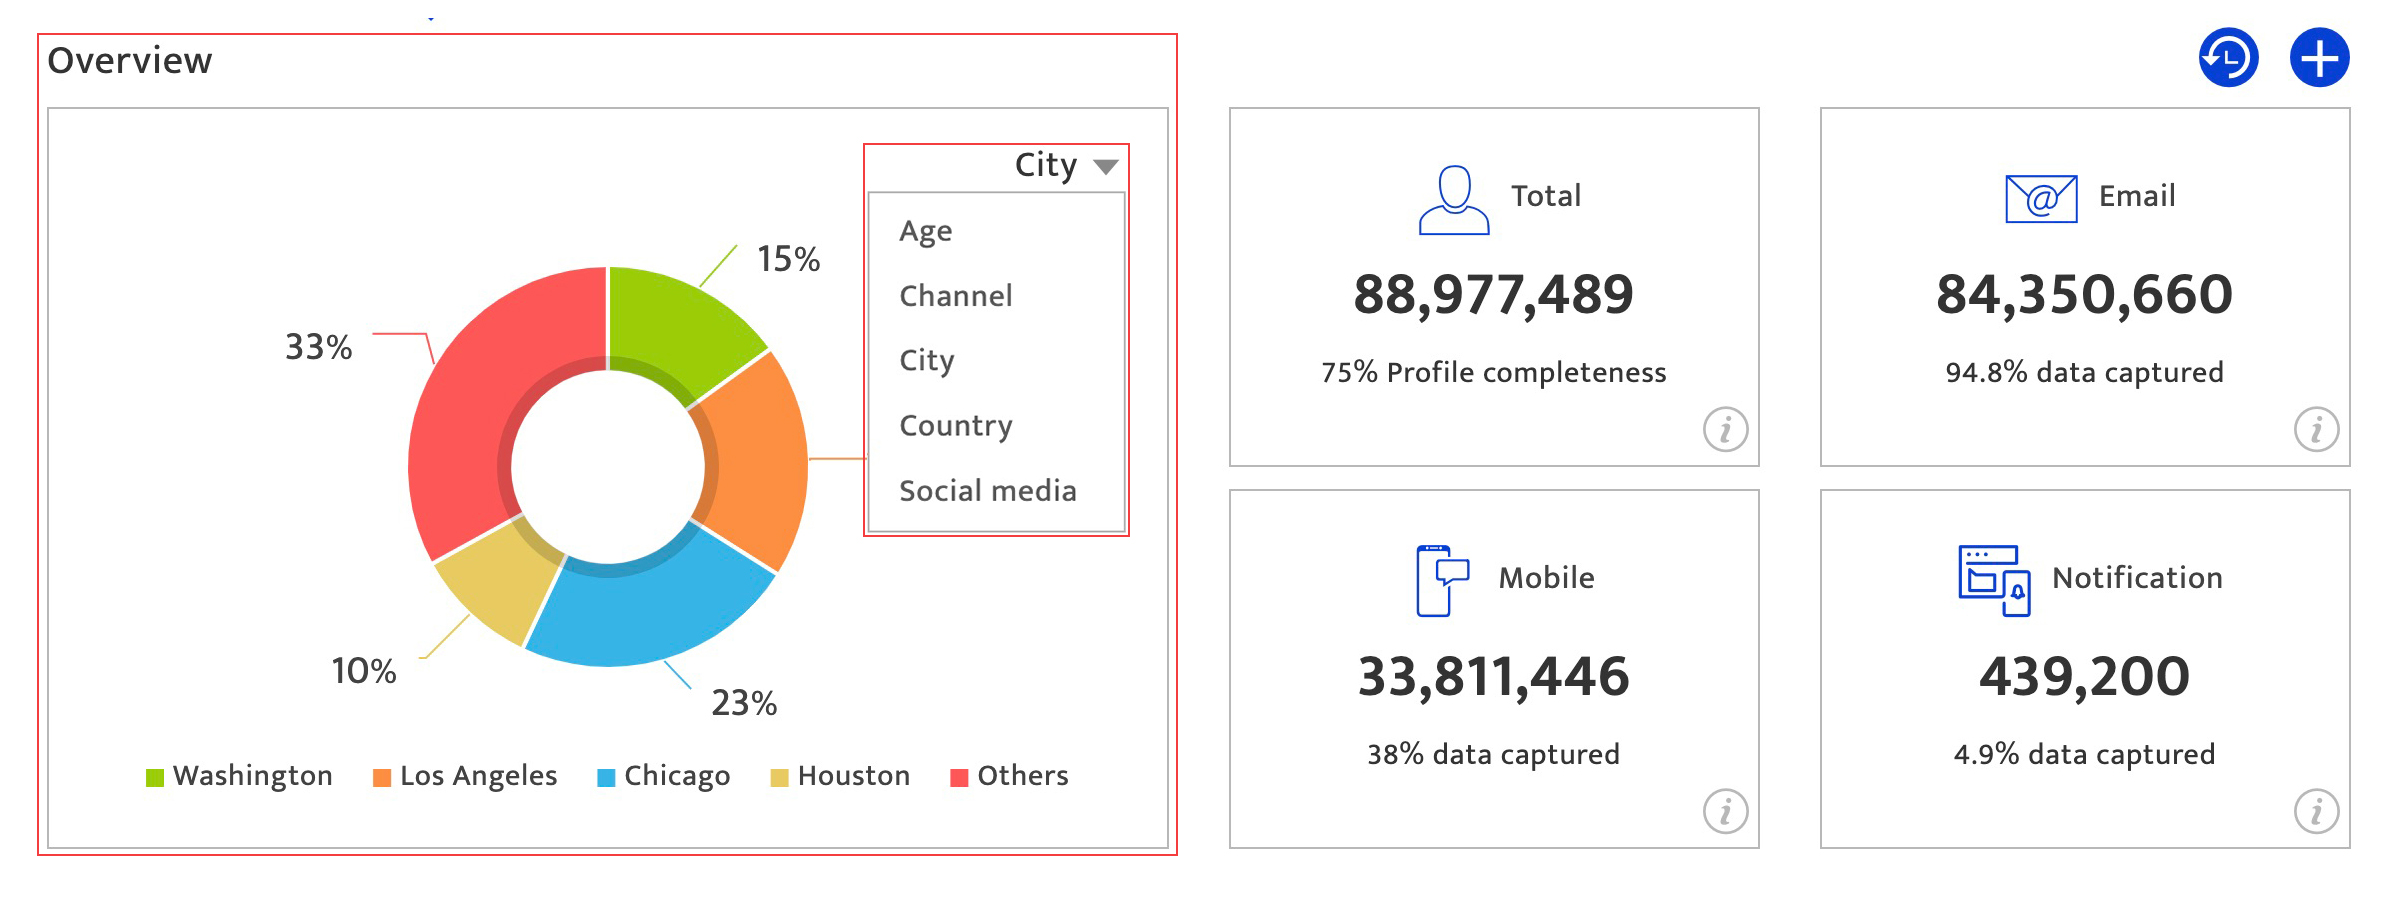
Users can view the total audience distribution based on Age, City, State, Country, Age Group, Channel, New Customer and Account Number by selecting the attributes from the drop-down list.
The attributes available in the drop-down list here can be customized from the Data catalogue screen of the Preferences module.
The total count of audience, number of audiences having email and mobile contacts are displayed in individual tile sections. To view more information, click on the associated ![]() button of the respective tile section. The information displayed for each of the tile section is described below.
button of the respective tile section. The information displayed for each of the tile section is described below.
Total Audience#
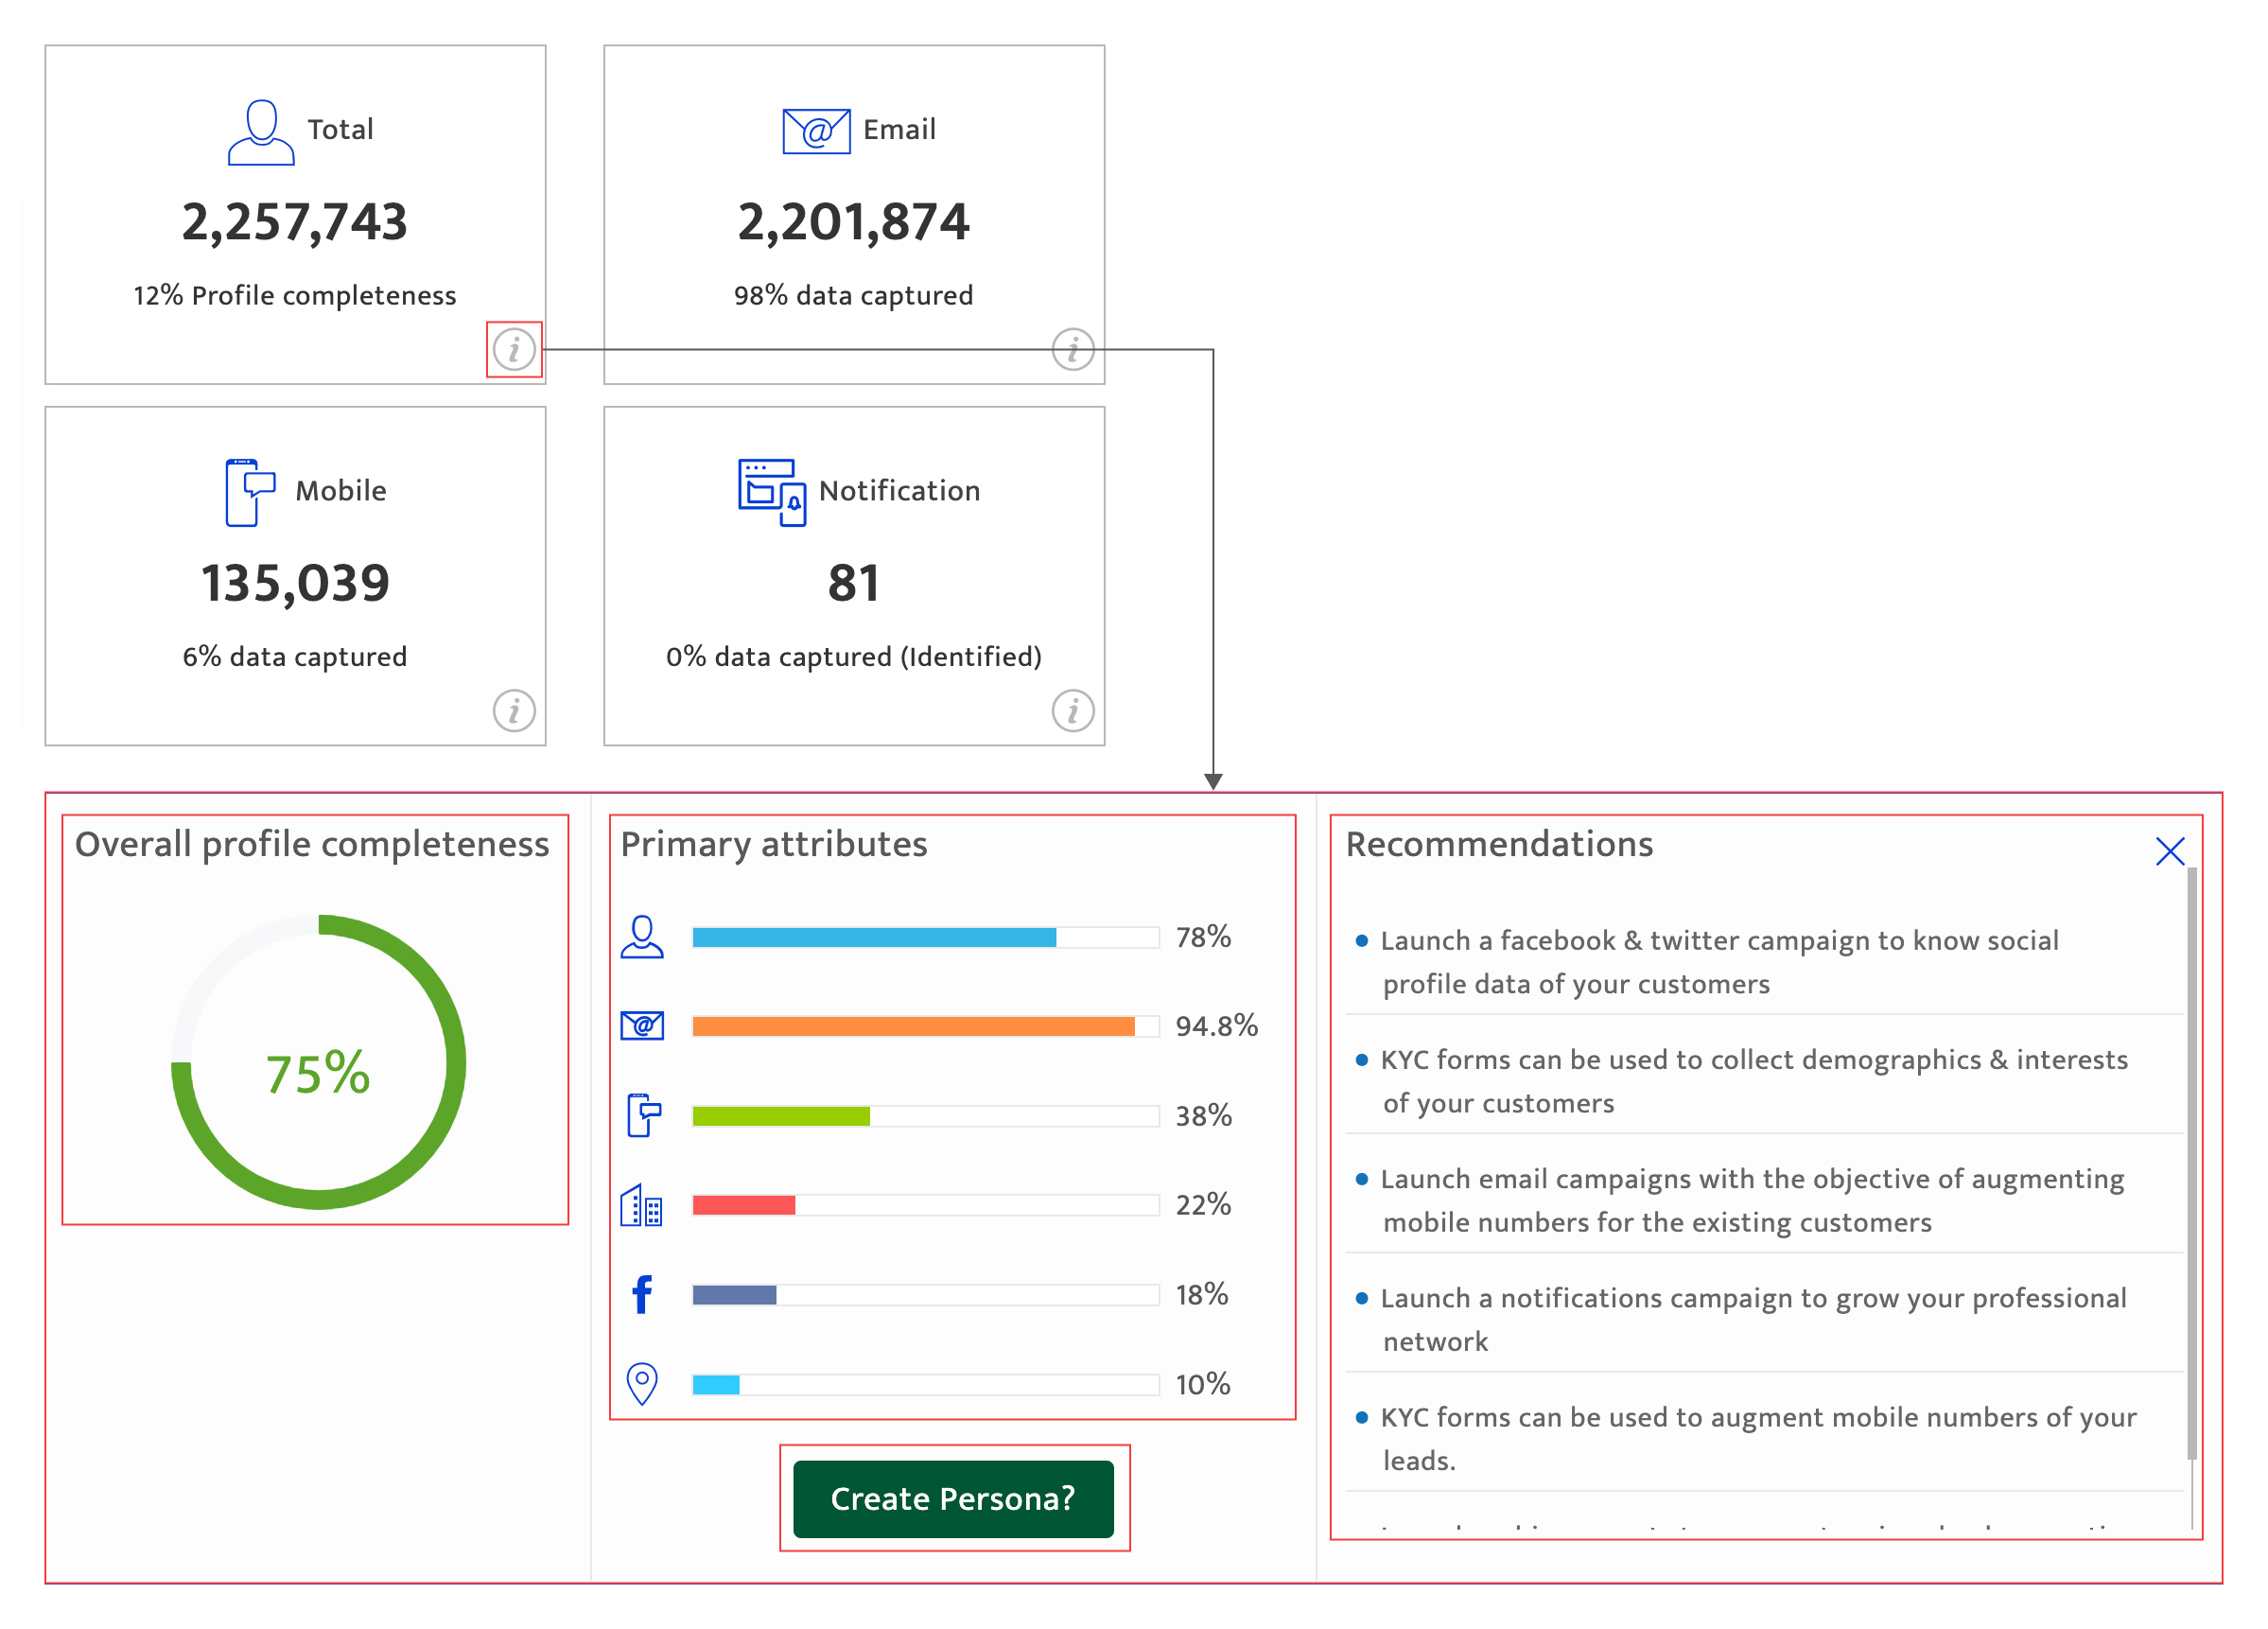
The total audience profile displays the following sections.
- Overall profile completeness - Displays the total percentage of individuals for whom all the primary attributes are available in the audience database.
- Primary attributes - Displays the percentage of individuals who has these primary attributes (e.g., name, email address, social handle, etc.)
- Recommendations – Displays the recommendations that are provided to improve profile completeness.
- Create Persona – Use this option to access the Persona creation screen. For more information, see Audience score.
Note:
The primary attributes are configured in the Preferences module under Classification section of Data catalogue.
Email Profile#
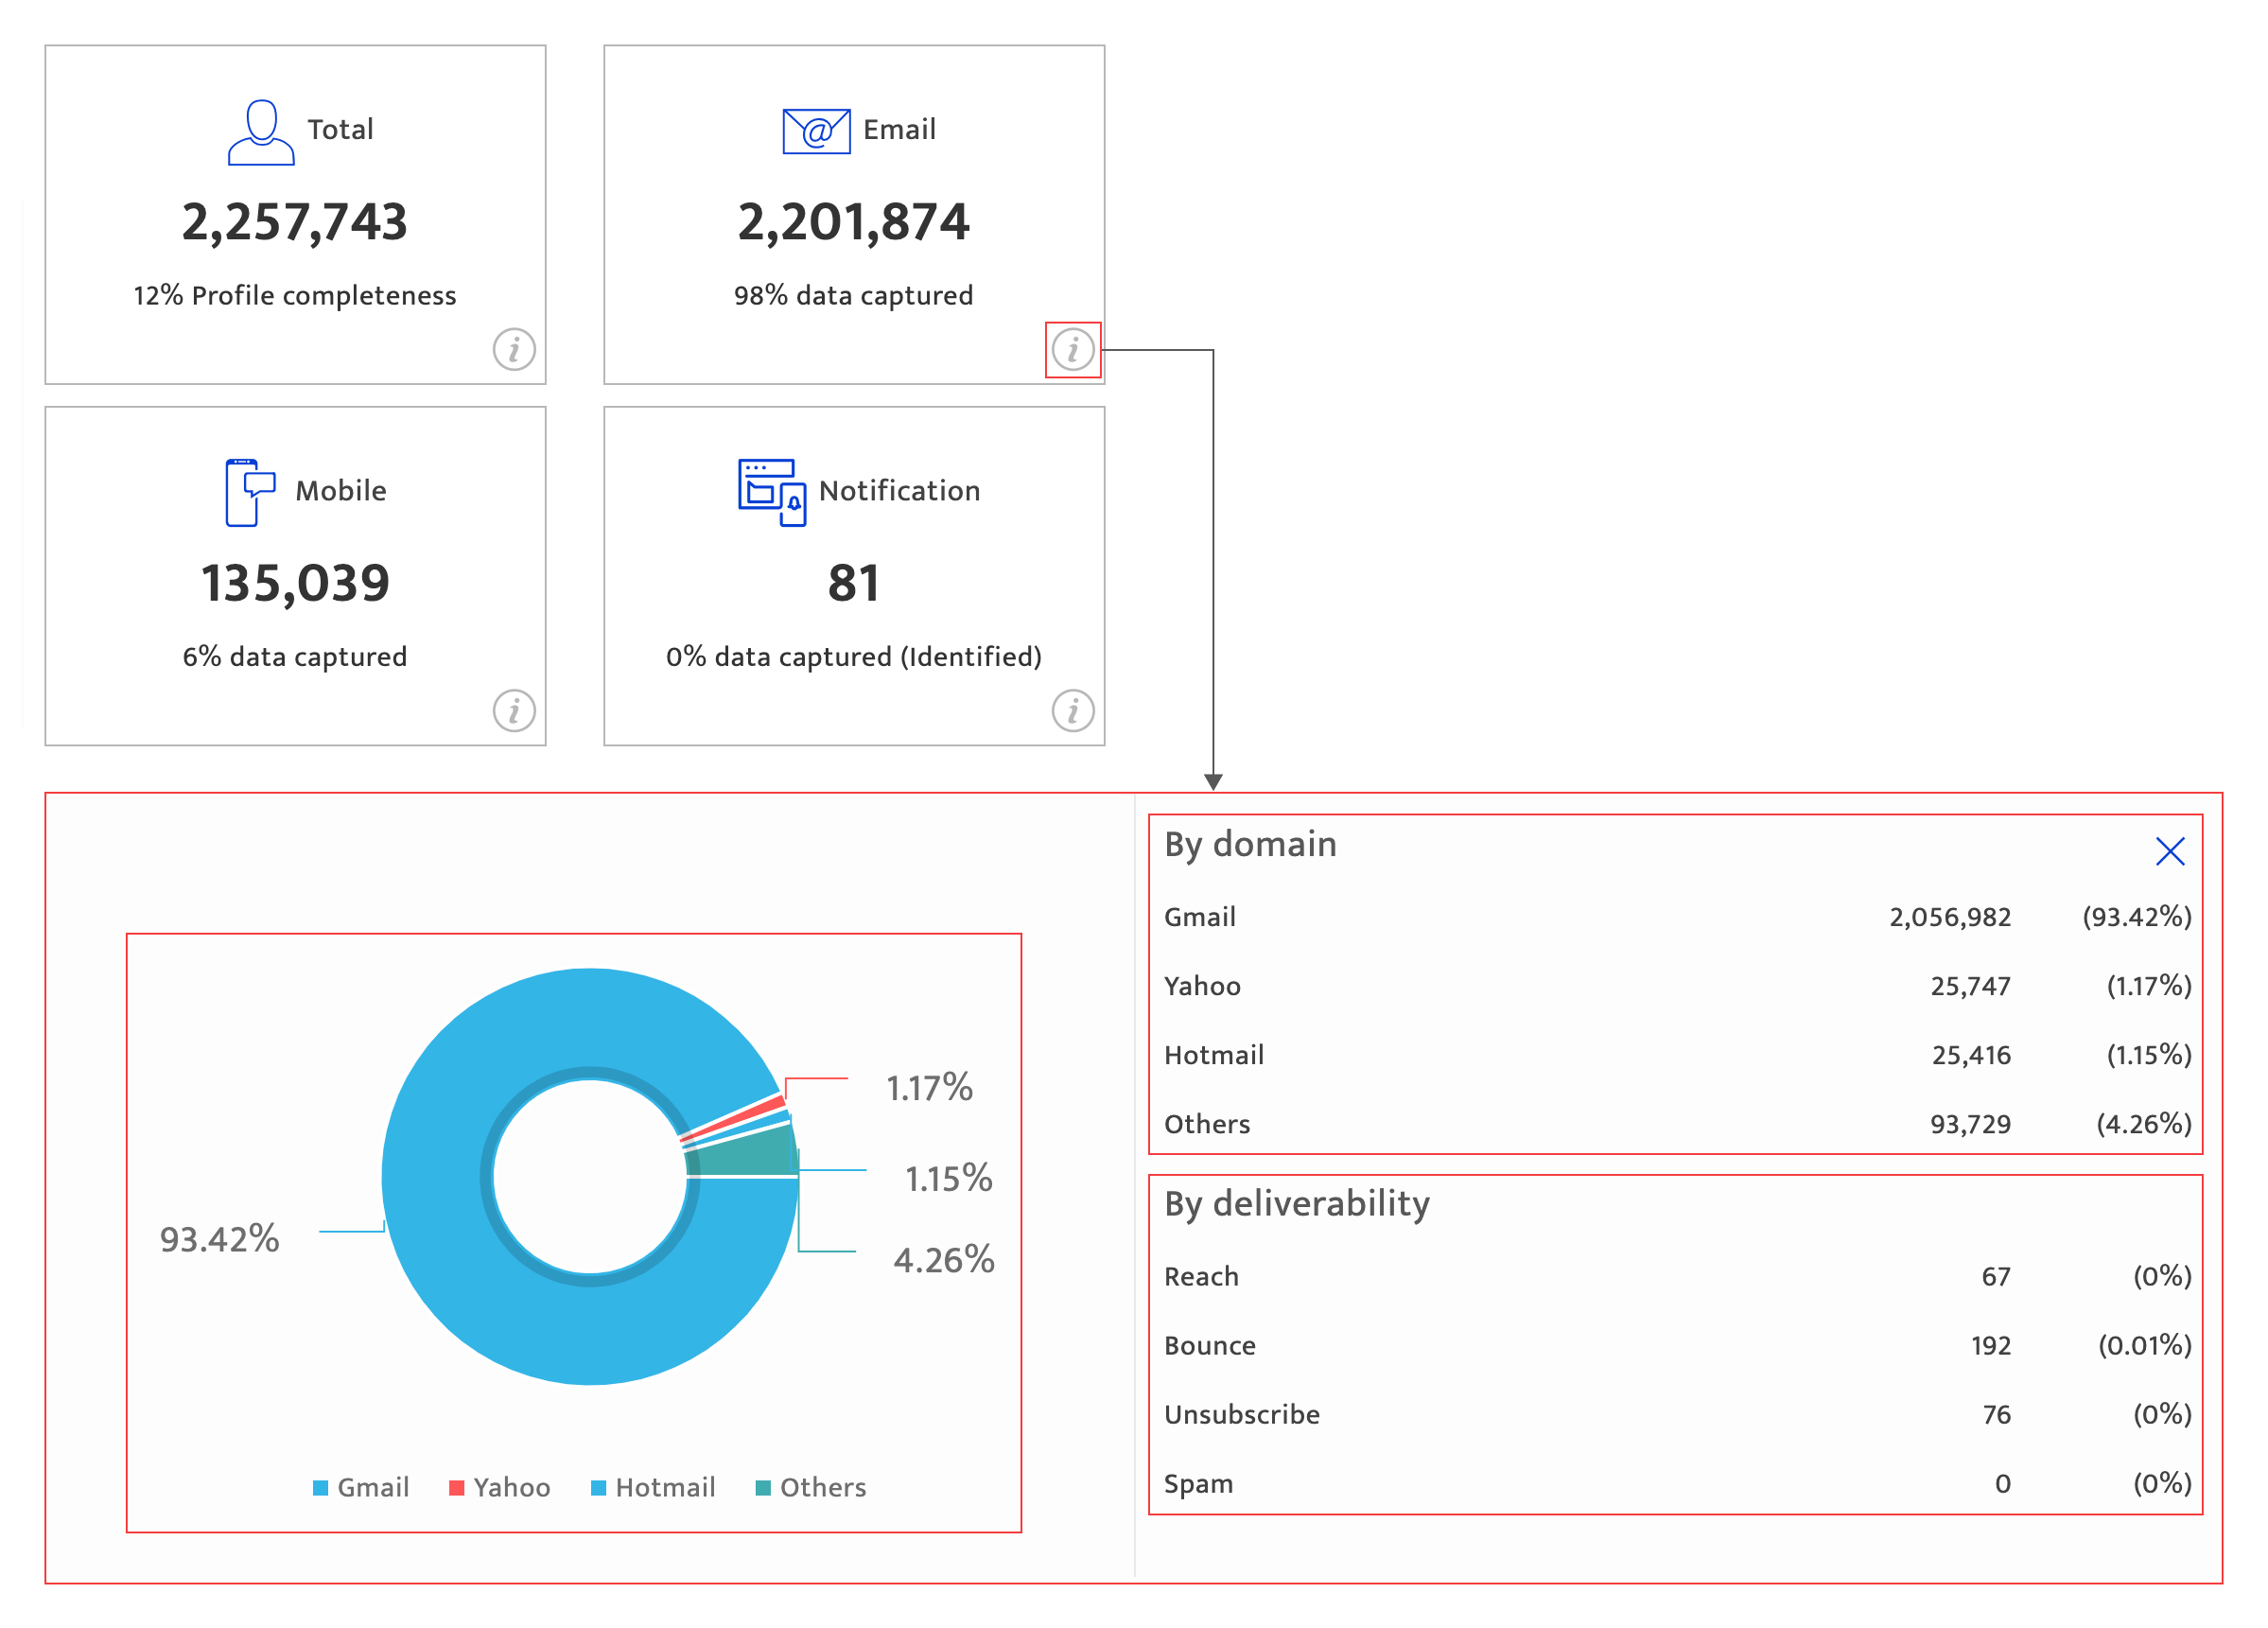
The Email Profile displays the following information.
By Domain - Displays the percentage split of email domains available for all the contacts in the audience database.
By Deliverability - Displays the percentage split of the email delivery status, which can be any of the following as mentioned below.
- Delivered: Email reached the targeted inbox
- Bounced: Email has not been delivered to the recipient because the sender server could not deliver it, or the recipient’s server has not successfully delivered the email to the specific contact
- Spammed: Email has been delivered to the recipient’s spam box
- Unsubscribed: Email account has been unsubscribed by the organization
Note:
The deliverability information will not be displayed unless communications are run.
SMS Profile#
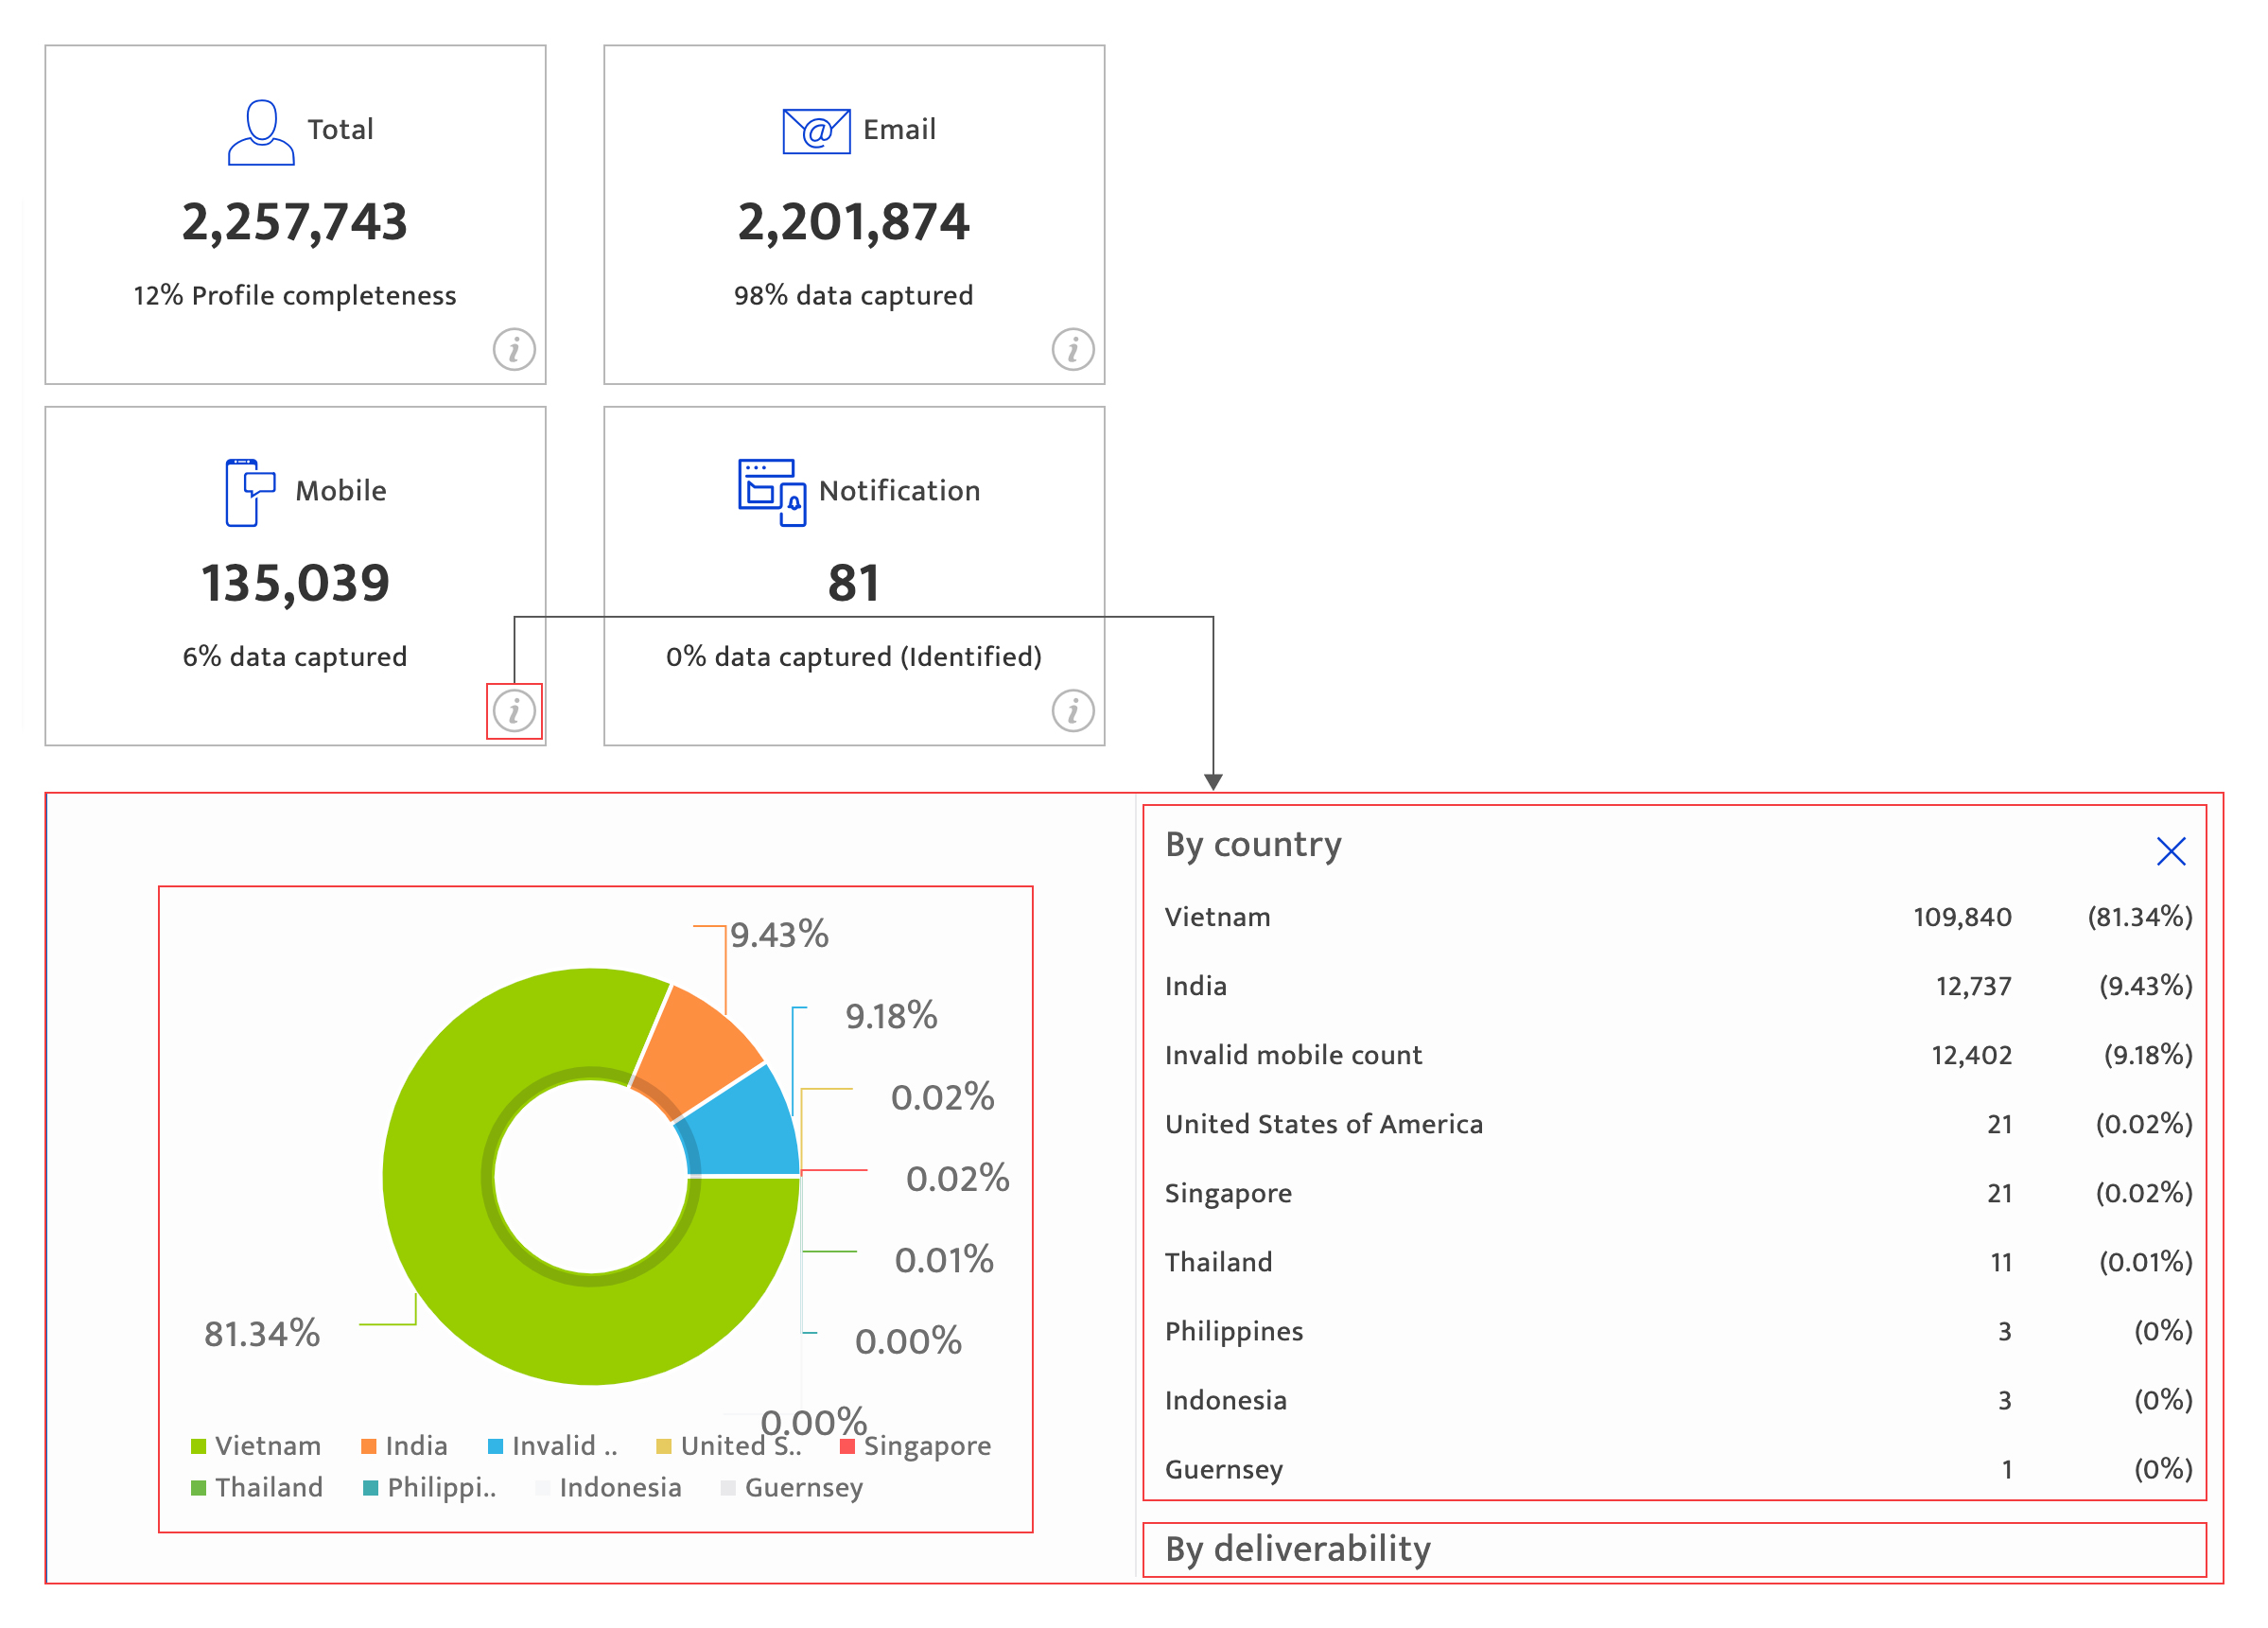
The SMS profile displays the following information.
By Country - Displays the percentage split of countries to which the audience belong. This information is gathered based on country codes associated with the mobile numbers of the audience.
By Deliverability - Displays the percentage of the SMS delivery status of the sent SMS. The delivery status of the SMS can be any of the following as mentioned below.
- Delivered: SMS successfully reached the end user device
- Undelivered: SMS has not reached the end user device
- Rejected: SMS rejection response is received
- Expired: An expiry notice is received
- DND: SMS is undelivered because the end user is listed on a DND (Do not disturb) register or when the user may have unsubscribed.
Notification#
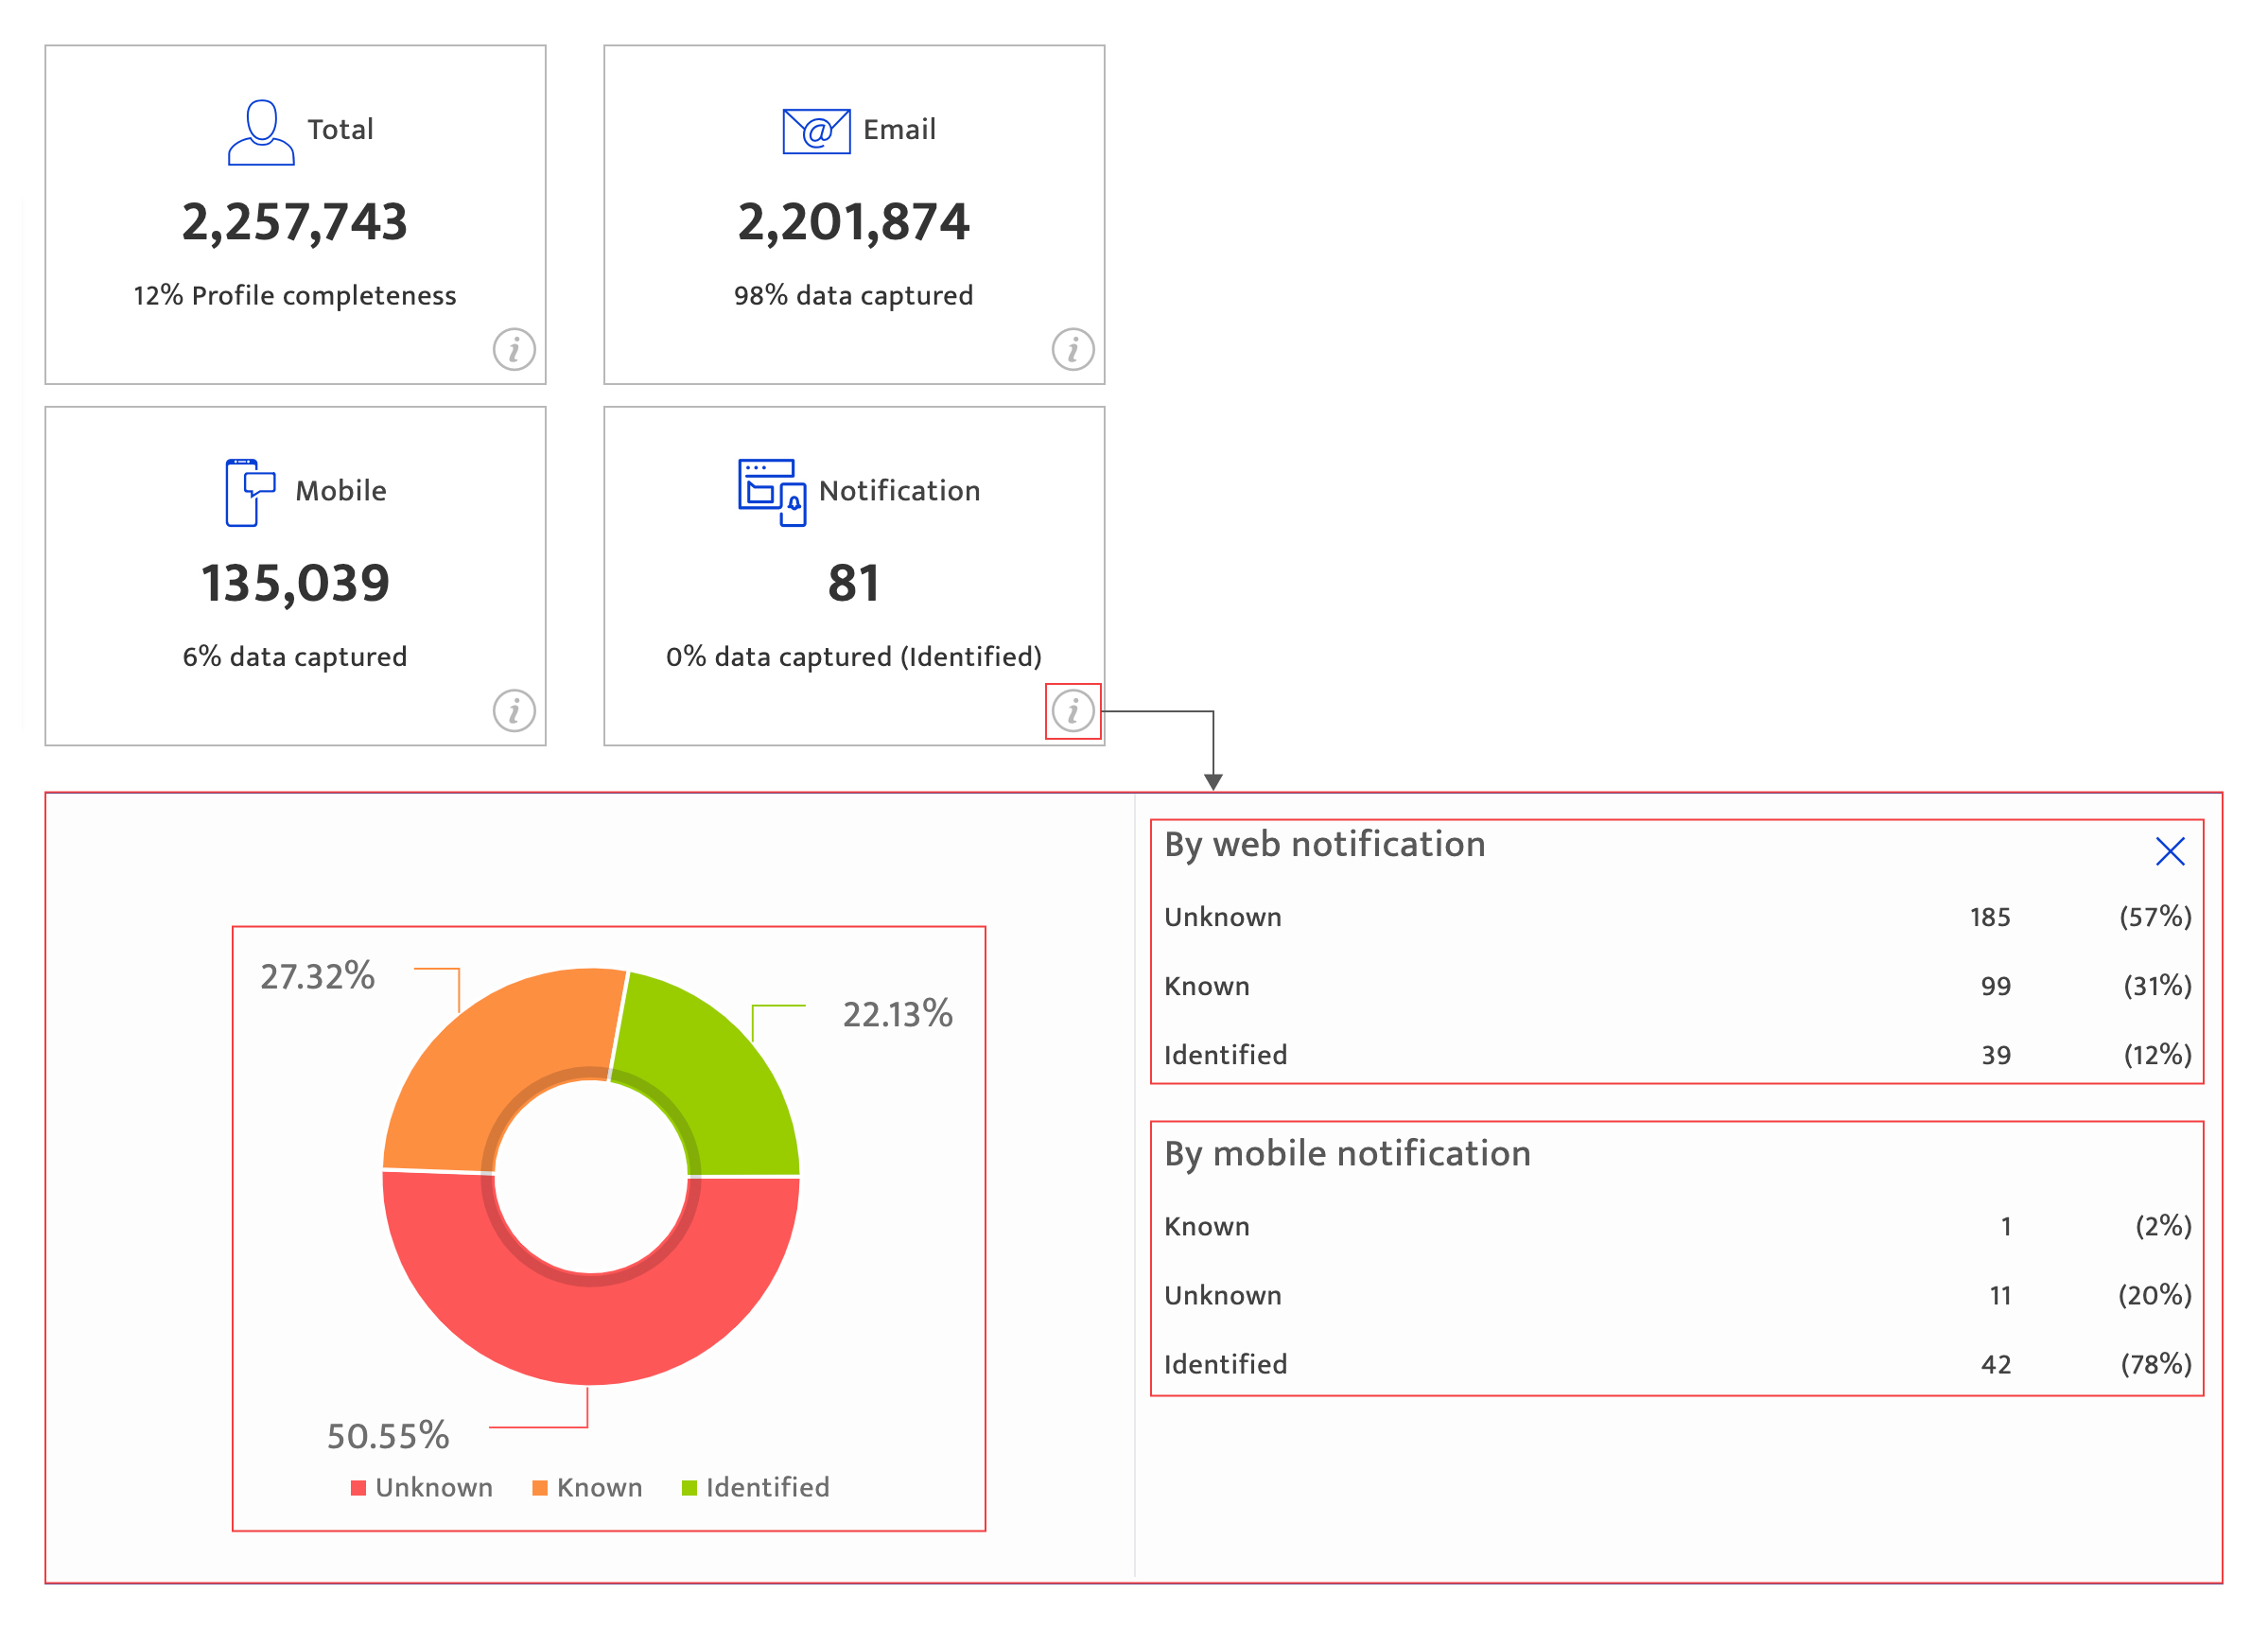
The numbers shown in the Notification tile indicates the number of users who have opted into the webpage.
The expanded view of this section displays the percentage split of the Unknown, Known and Identified audience contacts by web and mobile notification, the information is gathered when the audience visit the web page.
By web notification - Displays the percentage split of Unknown, Known and Identified users visiting the web page.
By mobile notification - Displays the percentage split of Unknown, Known and Identified users visiting the web page via mobile.
List acquisition#
This section displays a summary of the contact details acquired for contacts by channel type.
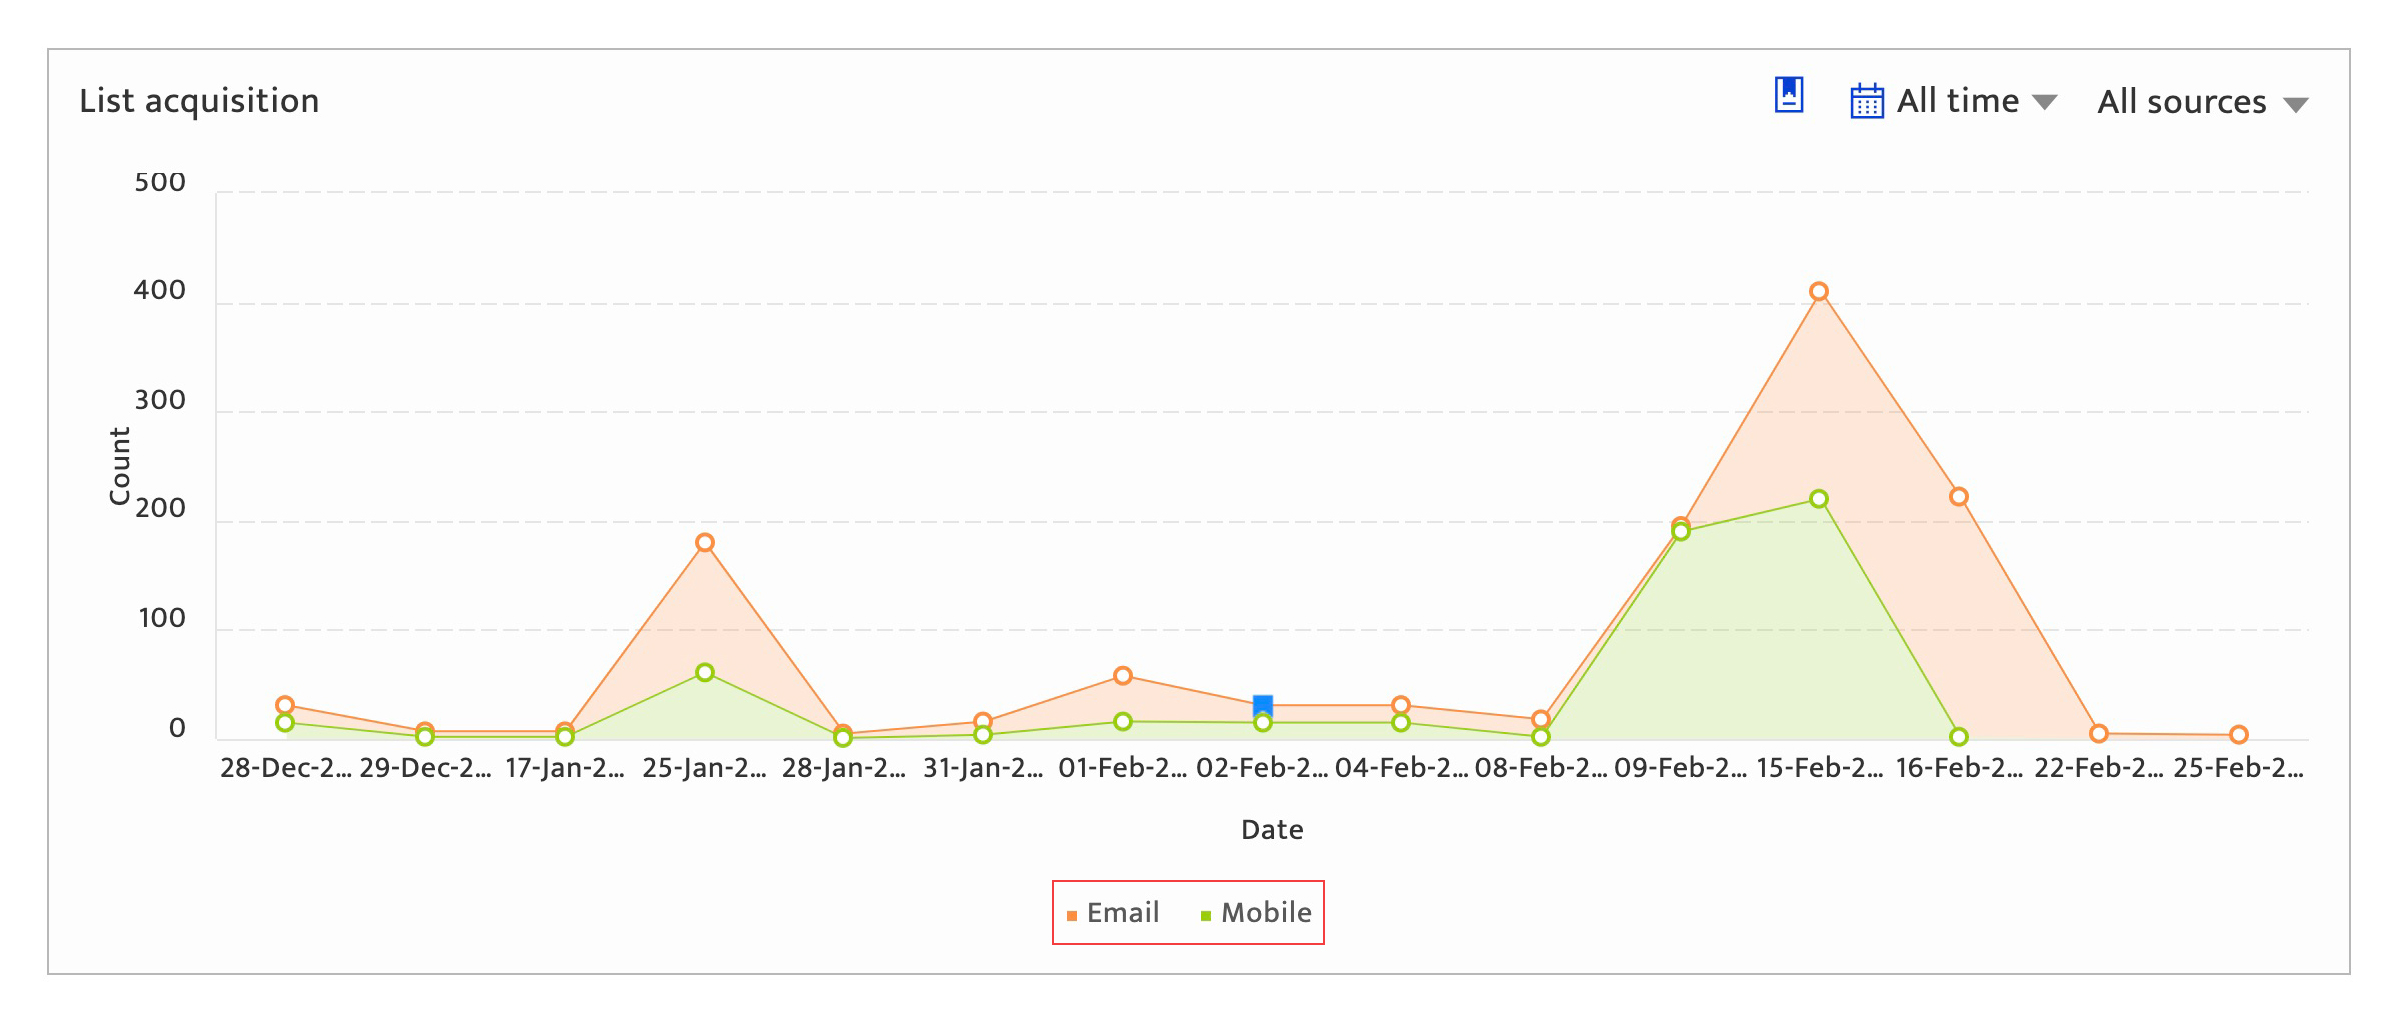
From this section, users can perform the following actions.
- View the graphical information based on different time and category using the Filter options.
- View date-wise information on the graph.
- Add Acquisition notes.
Using filter options#
Users can view the data by time period or audience sources using the filter options.
Time filter#
Users can filter the lists using the following options
- All time
- Last 7 days
- Last 30 days
- Custom date range
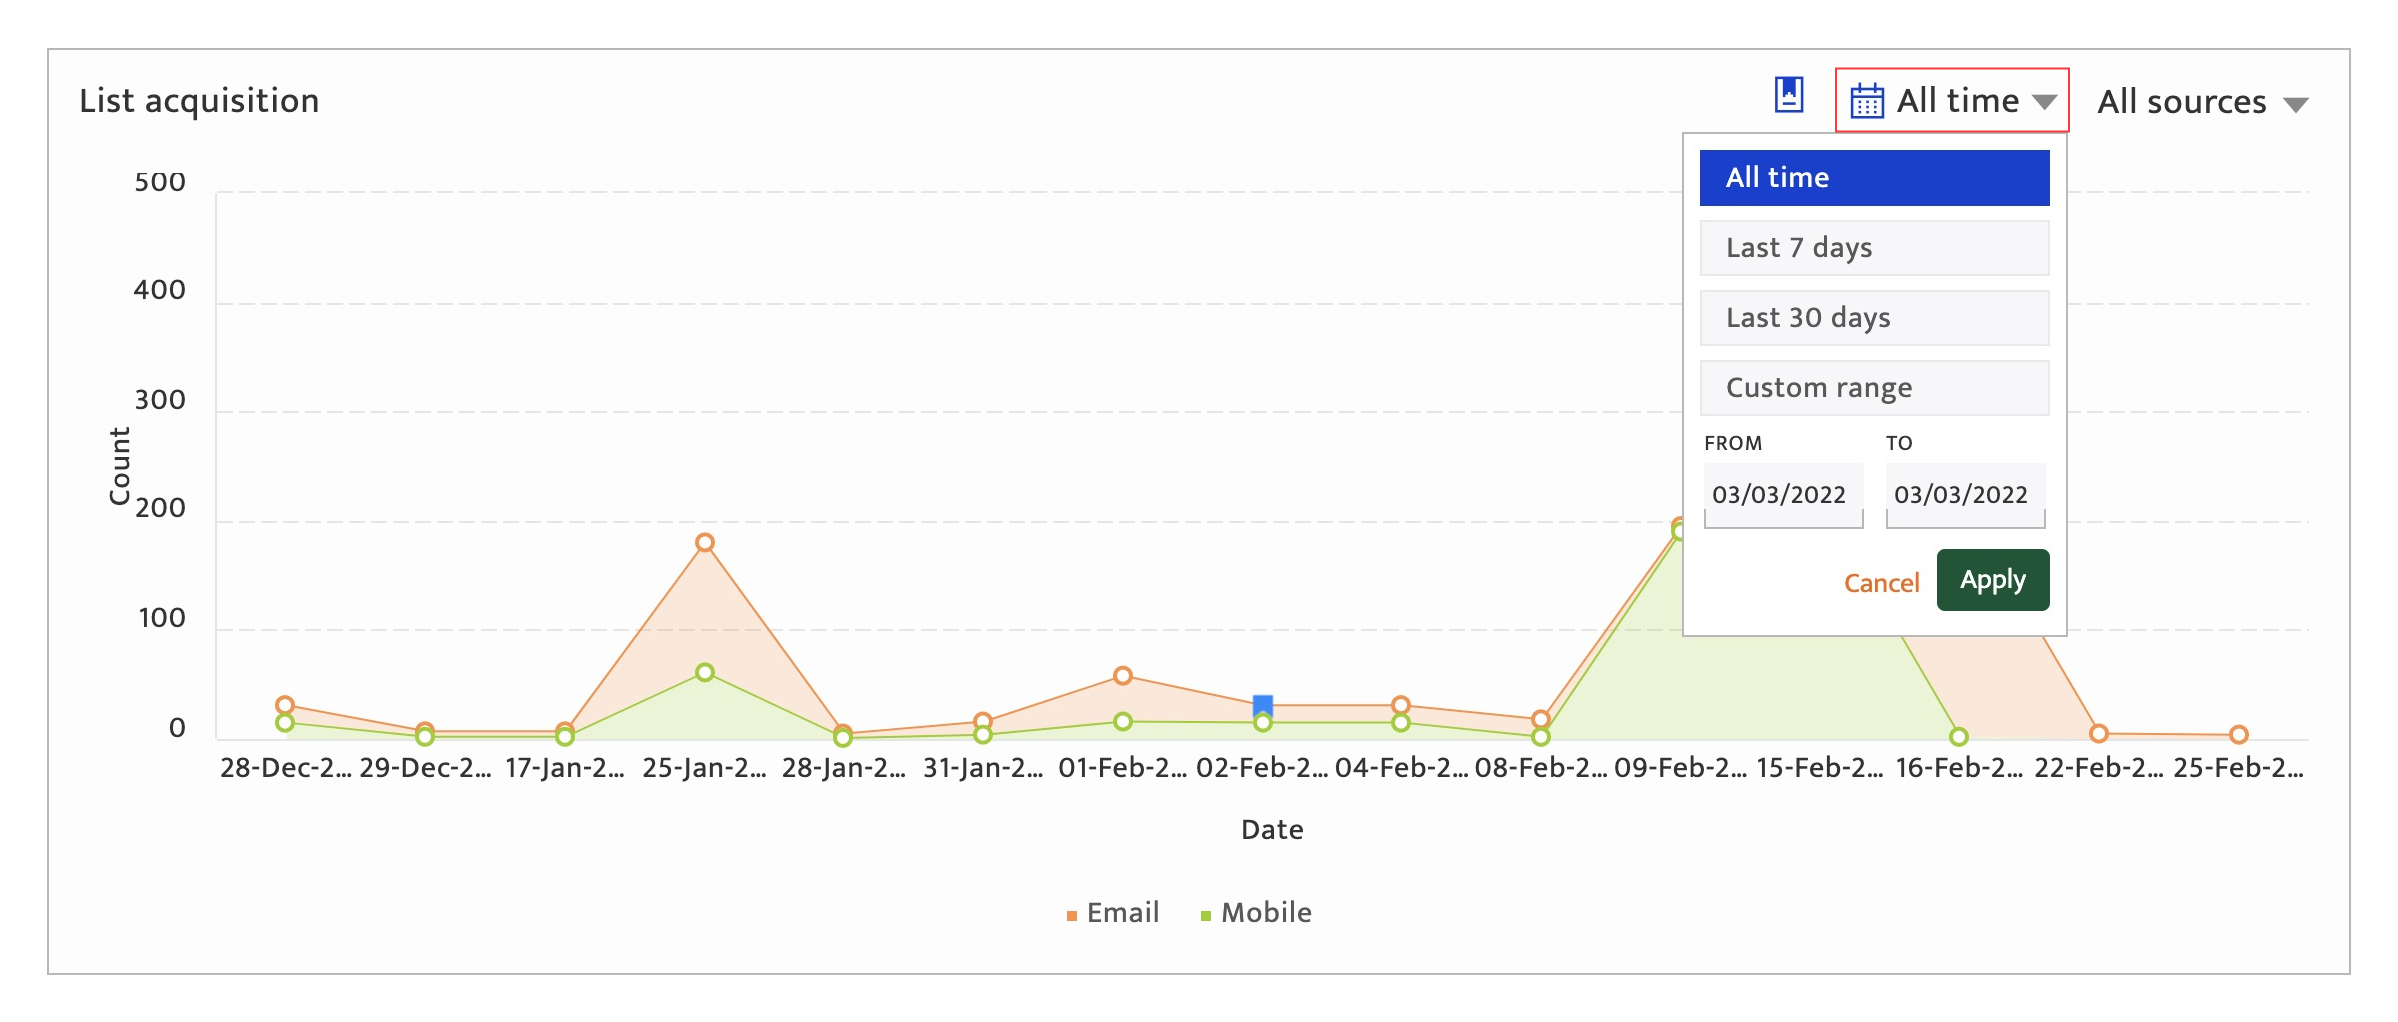
Select the appropriate time from the drop-down list and click the Apply button to view the information on the graph.
Sources filter#
Users can view the data by sources using the available options in the filter - All sources, CSV, XML, RDS, Form generation and KYC.
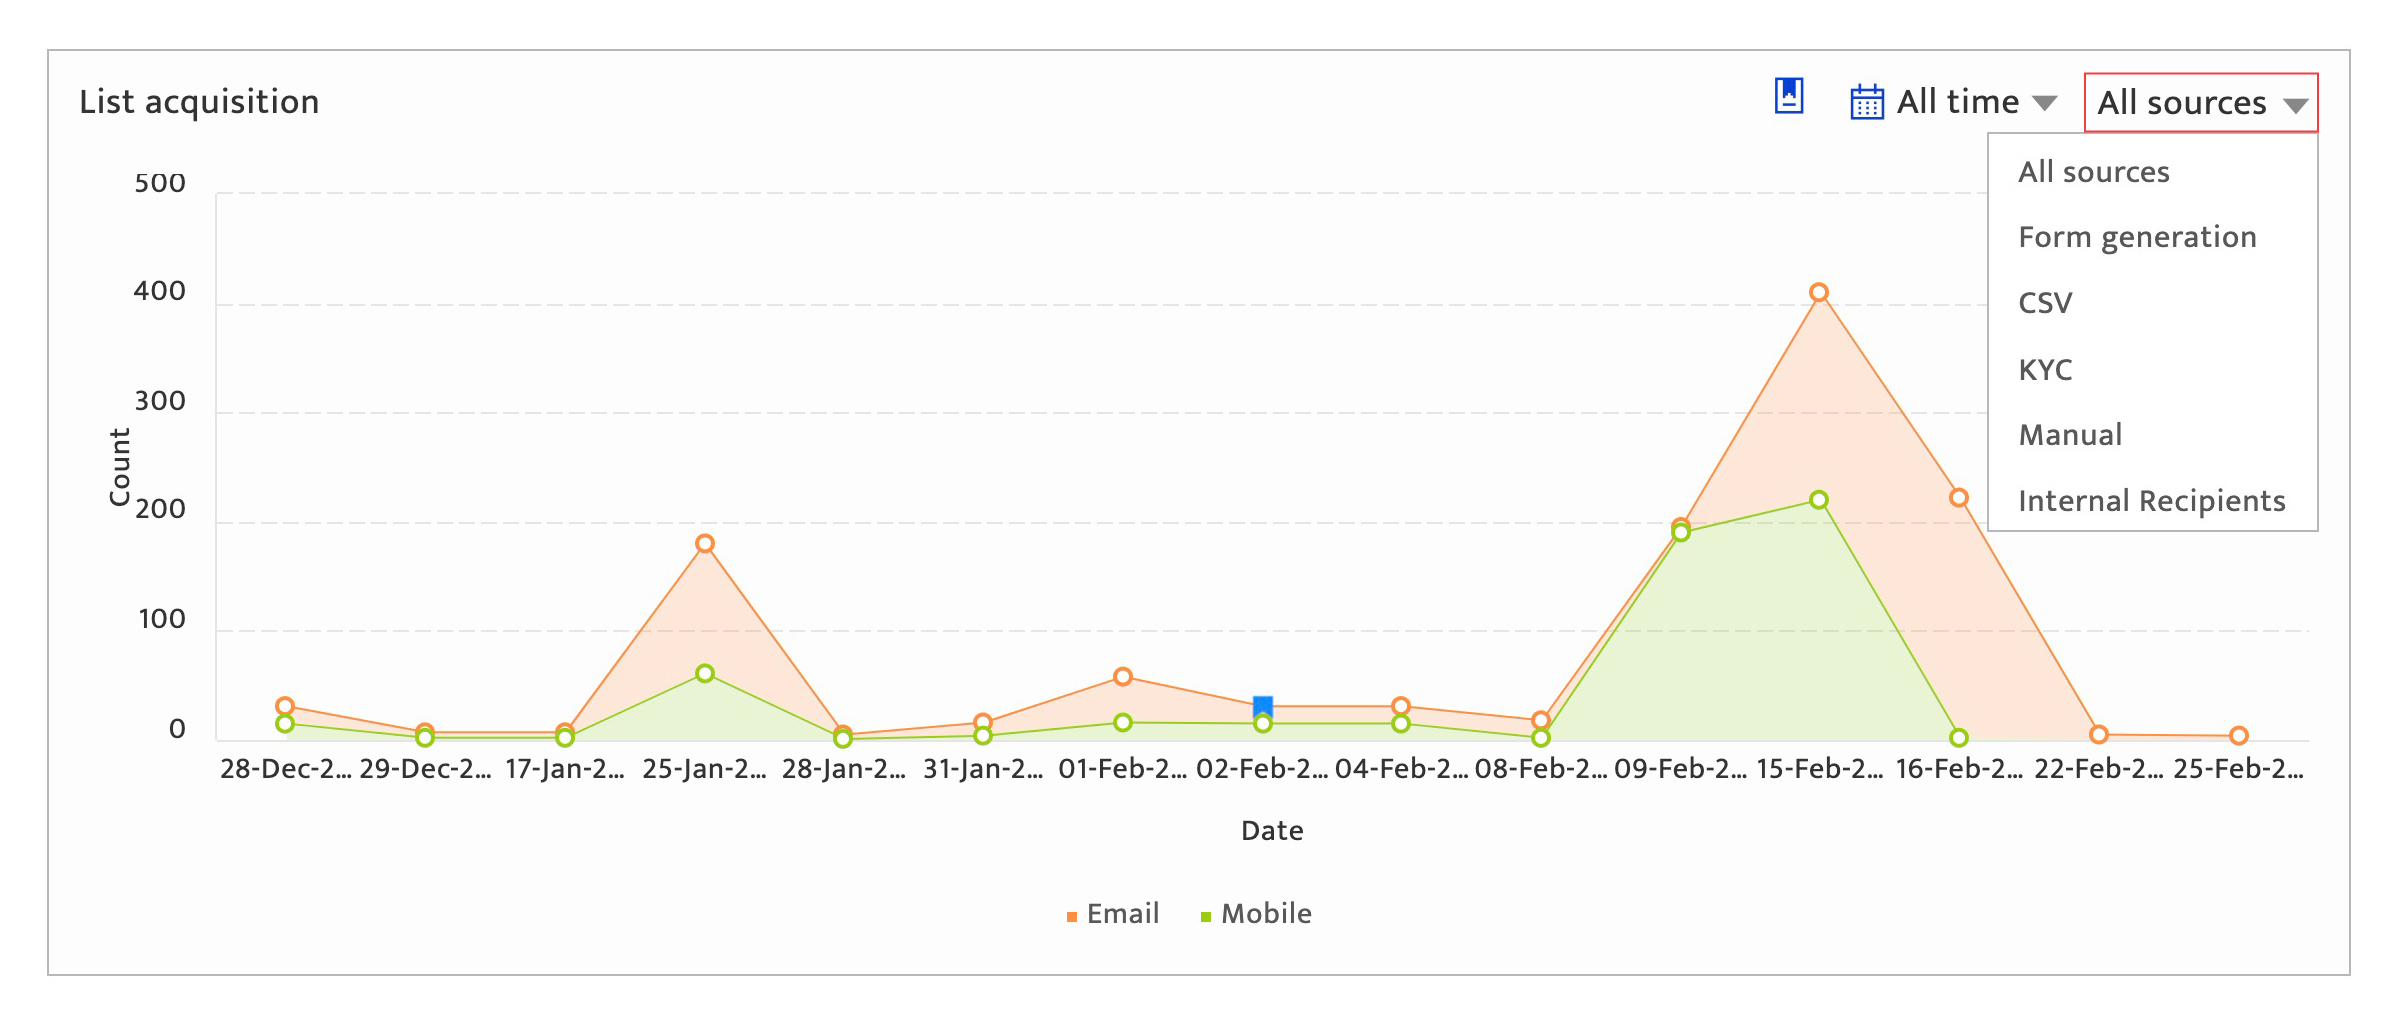
Select the appropriate source from the drop-down list to view the information on the graph.
Date-wise information#
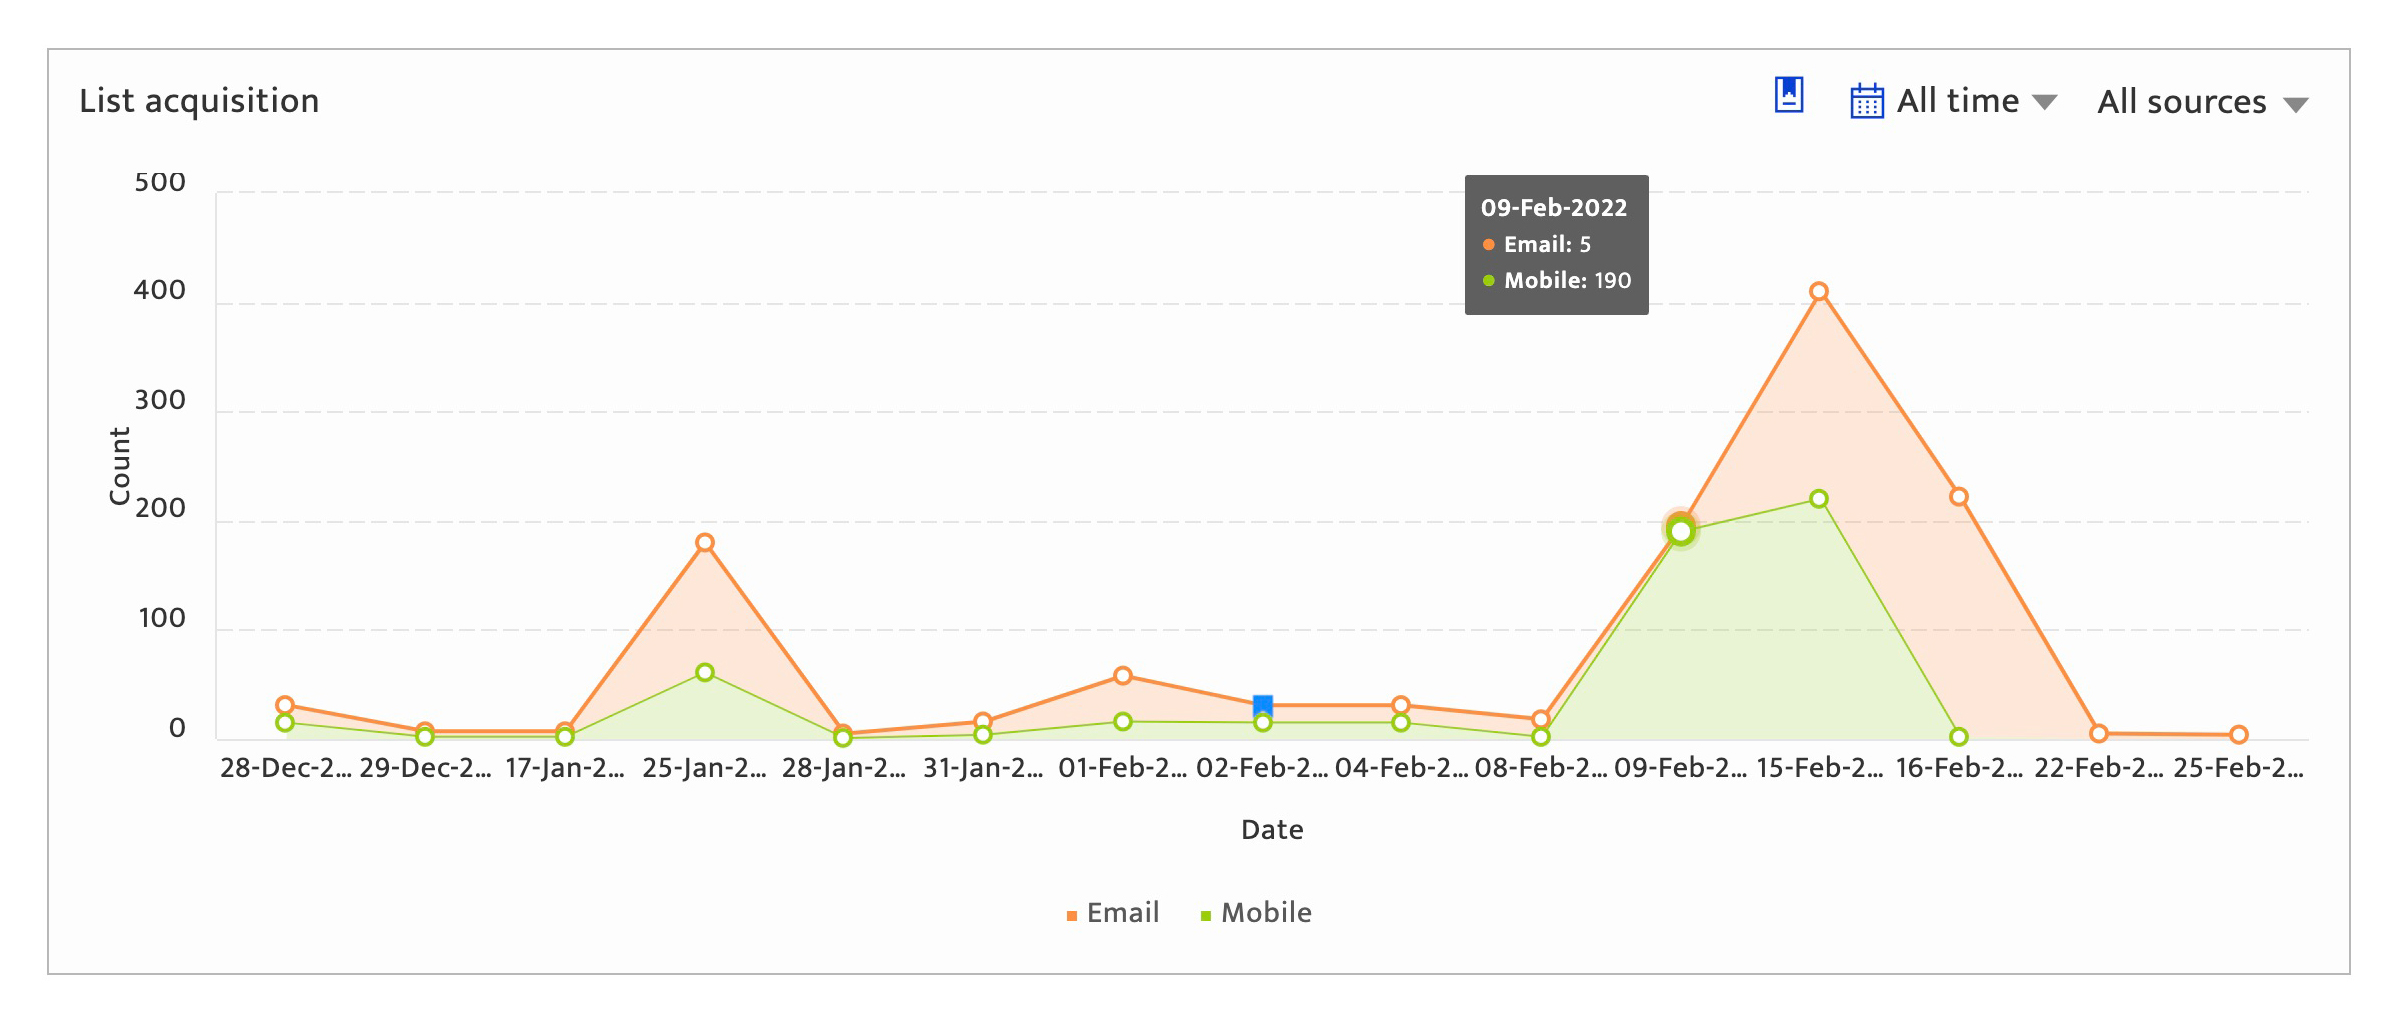
By hovering the mouse over the graph displays the date-wise information of Email and Mobile counts.
Adding Notes#
To add notes, click on the small circle of the graph-line. A pop-up window will be displayed.
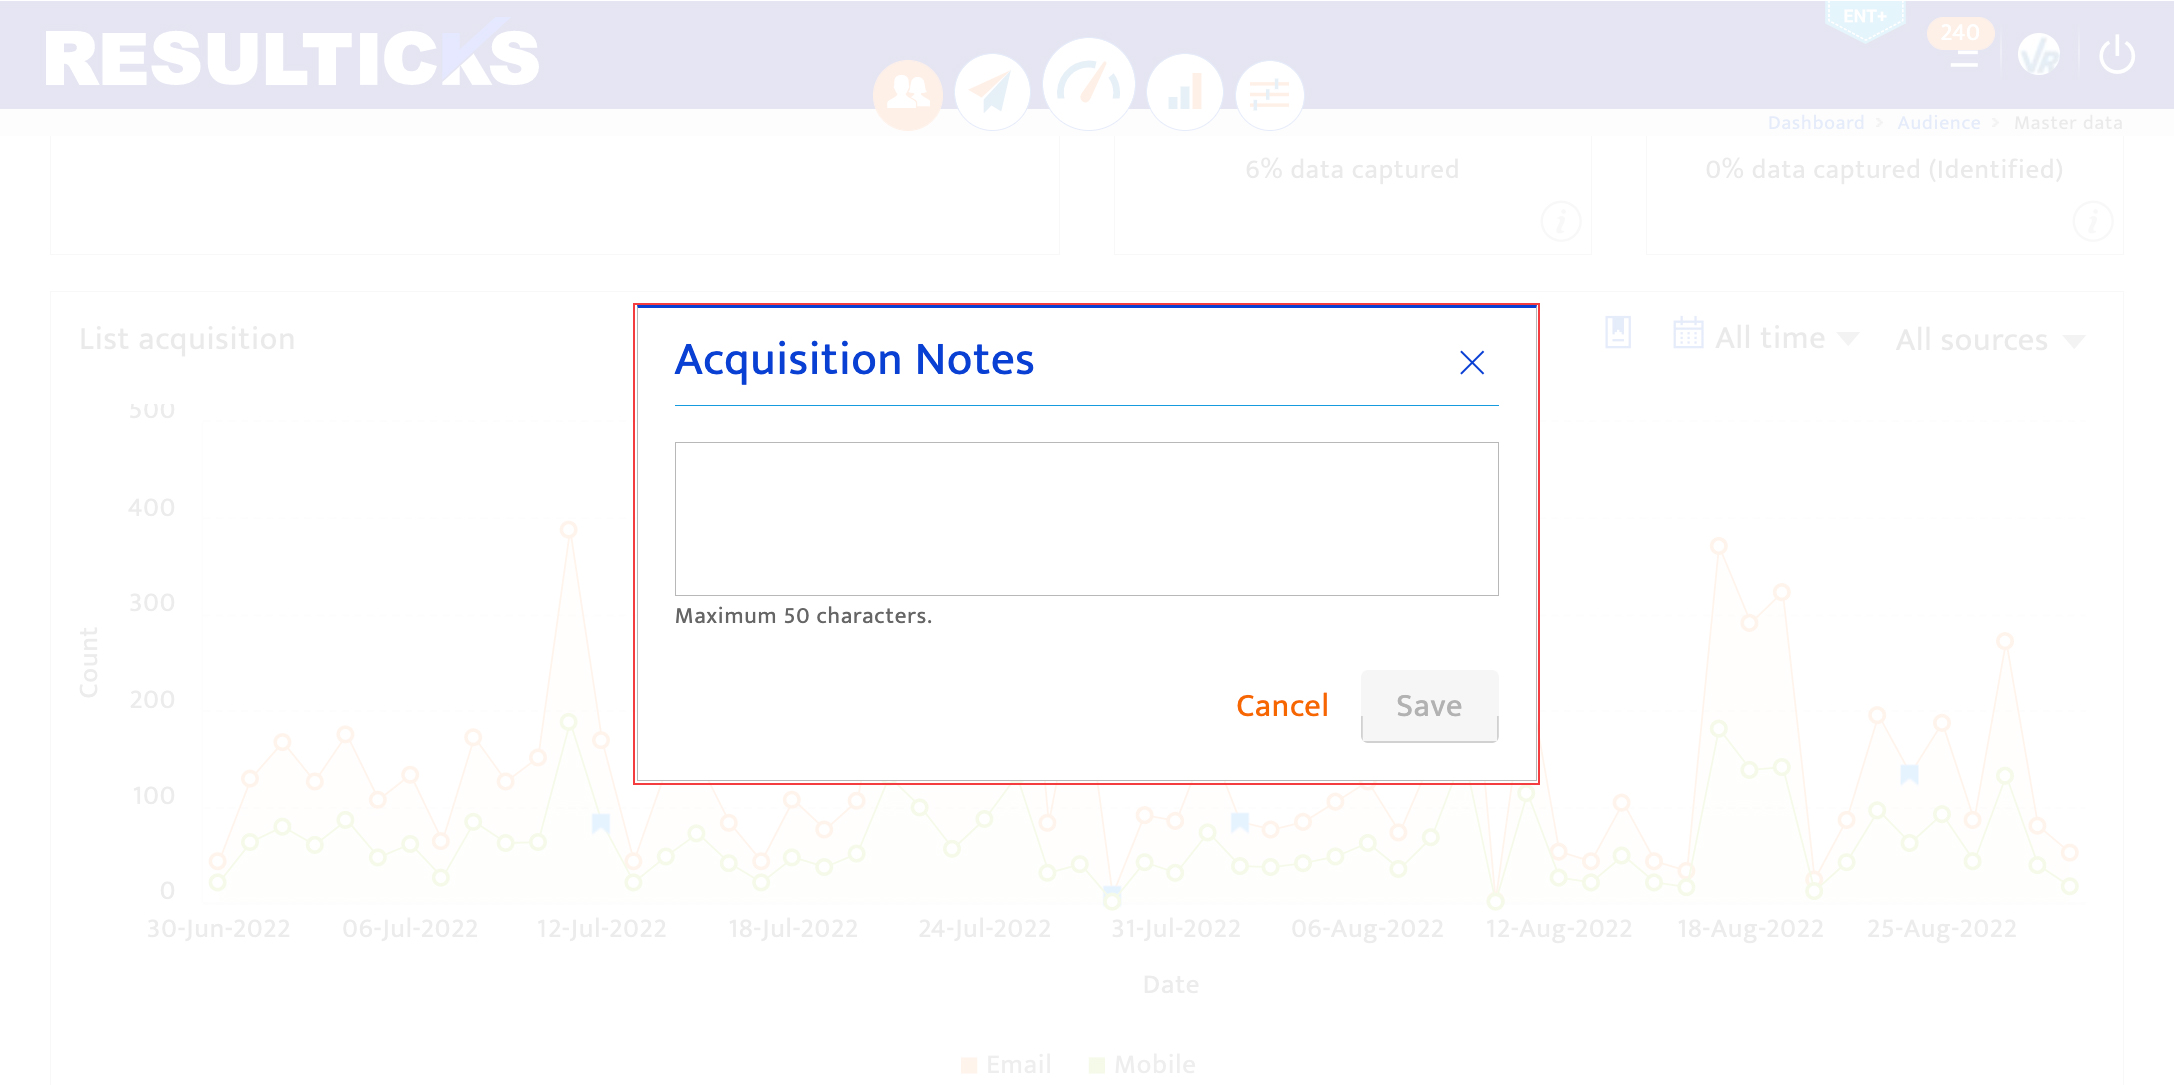
Enter the appropriate Notes and click the Save button to save the notes.
Audience list#
This section displays the audience information in list format.
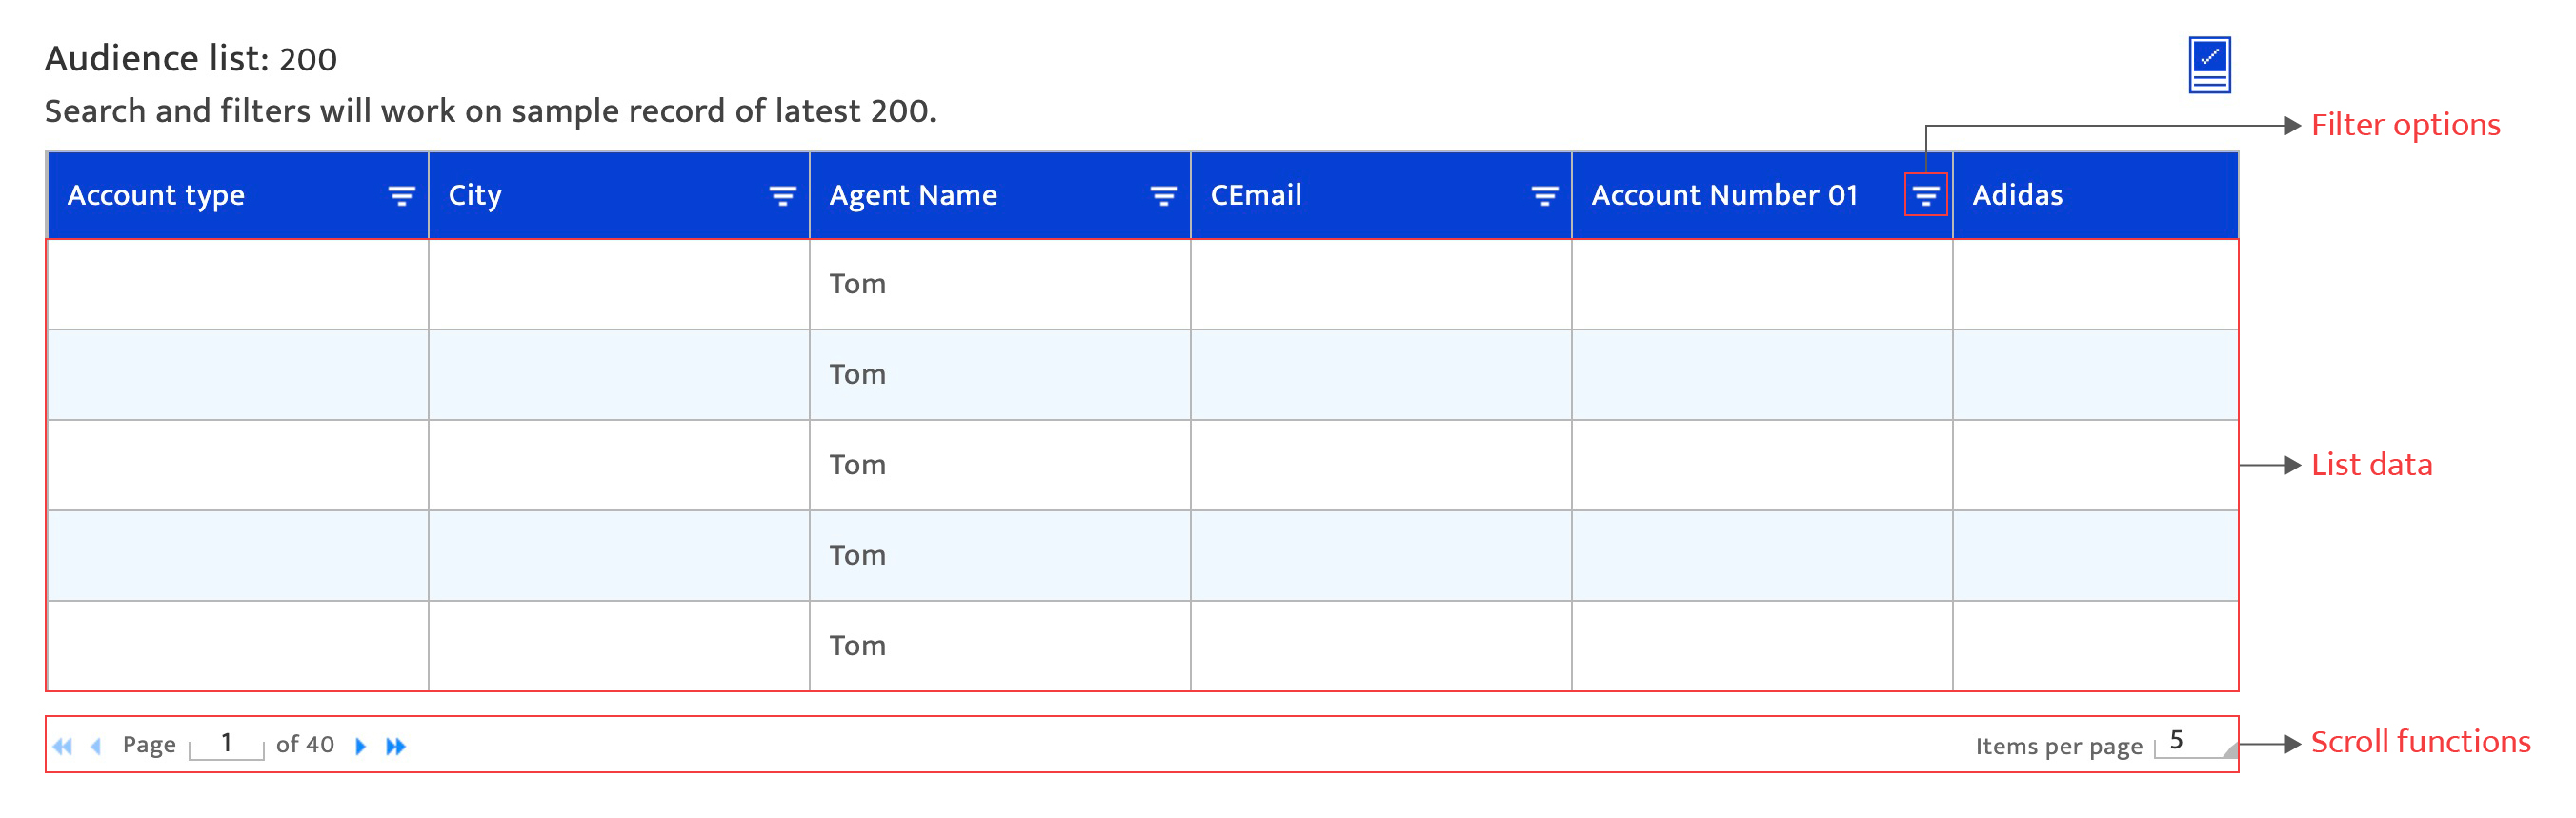
Screen options#
This section enables the users to perform following actions.
- To sort the columns in ascending or descending order by clicking on the column header.
- To filter the list using the filter function on each column header.
- To view the list in the subsequent pages using the horizontal scroll keys.
- To customize the number of items displayed in a page by defining the number in Items per page field.
- To select audience fields. The selected fields will be displayed as the column headers in the list.
- Click the Field
 icon. The Select audience fields screen will be displayed.
 - Select the required audience fields and click the Load button.
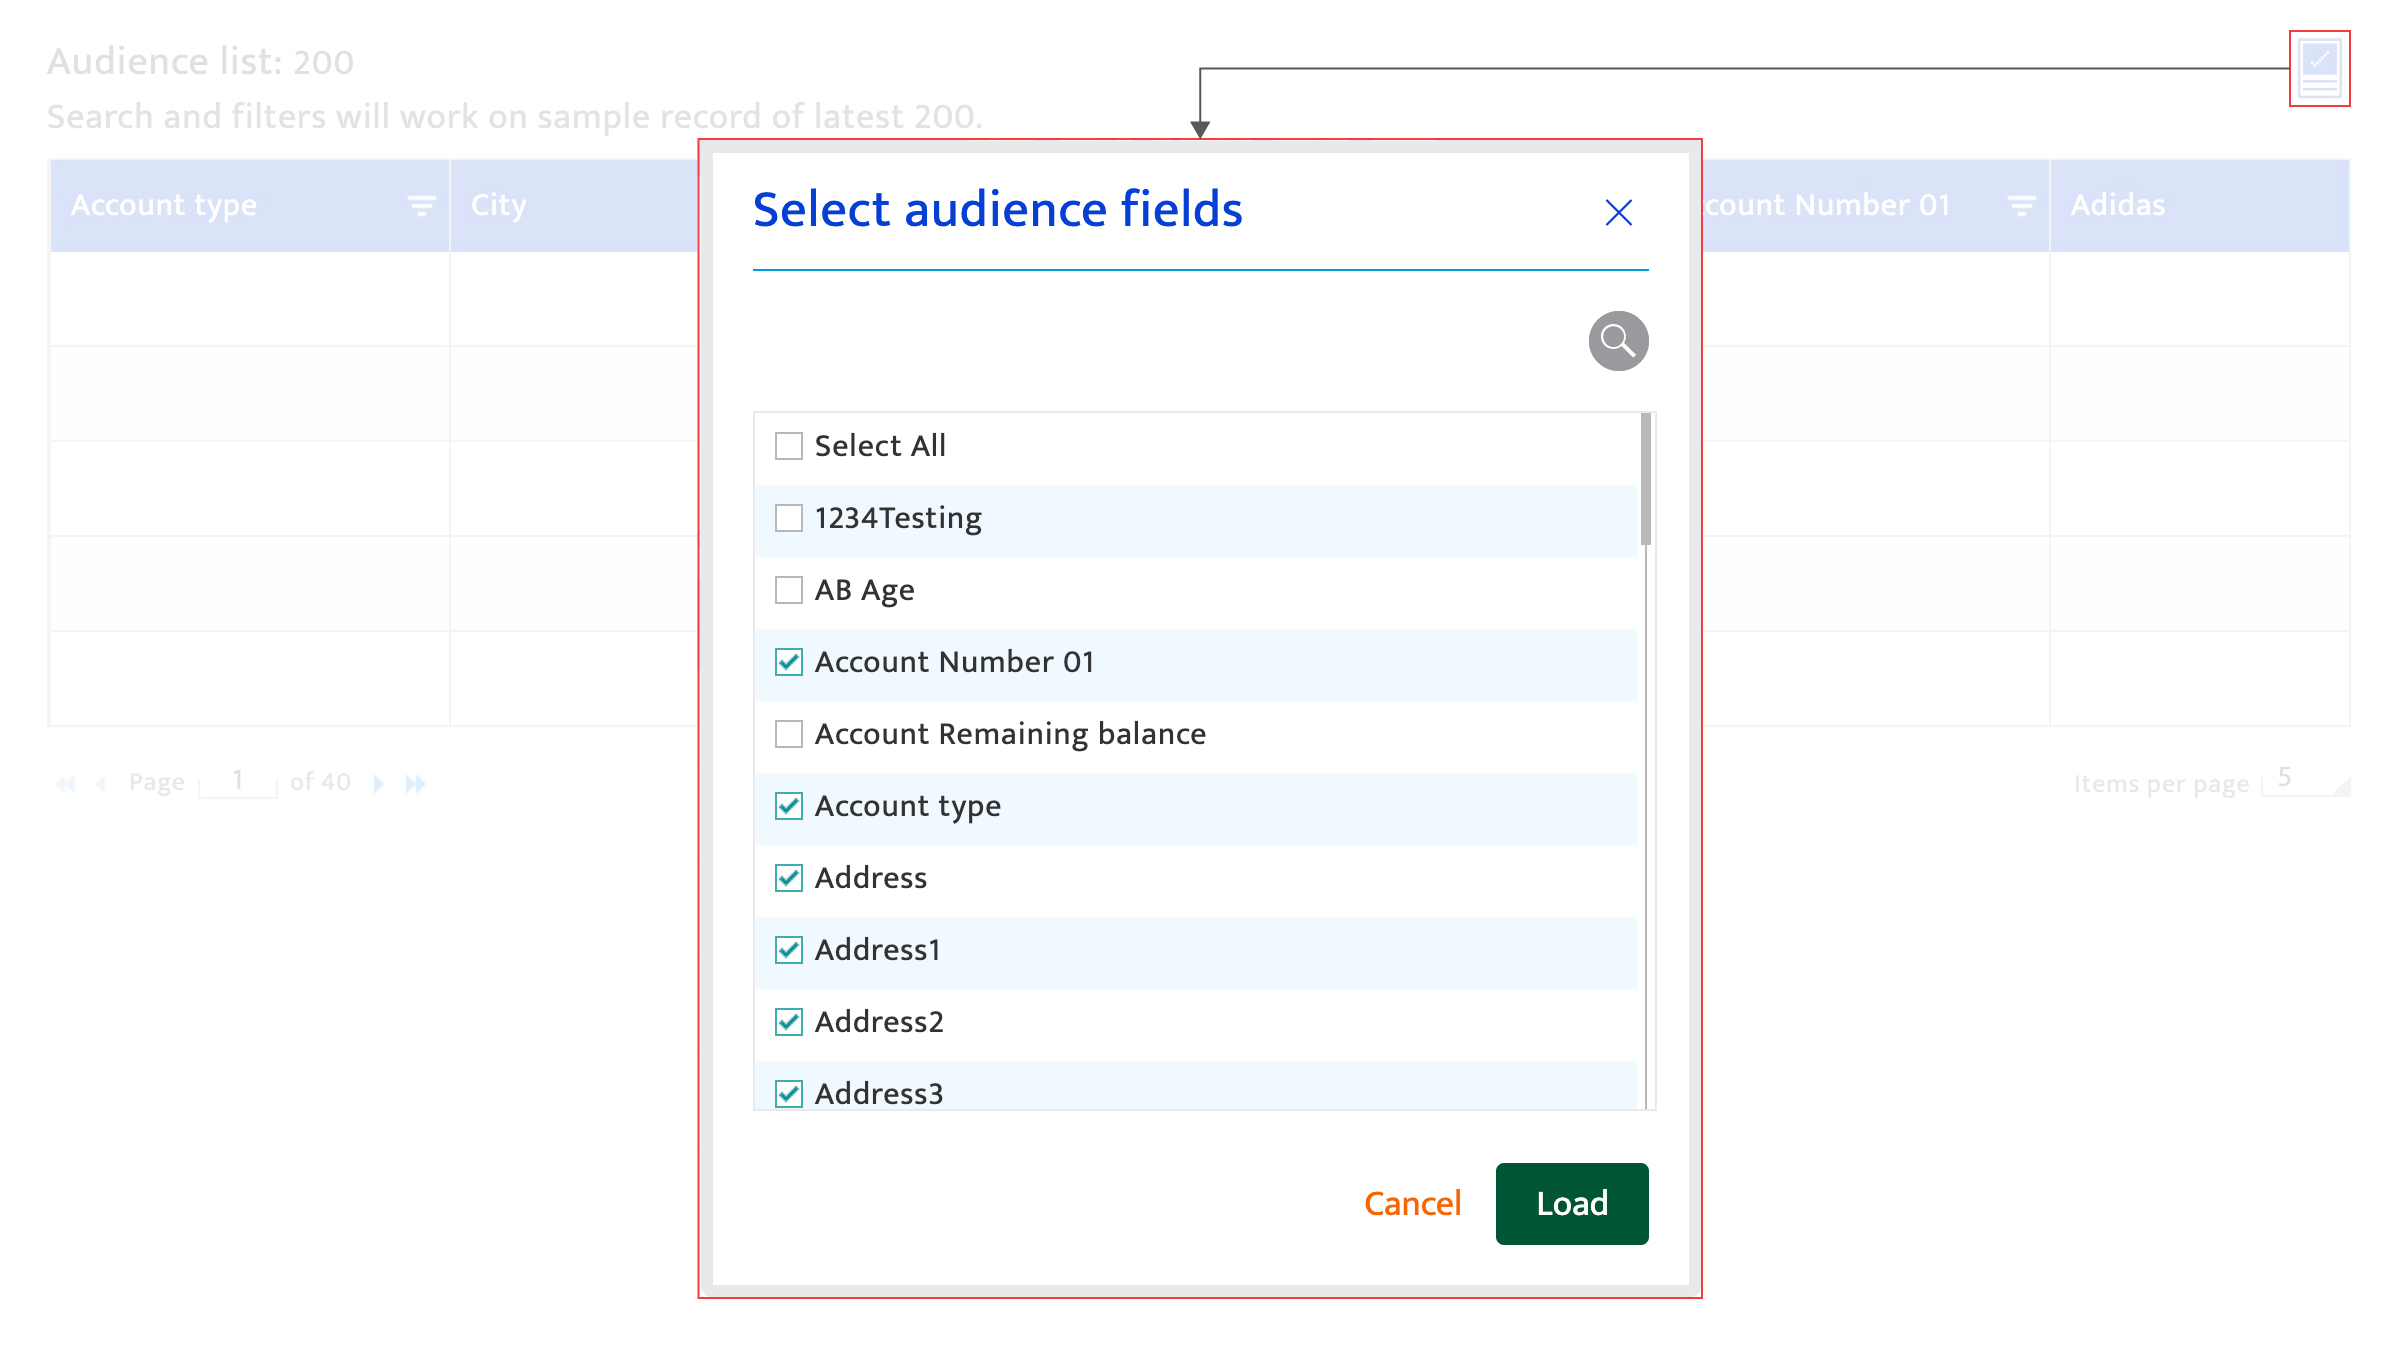
- Click the Field
- To download the total list. Users can view the entire audience list in the downloaded file.
- Click the Download
 icon. A one-time password (OTP) will be emailed to the Key contact person for OTP authentication.
 - Enter the OTP and click the Confirm button to complete the download.
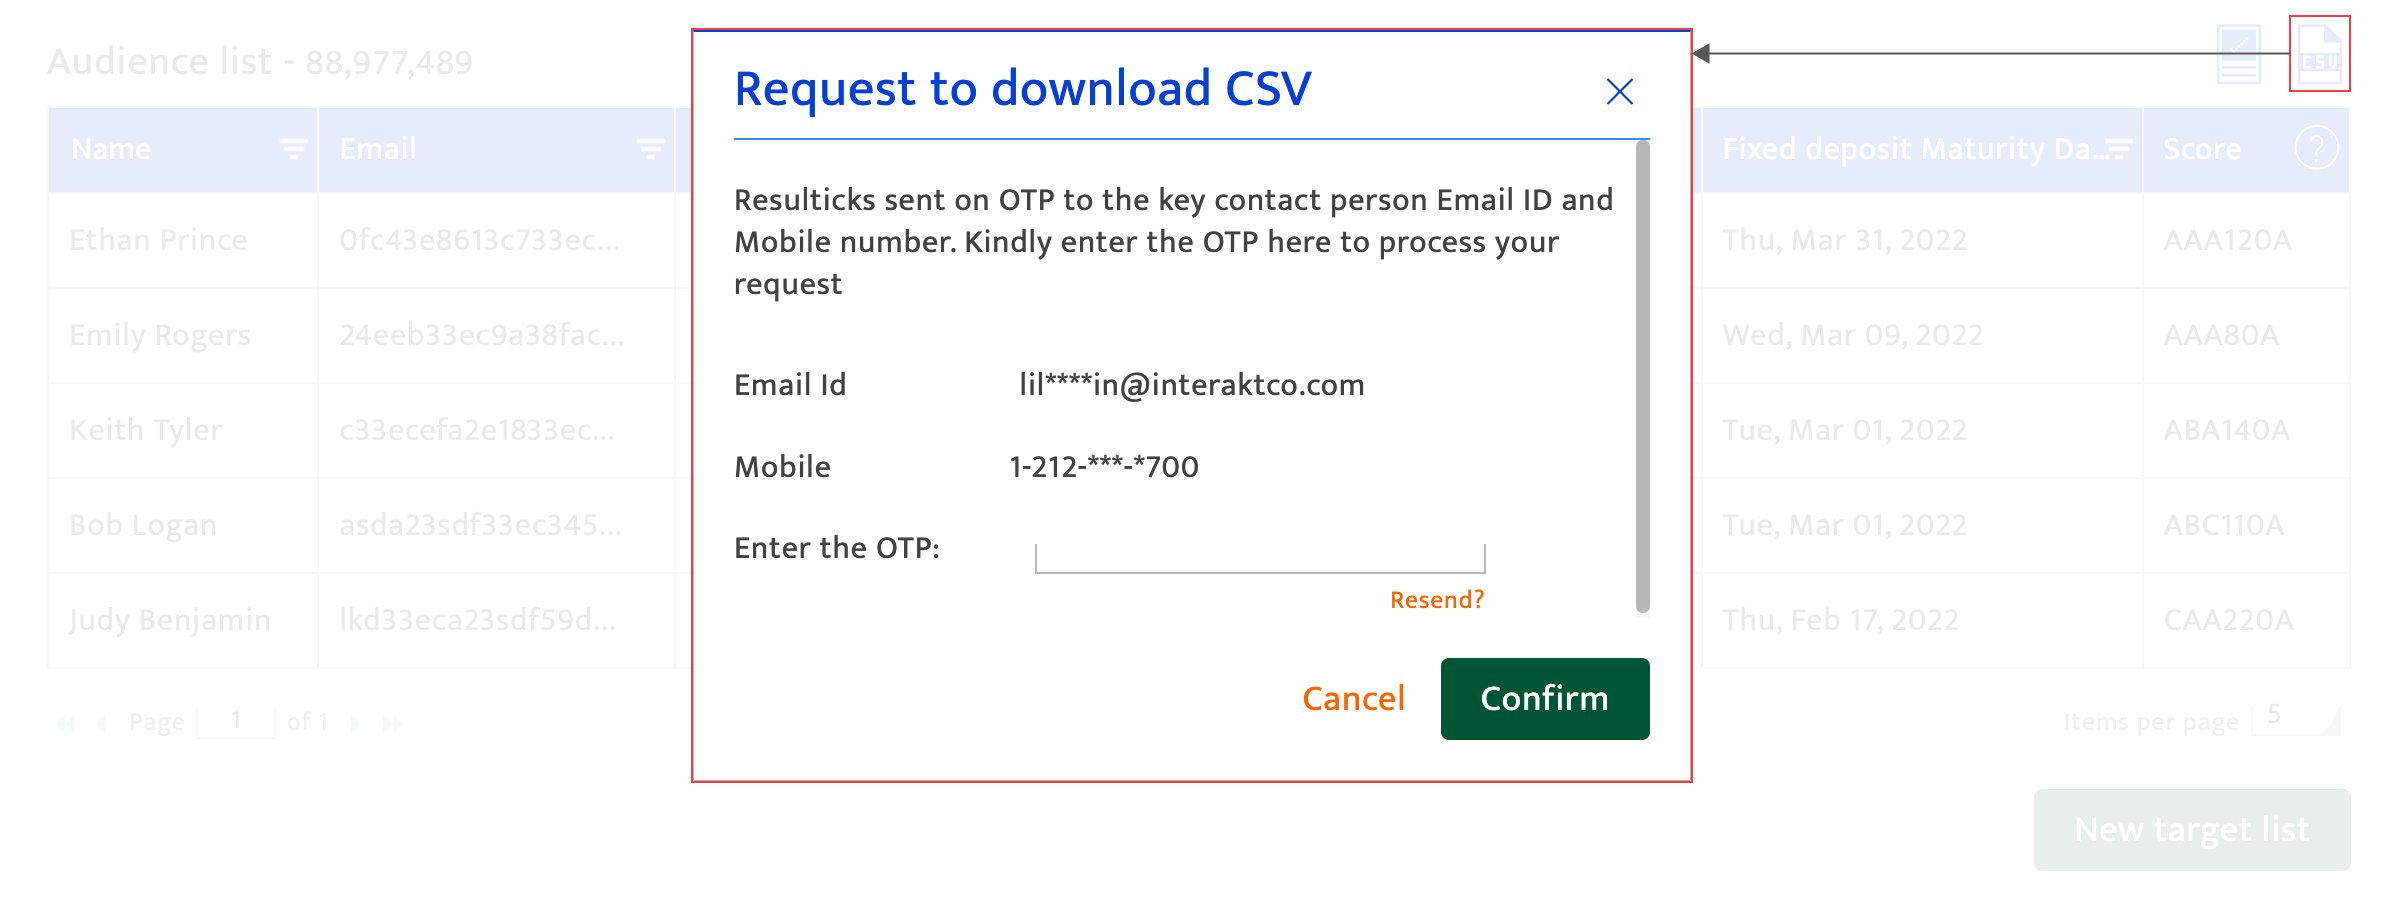
- Click the Download
Module Accessibility#
- Super user, Administrator, and Key contact for the account have the access to download reports and create target list
- User, Super user, Administrator, and Key contact have the access to view the screens.