Users
What is it?#
Users and their permissions are key components of the platform. Setting these up correctly is important to ensure that:
- The platform’s security is not compromised.
- The platform’s usefulness for the user is maximized.
- Platform access and usage align with company policies and processes.
Authorization and making changes#
This screen can be accessed by the Key Contact and Administrator for the account.
Making changes once a new user has been created can be done here and in the My Profile section.
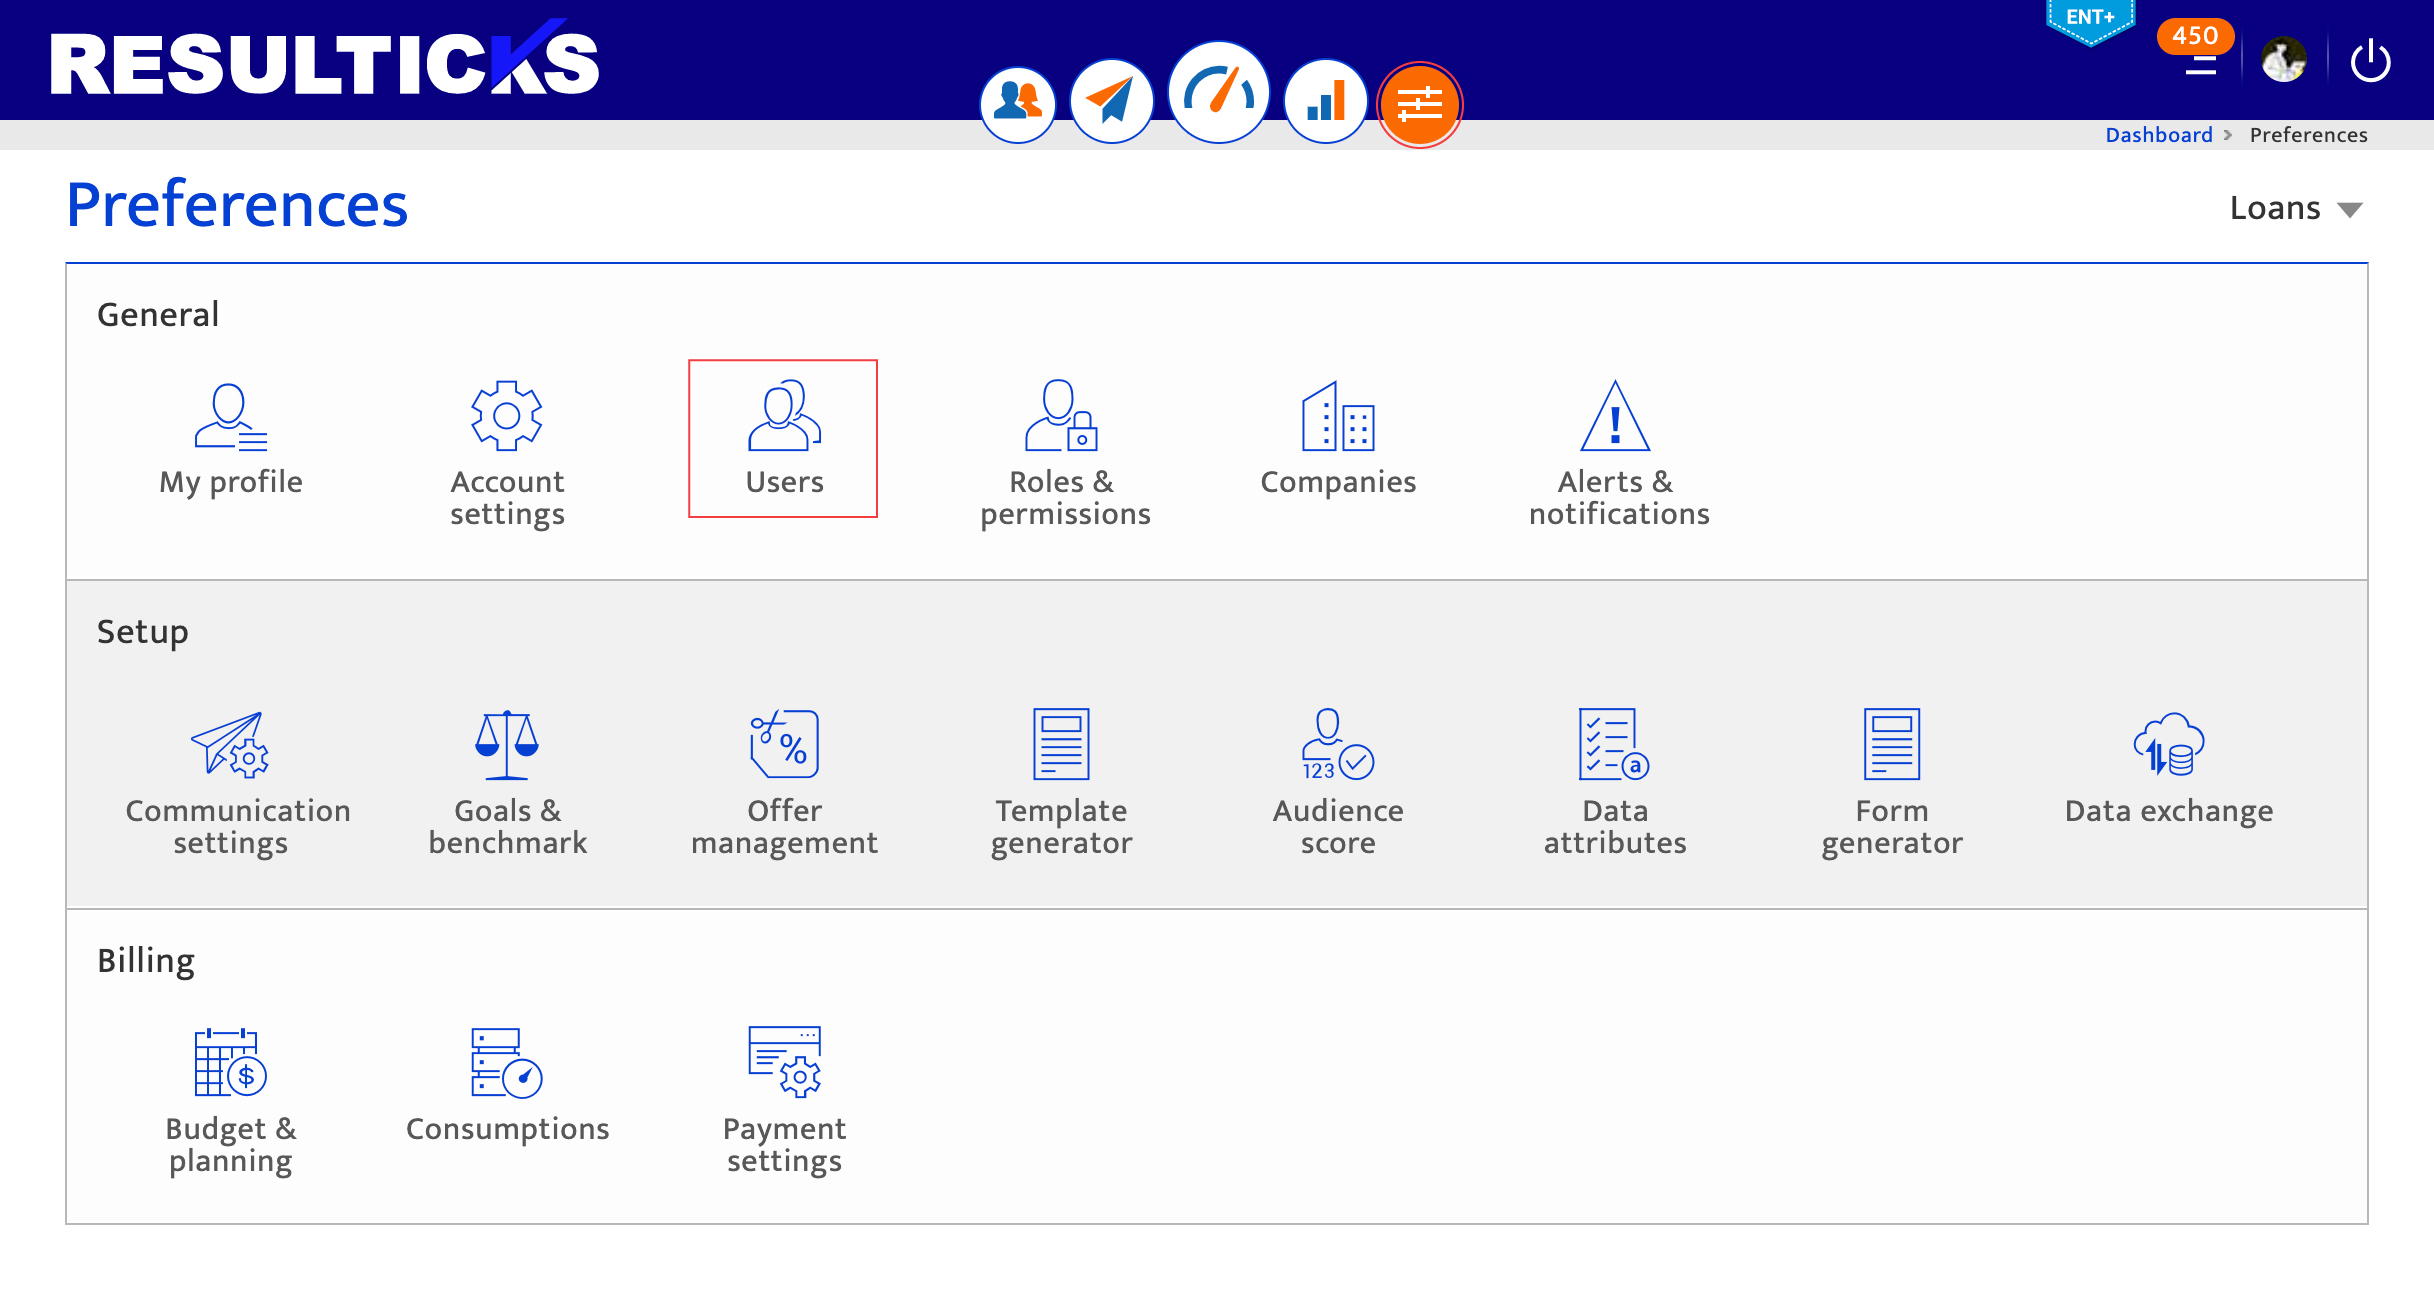
Accessing users#
- Select the Preferences Module
- Select Users from the General category.
Using the user list#
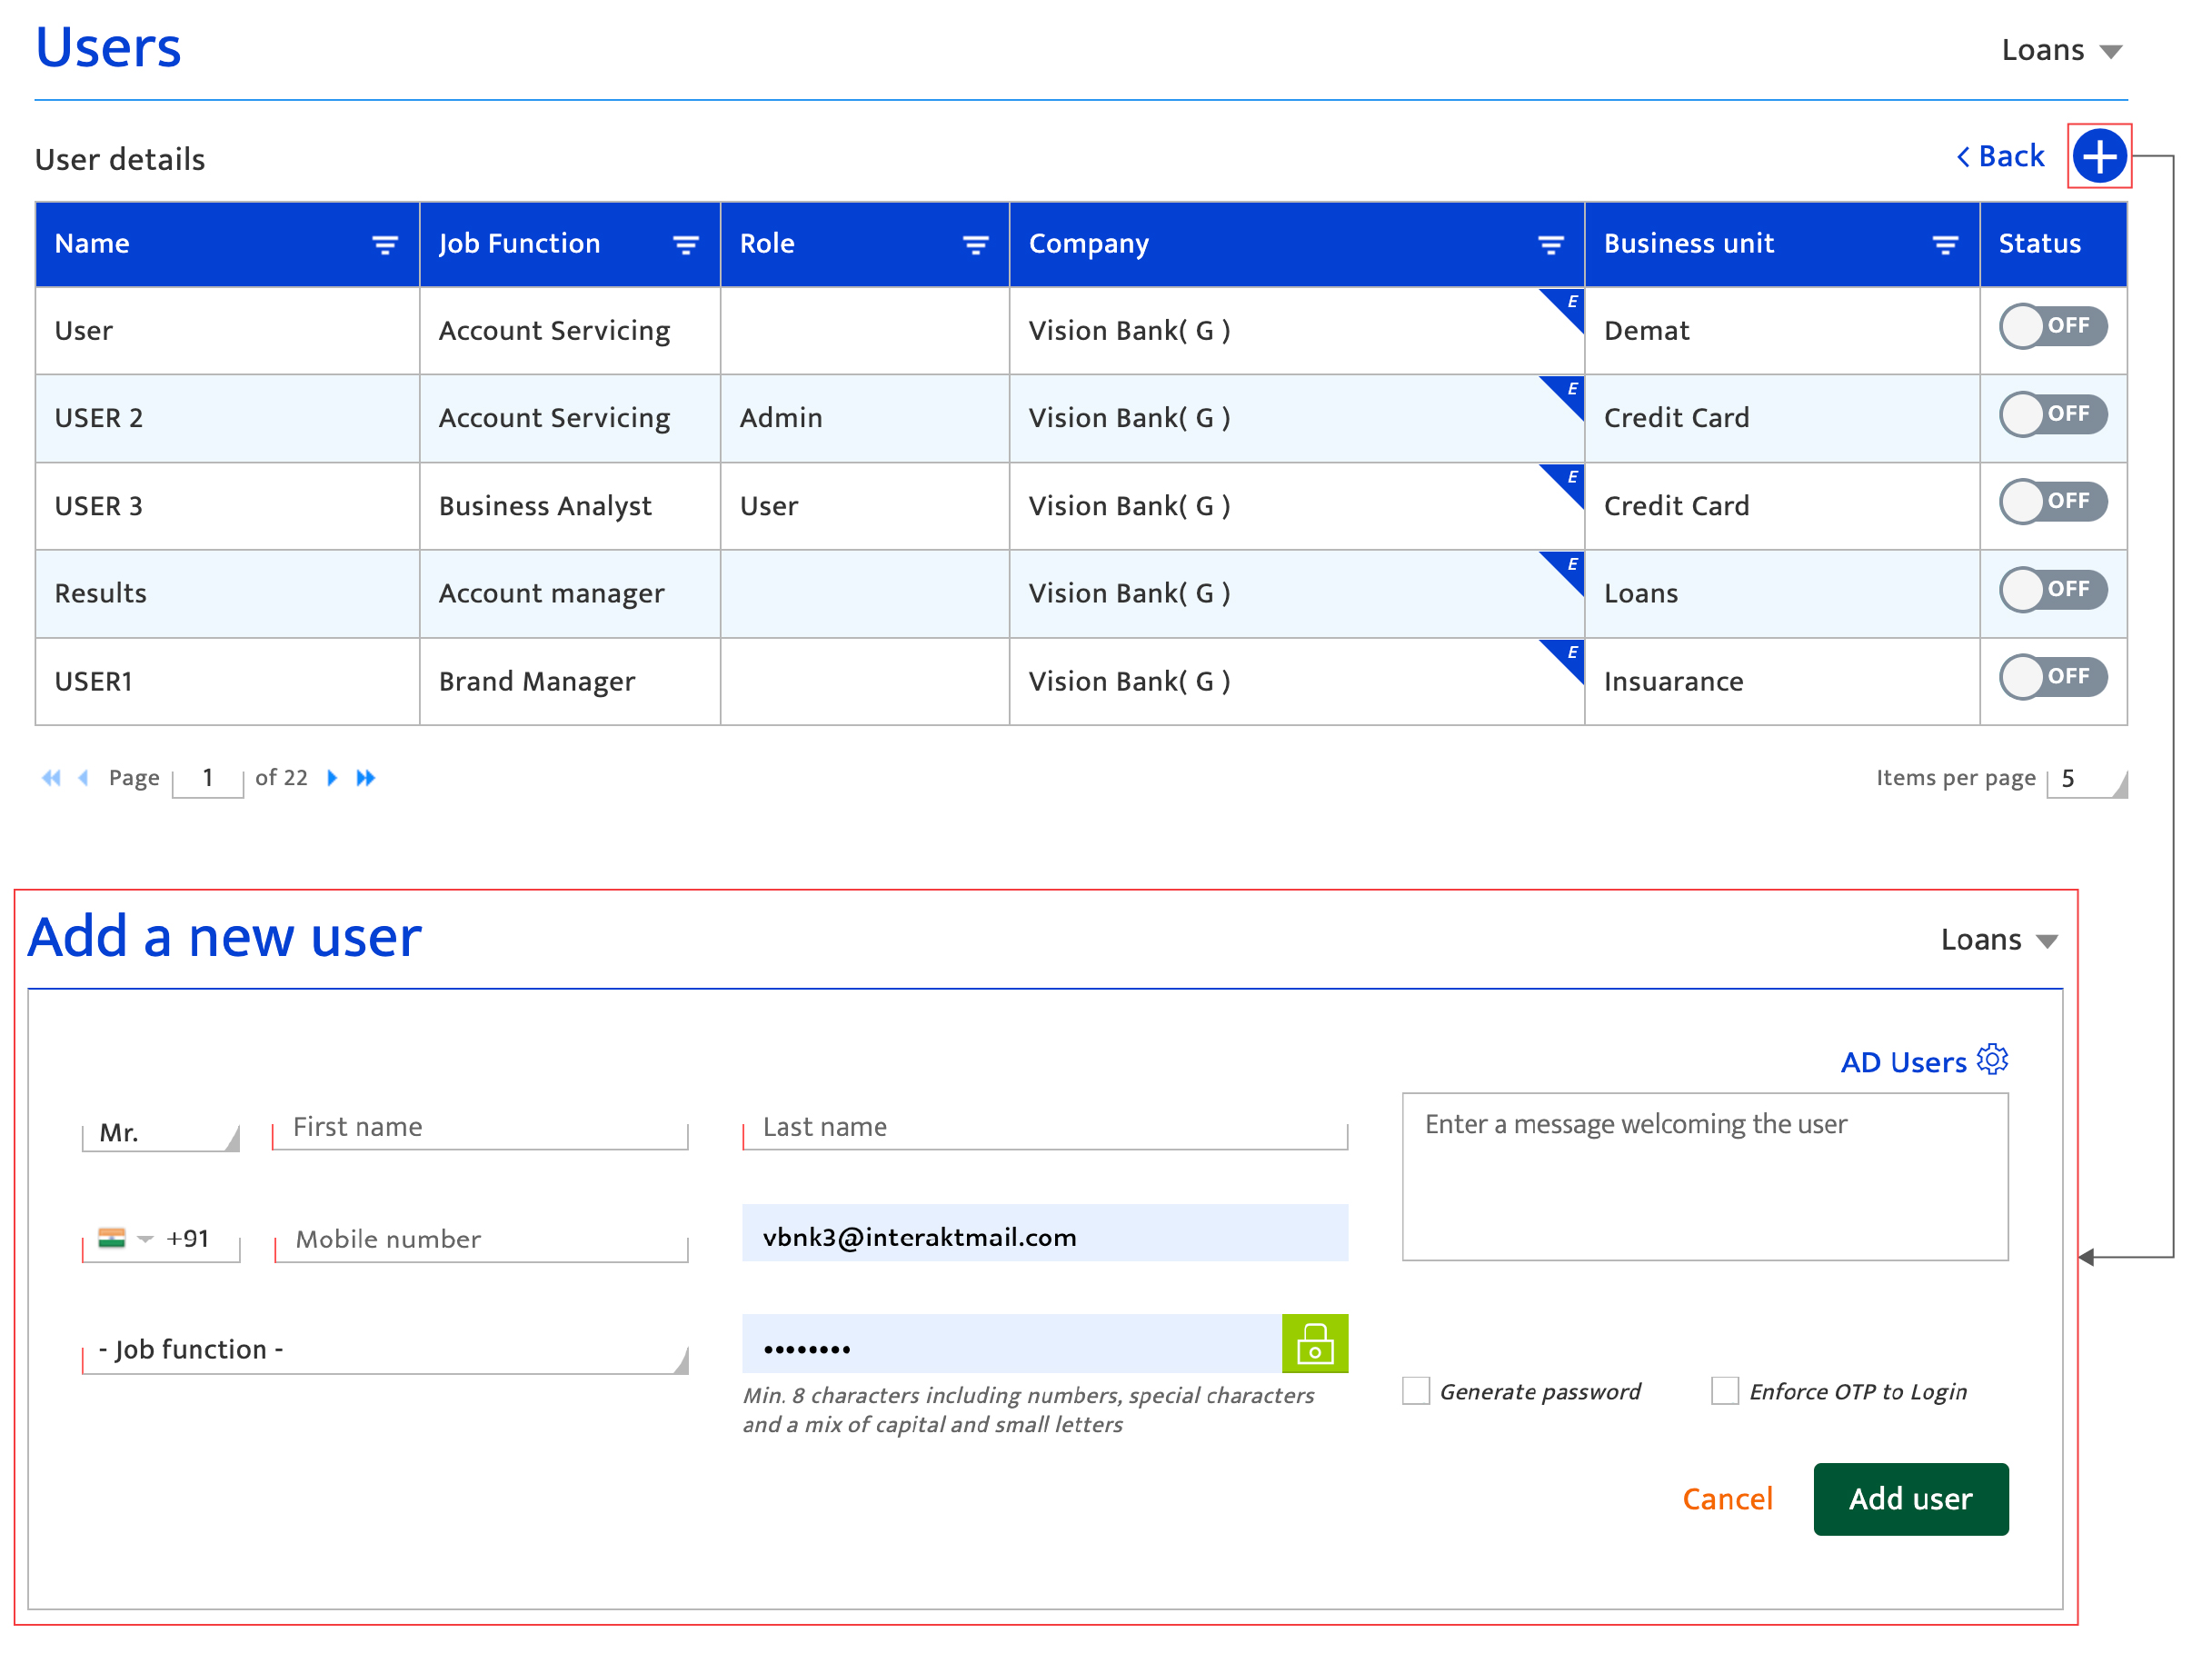
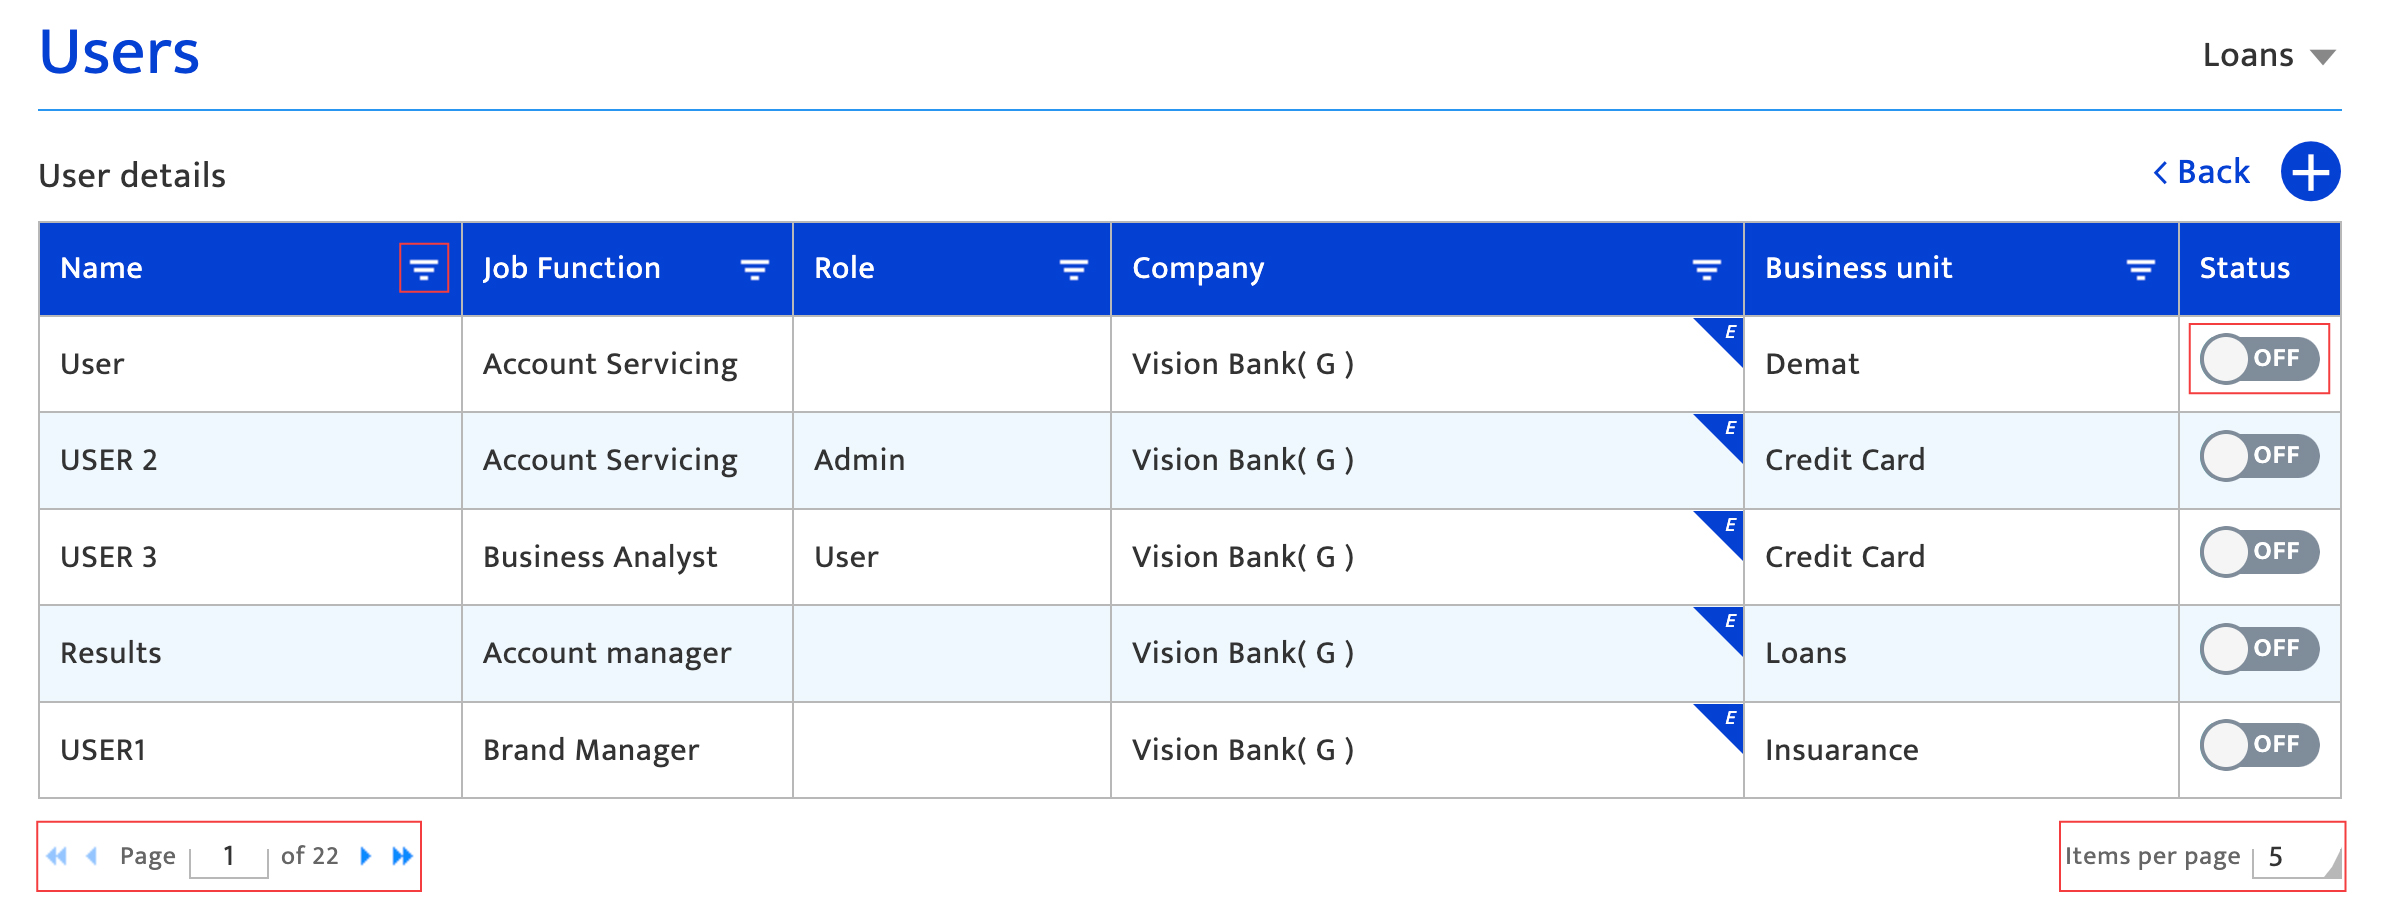
The list displays all the users associated with the Resulticks account. It shows each user’s name, job function, role, company, business unit, and activation status. On this list you can:-
- Sort the user list by clicking on the column name and toggle between ascending and descending sorts.
- Filter on columns by clicking the filter icon and entering filter values. Choose to filter for results that:
- Are equal to the search item
- Start with the search item
- Are not equal to the search item
- Enable / Disable a user by switching the On/Off toggle switch in the corresponding row. The change is effective immediately.
- Scroll through the list using the scroll buttons.
- Adjust the number of items shown per page using the drop-down list.
Creating a new user#
- Click on the “+” button to initiate the creation
- Populate all the fields displayed using manual entry
- First name: Maximum 50 characters
- Last name: Maximum 50 characters
- Email address: Business emails only
- Mobile number: Valid mobile number
- Job function: Select from a drop-down list
- Password: Minimum 8 characters with recommended inclusions of at least one capital, one small character and a number. A password can be auto-generated by ticking the box.
- Welcome message upon first time sign in. Tick the box and enter the message. There is no character limit. This is optional.
- Enforce OTP (One-time password)entry for the user on login by ticking the checkbox. This is optional.
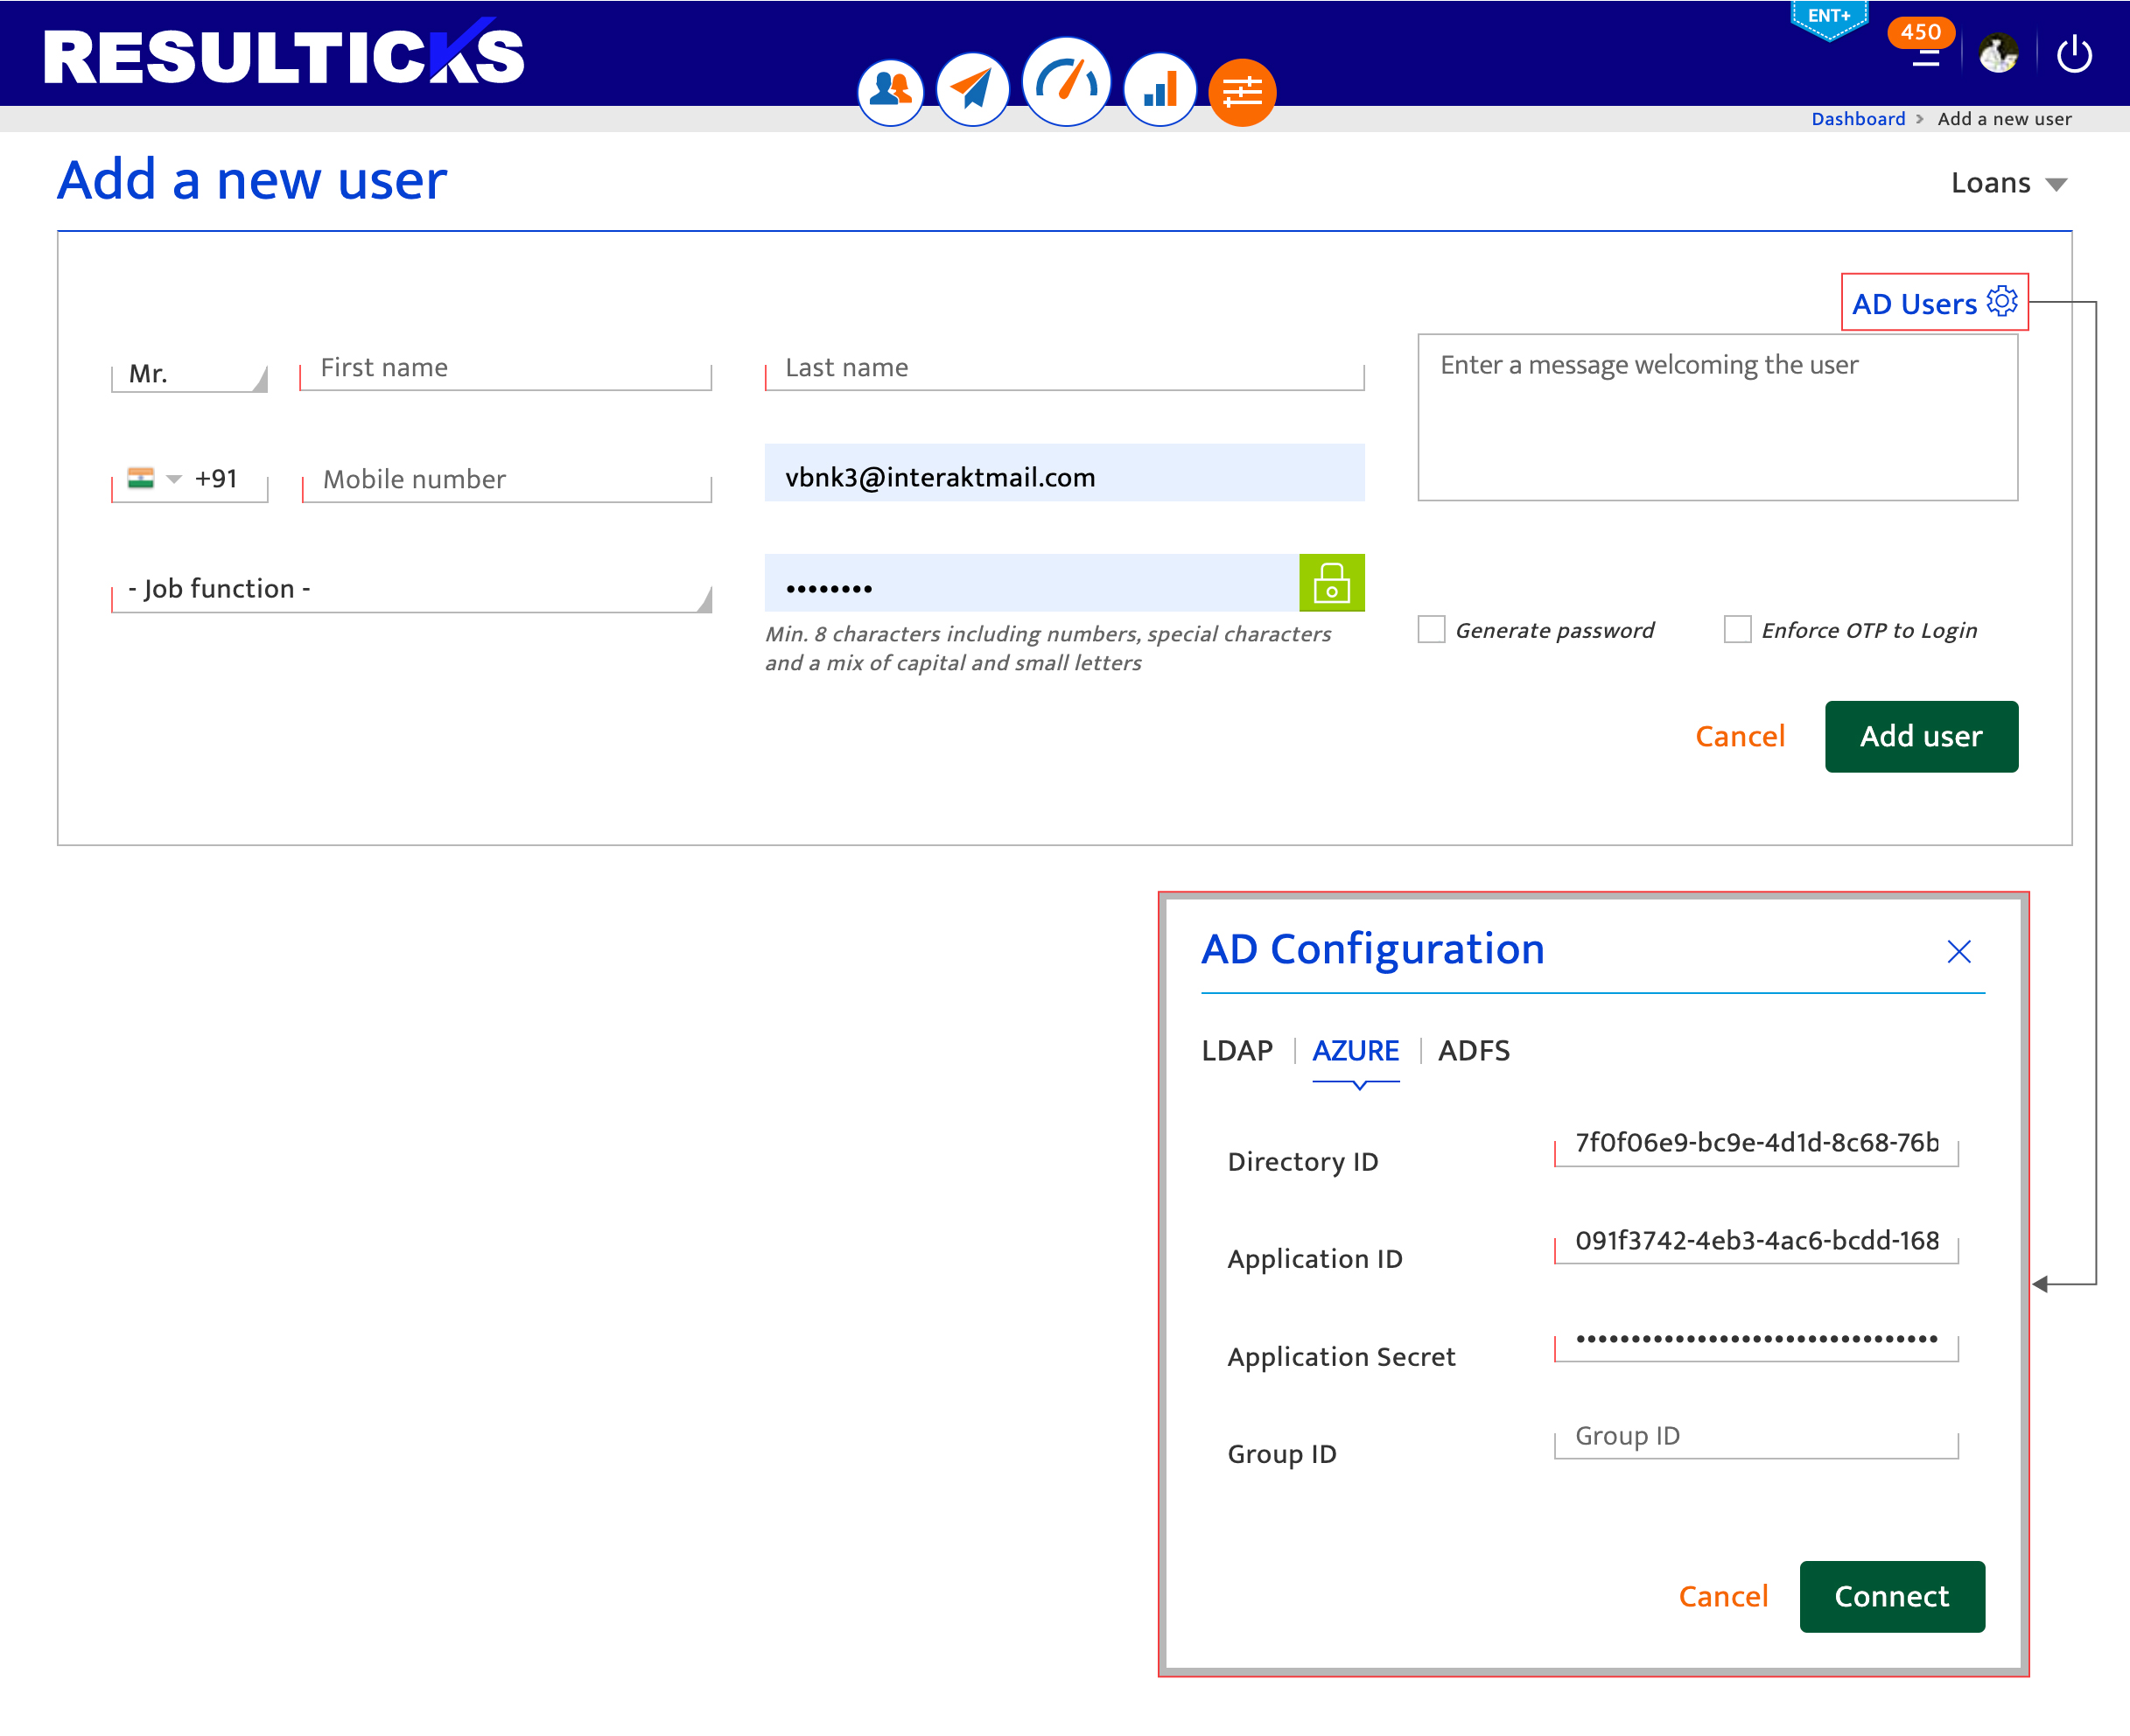
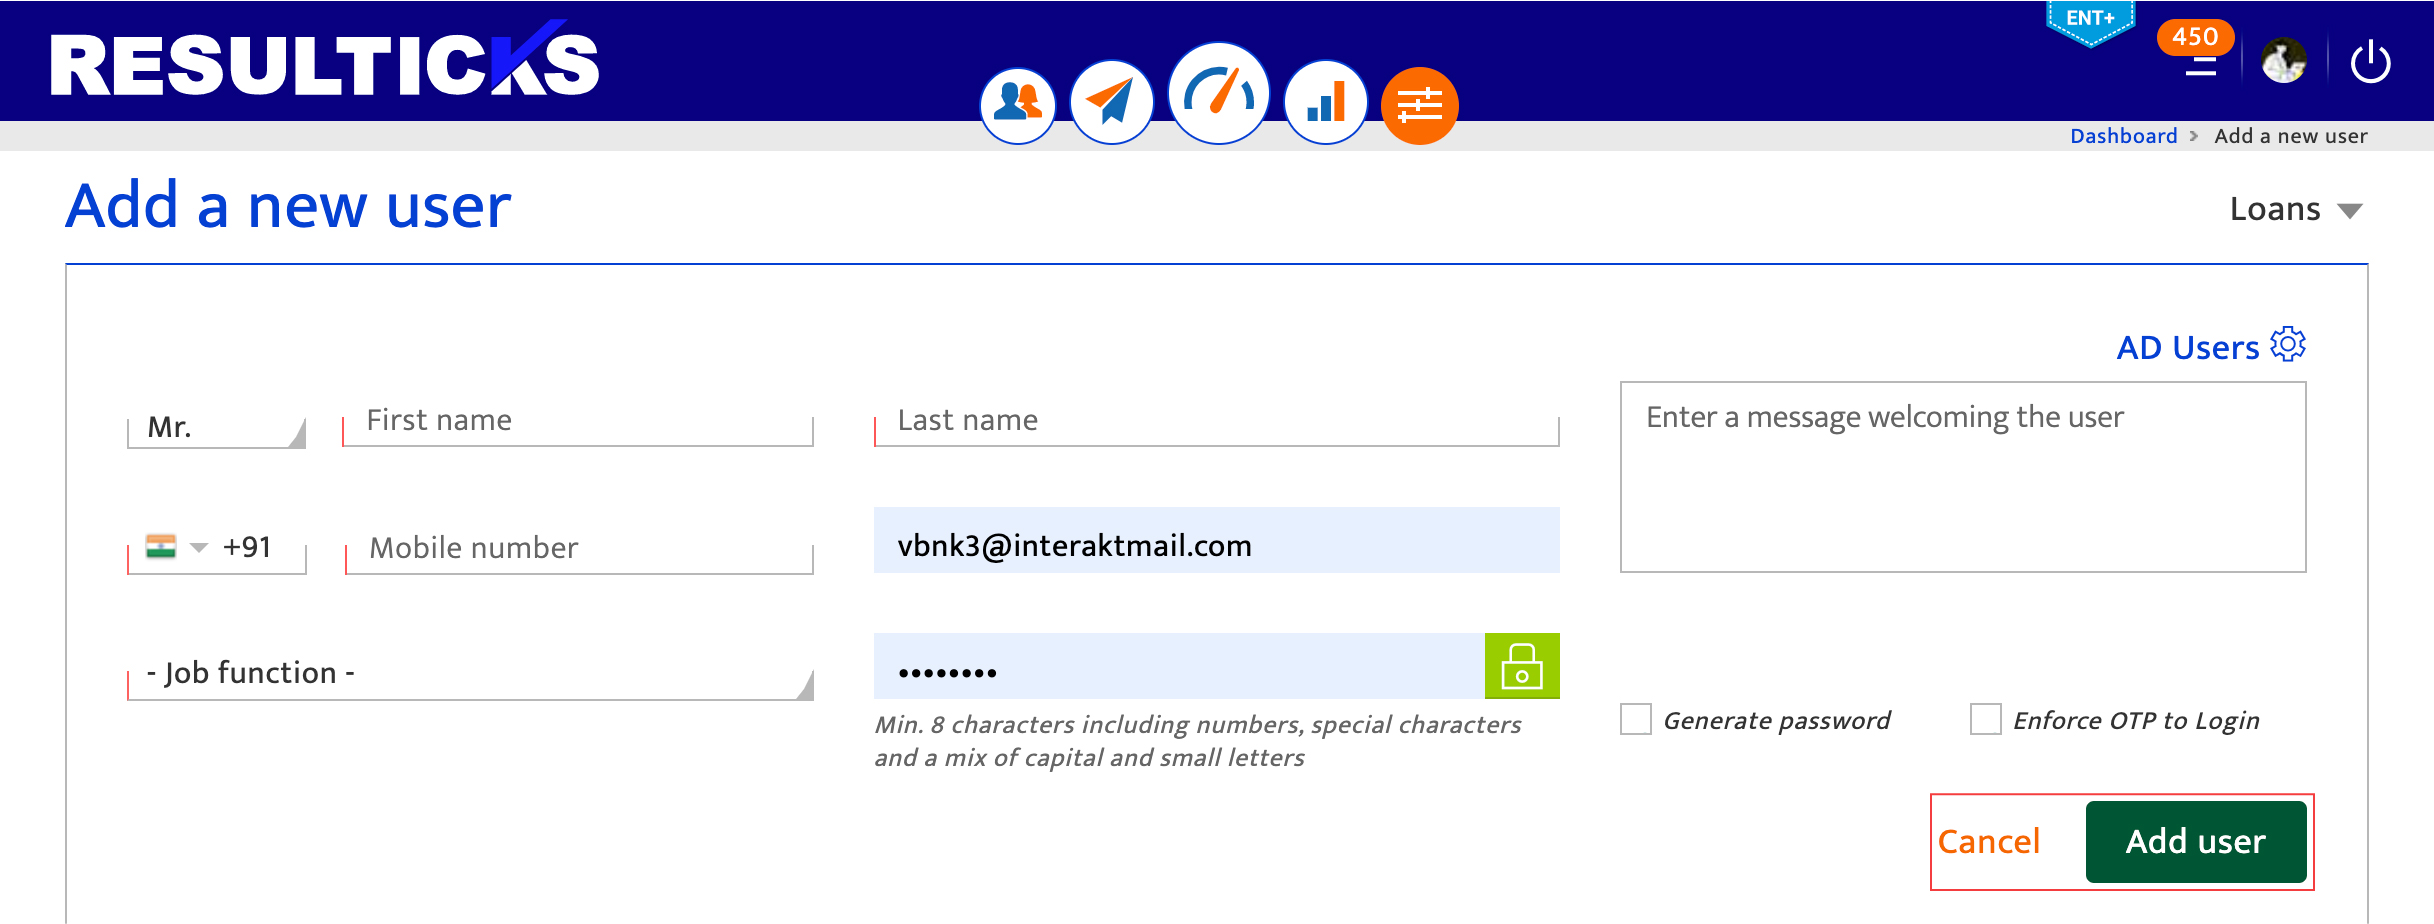
- Use an integrated active directory:
- Click the AD icon. If no AD has been integrated, enter the details in the configuration popup displayed to establish the connection.
- Select a user from the list displayed
- Complete any field not populated or amend displayed fields where required
- Save the user information by clicking Add User.
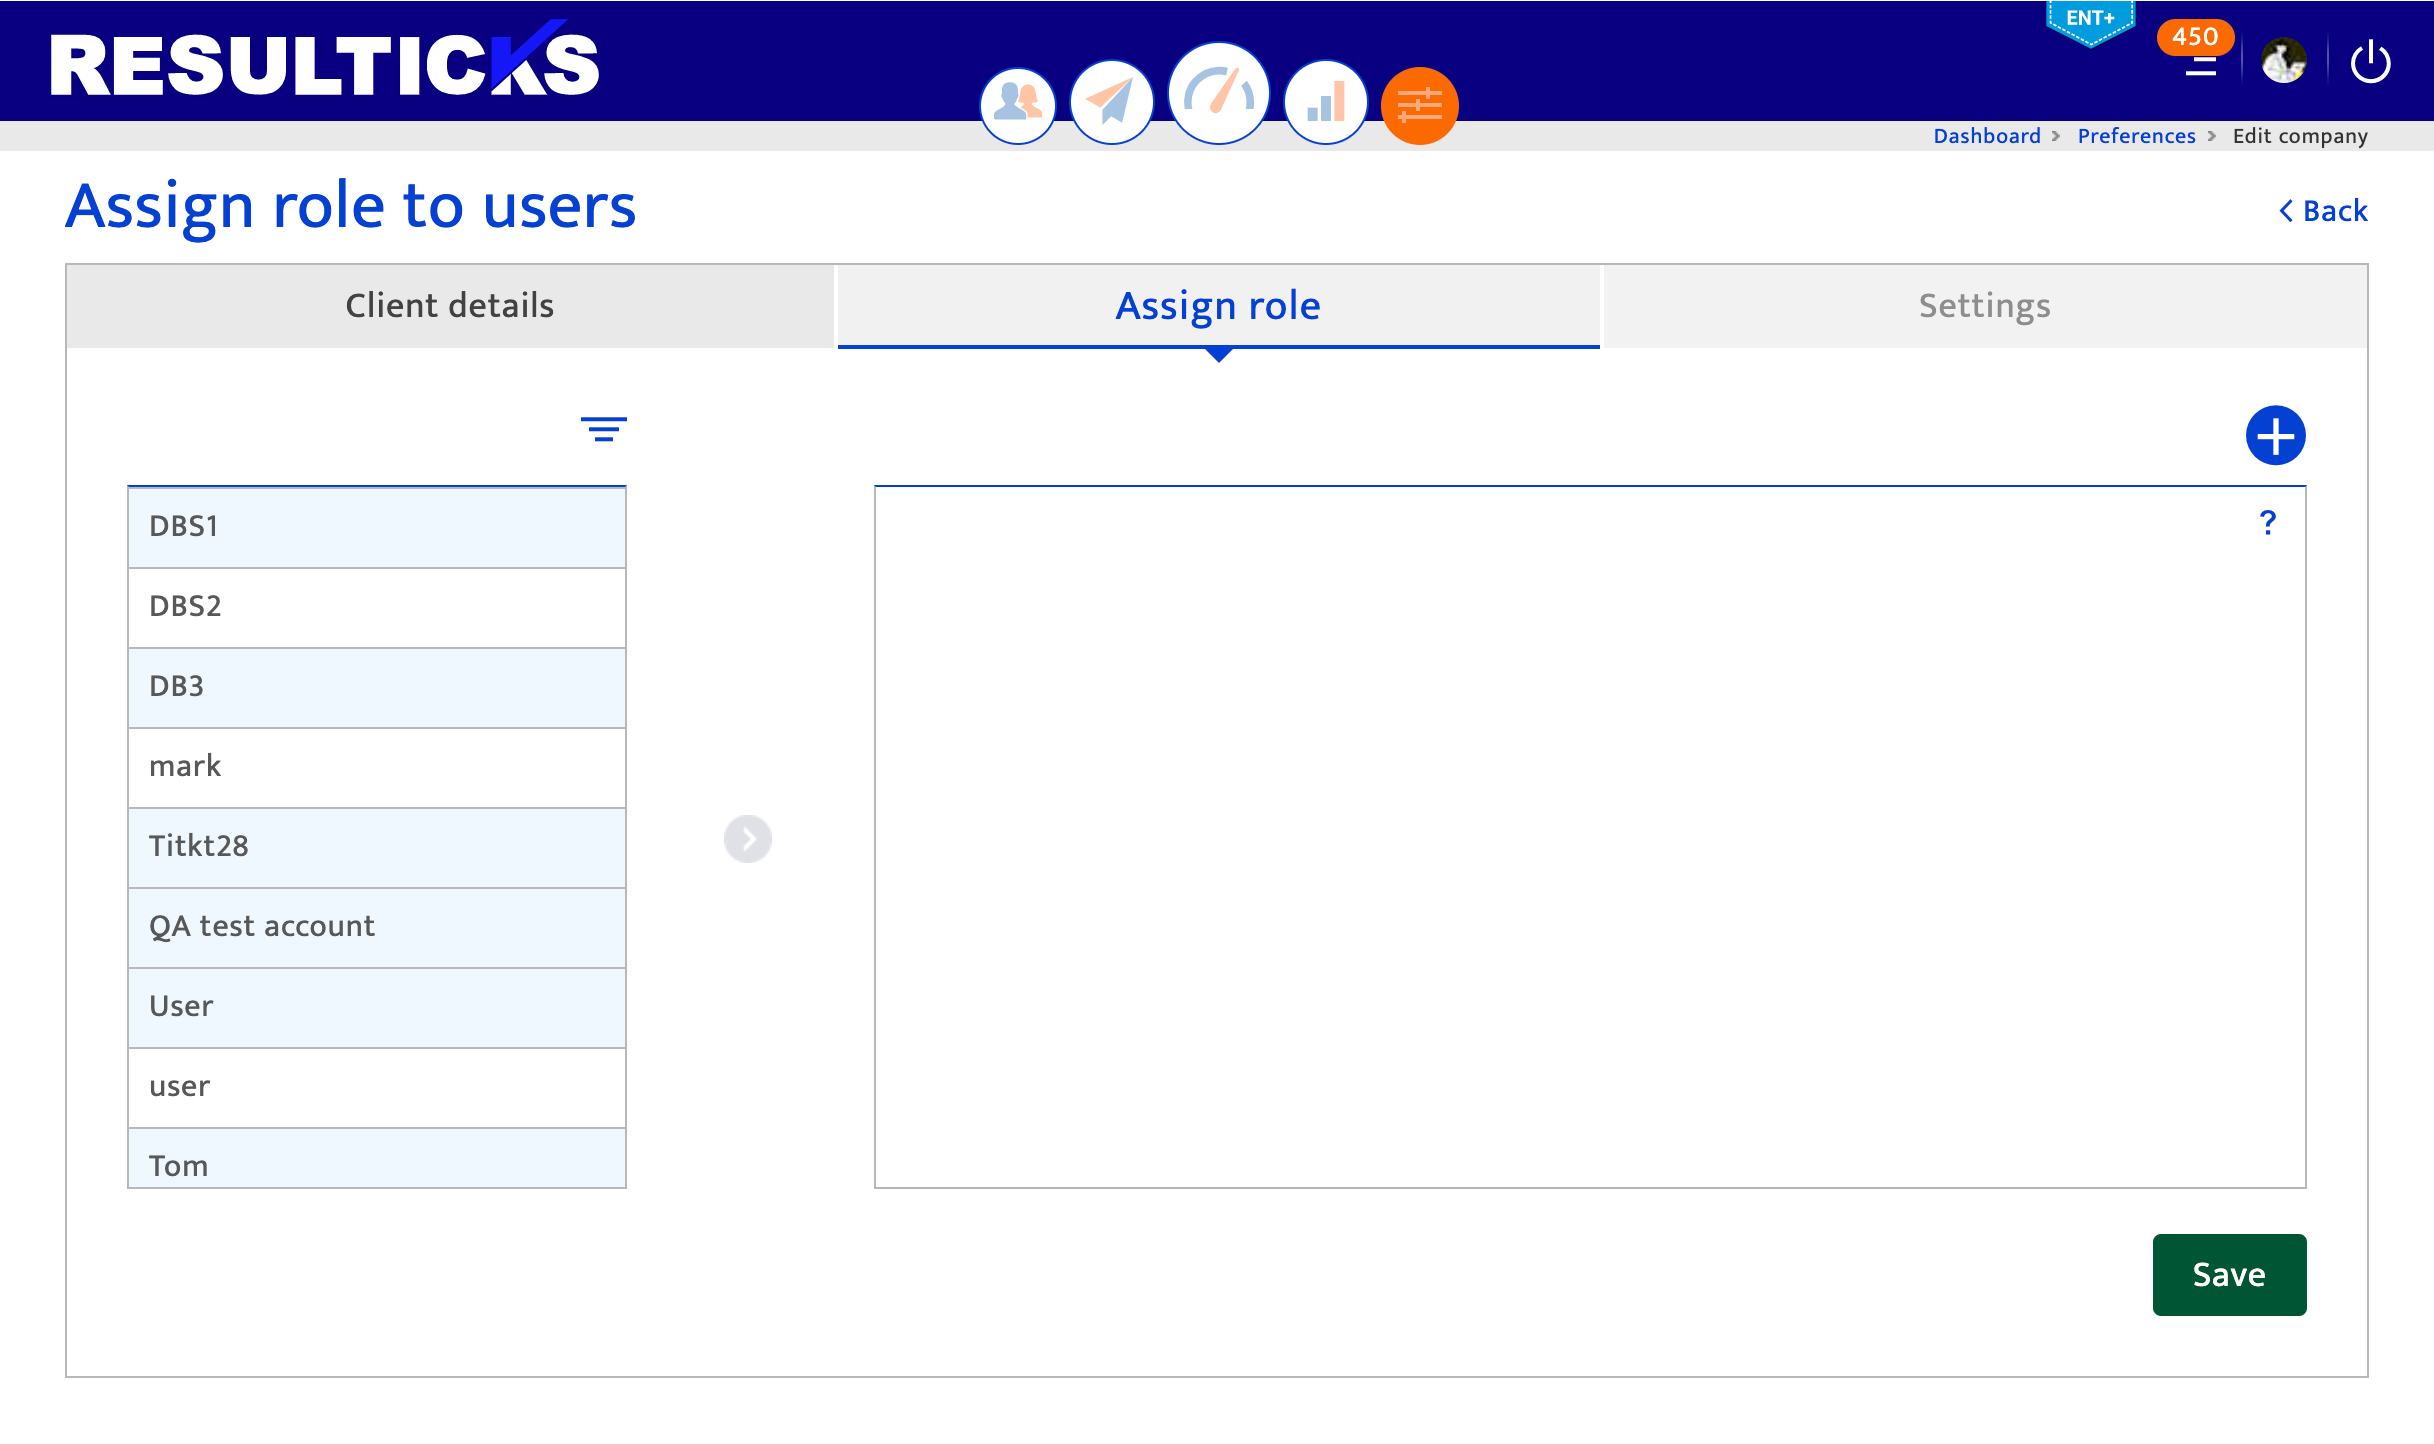
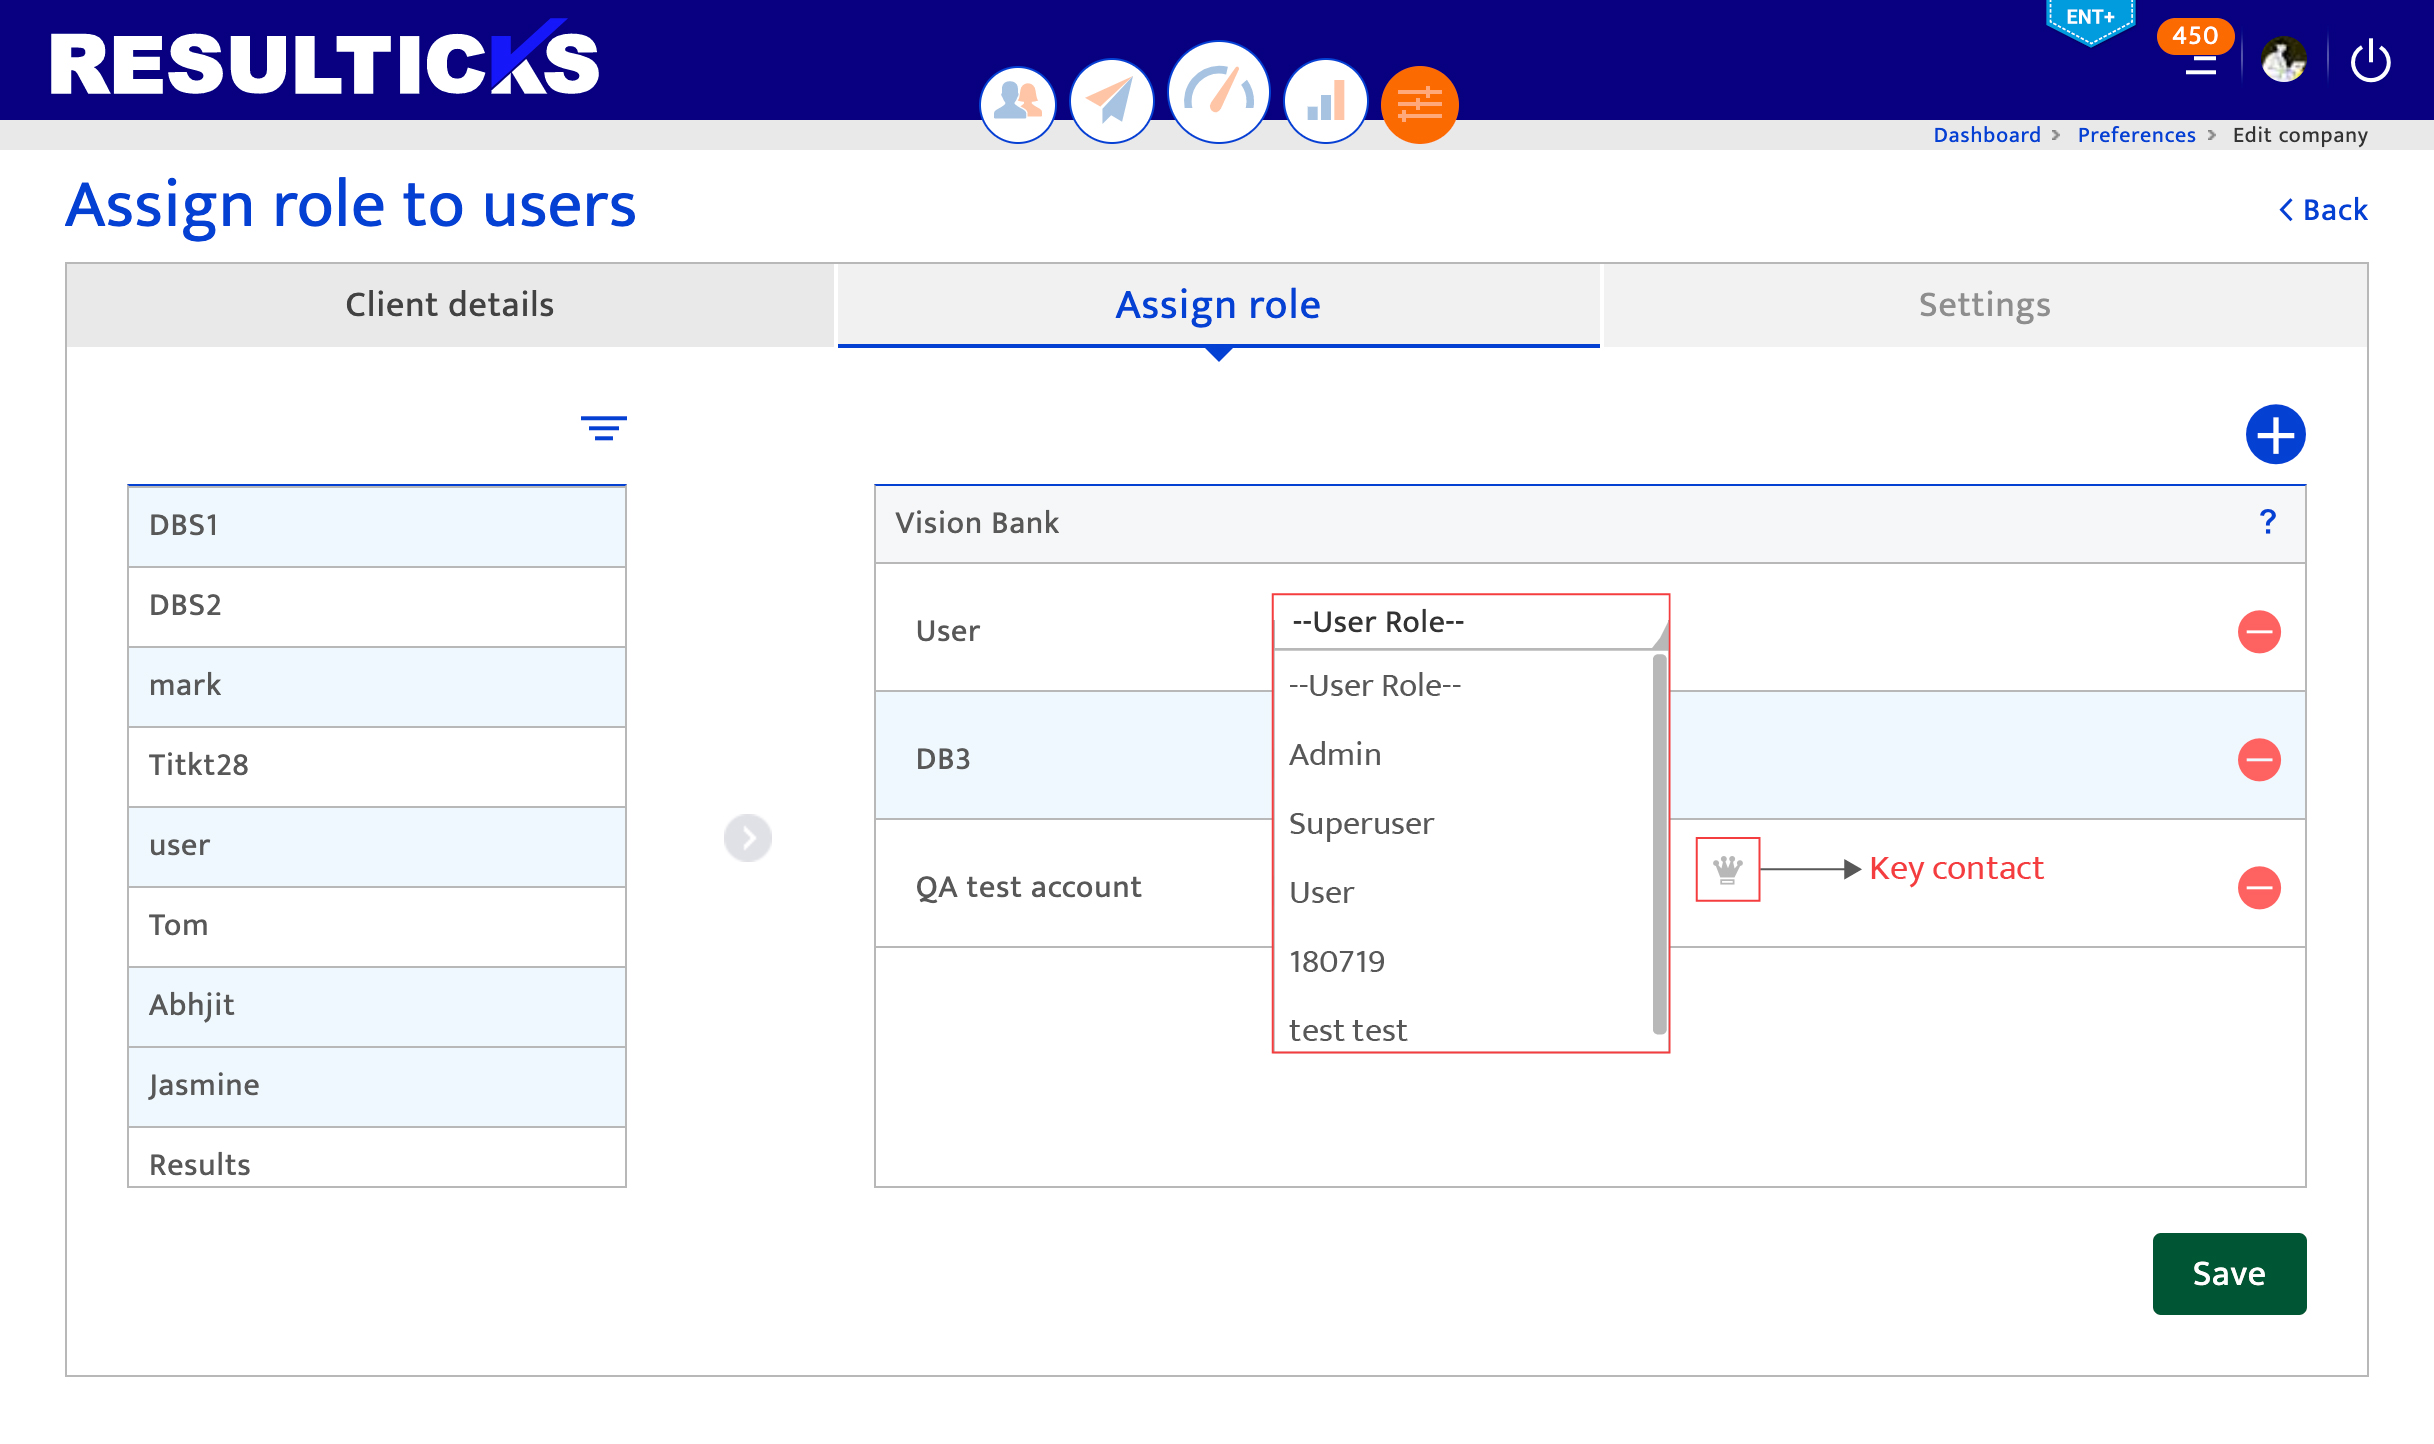
- Assign a user role
Three different types of user roles can be assigned by default in Resulticks – User, Super User and Administrator. Predefined permissions assigned to the three user roles are:-
Permission configured for any other user roles can be defined in Roles and Permissions under the Preferences section. To assign a role to a user:-Role Permissions User Has only read access to all the modules in the platform Superuser All the access assigned to users and additional access to create and edit campaigns and forms. Administrator All the privileges of a Superuser and additional authority to access the preferences section and make the changes to the platform settings. - Select the username(s) from the list and click the right arrow to add to the right panel
- Select a role from the drop-down list. Click on the crown icon to make this user as the key contact for the account.
- Click “Save” to complete user creation or click “Cancel” to discard changes. A Super User or Administrator is marked with a crown icon.