Microsoft dynamics CRM
What is it?#
Microsoft Dynamics® CRM is a CRM (Customer Relationship Management) system that can be a valuable source of information such as:
- Permissioned personal information
- Demographic profile
- Interactions histories
- Communication preferences
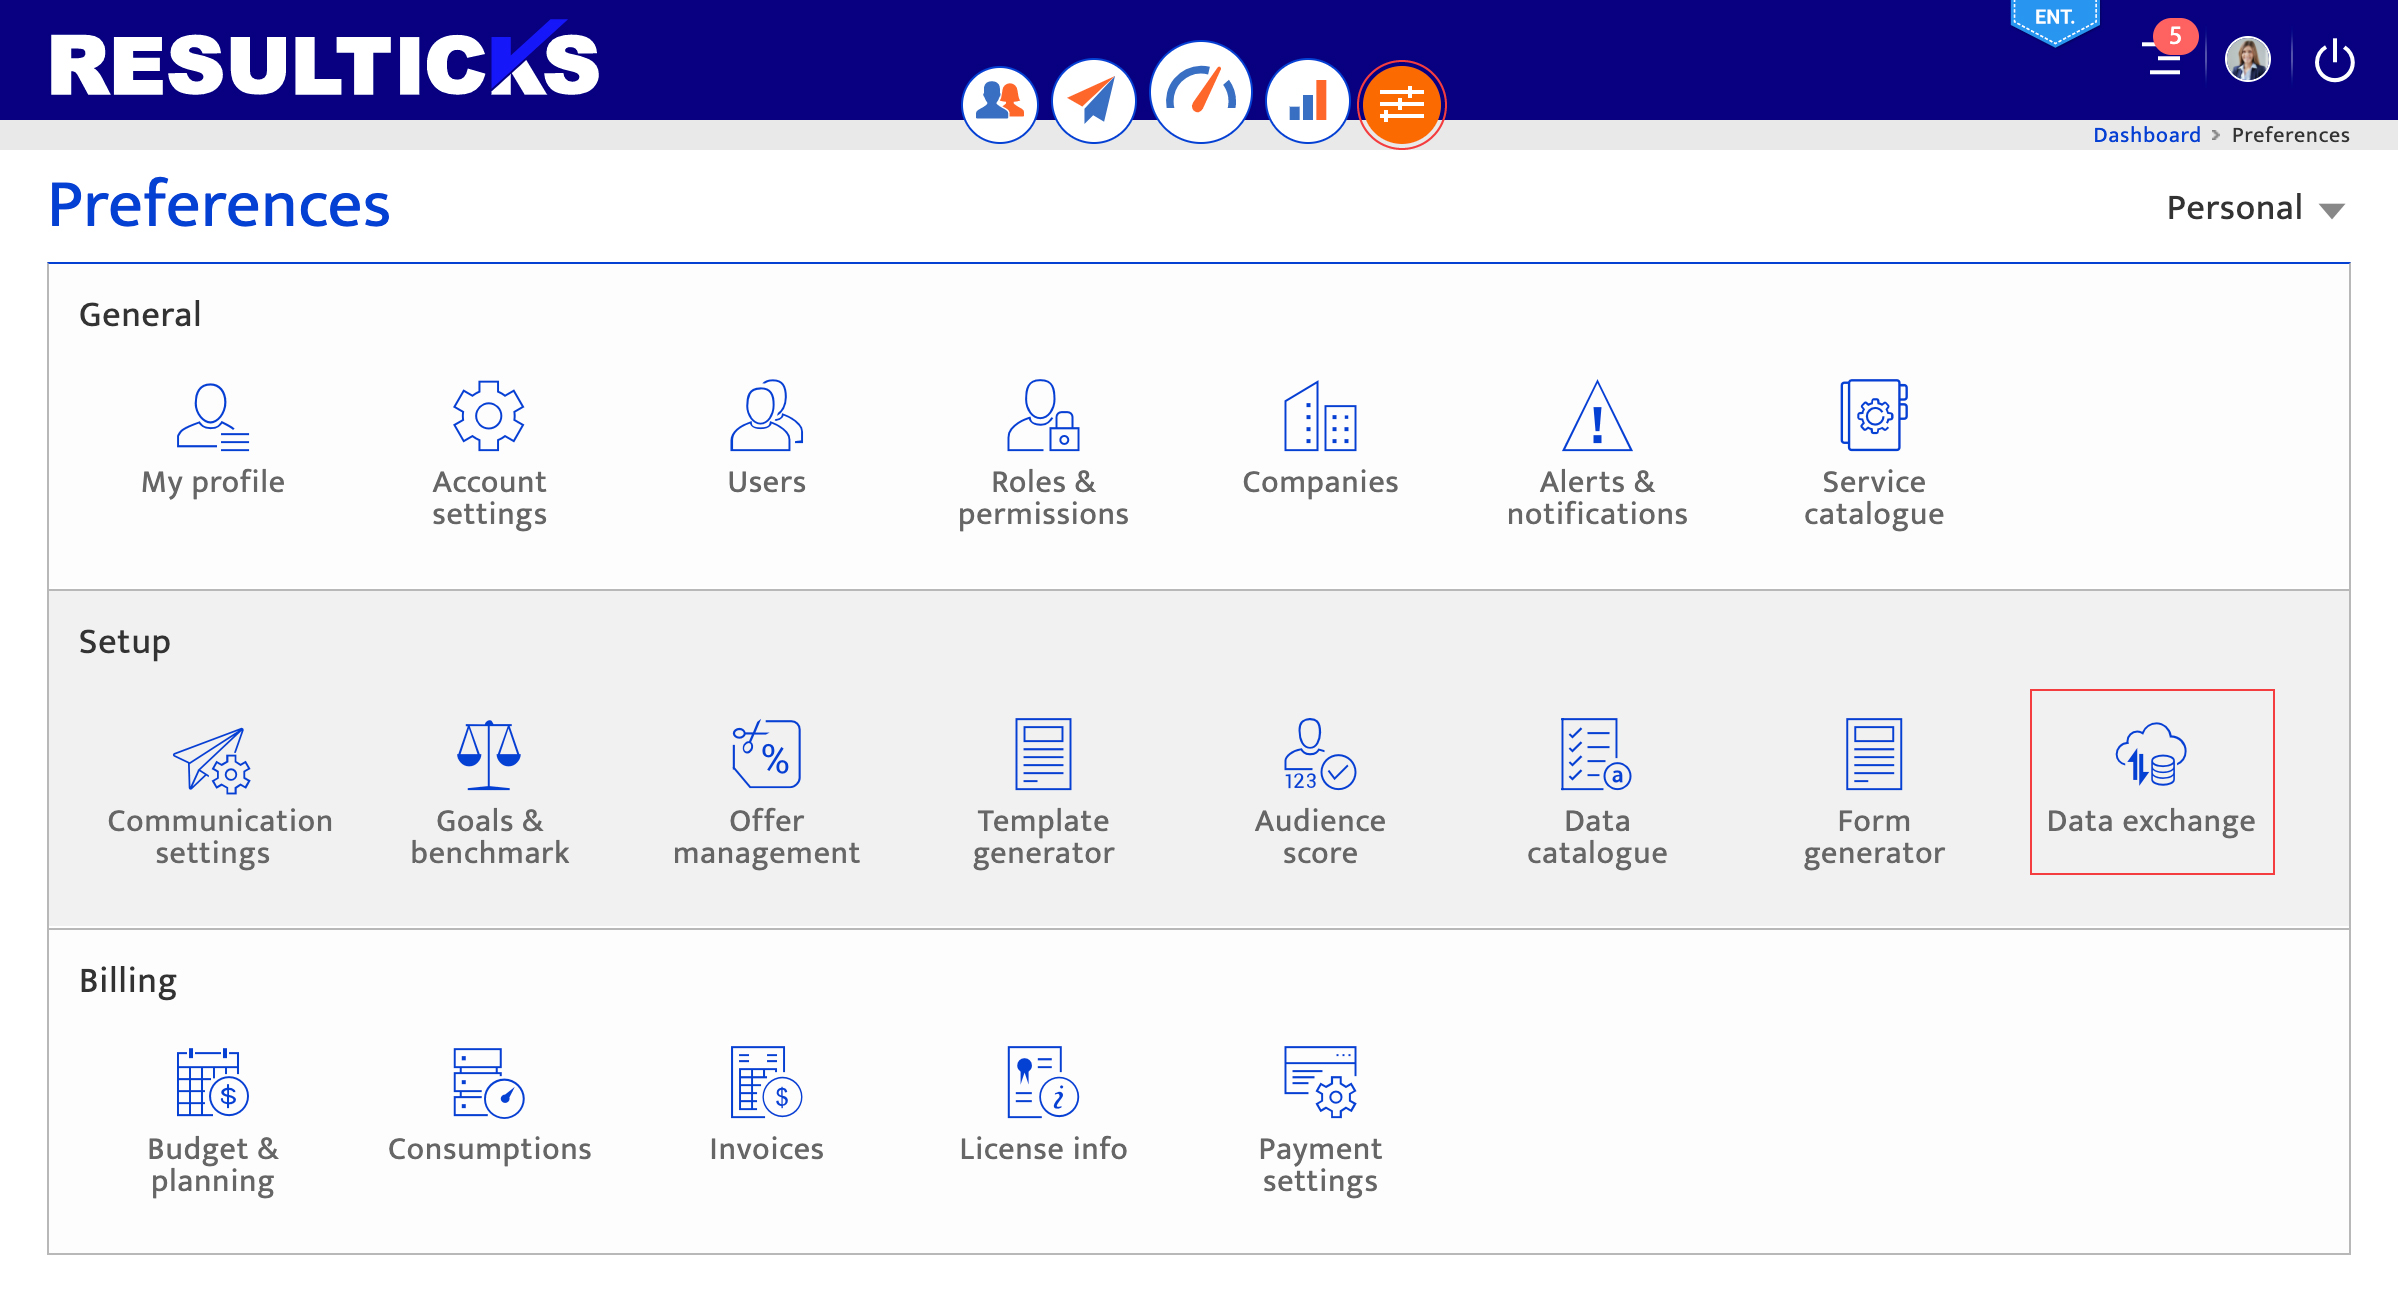
Accessing this Section#
- Select the preferences module.
- Select data exchange.
Configuring a connection#
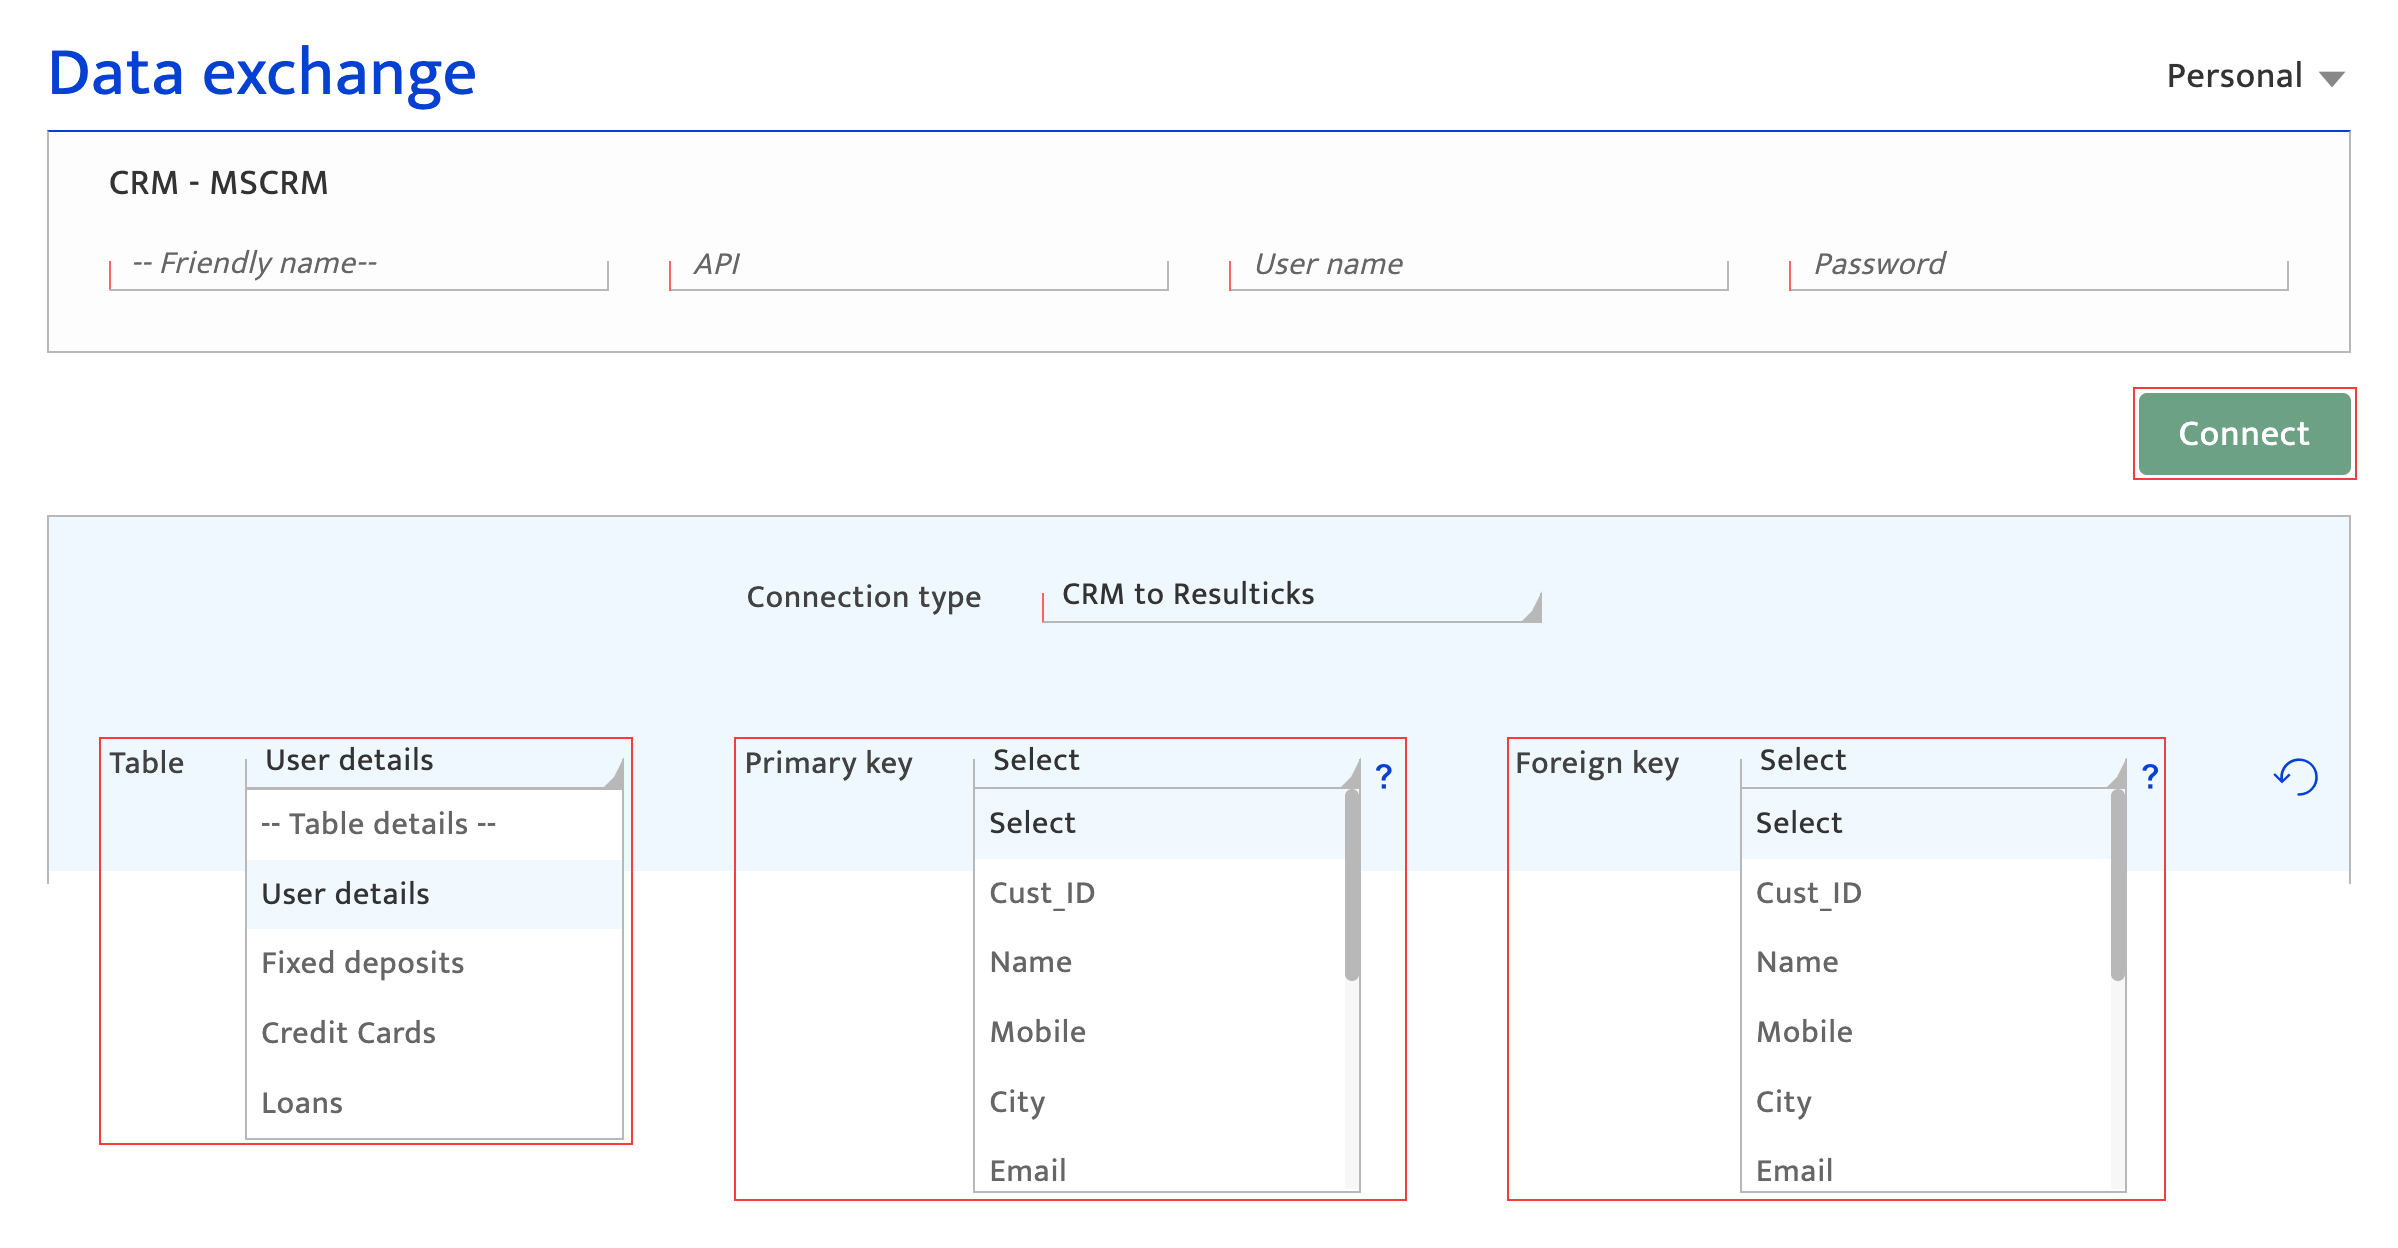
- Select the CRM menu from the left panel in the Data Exchange.
- select microsoft dynamics® CRM by clicking on the plus icon.
- Enter the requested account details and click “Connect” to establish a connection. The supplied credentials will be validated by the CRM system being integrated with.
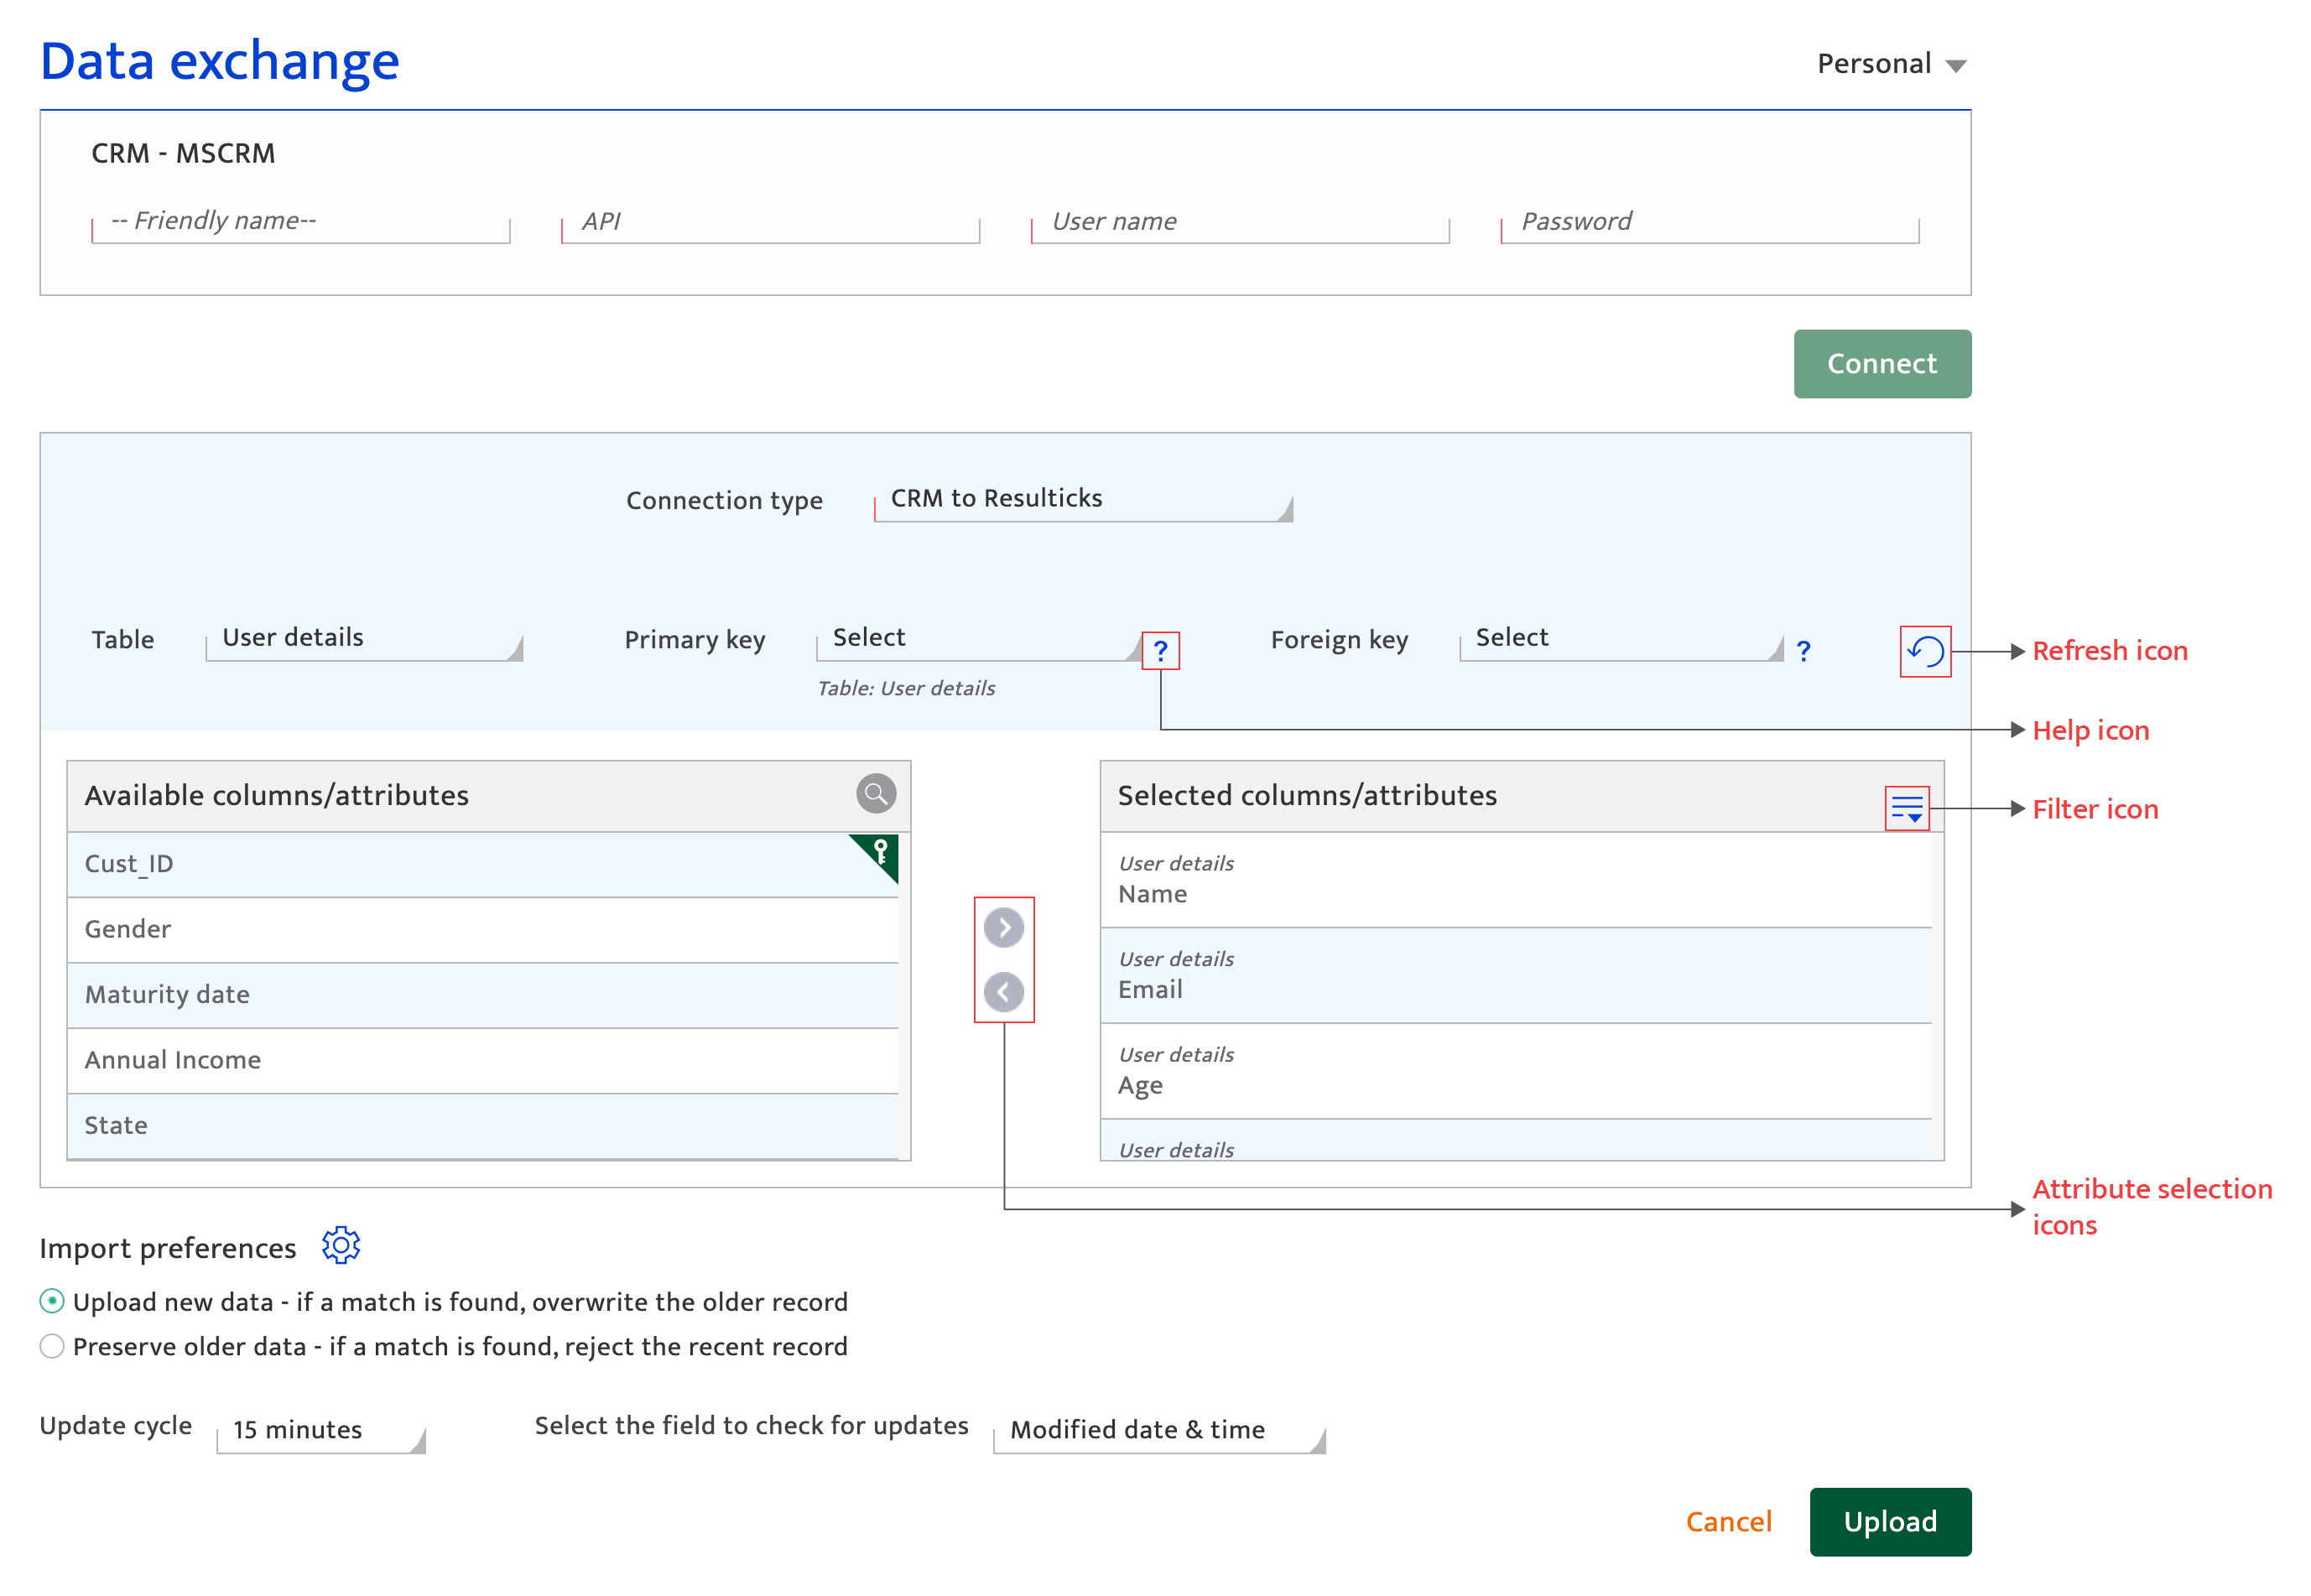
- Select the database table(s) and attributes from the drop-down lists to identify data to be imported into Resulticks.
- Add or remove the columns attributes to be imported from the selected tables using the “>” and “<” buttons
- Specify import preferences to permit or reject the upload of the new record when matches are found
- Specify the update cycle and the key field/column to use to identify records for update
- Reset-table and data selection, if need be, by clicking on the “Reset” icon. To filter data for viewing, click the “Filter” icon.
- Click “Upload” to initiate the import.
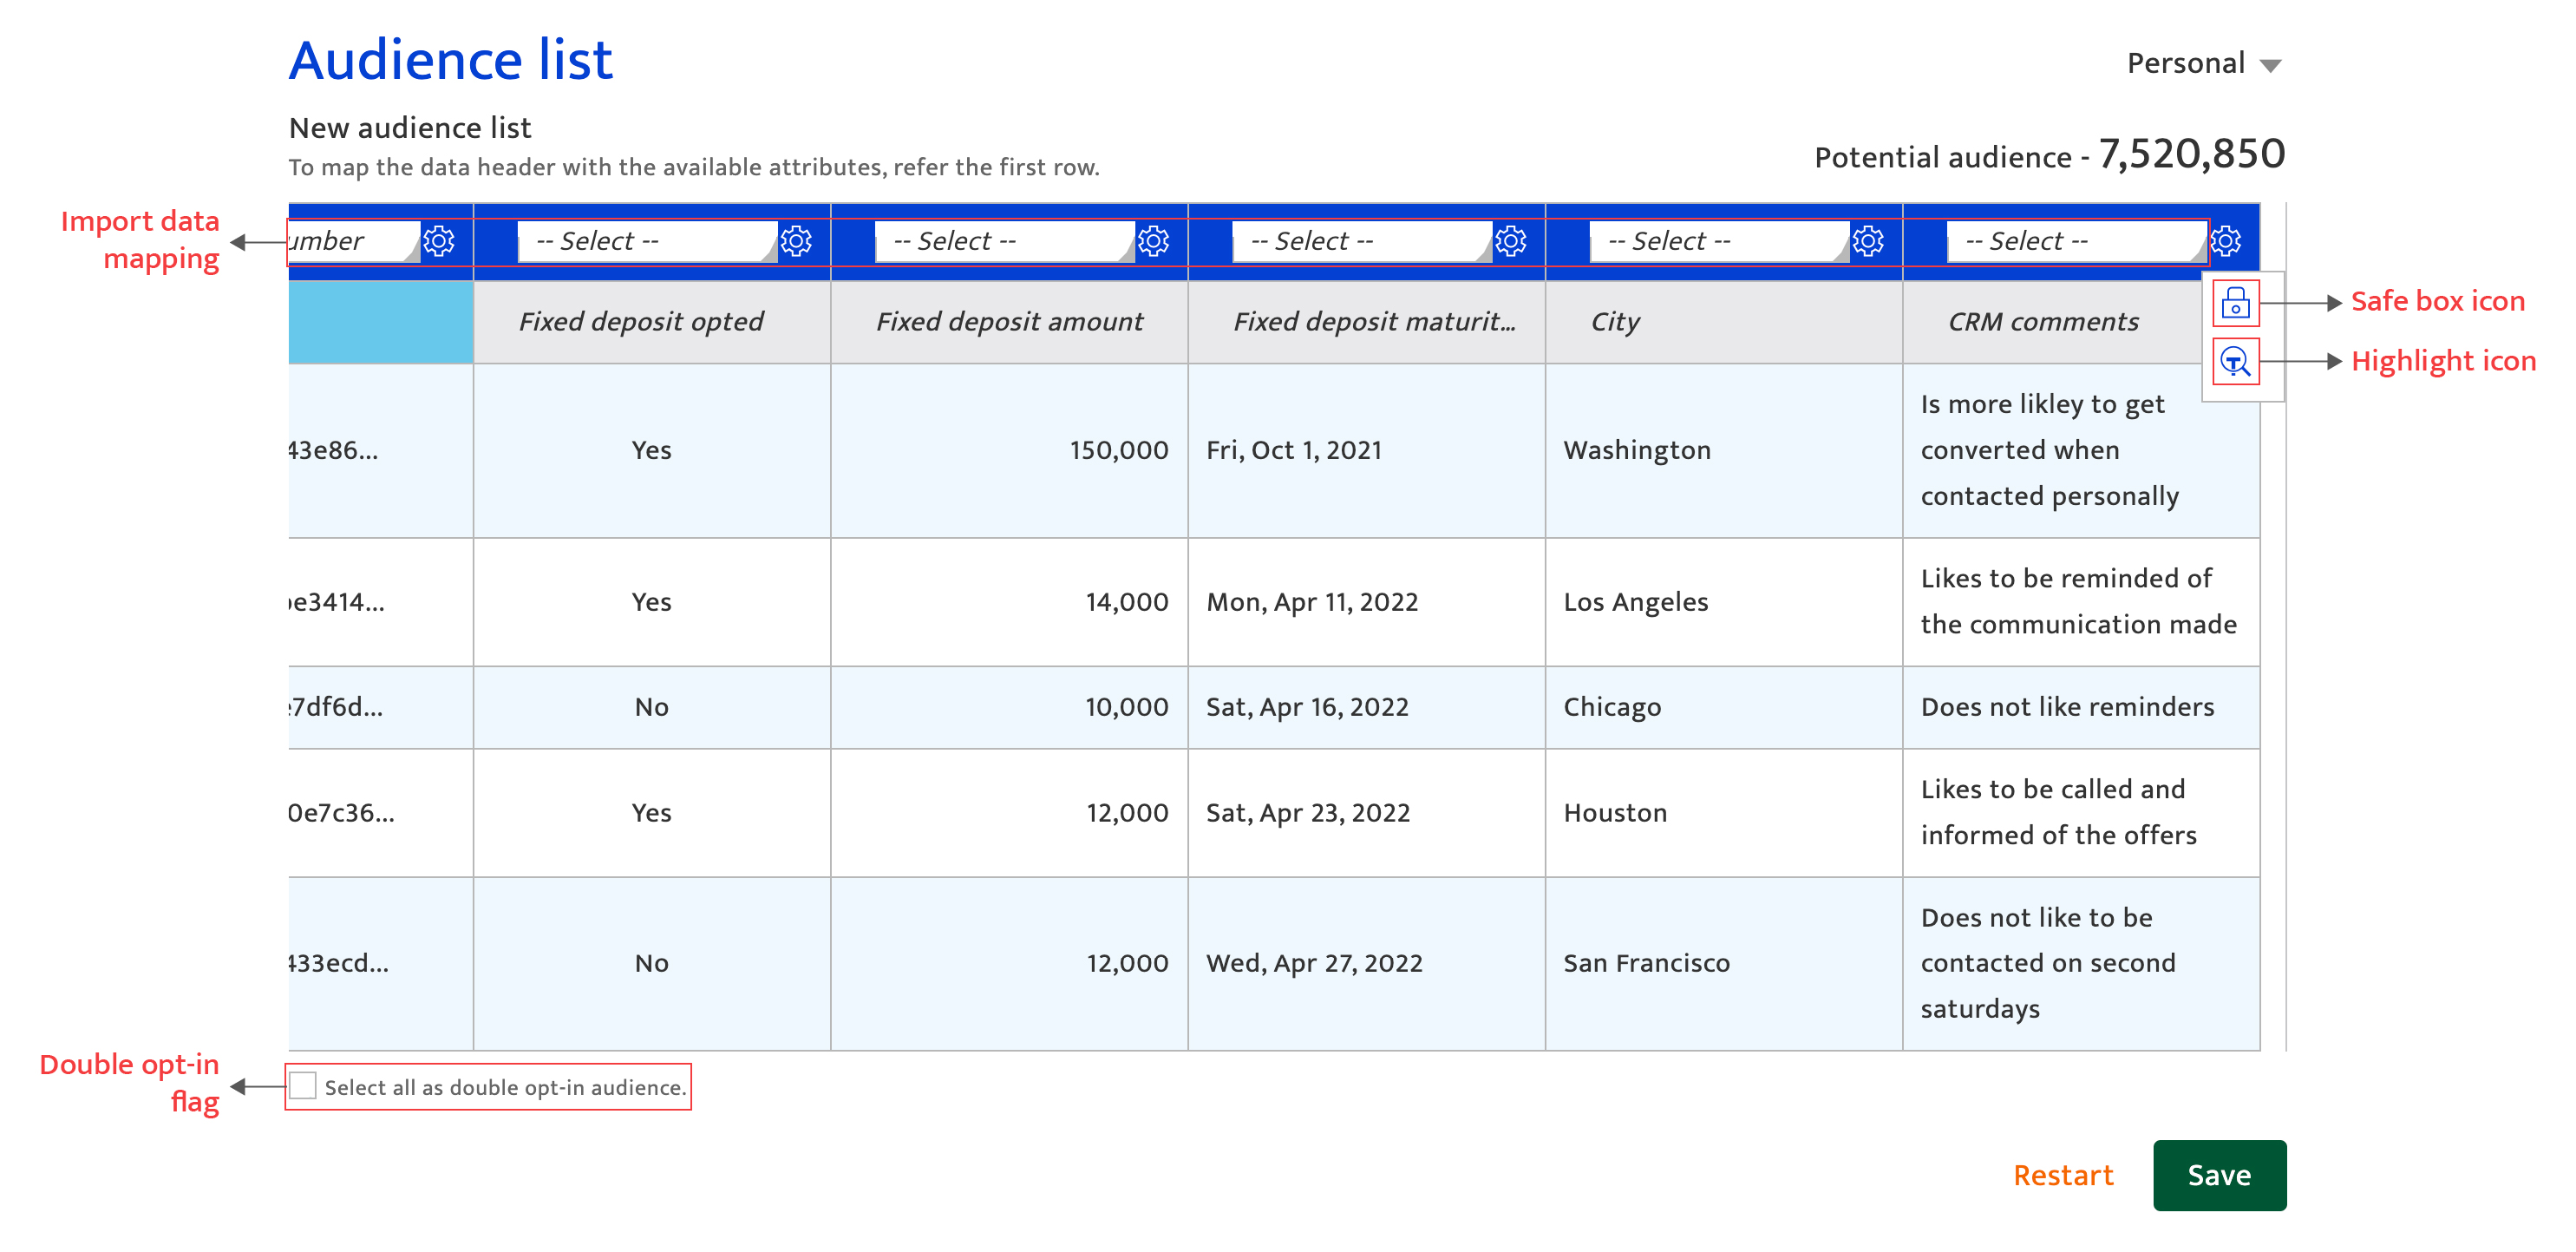
- Manage the data imported using the following options available with the list:
- Map each import data column to a data header from the system using the first row. The defaulted suggestions for Email and Mobile contact handles can be changed manually. All other attributes must be mapped using the drop-down list available.
- Identify an attribute/column as the unique identifier for this audience by selecting the highlight icon. This is a mandatory requirement.
- Identify an attribute/column as sensitive data by selecting the safe box icon on the column header. Sensitive data, flagged in this manner, will be hashed and encrypted to preserve privacy.
- Flag double opt-in for the entire list by ticking the checkbox below the table. Note that the box must be checked for the data to upload as the Resulticks platform will reject data without contact consent.
- Complete import by clicking the “Save” button.
- Confirm the connection is successful by validating that the connection is shown in the Integrated Systems section at the top of the Data Exchange page. If there are any response messages, please follow the pop-up instructions to complete the configuration.

Making changes#
Integrating a Microsoft Dynamics® CRM account can be done by an Administrator or the Key Contact for the account. Once done, the Microsoft Dynamics® CRM integration cannot be deleted.
Changing specifications here can have a follow-on impact within the Audience, Campaign, and Analytics modules of the Resulticks platform. Please discuss implications with the Resulticks Account Manager before making any changes.
Changes that can be done:
- Add a new table
- Add new attributes from an existing table
- Delete attributes
- Open the table and attribute screen by clicking on the edit icon on the Microsoft Dynamics® CRM tile in the Integrated Systems section of Data Exchange.
- Select a new table from the drop-down list.
- Select attributes, upload, map attributes, confirm and procee using the same process as for creating a new connection.
- Open the table and attribute screen by clicking on the edit icon on the Microsoft Dynamics® CRM tile in the Integrated Systems section of Data Exchange.
- Select the same table used when setting up the connection from the drop-down list.
- Select additional attributes, upload, map attributes, confirm, and proceed using the same process as for creating a new connection.
- Open the table and attribute screen by clicking on the edit icon on the Microsoft Dynamics® CRM tile in the Integrated Systems section of Data Exchange.
- Select the table used when setting up the connection from the drop-down list.
- Choose already selected attributes and remove them using the “>” and “<” buttons.
- Upload, map attributes, confirm and proceed using the same process as for creating a new connection.
It is to be noted that a table cannot be deleted but its attributes can be deleted.