Companies
What is it?#
The Companies module enables the addition and management of companies for a Resulticks Enterprise Plus account.
If an enterprise account sets its office hierarchy as a Regional or Global headquarters (RHQ or GHQ), then it is classified as an“Enterprise Plus” account and will be enabled to add up to five companies.
Authorization and making changes#
Key Contact persons of the parent company can manage companies. Changes are effective immediately.
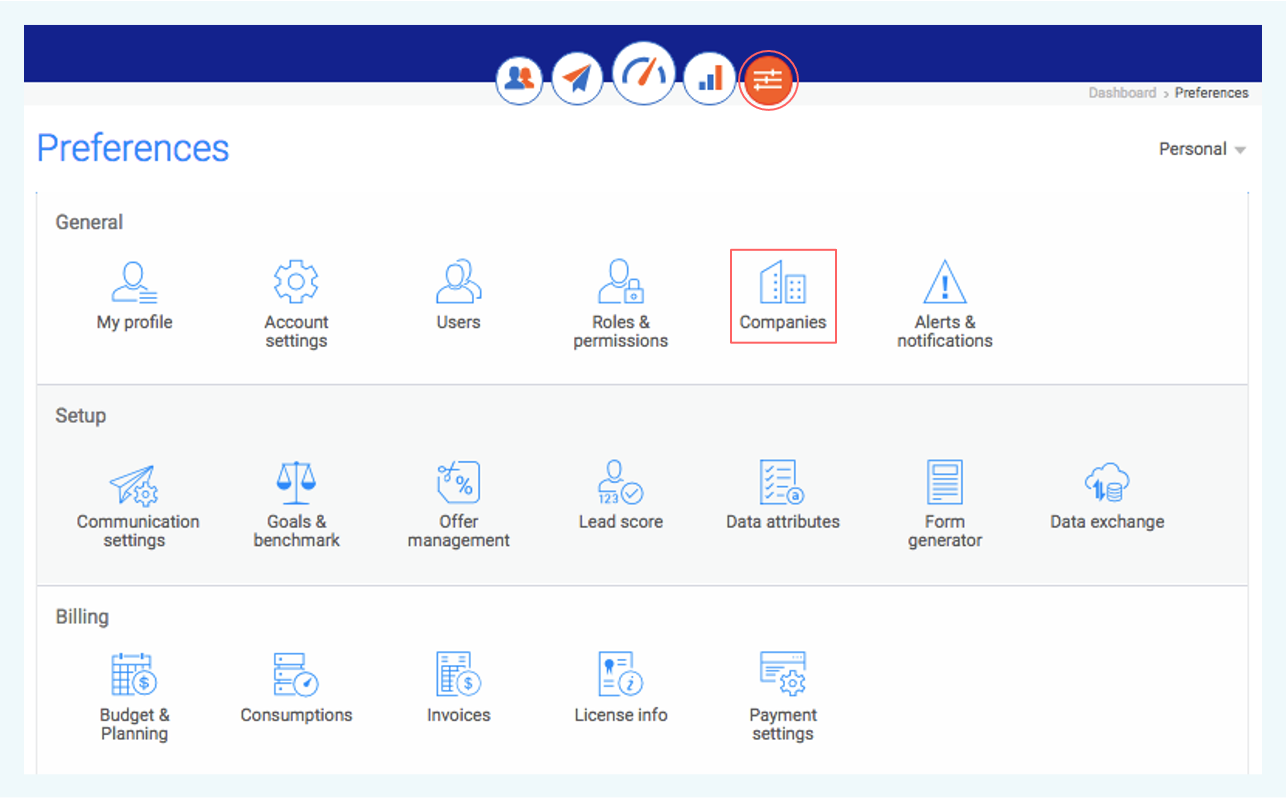
Accessing companies#
- Select the preferences module
- Select companies from the general category.
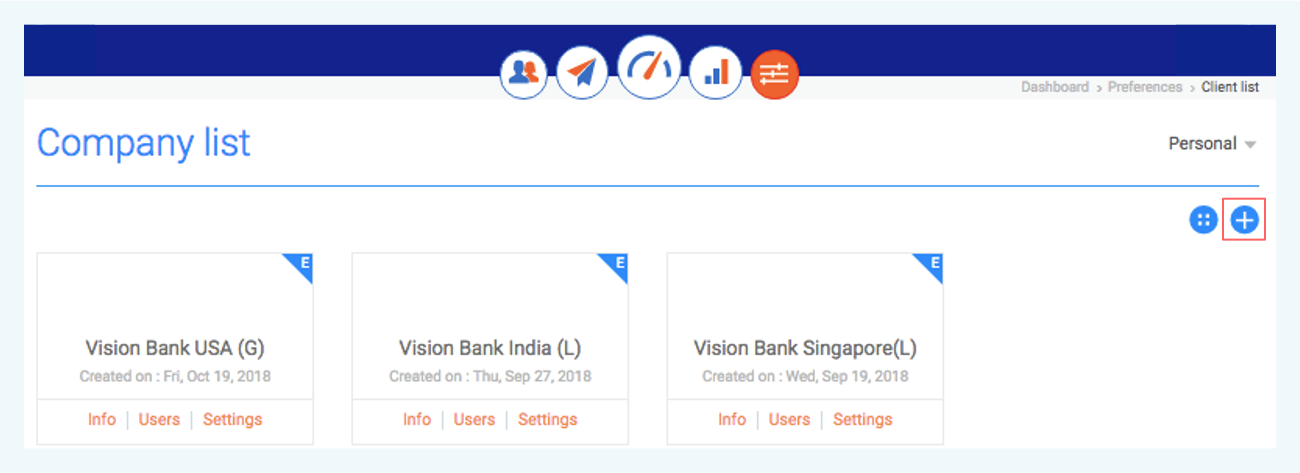
Using the company listing#
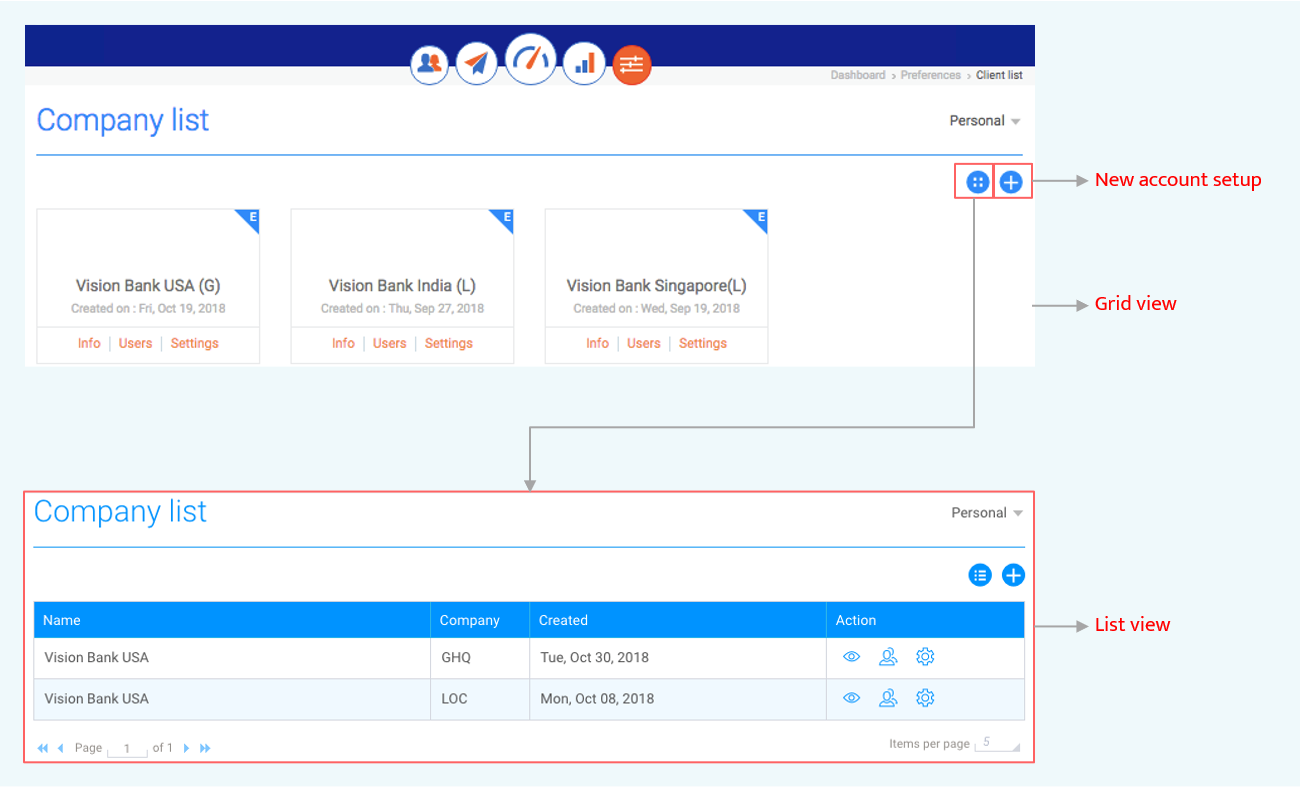
The company list displayed by default in this module includes the company name, office hierarchy, and date of creation for all companies in the Resulticks account.
Actions that can be performed on this list :-
- To view the Company details in Account Settings for the company, click on the ‘Info’ link
- To view the User details in Account Settings for the company, click on the ‘Users’ link
- To view the other settings in Account Settings for the company, click on the ‘Settings’ link
- Toggle between a grid and list view of these companies by clicking on the ‘View’ icon
- To create a new company (given this is an Enterprise plus account) and Resulticks account, click on the ‘plus’ icon
Adding a new resulticks account#
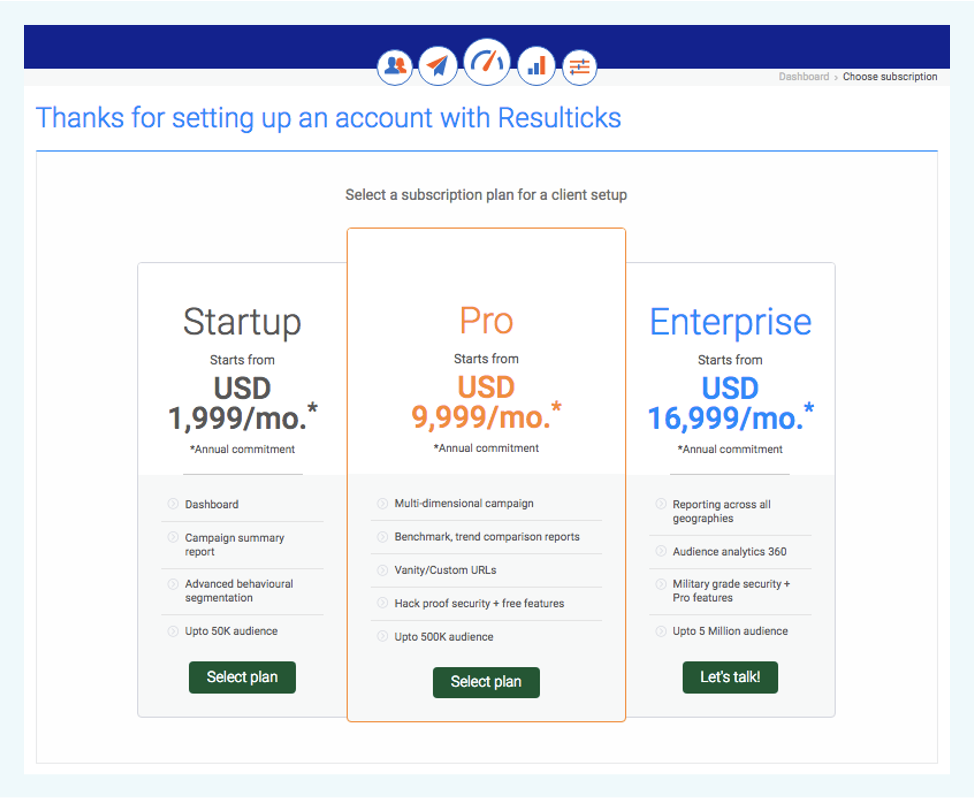
The steps to add a new Resulticks account are:-
- Click on the plus icon on the company listing screen to initiate the creation of an account
- Select a subscription plan from the three options displayed. If the current companies is an Enterprise Plus account, only the Enterprise account option will be enabled, the other two options will be disabled.
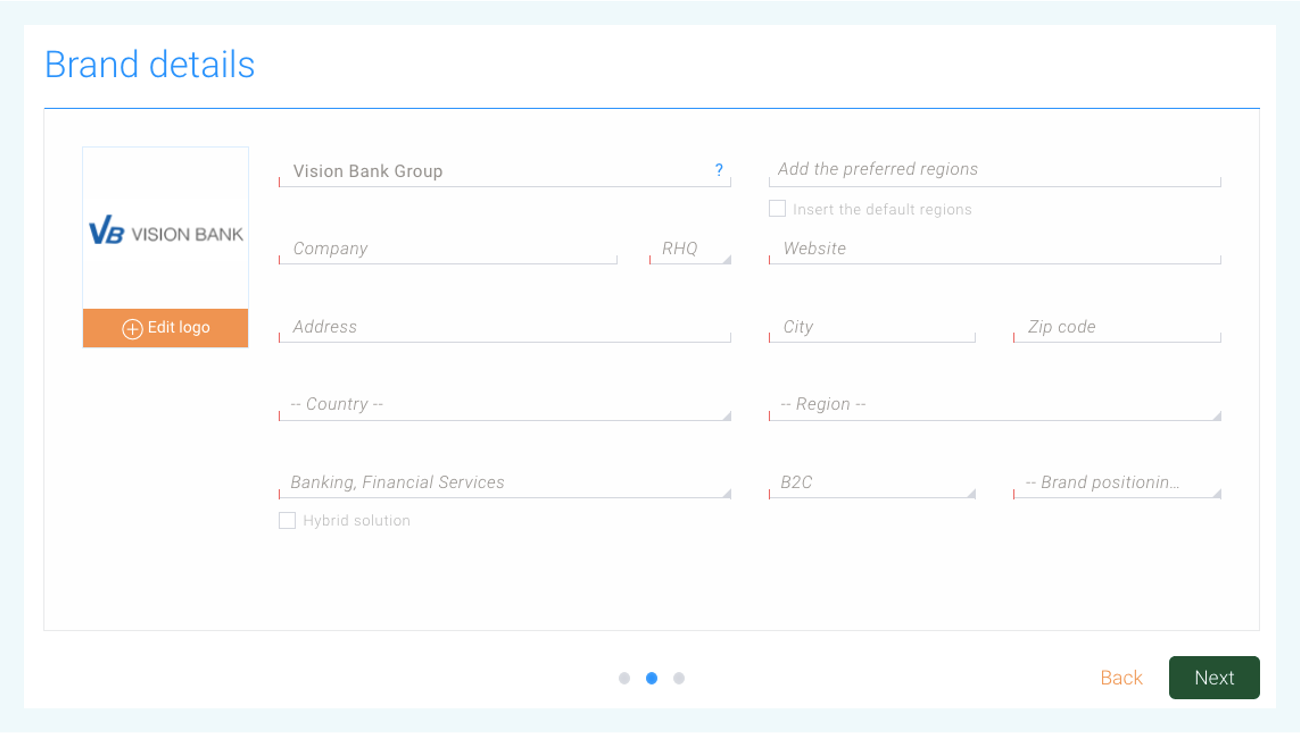
- Enter company details following the same specifications as in Account Settings section under Preferences. Click ‘Next’ button to proceed.
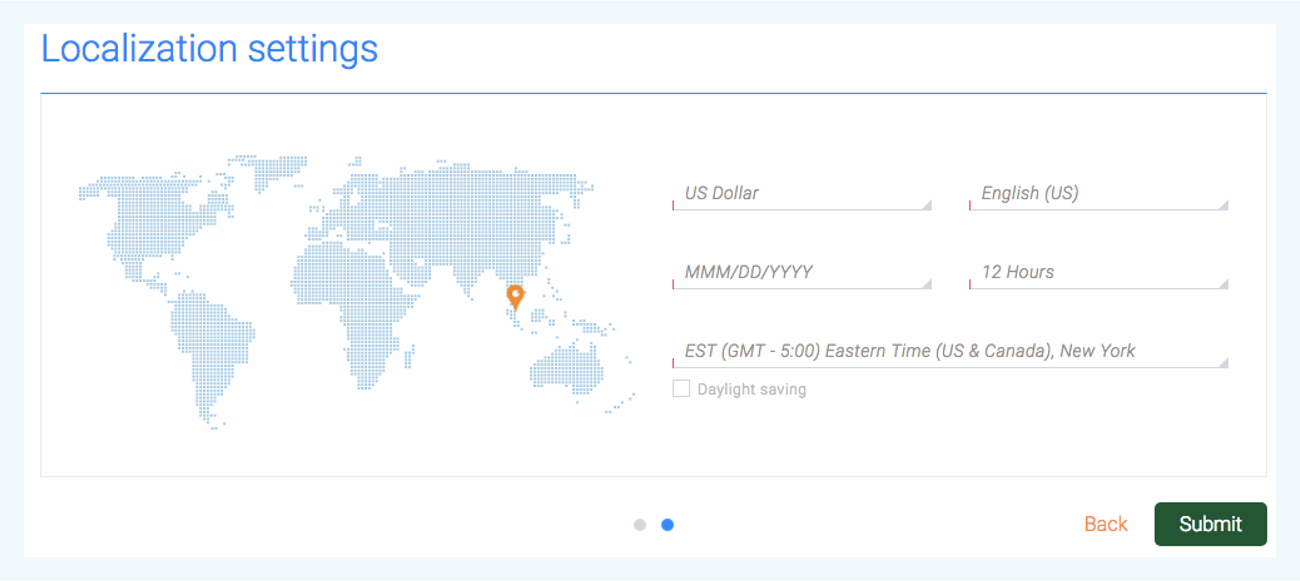
- Enter localization settings following the same specifications as in the Account Settings section under Preferences. Click ‘Submit‘ button to proceed.
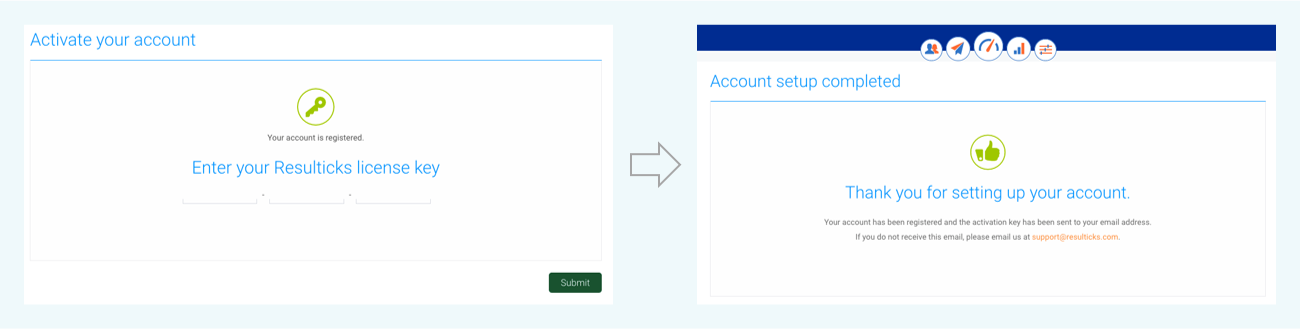
- Active the new account using the key sent to the email id of the key contact for the account set up and completing any payment process required.
- Complete setup through subsequent steps following the same specifications as in Account Settings section under Preferences.