What is it?#
Settings that are needed to regulate campaign communications through the email channel are defined in this section. These include:-
- SMTP server configuration settings
- Configuring the unsubscription option
- Customization of double opt-in process
- Creation of email footers
It also facilitates the setting of frequency caps for email communication delivery, as described in the Communication Settings Overview
Authorization and making changes#
Only the Key Contact and Administrator of a Resulticks account can access this module.
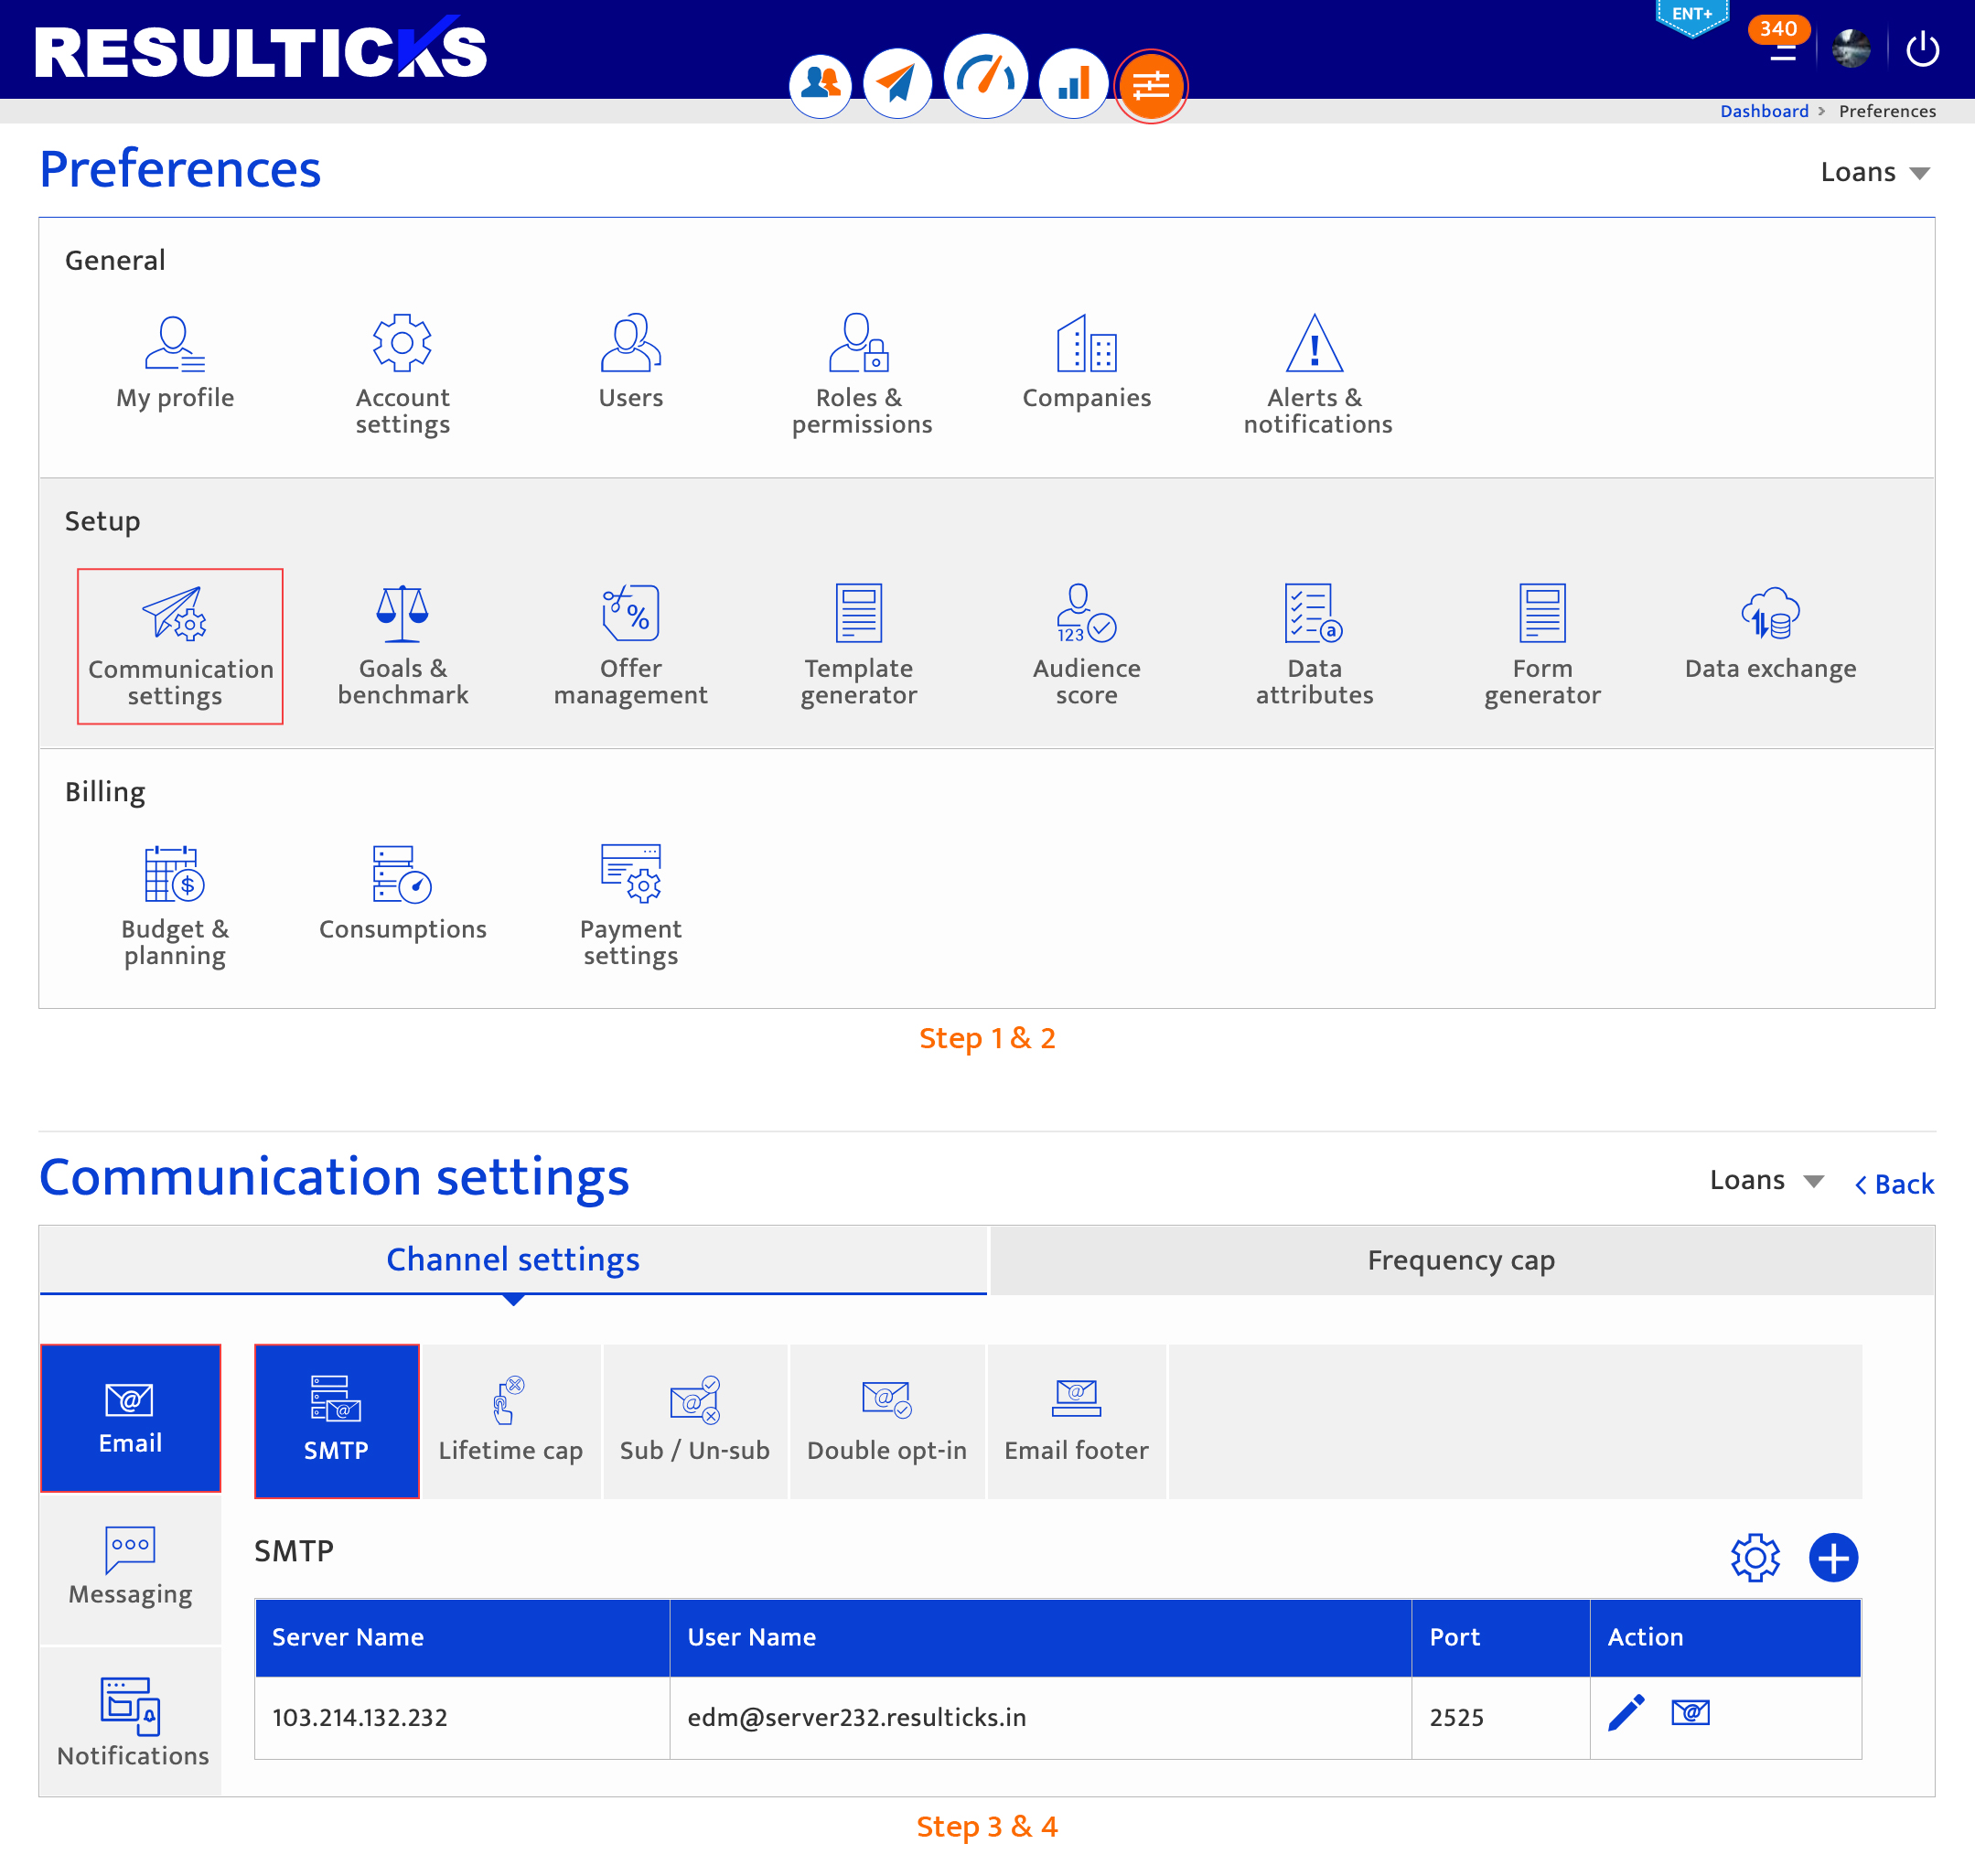
Accessing email channel settings#
- Select the preferences module
- Select communication from the Setup category.
- Select Email channel from the left menu.
- The Channel settings tab is displayed by default
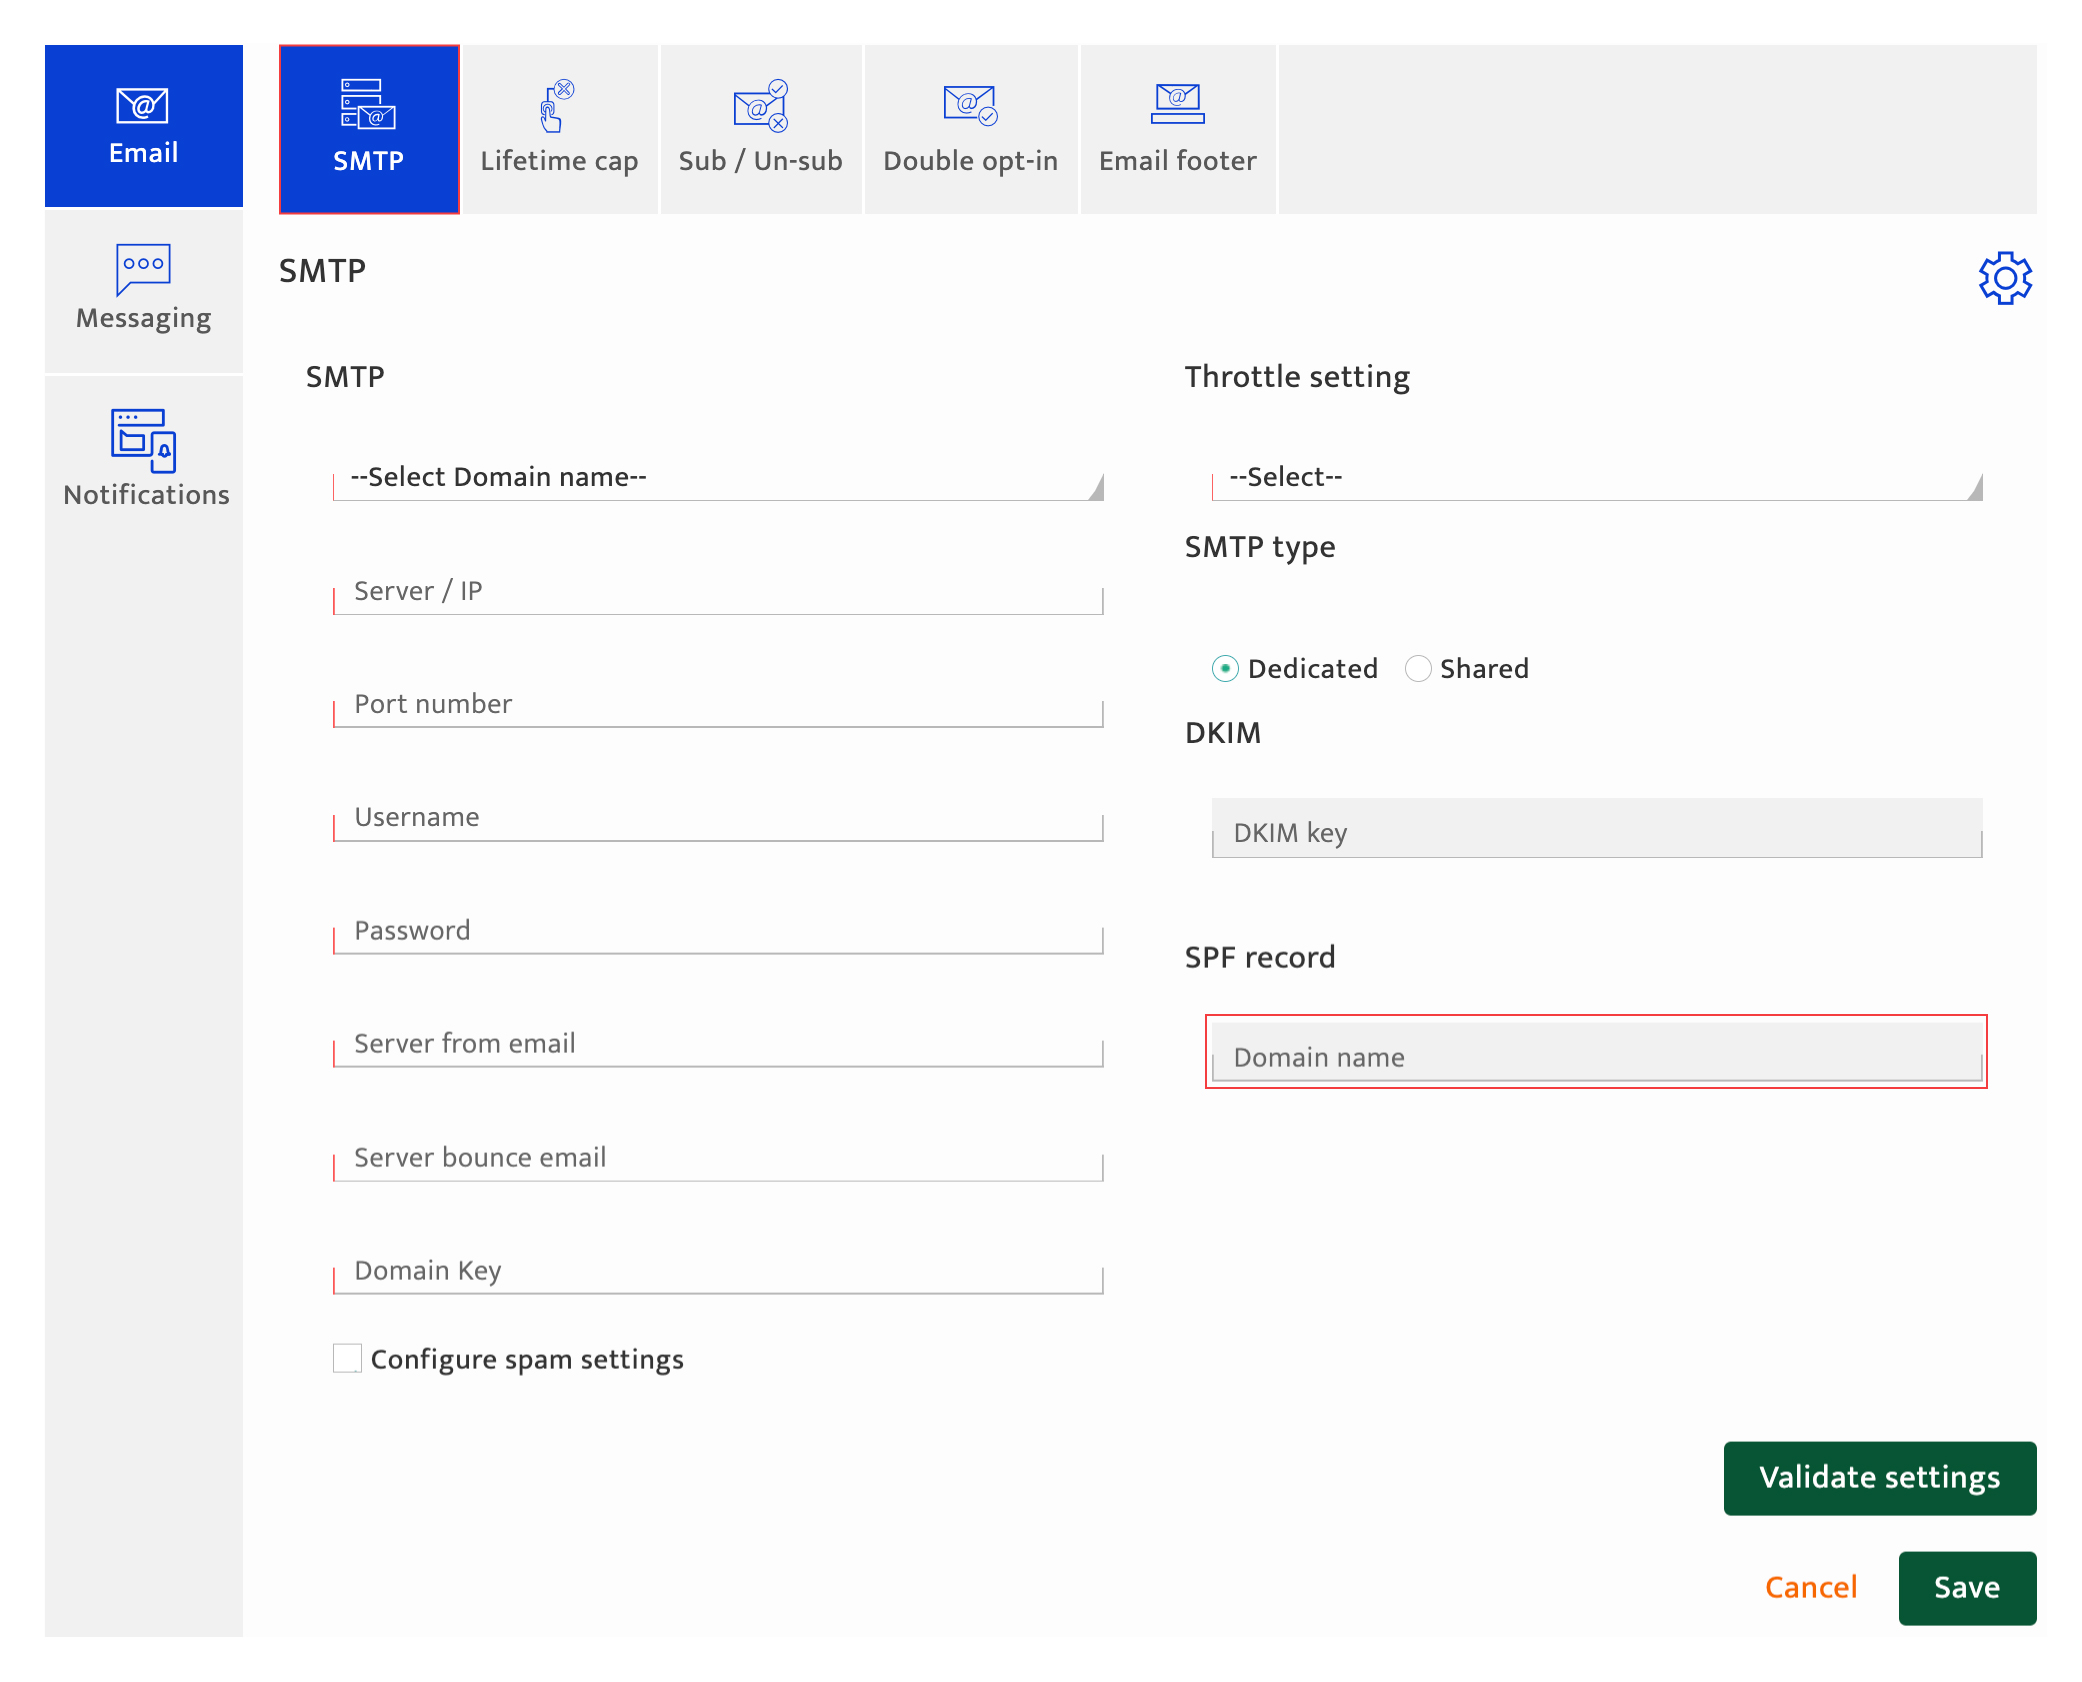
Configuring email communication settings#
To configure channel settings for email, the following inputs are required:-
SMTP settings
SMTP settings are required for email delivery and can be provided by either the organization or Resulticks. The following details must be provided:
- Server IP
- Port Number
- Username and password for the organization’s SMTP server
- Domain key
- DKIM key
- SPF record domain name. If a valid domain is entered, the SPF record can be generated and added to the user’s clipboard for use within their environment.
Click the Validate settings button, to ensure that all entries are valid.
Lifetime cap
The lifetime cap functionality allows you to limit the number of communications sent to an individual audience member through a specific channel over their lifetime.
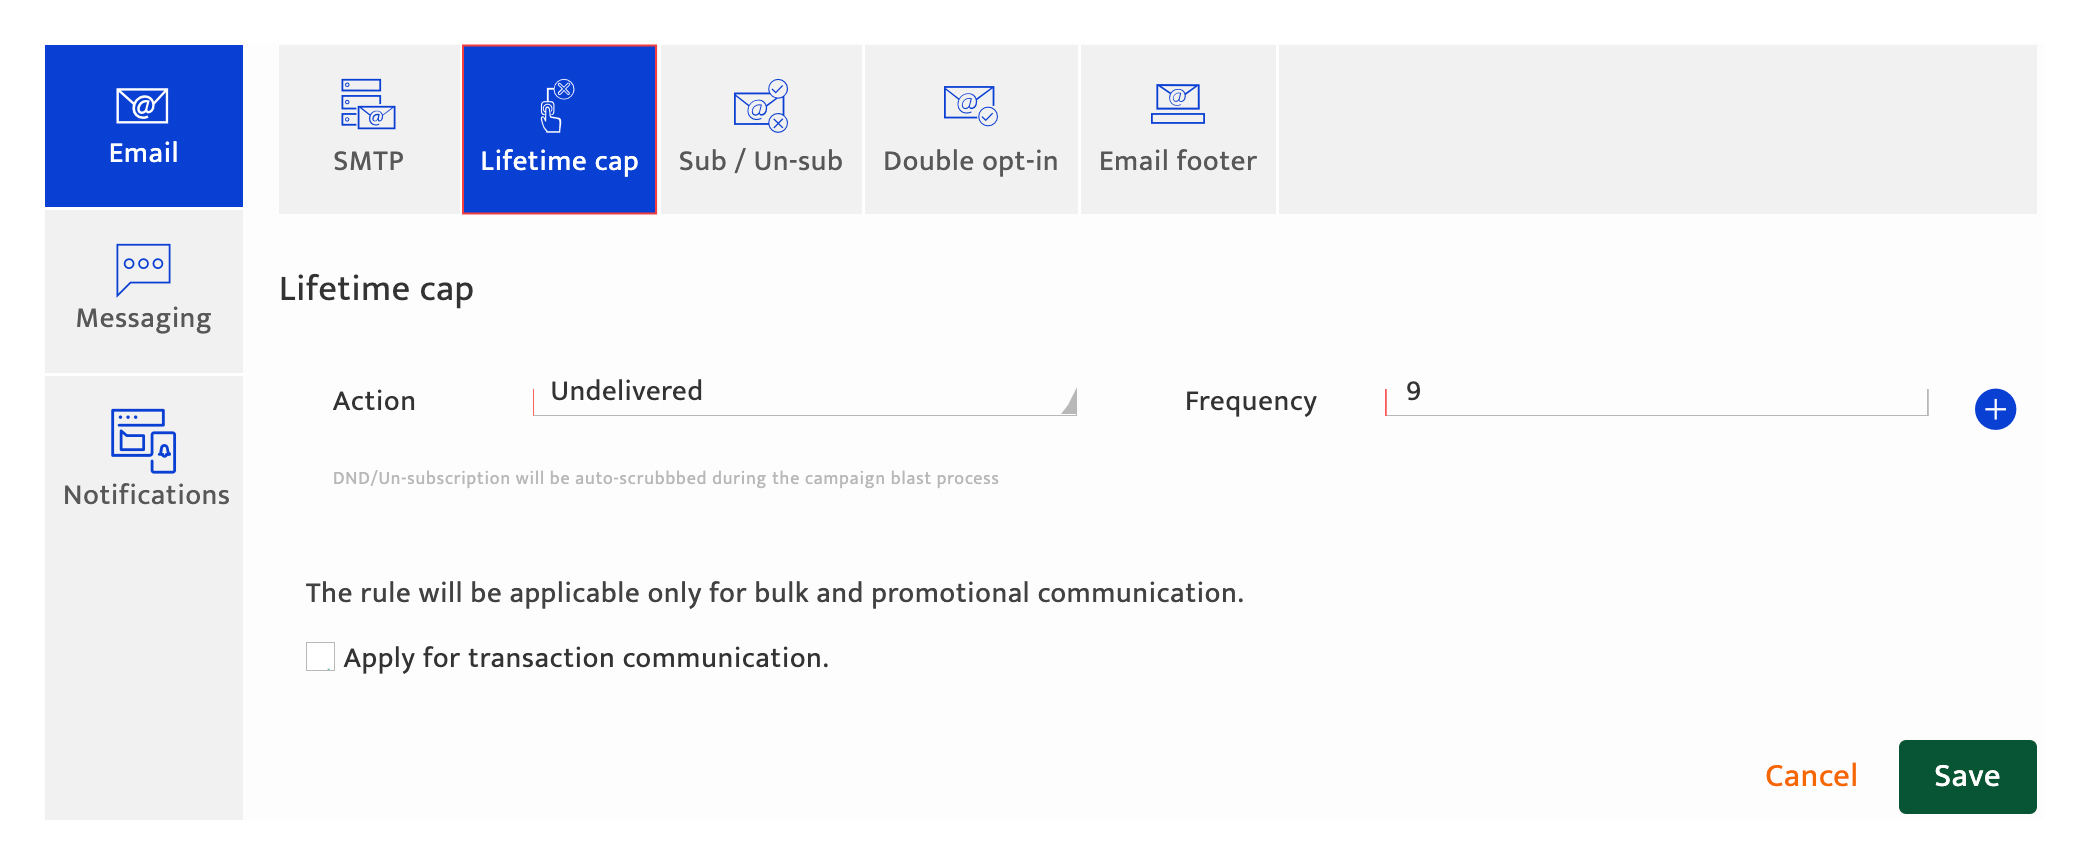
To create a lifetime cap rule:
- Select the action and set the maximum frequency of communication.
- Click the + button if you would like to add another lifetime cap rule
- Check the apply for transaction communications checkbox. This indicates if the rule is applicable only to marketing or also for transactional communications
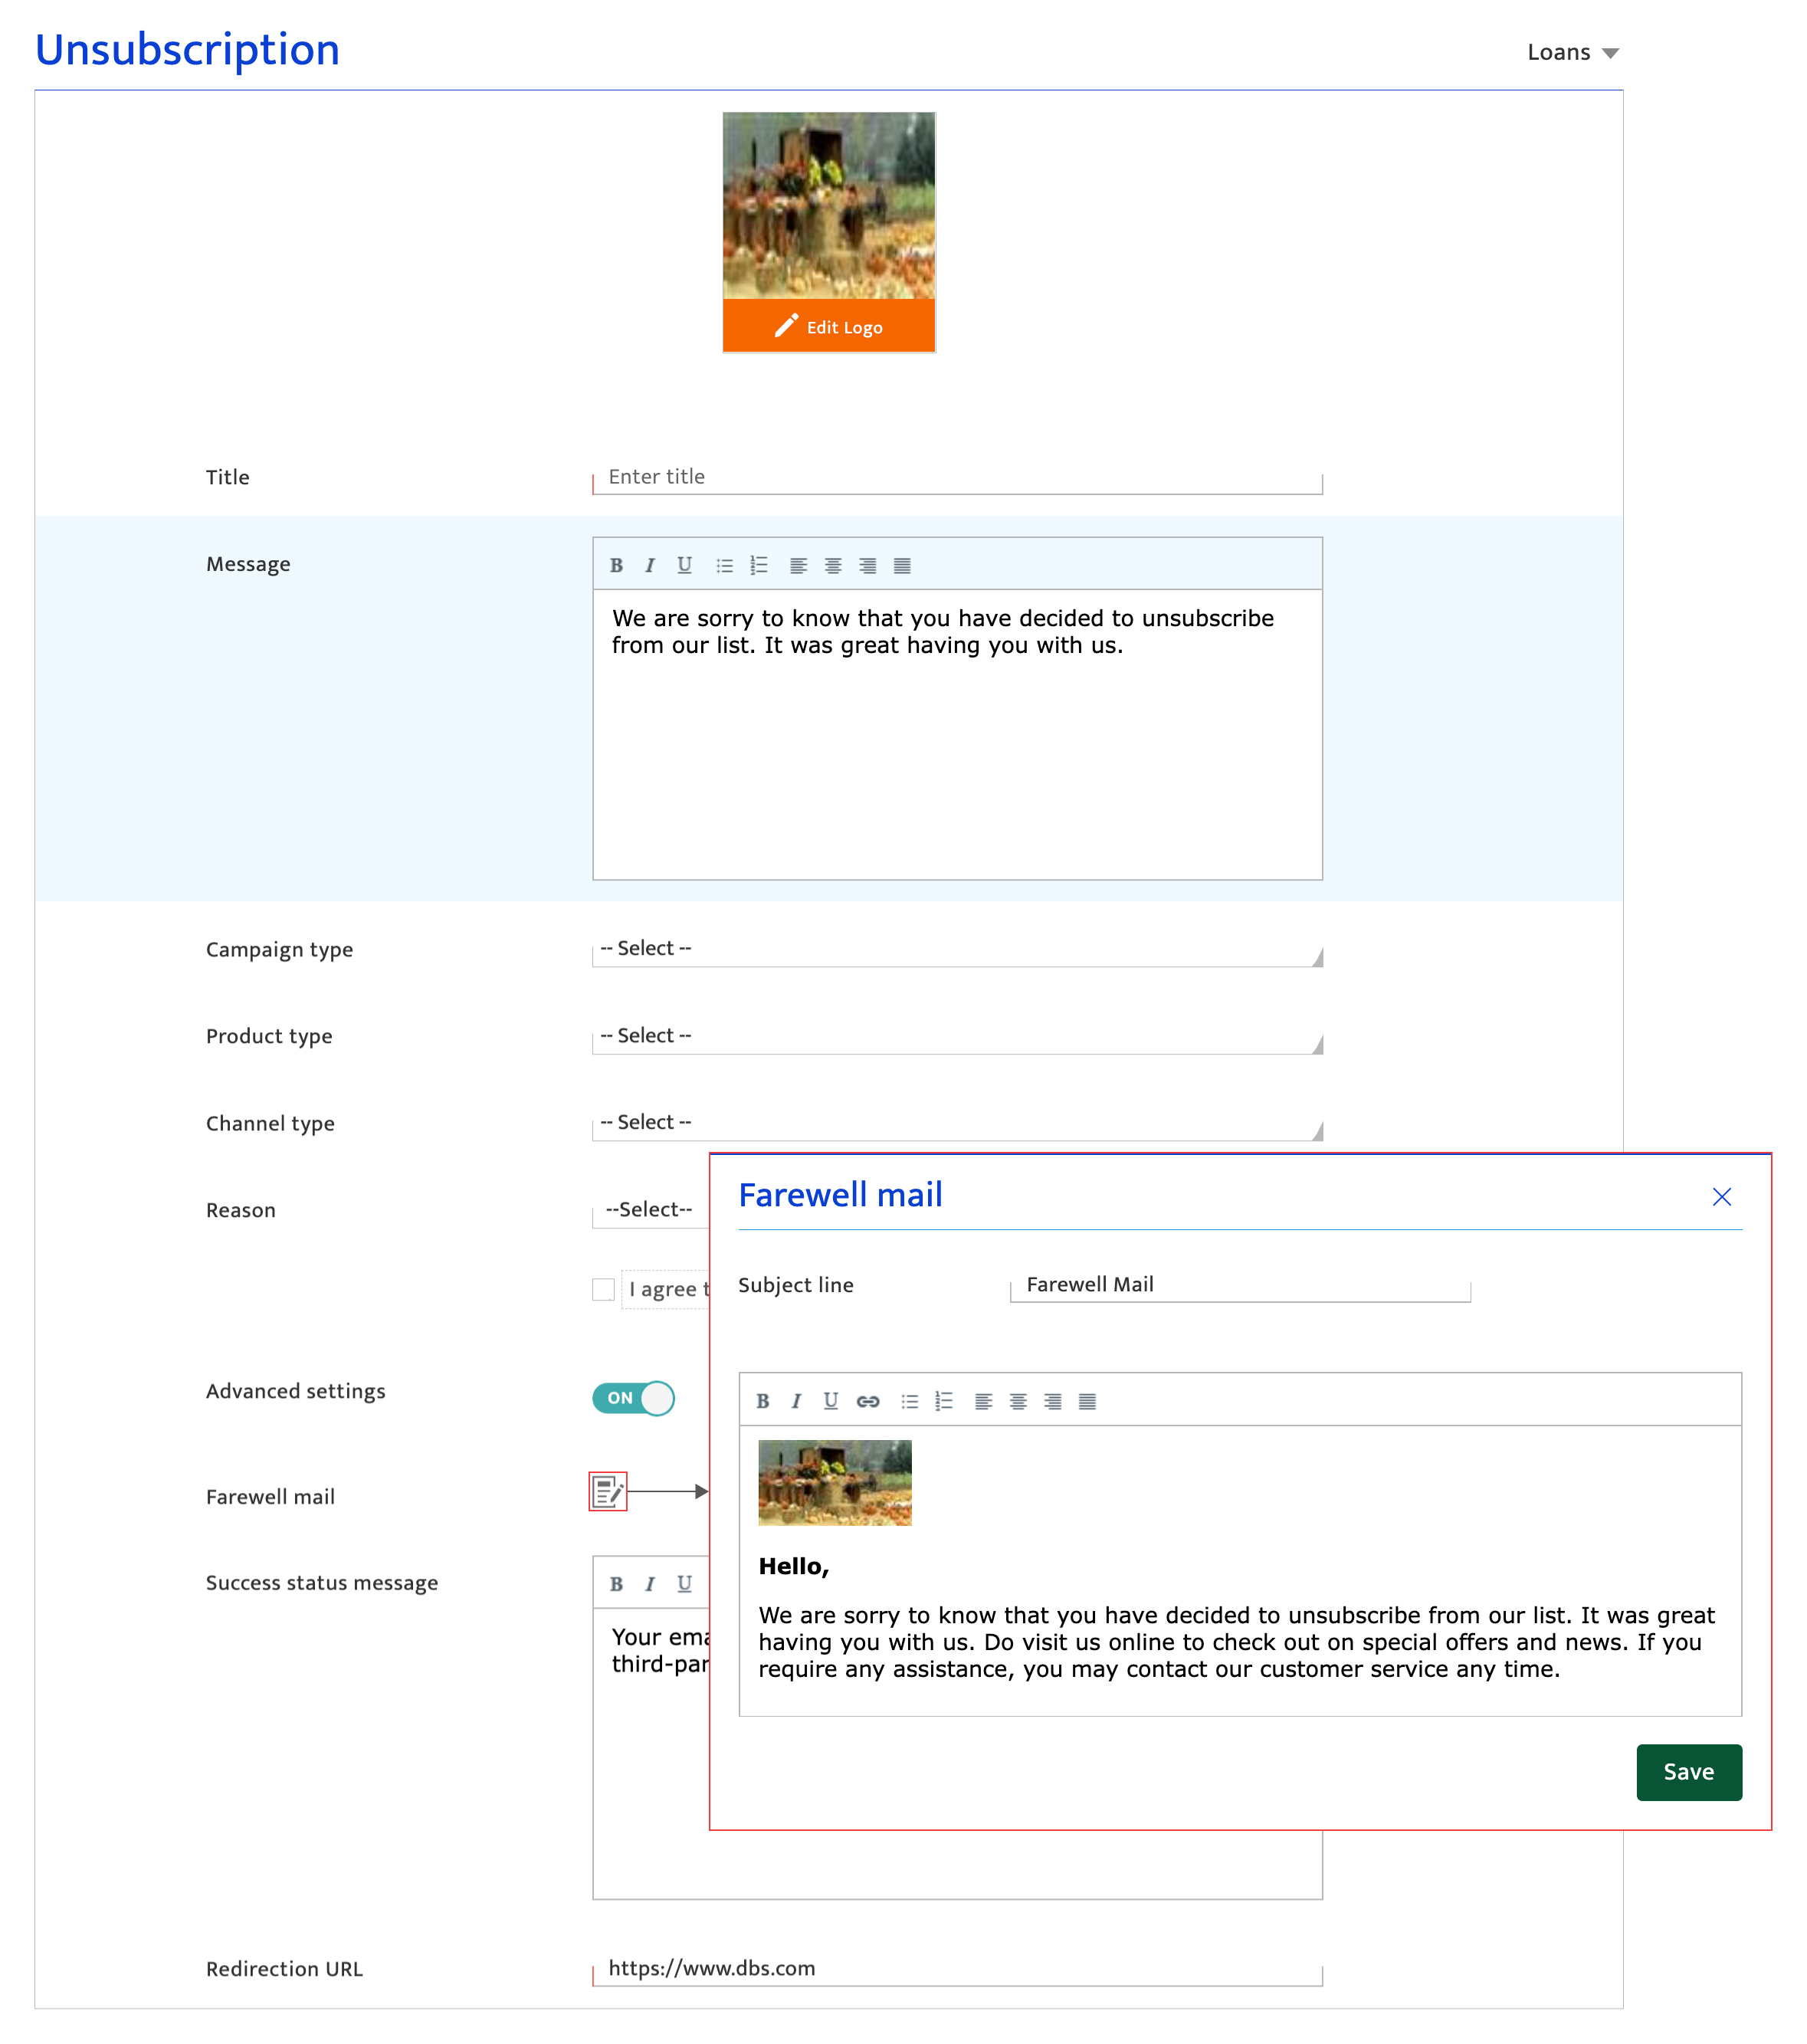
Unsubscribe
The unsubscribe option is normally provided in the email footer as a hyperlink. The unsubscription library displayed by default includes all the unsubscription settings configured for the email channel for the account. These can be edited, duplicated, and deleted using the icons alongside the row.
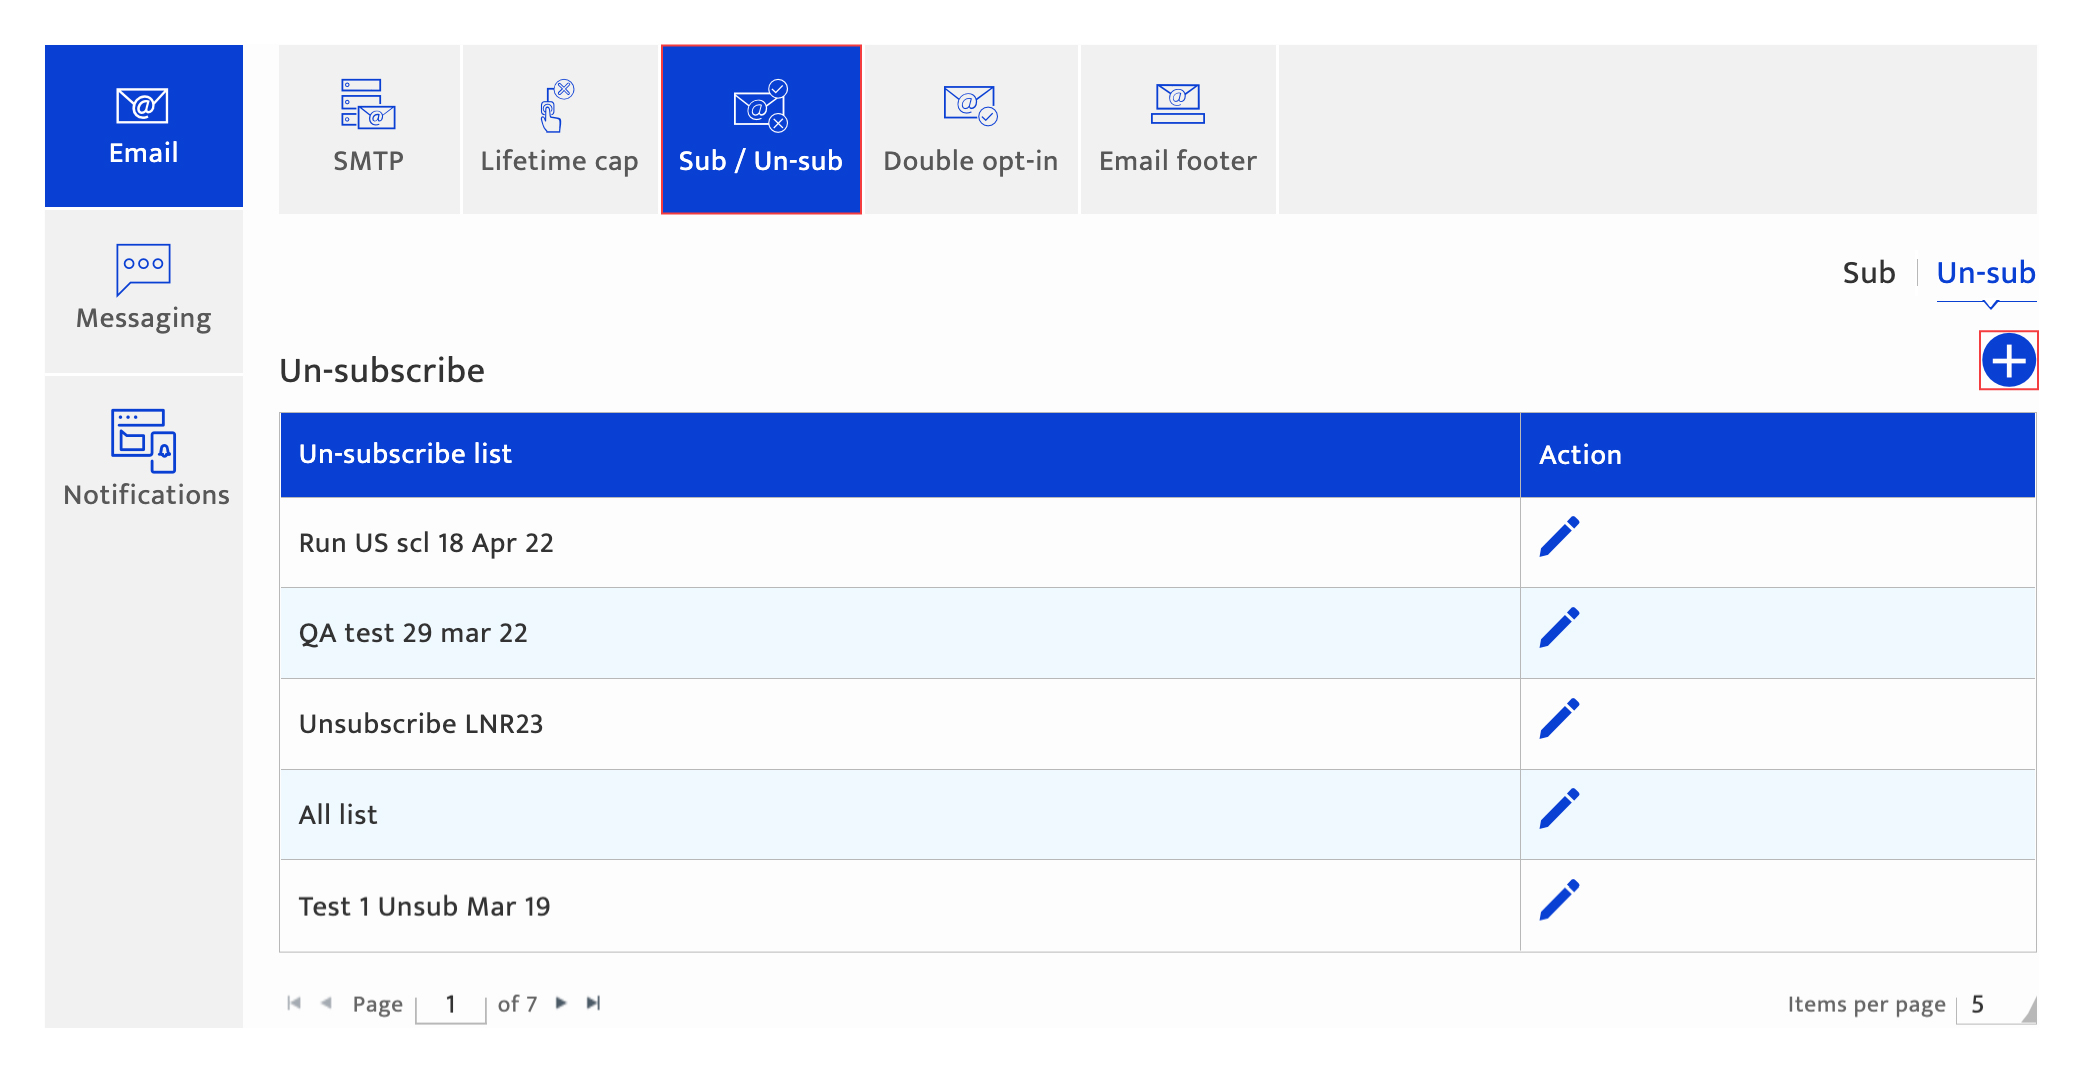
To create a new unsubscription message:
- Click the “+” icon.
- Enter the message with a 150-character limit.
- Choose the campaign types and product categories for which this message can be applied.
- Create the farewell email to be used if the unsubscription link is clicked, by clicking on the Compose icon and using the rich text editor.
- Preview the message.
- Click “Save” to store the current message or click “Cancel” to discard the input and return to the previous screen.
- Enter an unsubscription list name to identify it in the library.
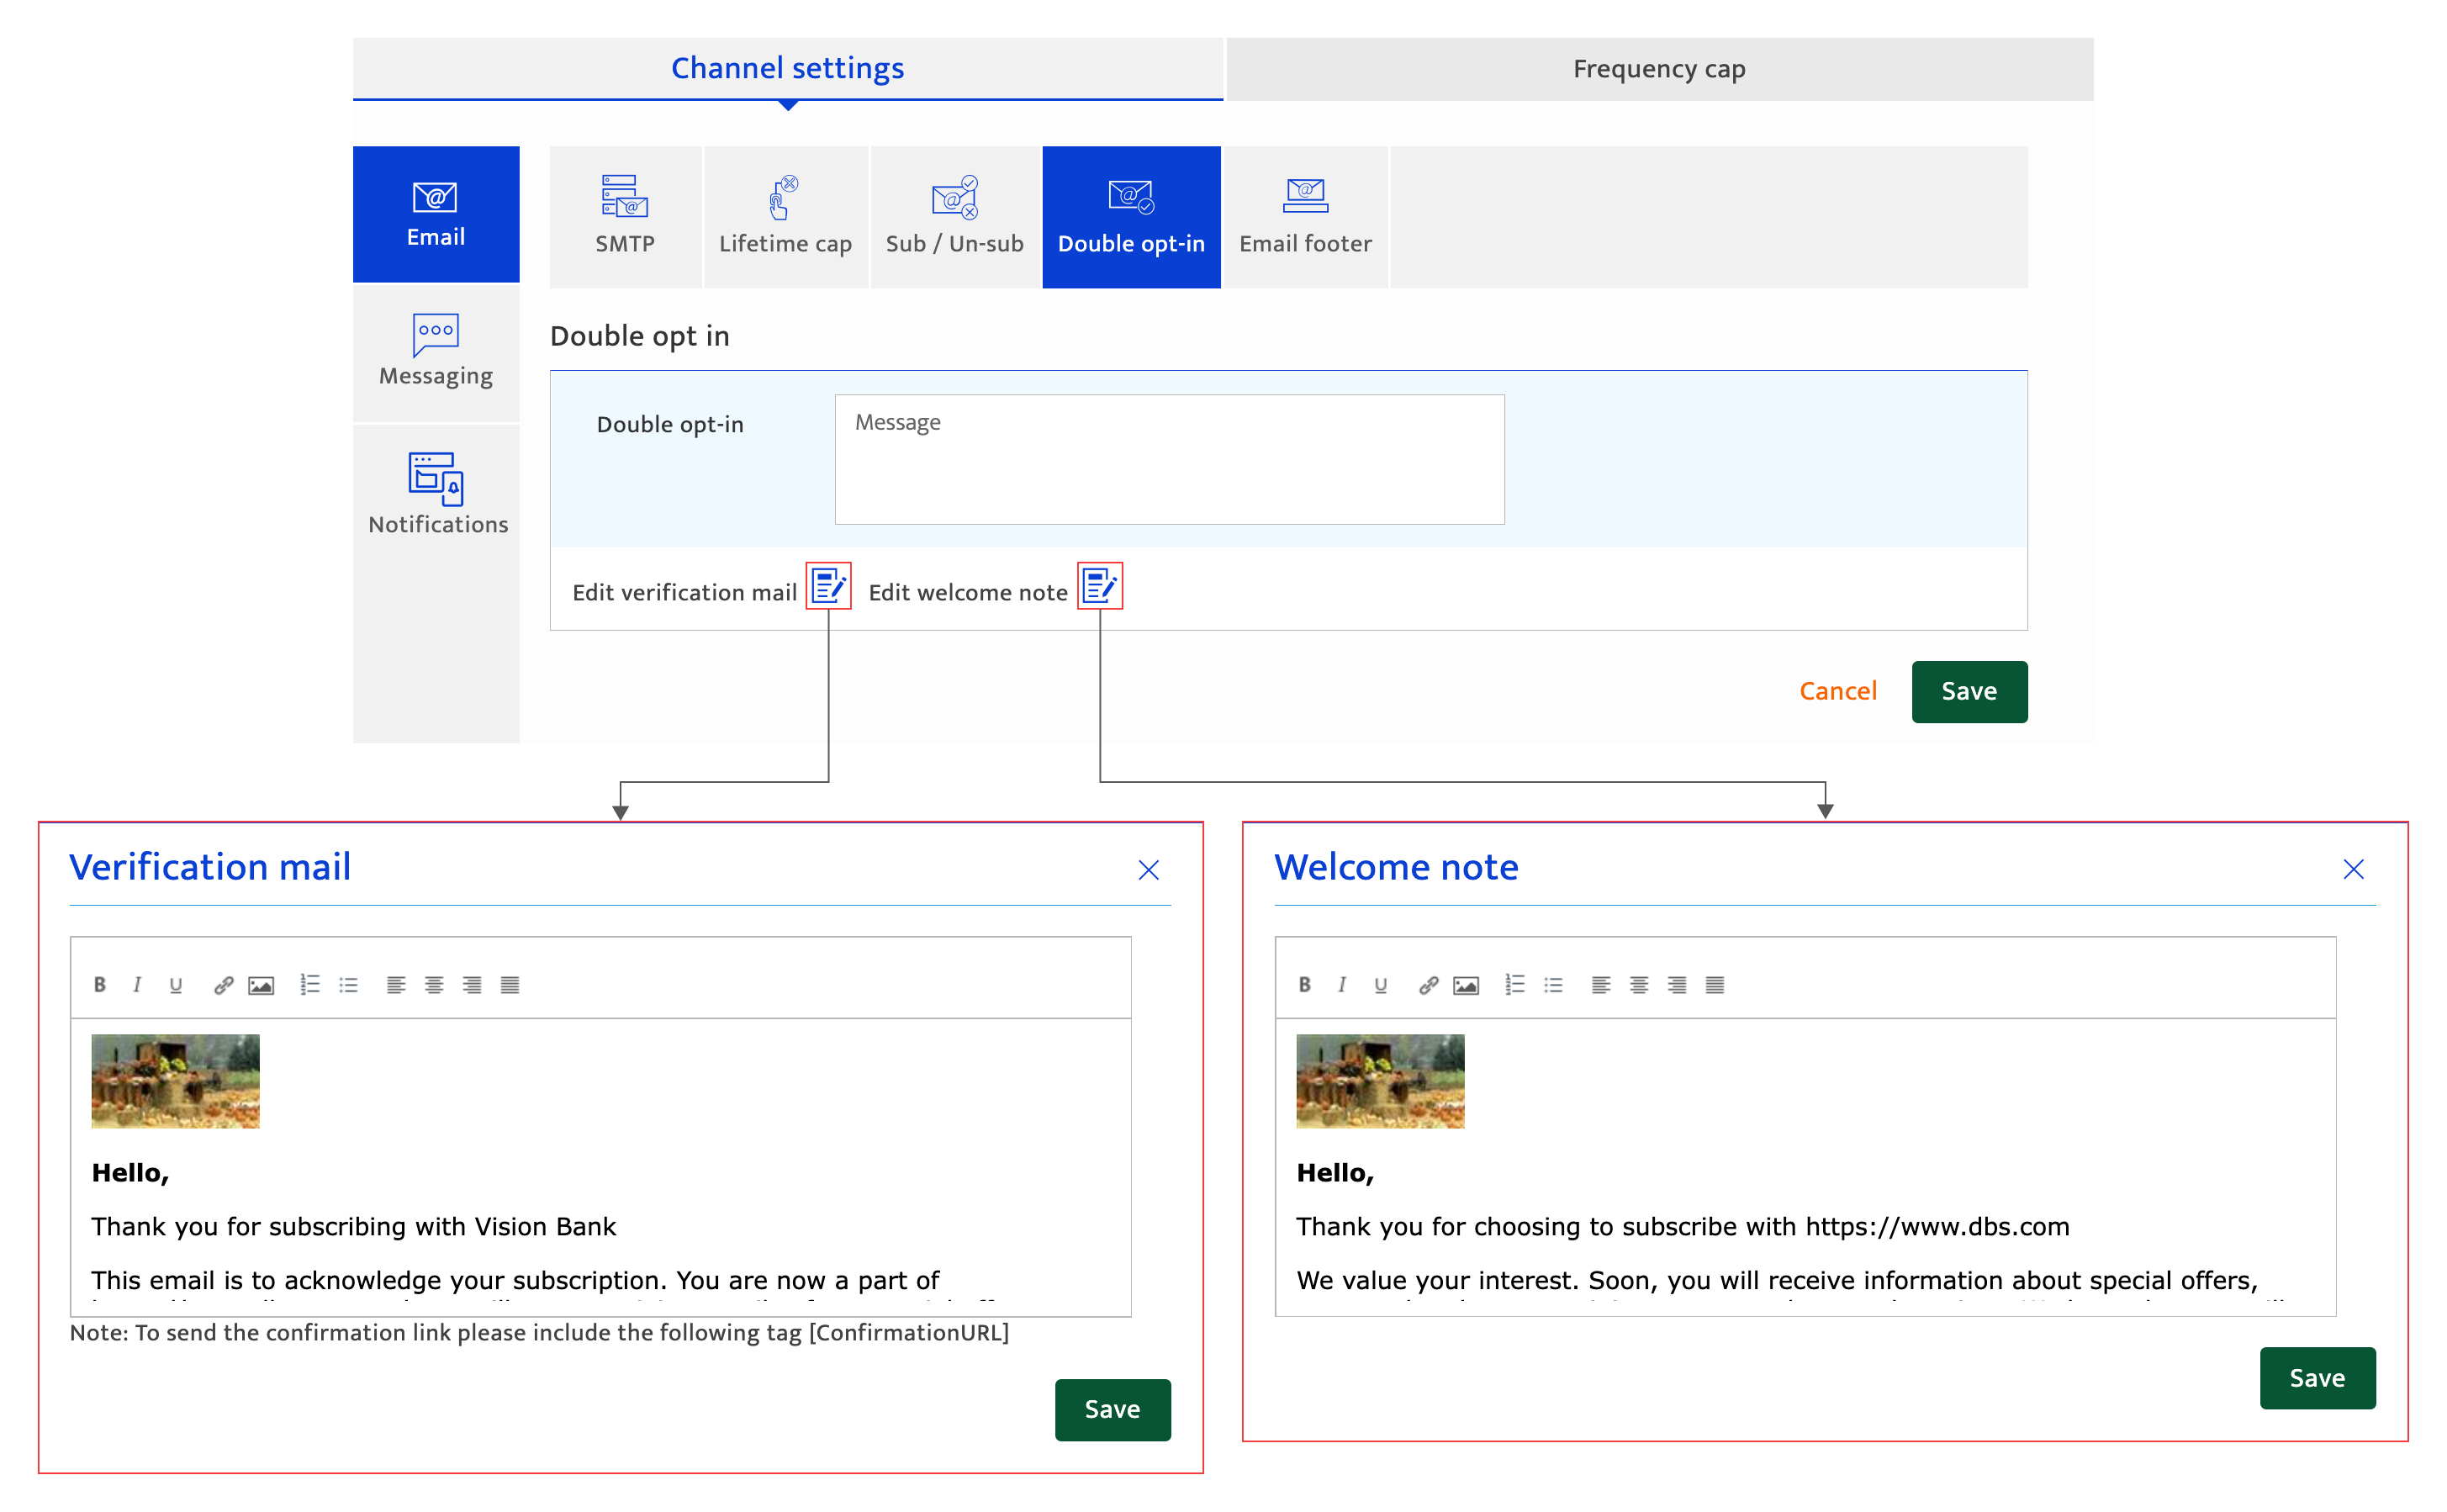
Double opt-in
Use a double opt-in process for subscription in order to minimize the likelihood of incorrect subscriber details. The three-step process is facilitated with:-This section enables the user to create the messages for the three key steps of the double opt-in process.
- Creation of the initial opt-in message with a 150-character limit.
- Creation of the email-ID verification message, by clicking the Compose icon and using the rich text editor.
- Creation of the welcome message following successful verification, by clicking the Compose icon and using the rich text editor.
Email footer
Most emails will utilize footers, incorporating options such as:
- Forward to friends
- Update your profile (as mandated the General Data Protection Regulation (GDPR) Act)
- Subscribe
- Unsubscribe
- Company details
- Privacy policy
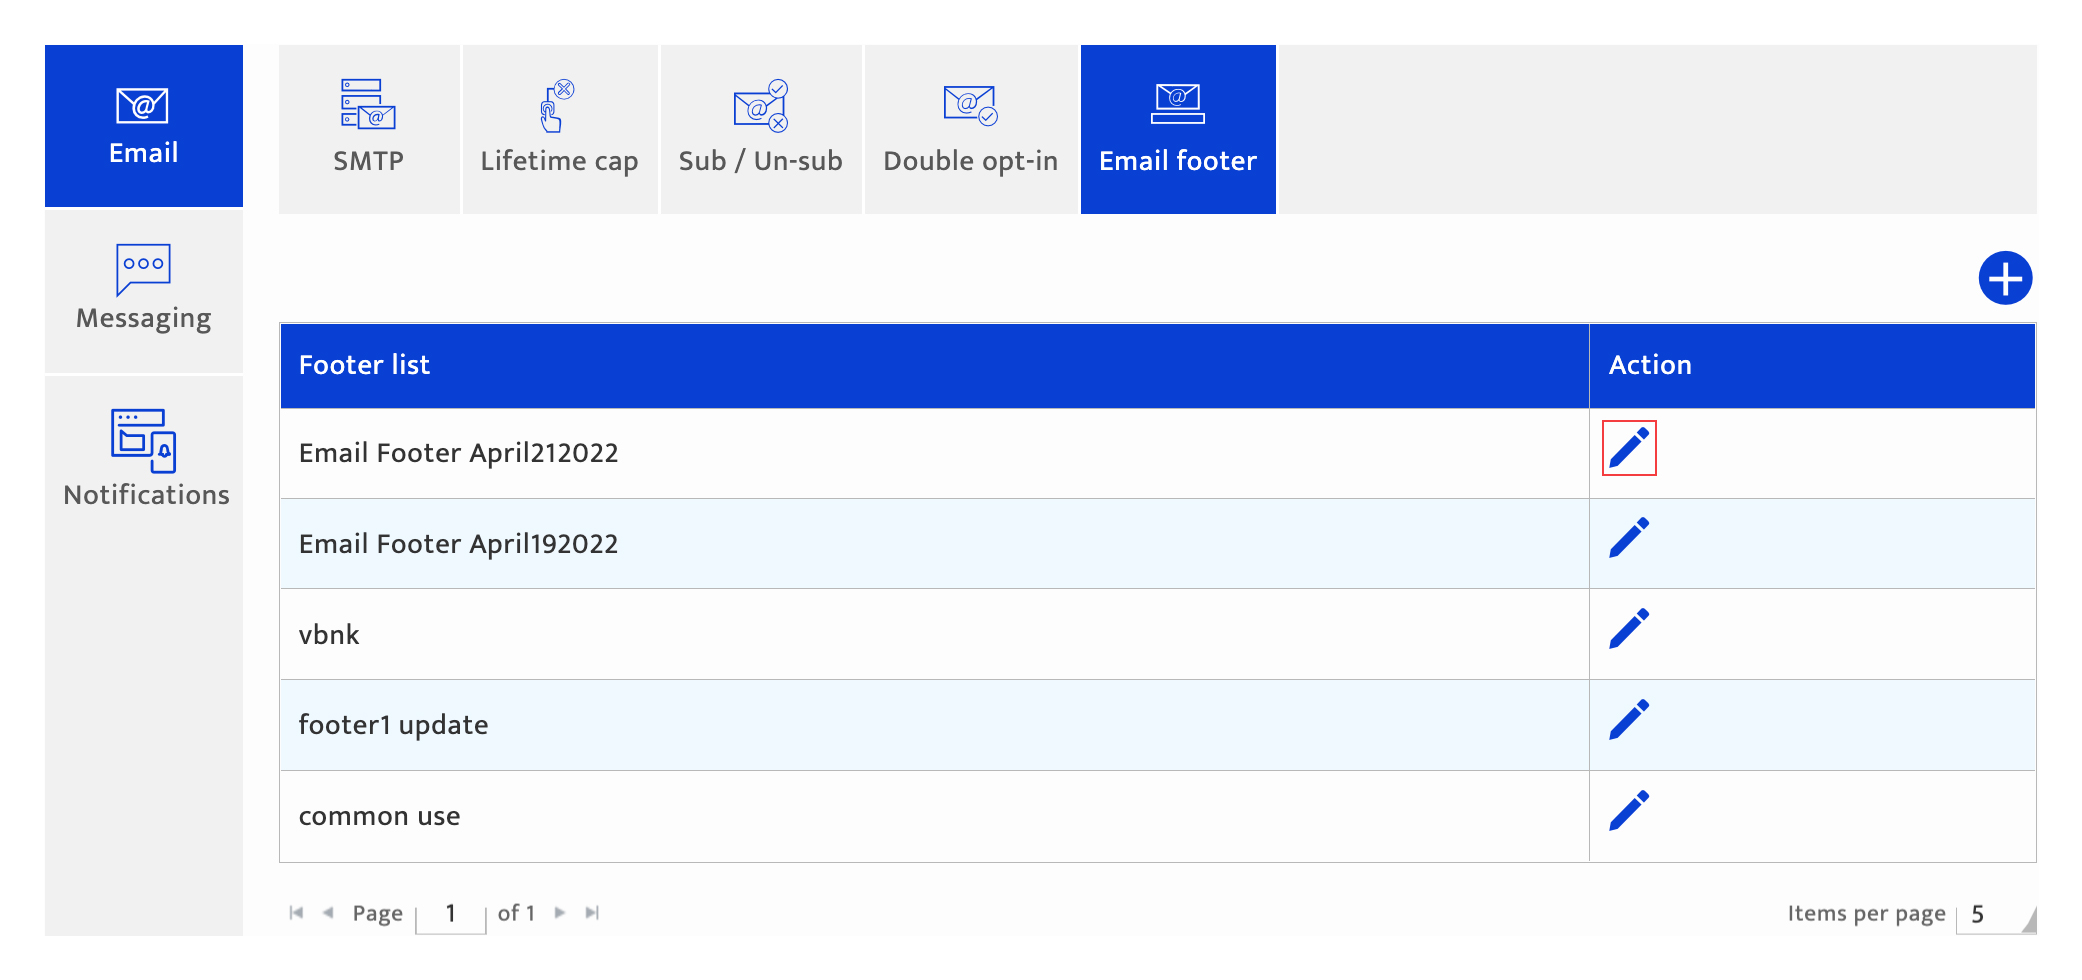
To create a new email footer click the “+” icon. Options to customize the footer include:-
- Using the “bucket” icon to update the footer’s background colour.
- Drag-and-drop of any combination of the available sections—text, left the caption, and right caption—onto the email footer template.
- Using the text editor to customize the content of the text, left the caption, and right caption sections.
- Move or deletion of the new sections
