Suppression list
Overview #
A Suppression input list is used to further segment a created target list. The audience records in the original target list that are matched with all the designated attributes of the selected Suppression input list will be excluded in the newly created target list. But the audience records from this list will not be added to the audience database.
Creating suppression input list#
- Go to Audience module >>Master data tab.
- Click the
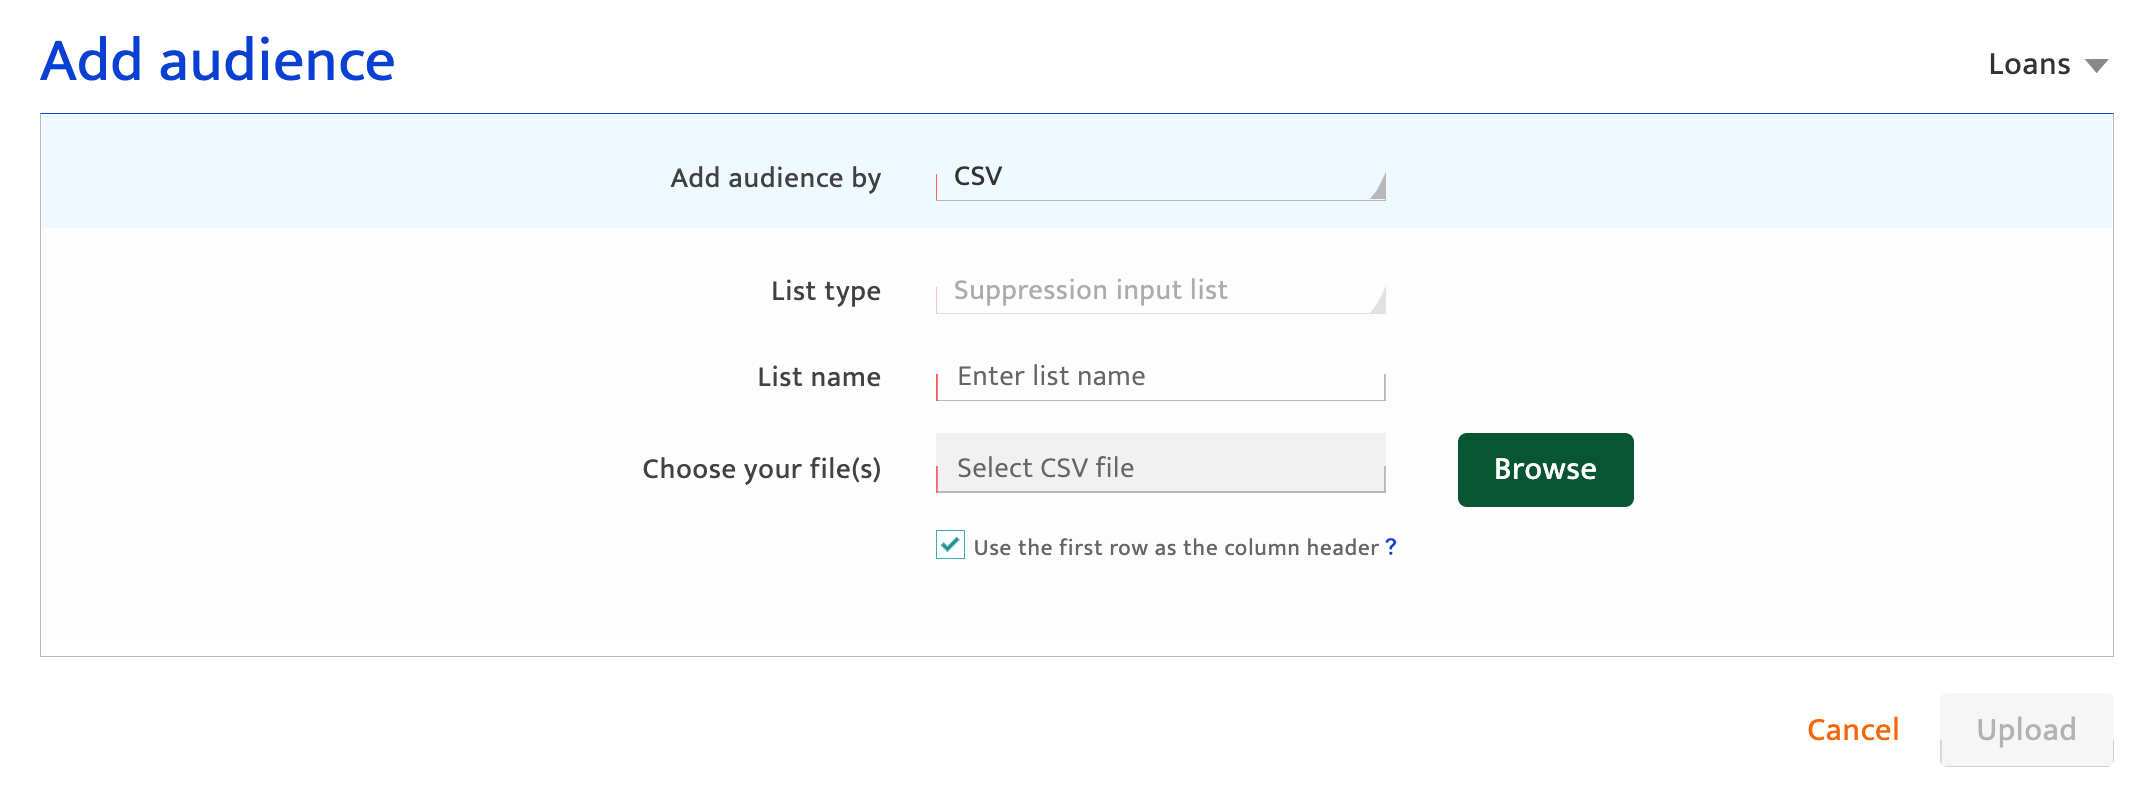
 icon in the Master data screen. The Add audience screen will be displayed
 - Select CSV from the drop-down list
- Select List Type as Suppression input list from the drop-down list. A pop-up message will be displayed.
- Click I Agree & proceed.
- Enter the List name. The list name is used to identify the list during campaign orchestration and segmentation. This can be combination of numbers, text, and special characters with a maximum of 50 characters.
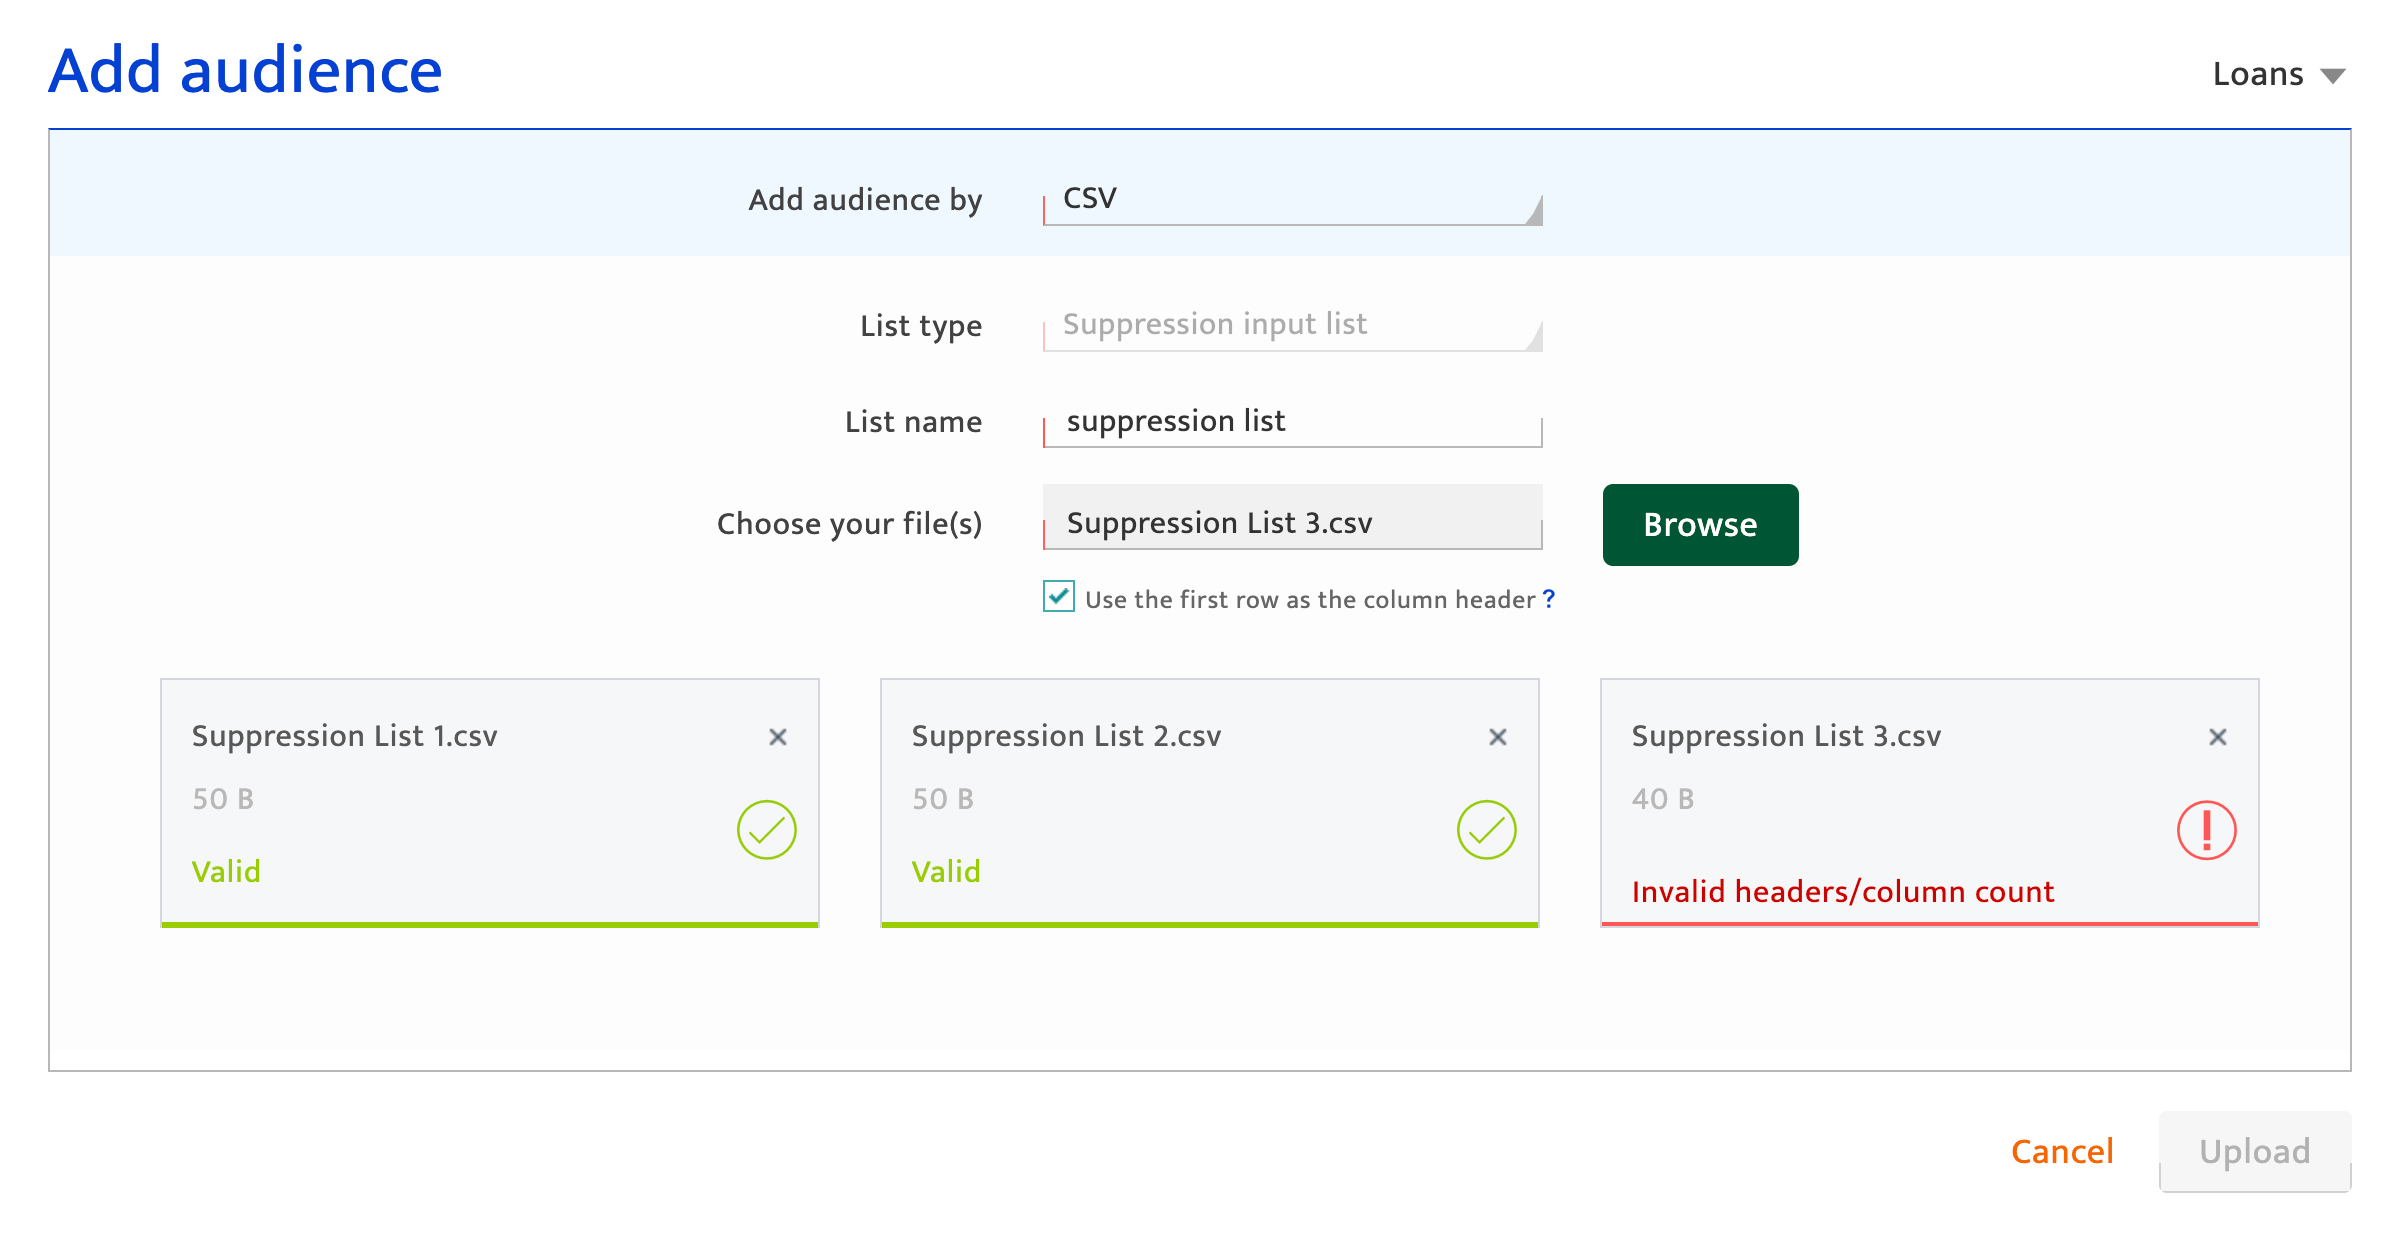
- Click the Browse button to select the CSV file
- User can upload a maximum of 6 CSV files, each file should not exceed 10 Mb in size.
- Each list can contain up to 5 million records and up to 5 attributes.
- If multiple files are uploaded, make sure the column headers are consistent across all uploaded files. Also, all column headers must match with existing data attributes.
- The maximum time to process 1 million records may takes 3 hrs
- Choose whether the first row of the imported data to serve as the column header by selecting the associated check box.
- Click the Upload button to import the data. Verify the upload status of each CSV file using the status bar against each. The status could be:
- progress: Still uploading
- Verified as valid: Successfully uploaded into the Audience database
- Error with a summary message shown: The file was not uploaded due to invalid or missing data. Click the
 icon to view the error information and fix it.


Mapping imported data#
For information on mapping the attributes, see Add Audience.
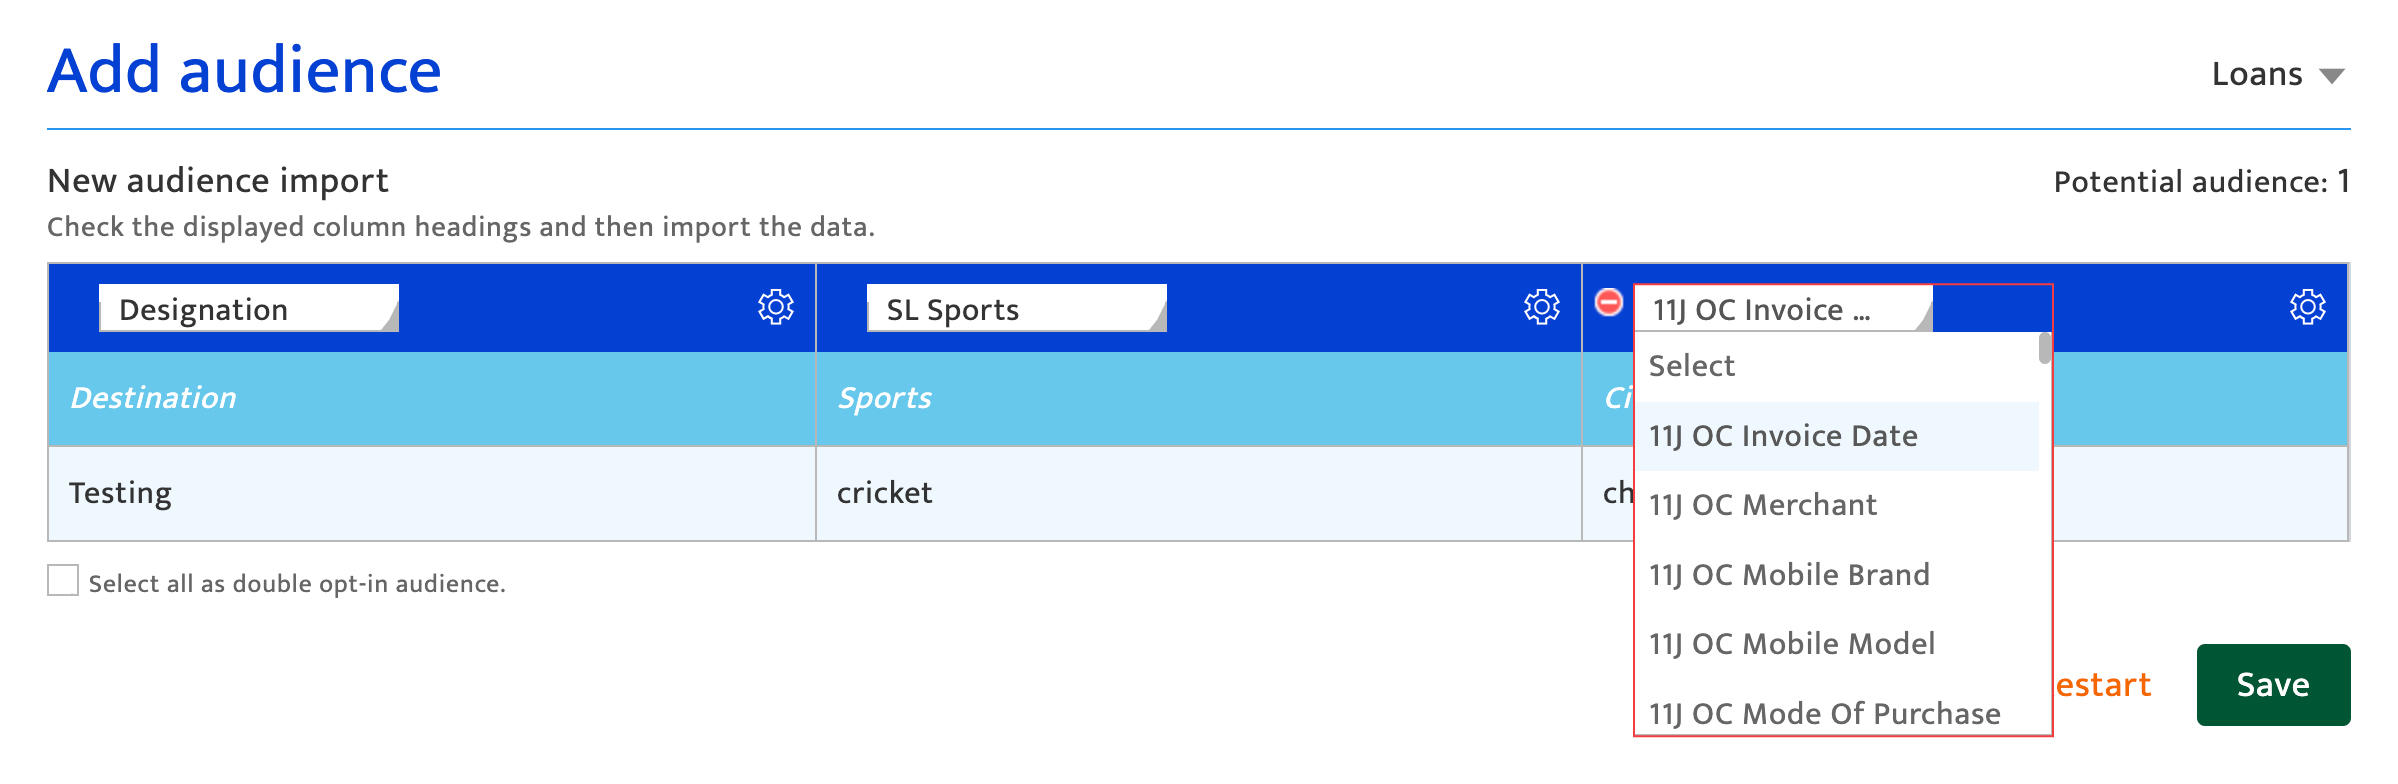
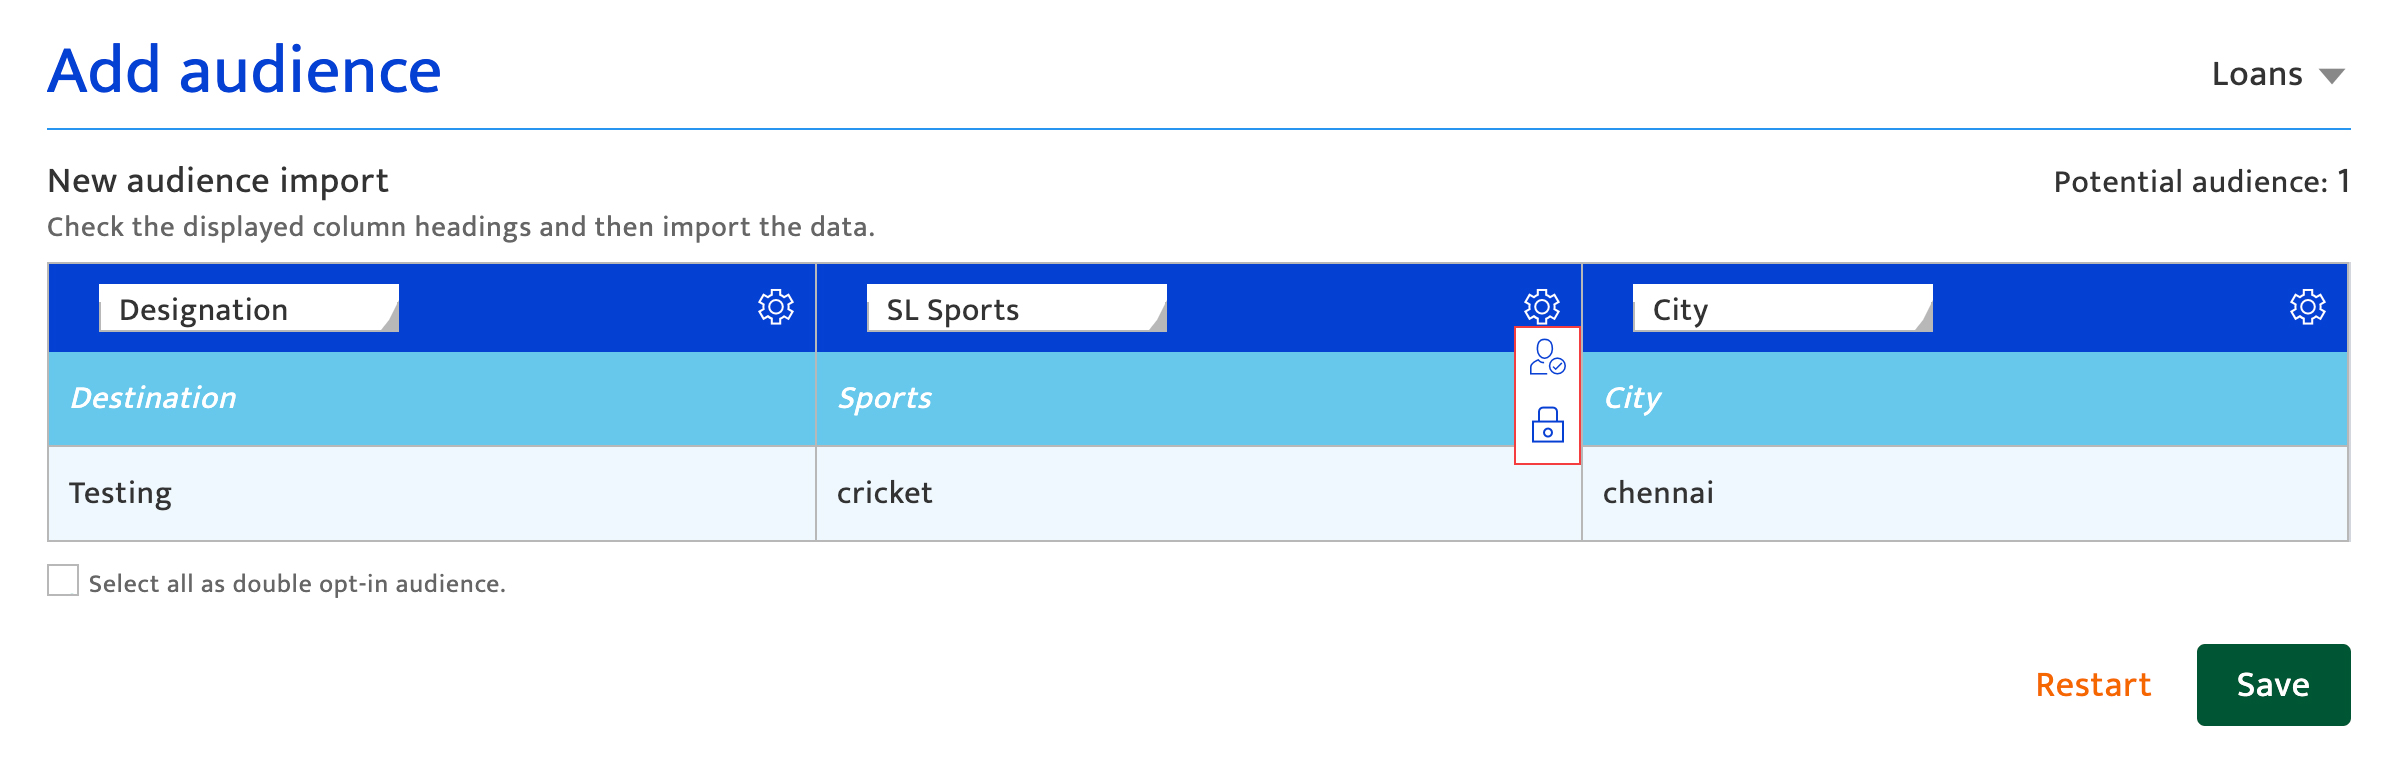
Map the data attributes being imported using the following options:
- Map each imported data attribute (column header) to an audience data attribute from the platform using the drop-down lists.
- Identify an attribute as sensitive data by selecting the safe box icon.
- Flag double opt-in for the entire list by ticking the checkbox below the table. Note that if the box is checked the Resulticks platform will reject data during upload without contact consent.
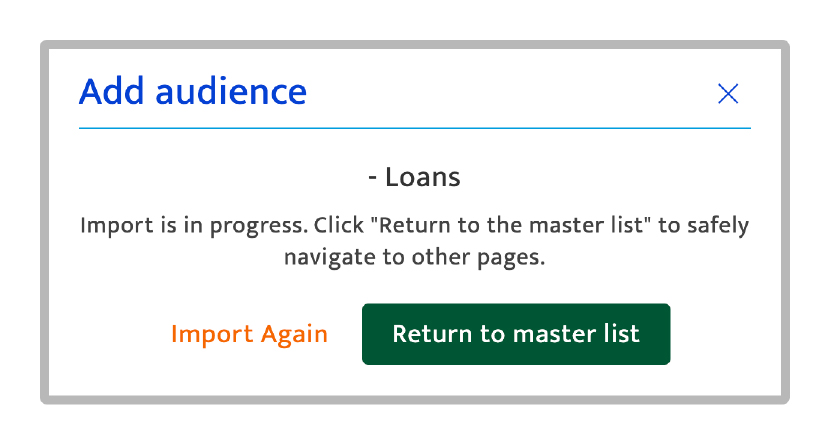
Confirming audience import#
- Click the Save button to upload the data.
- Click the Restart button to discard the data import and return to the Add audience screen.
- Confirm the data import is in progress by viewing the in-progress pop-up notice. Validate the import status in Import History.
- Click Import again to add more audience data (or)
- Click Return to master list to return to the Master data screen.
Note:
Suppression Input list uploads will not affect the counts on the master data management screen as these audiences are not added to the Audience database.
Viewing Suppression input lists#
The created suppression input list is added in the Target lists screen. Users can view the uploaded list and create a target list with matched audiences.
- Click the Audience module.
- Click the Target list tab.
- Select Match input lists from dropdown list.
- Click the split icon. The Suppression input list will be displayed.
- Select suppression input listfrom the drop-down list.
- Select the attributes within the Suppression input list using the multi-select dropdown.
- Click Submit to create a new target list which excludes audience of the original target list that matches the designated attributes of the selected Suppression input list.
- The new list is created. Users can edit list name by clicking the edit icon.

The Suppression input list will display the List name which was entered in the add audience screen. Create a target list with a suppressed audience
