Event trigger communication plan
Overview#
This section addresses the setup of the primary specifications for an event-trigger communication.
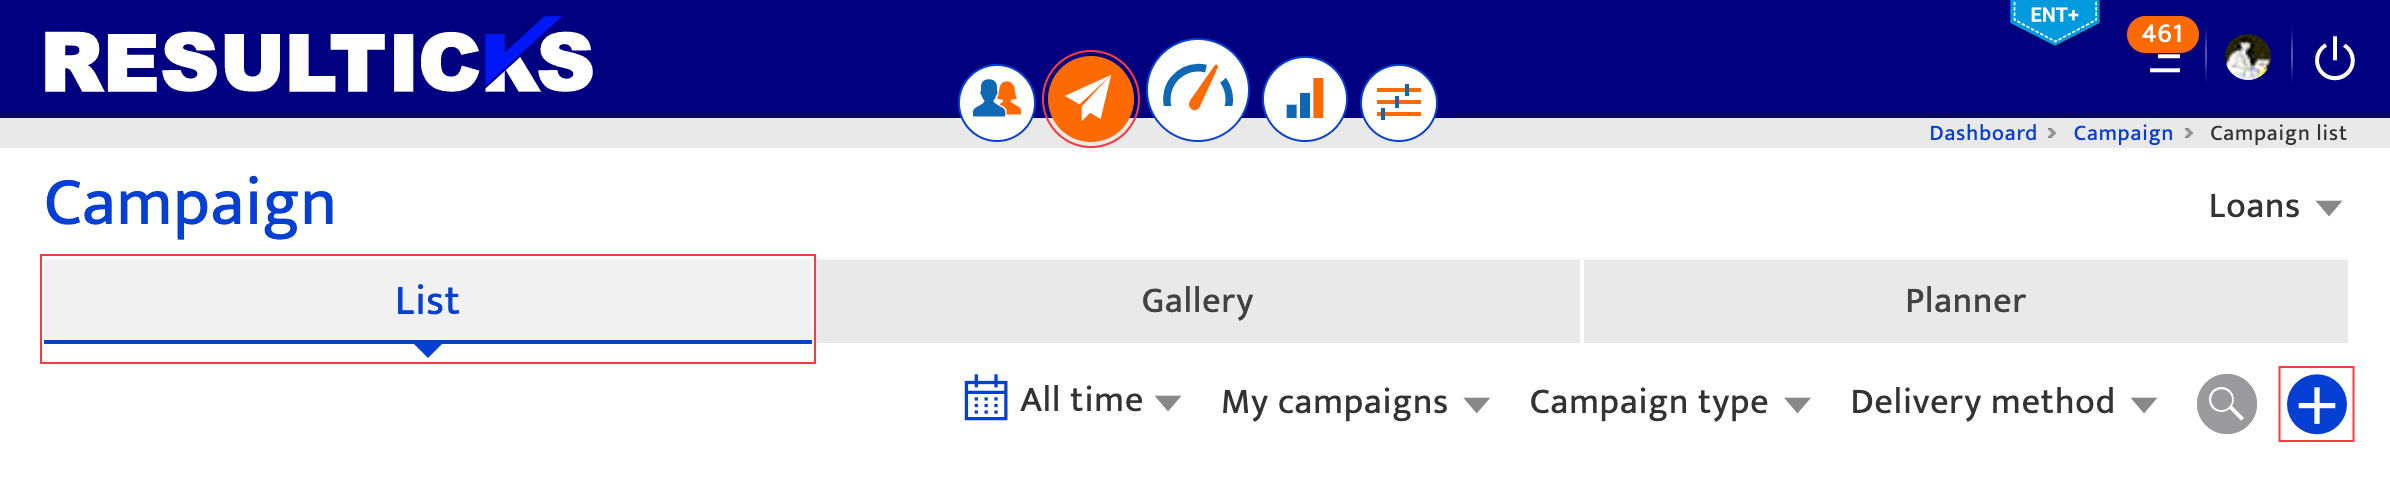
Accessing event trigger communication planning#
- Click on the communication icon of the main Resul menu.
- Click "+" on the List tab displayed in the default view.
- Click the event-trigger icon from the three options displayed.
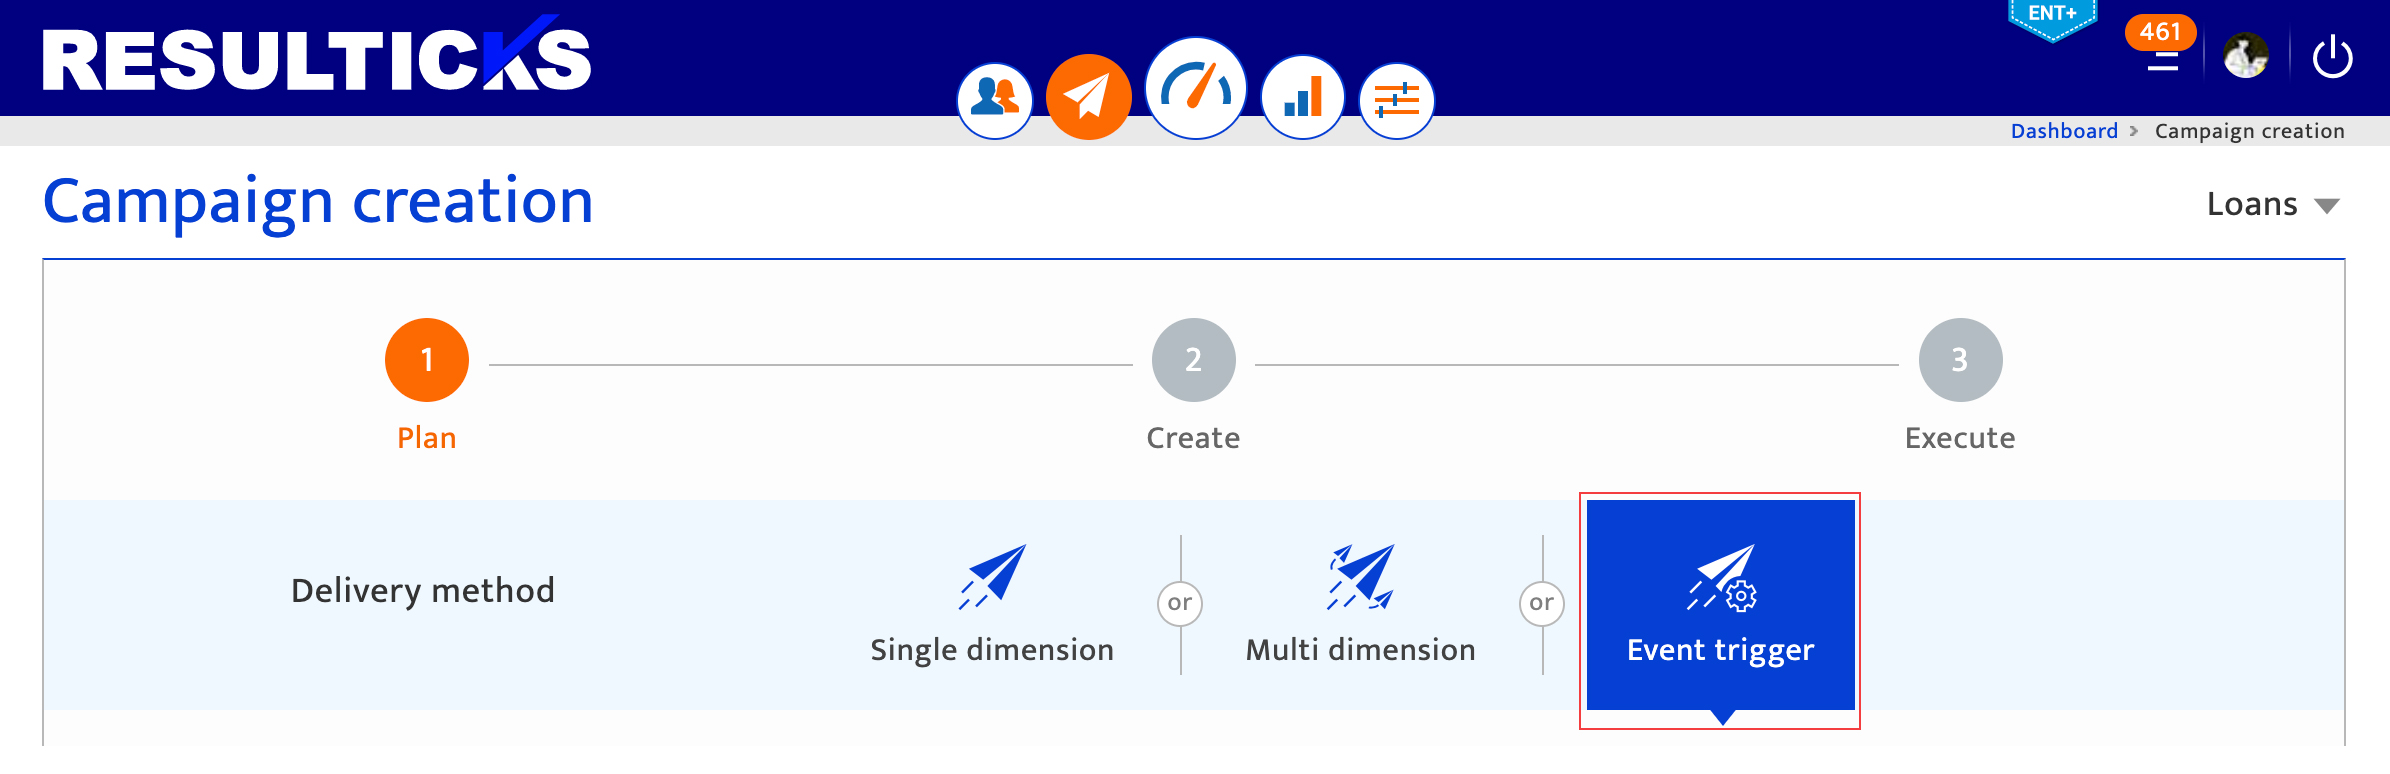
Setting up the communication#
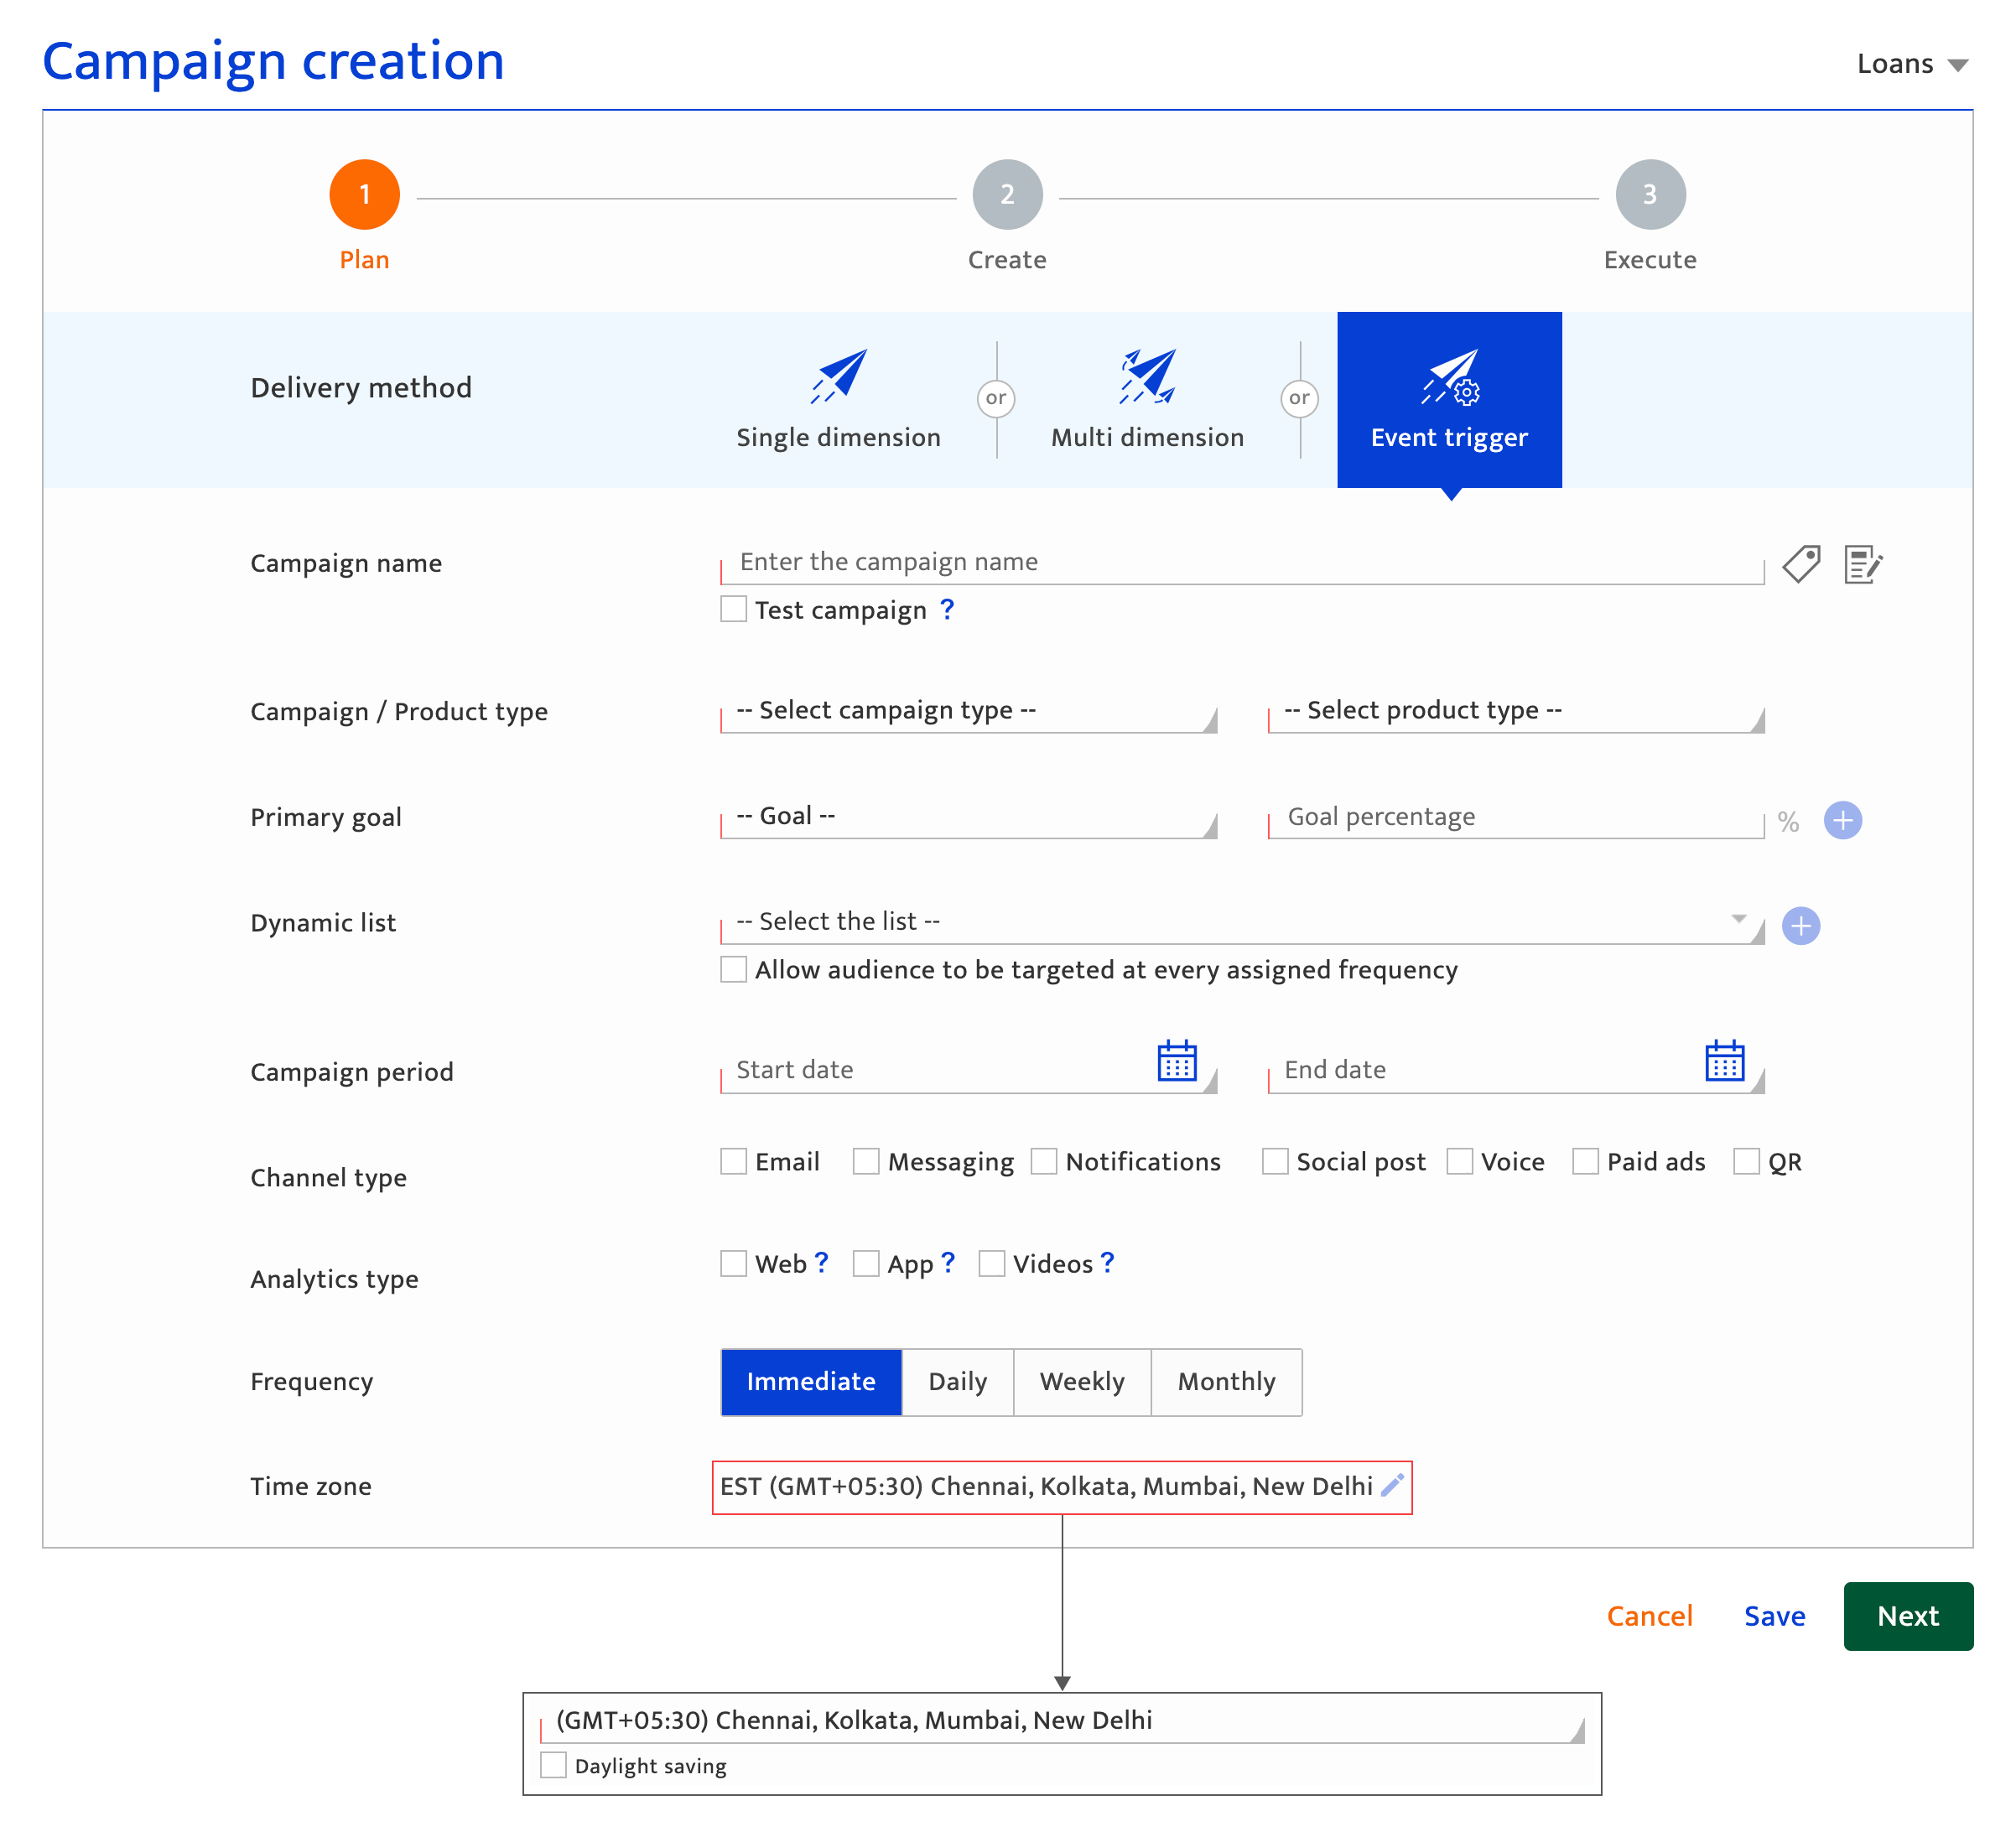
An event-trigger communication setup requires input for the following elements in the sequence recommended.
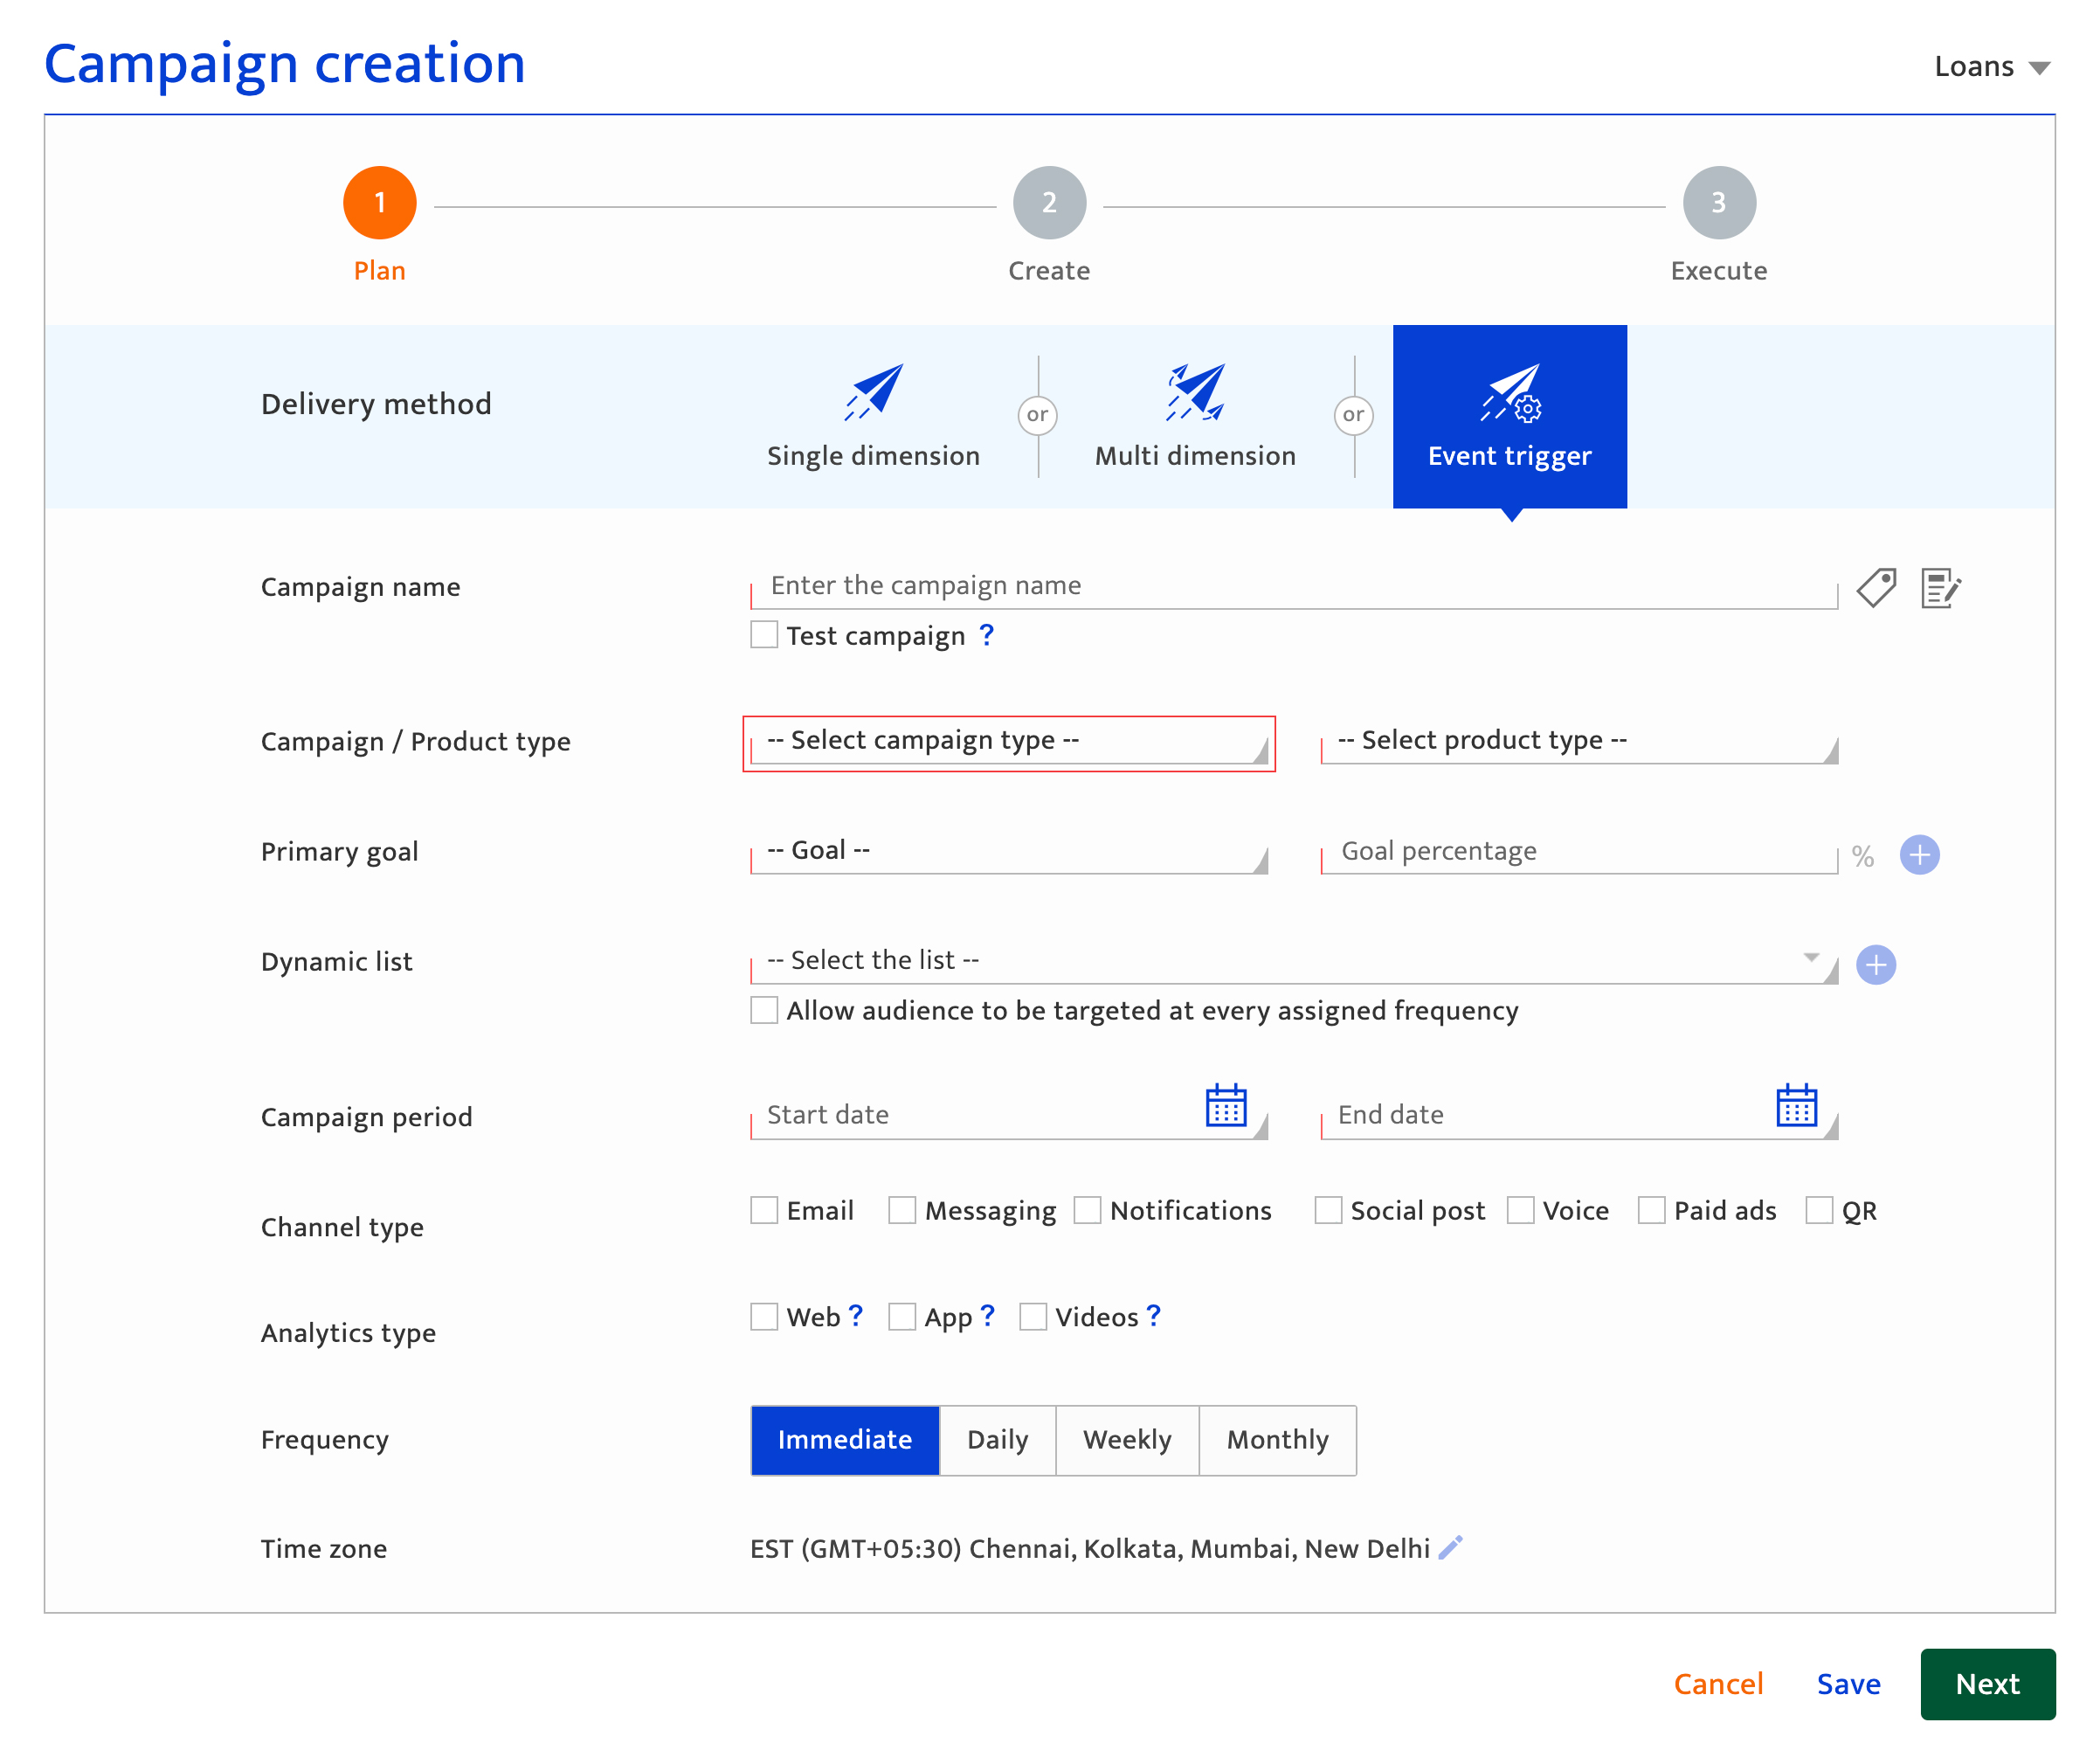
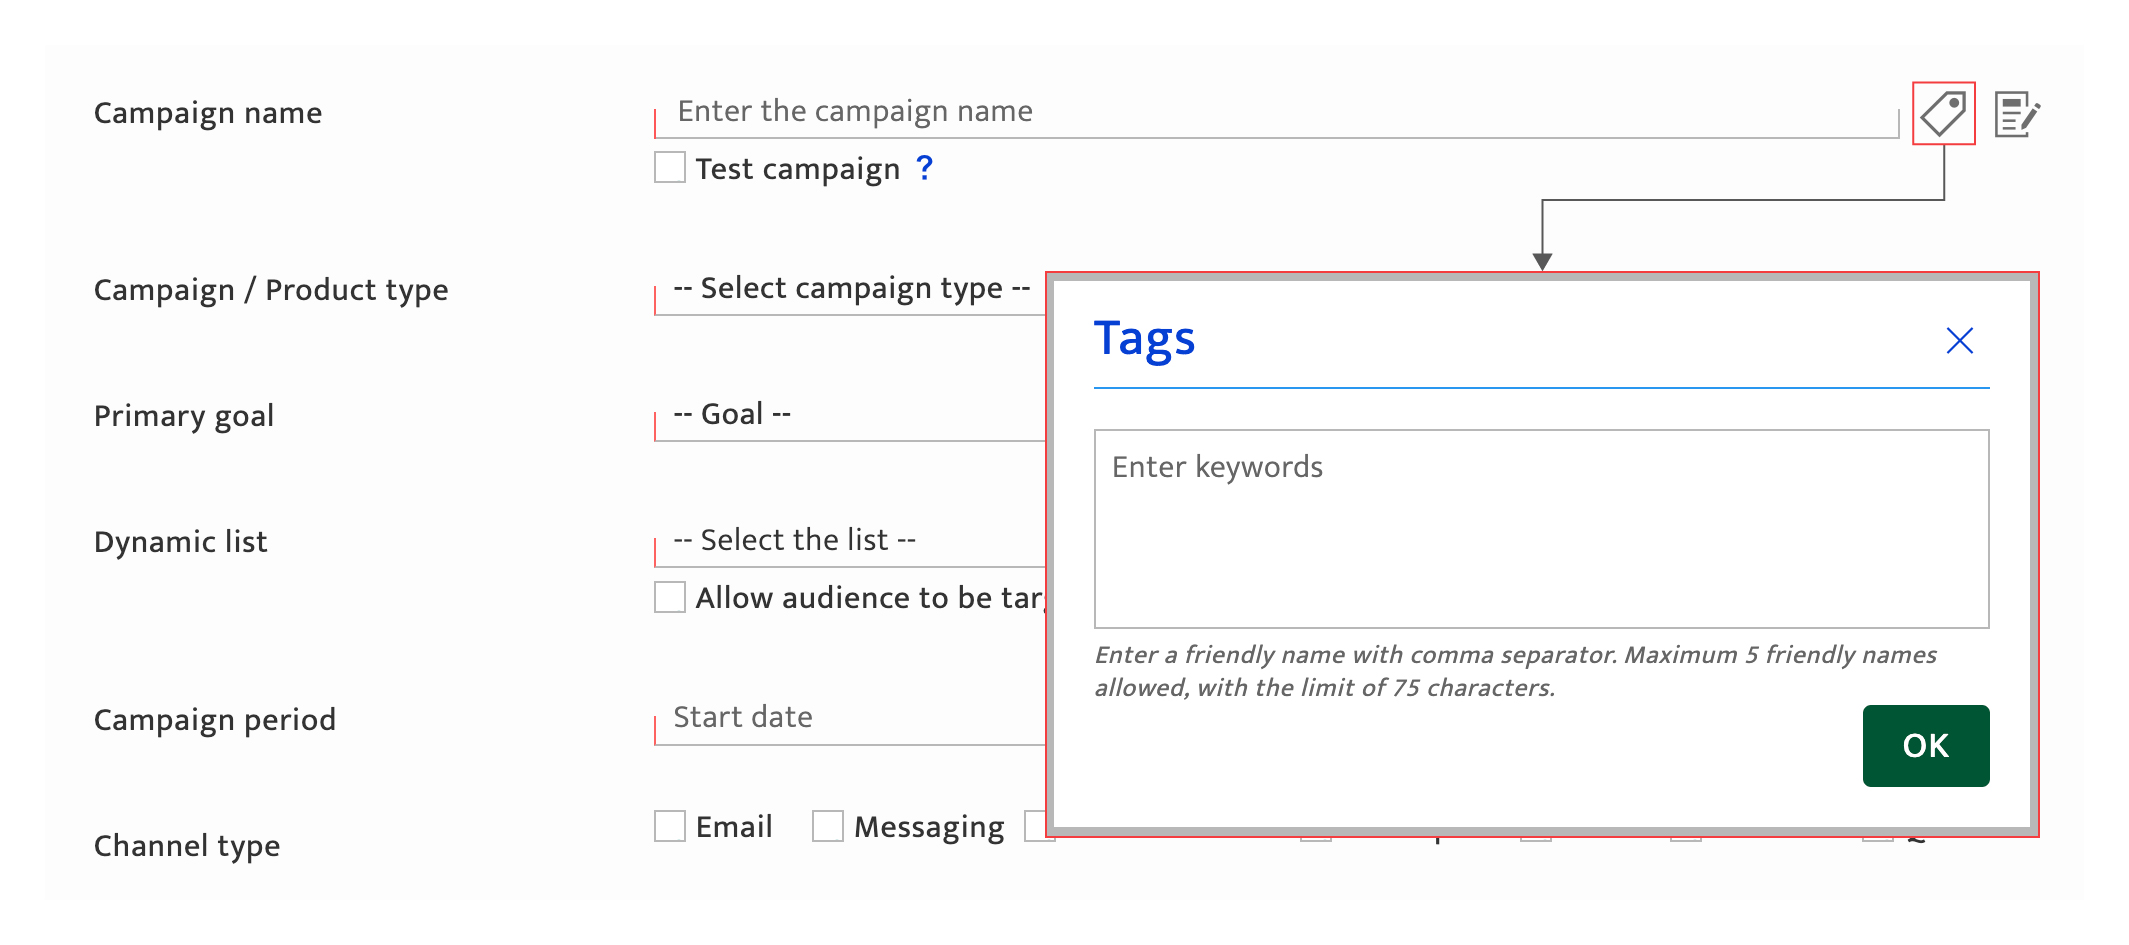
- Set the communication name to be an easily recognizable name that will be used in the communication List, Reporting, the Dashboard, and Analytics. You can use up to 50 characters, including a combination of numbers, text, and special characters.
- Use communication tags to identify or search communications in the communication list. This information is optional. Click on the tag icon and enter keywords/phrases for the communication with comma separators.
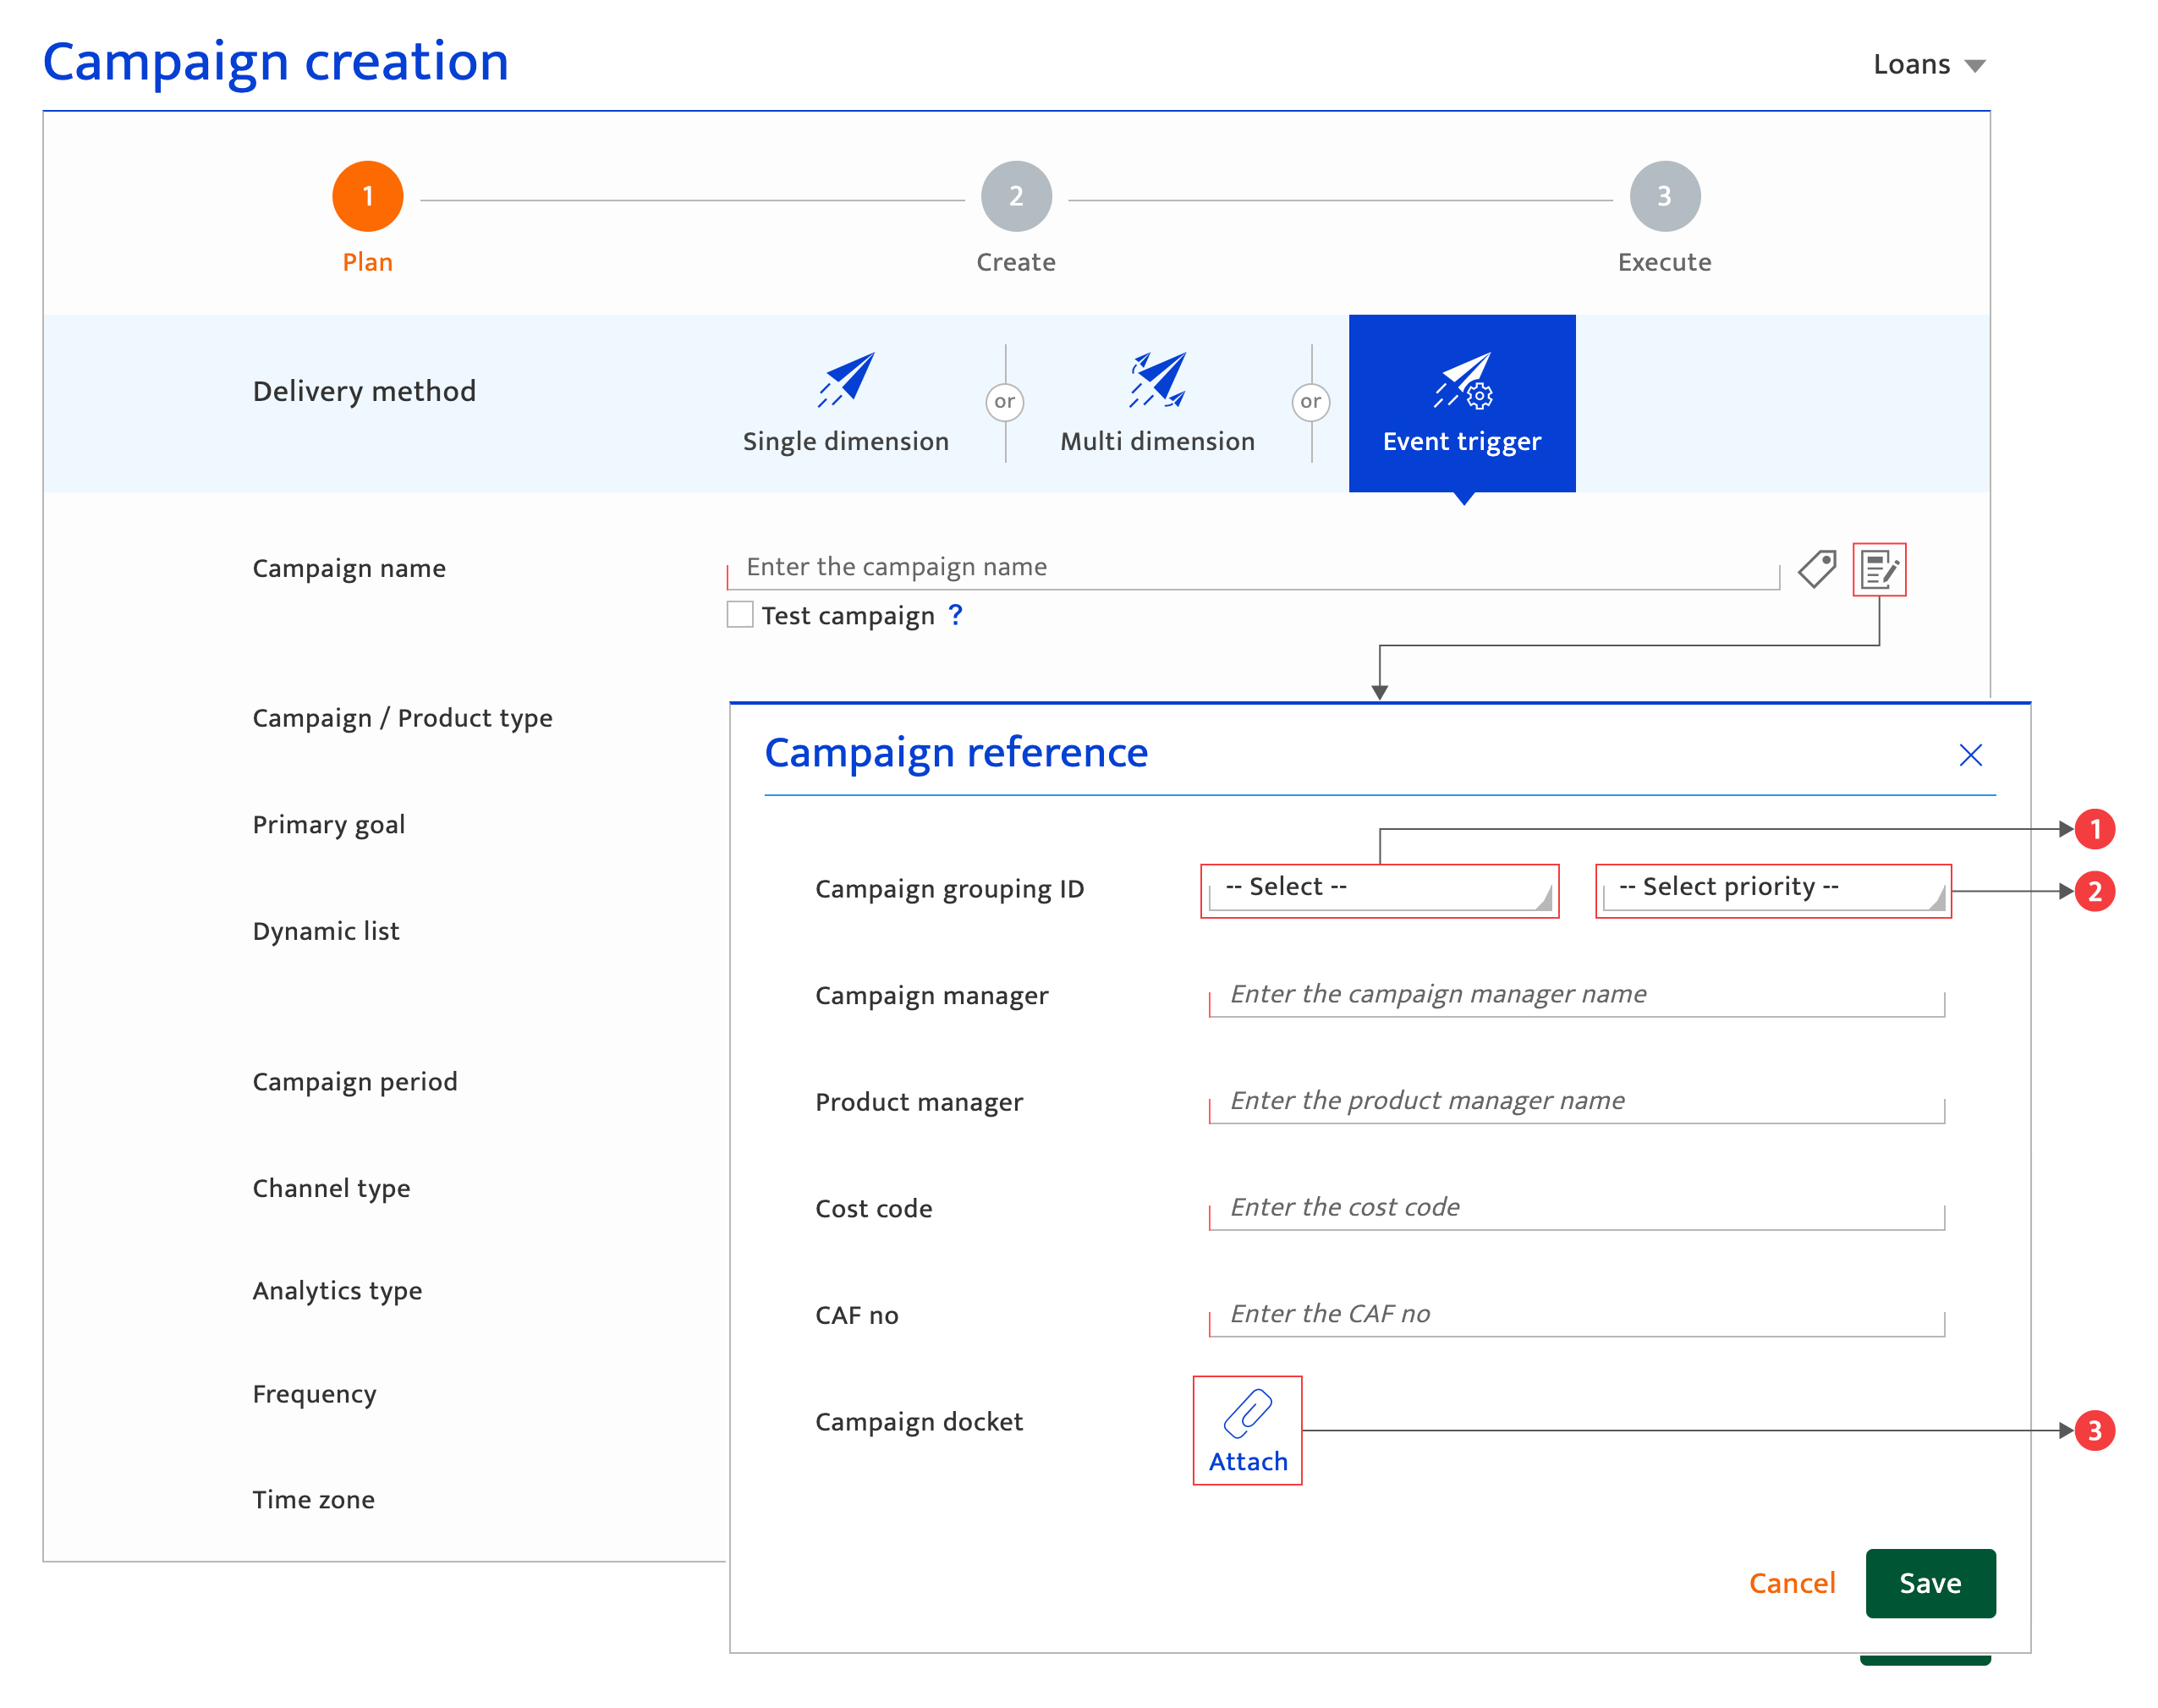
- Create communication reference information to record information for your internal purposes. This information is optional. You can enter a maximum of seven fields of information. Information on up to 5 brands specified alphanumeric fields can be captured as well. these fields have to be defined during on-boarding.
Two fields automatically provided are:- communication grouping ID
- Priority
Using the Automatic Fields#
- Input the communication grouping ID to group multiple communications under a single umbrella communication. You might run multiple communications for Christmas and group them under a single ID for reference. To set the priority:
- Select the relevant communication grouping ID from the drop-down list, or Create a new communication grouping ID by clicking on "New grouping ID".
- Set the priority using the drop-down list to define the order in which the communications are to be sent within a Grouping ID.
- Attach one communication docket of any type for internal information purposes (e.g. a communication manager attaching checklist document for reference)
- Click on the Attach icon and upload.
- Tick the test communication checkbox if this communication is a test communication. If this is enabled then communication analytics will not be generated for this communication and the communication's performance will not affect the communication dashboard report.
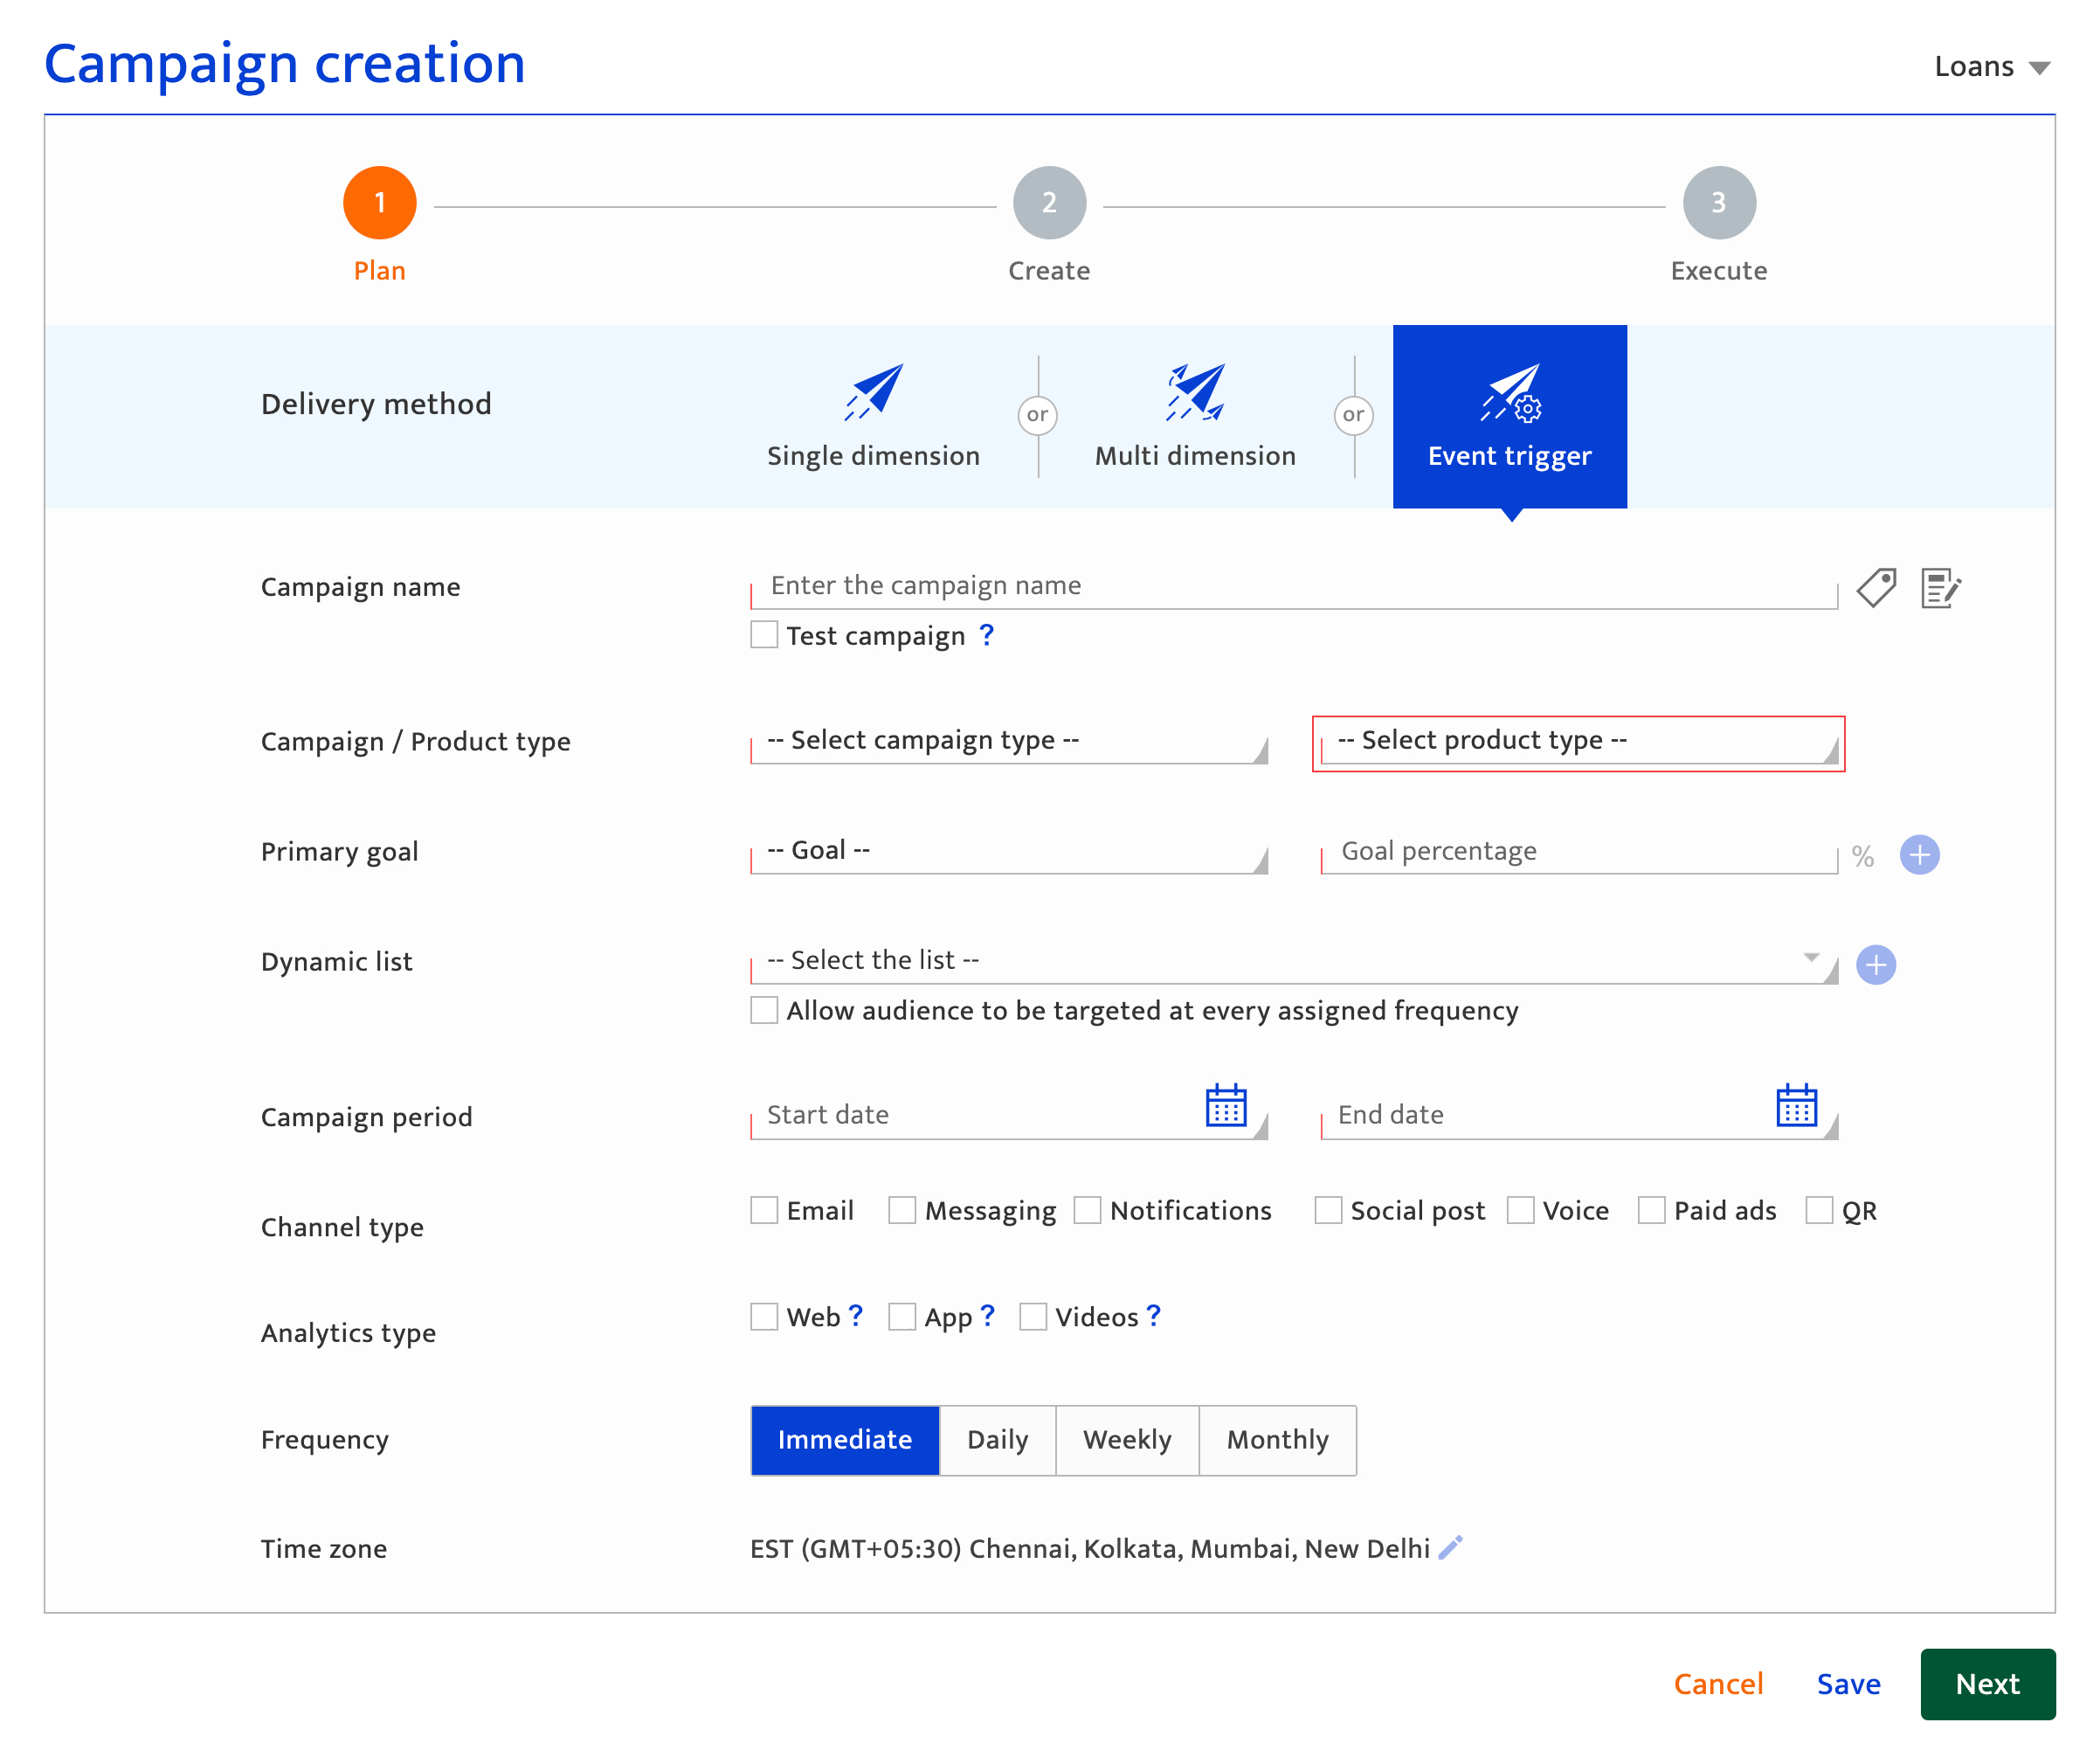
- Select the communication type from the drop-down list. communication types are set during on-boarding.
- Select the product type from the drop-down list.
- Product types are set during on-boarding.
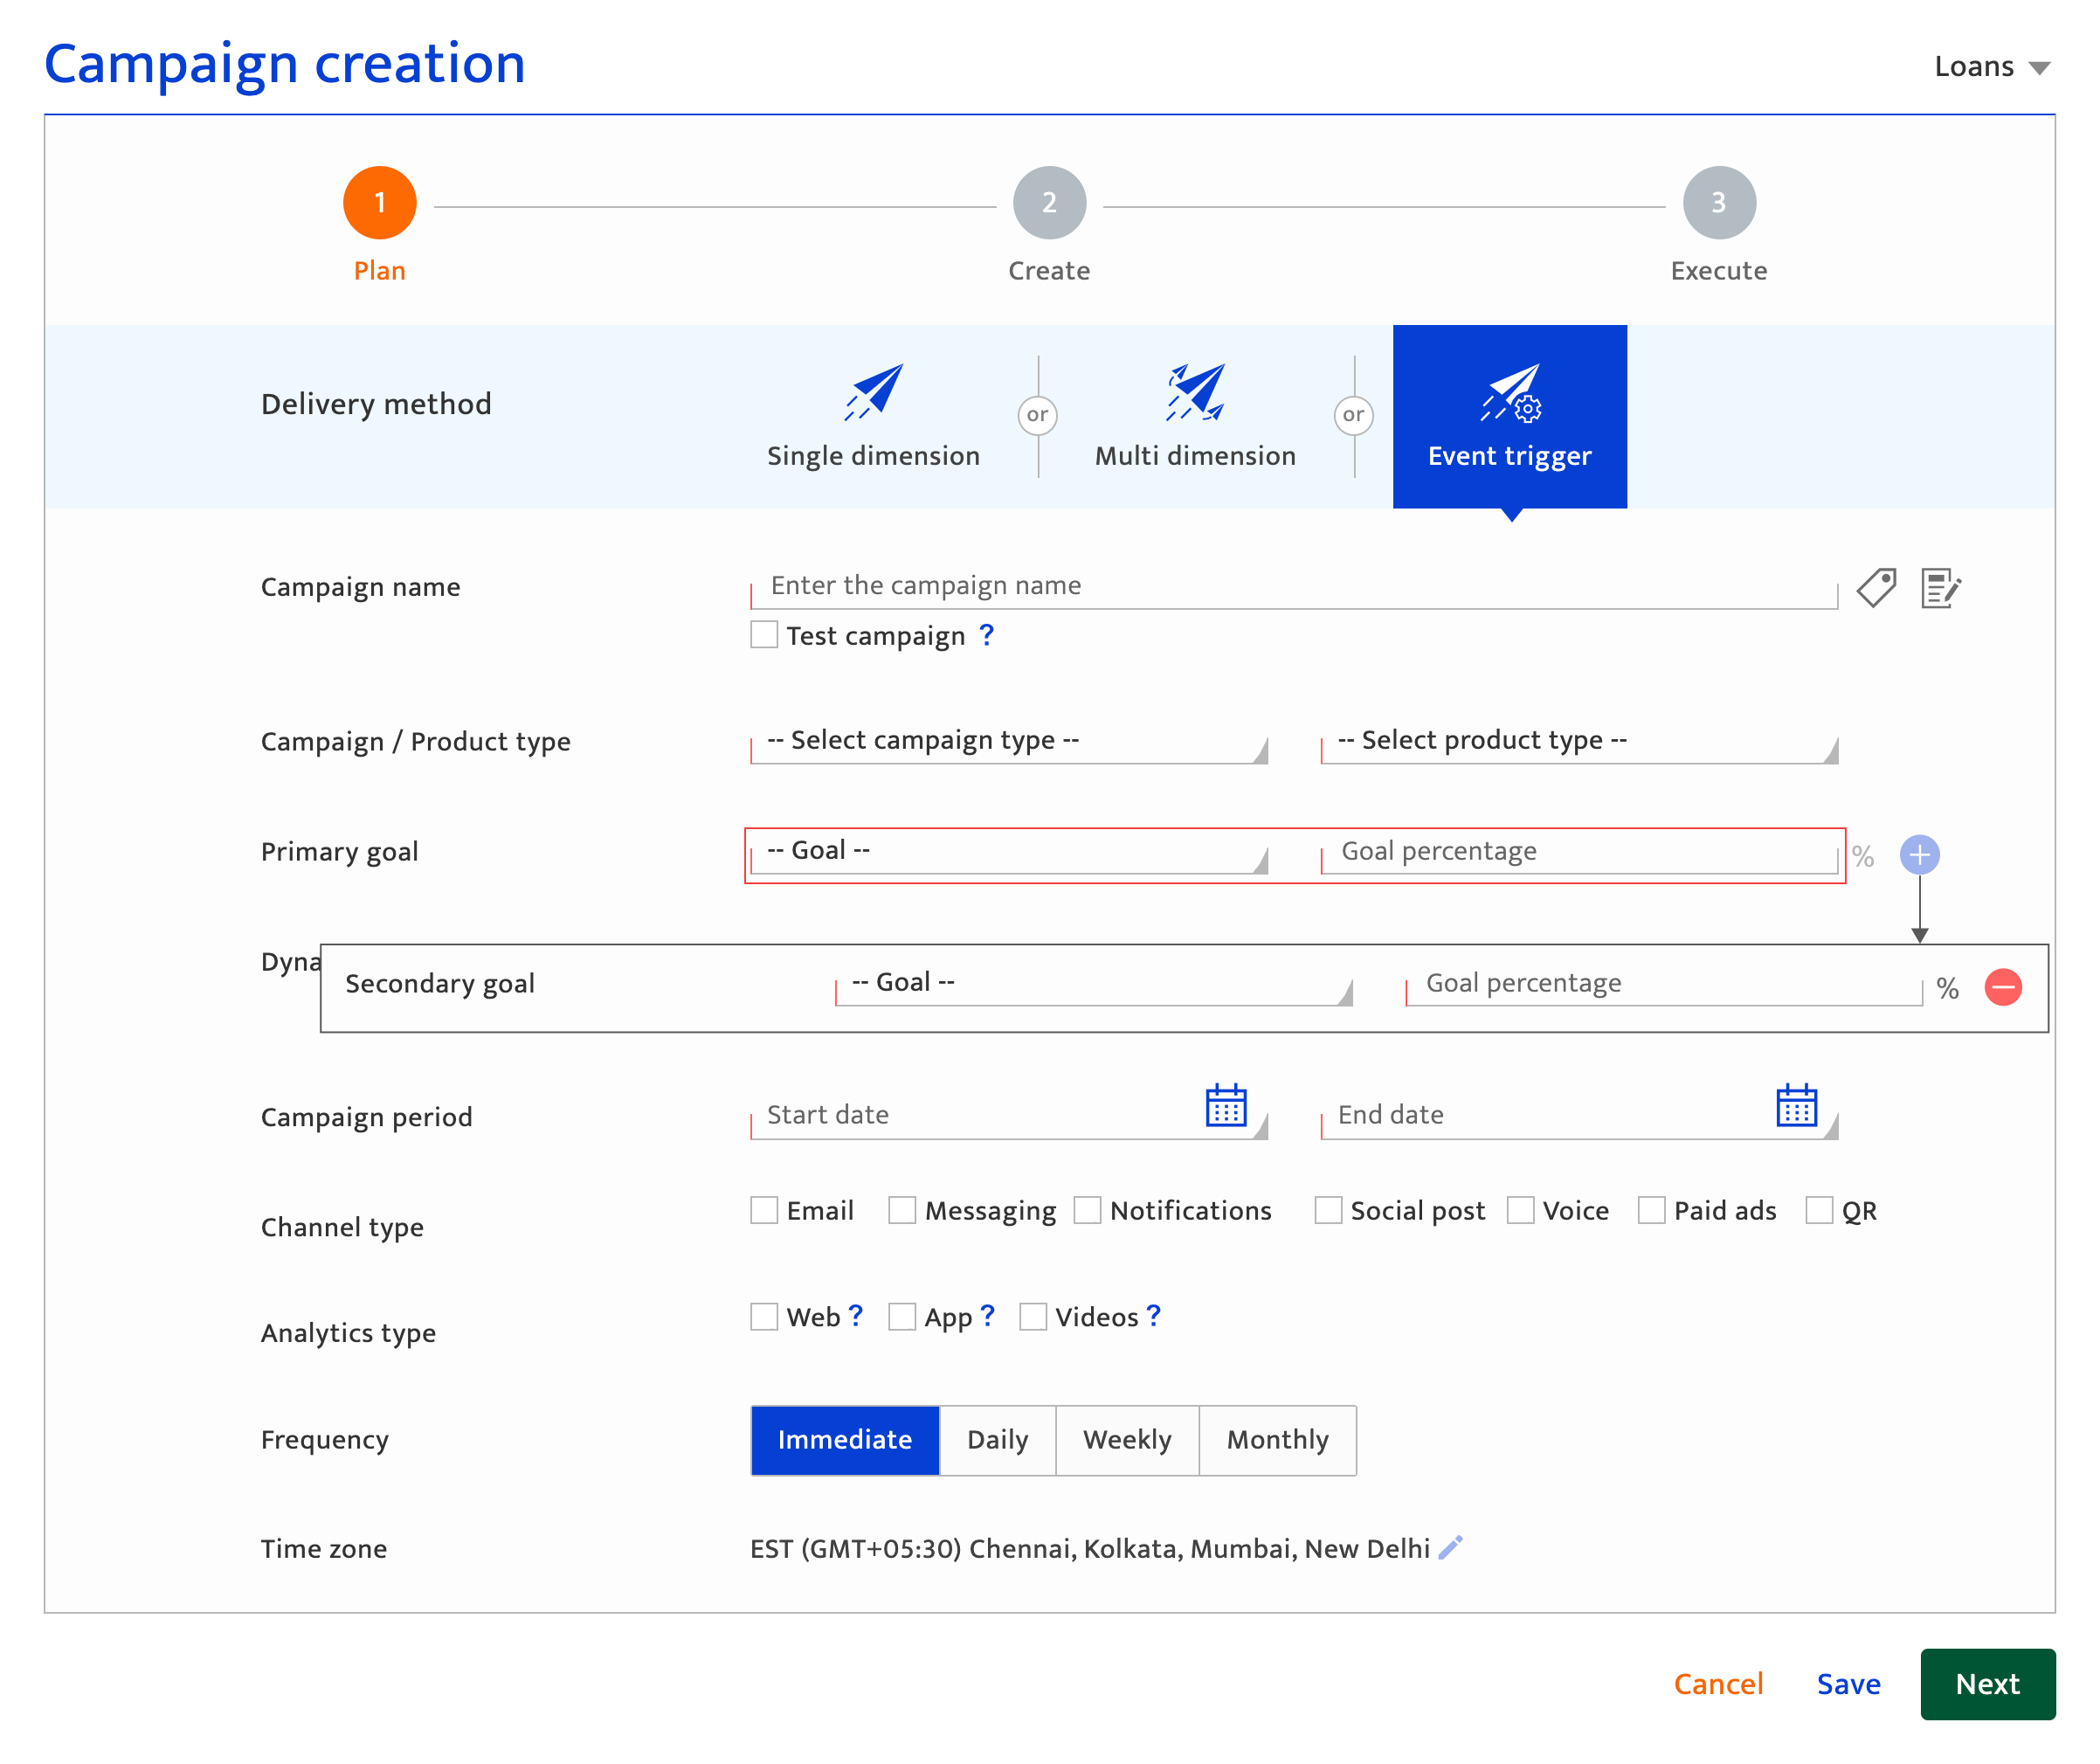
- Set the primary goal to be used to measure communication performance and success. The goal is used for benchmarking purposes as well as for descriptive, predictive and prescriptive analytics. Performance against this goal will be displayed in the Dashboard, as well as in the analytics for that communication. A secondary goal can be defined as well. The secondary goal is not used on the dashboard or to assess performance against target. The secondary goal is used by Resul to report as part of the communication analytics.
To set the primary goal:- Select one of the metrics to be used: Reach, Engagement, or Conversion from the drop-down list.
- Enter the goal percentage(s) being targeted.
- Select the conversion types from the drop-down if conversion is set as the primary goal. Conversion events need to be defined at the time of on-boarding.
To set the secondary goal: - Click on the "+" icon to set an optional secondary goal for the communication and follow the same process as the setting the primary goal.
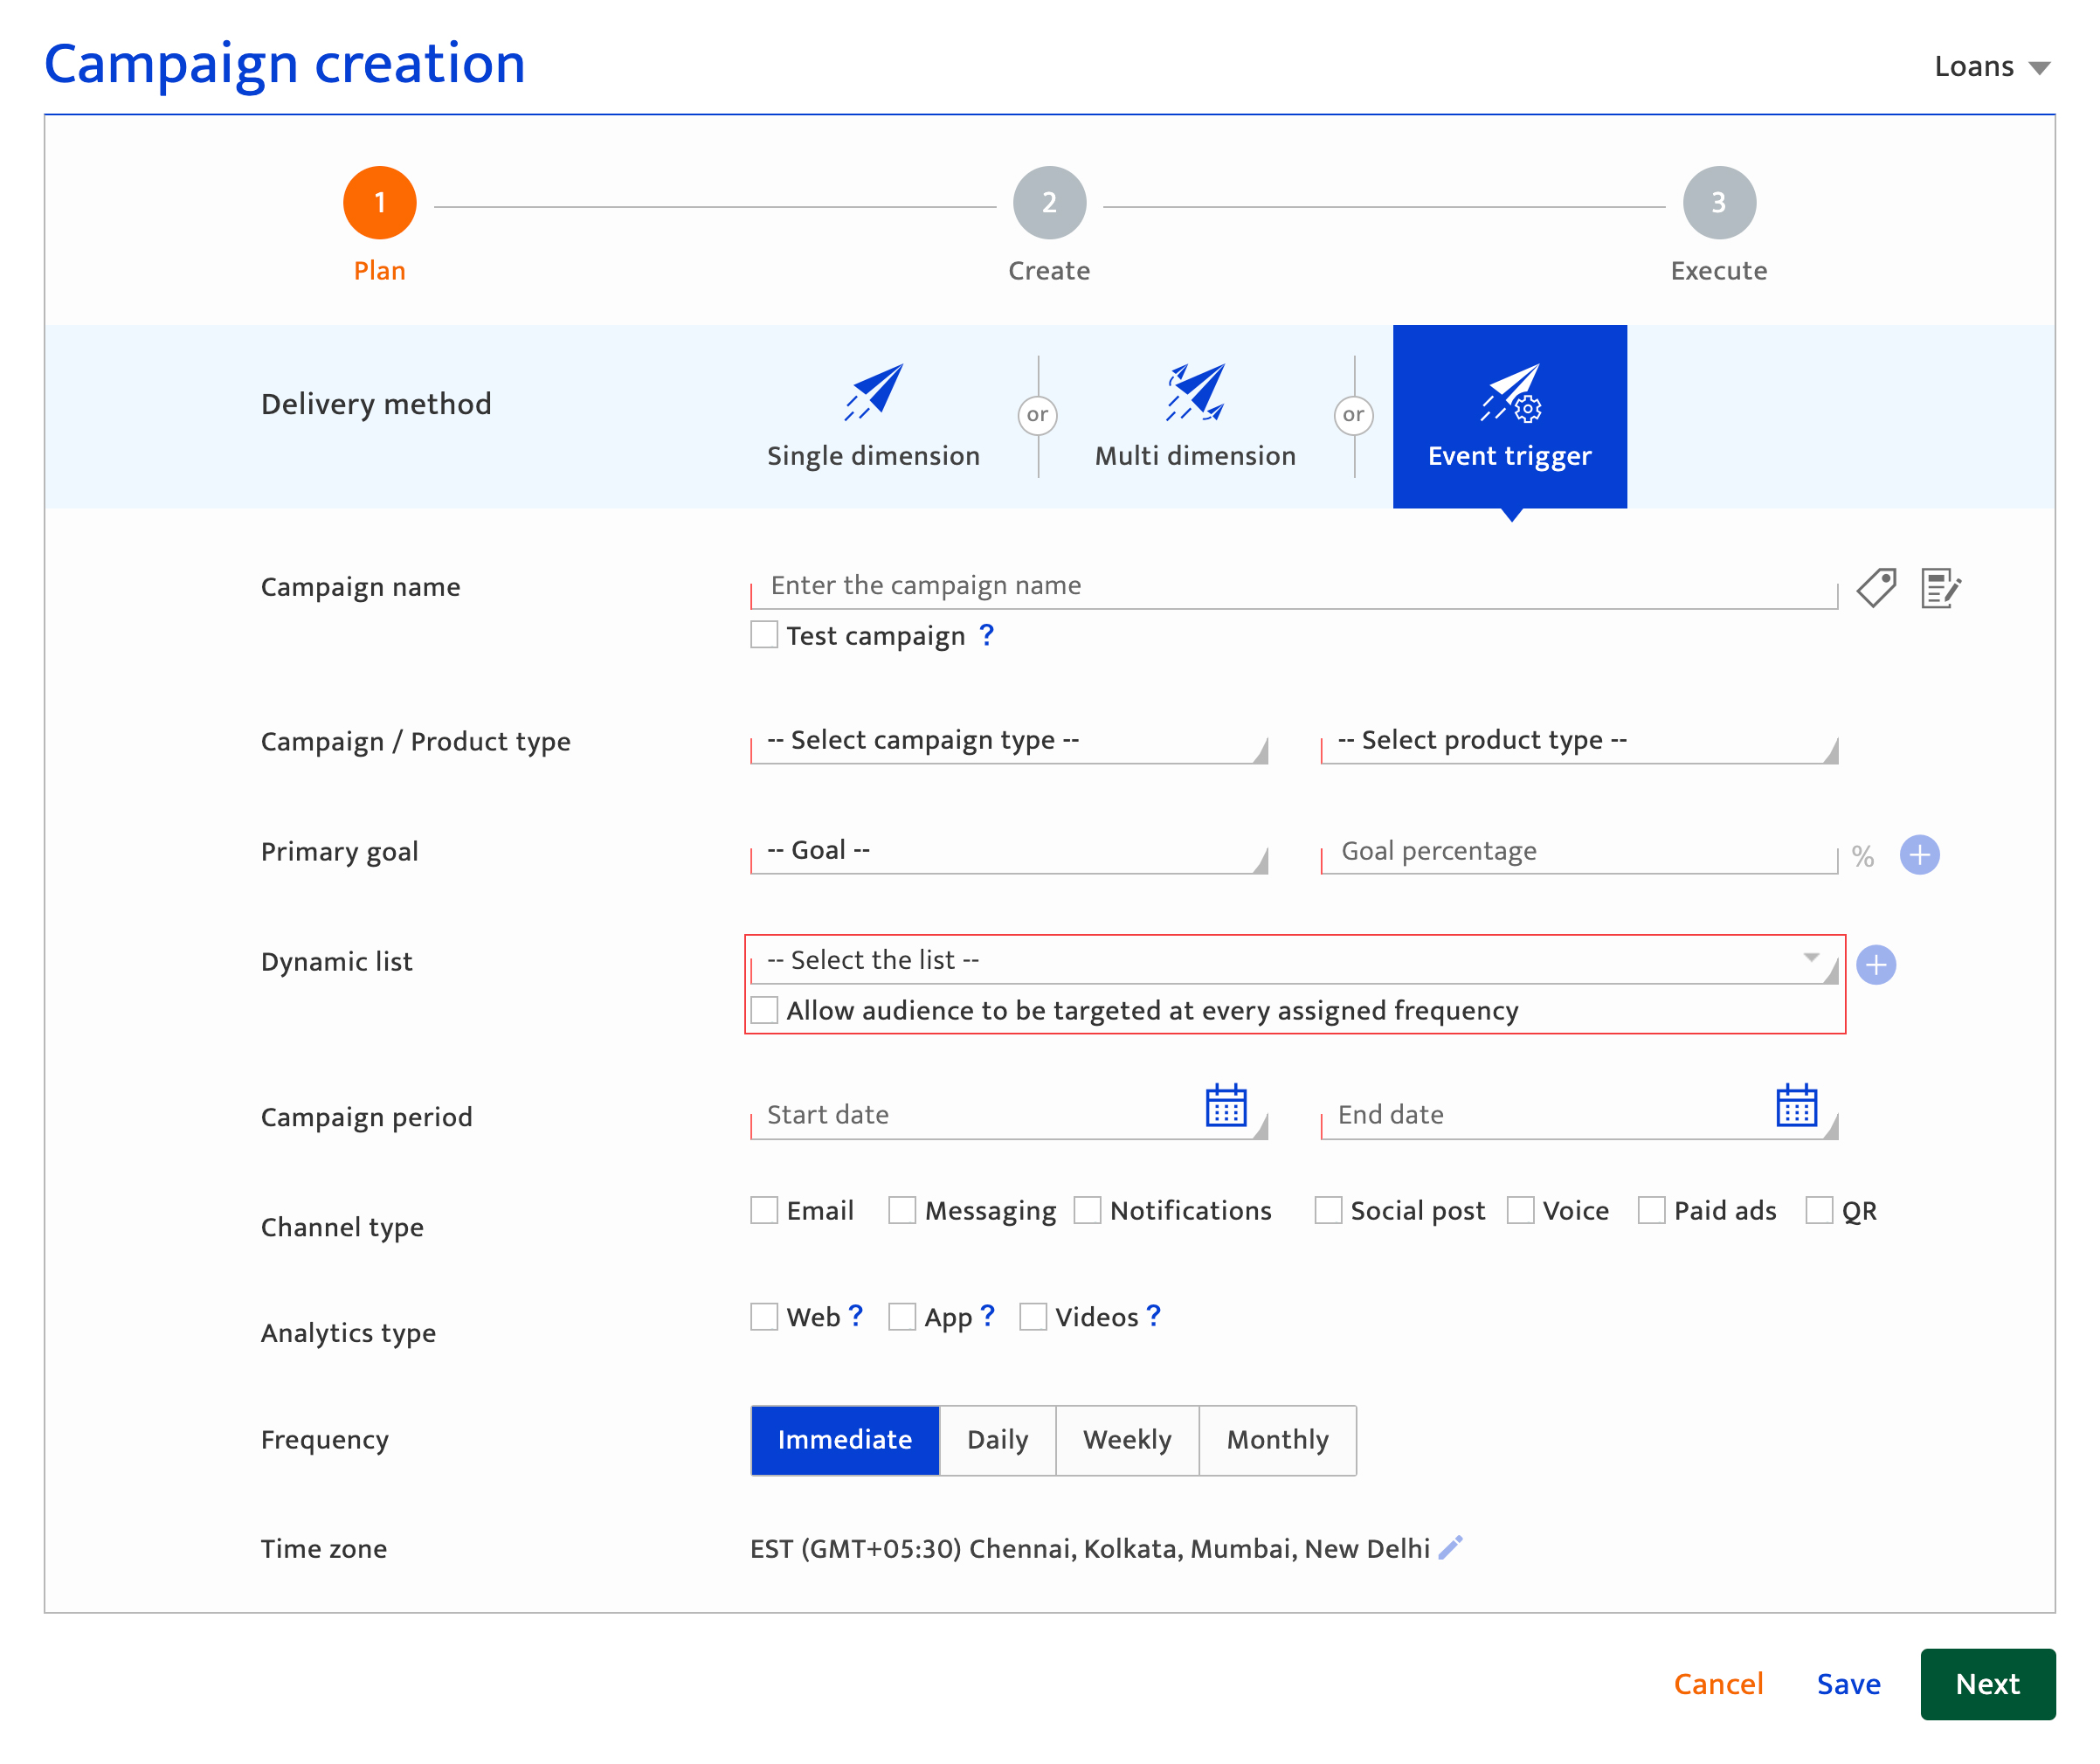
- Select the dynamic list for the communication, defined in the Audience module. Click the "+" icon to create a new dynamic list.
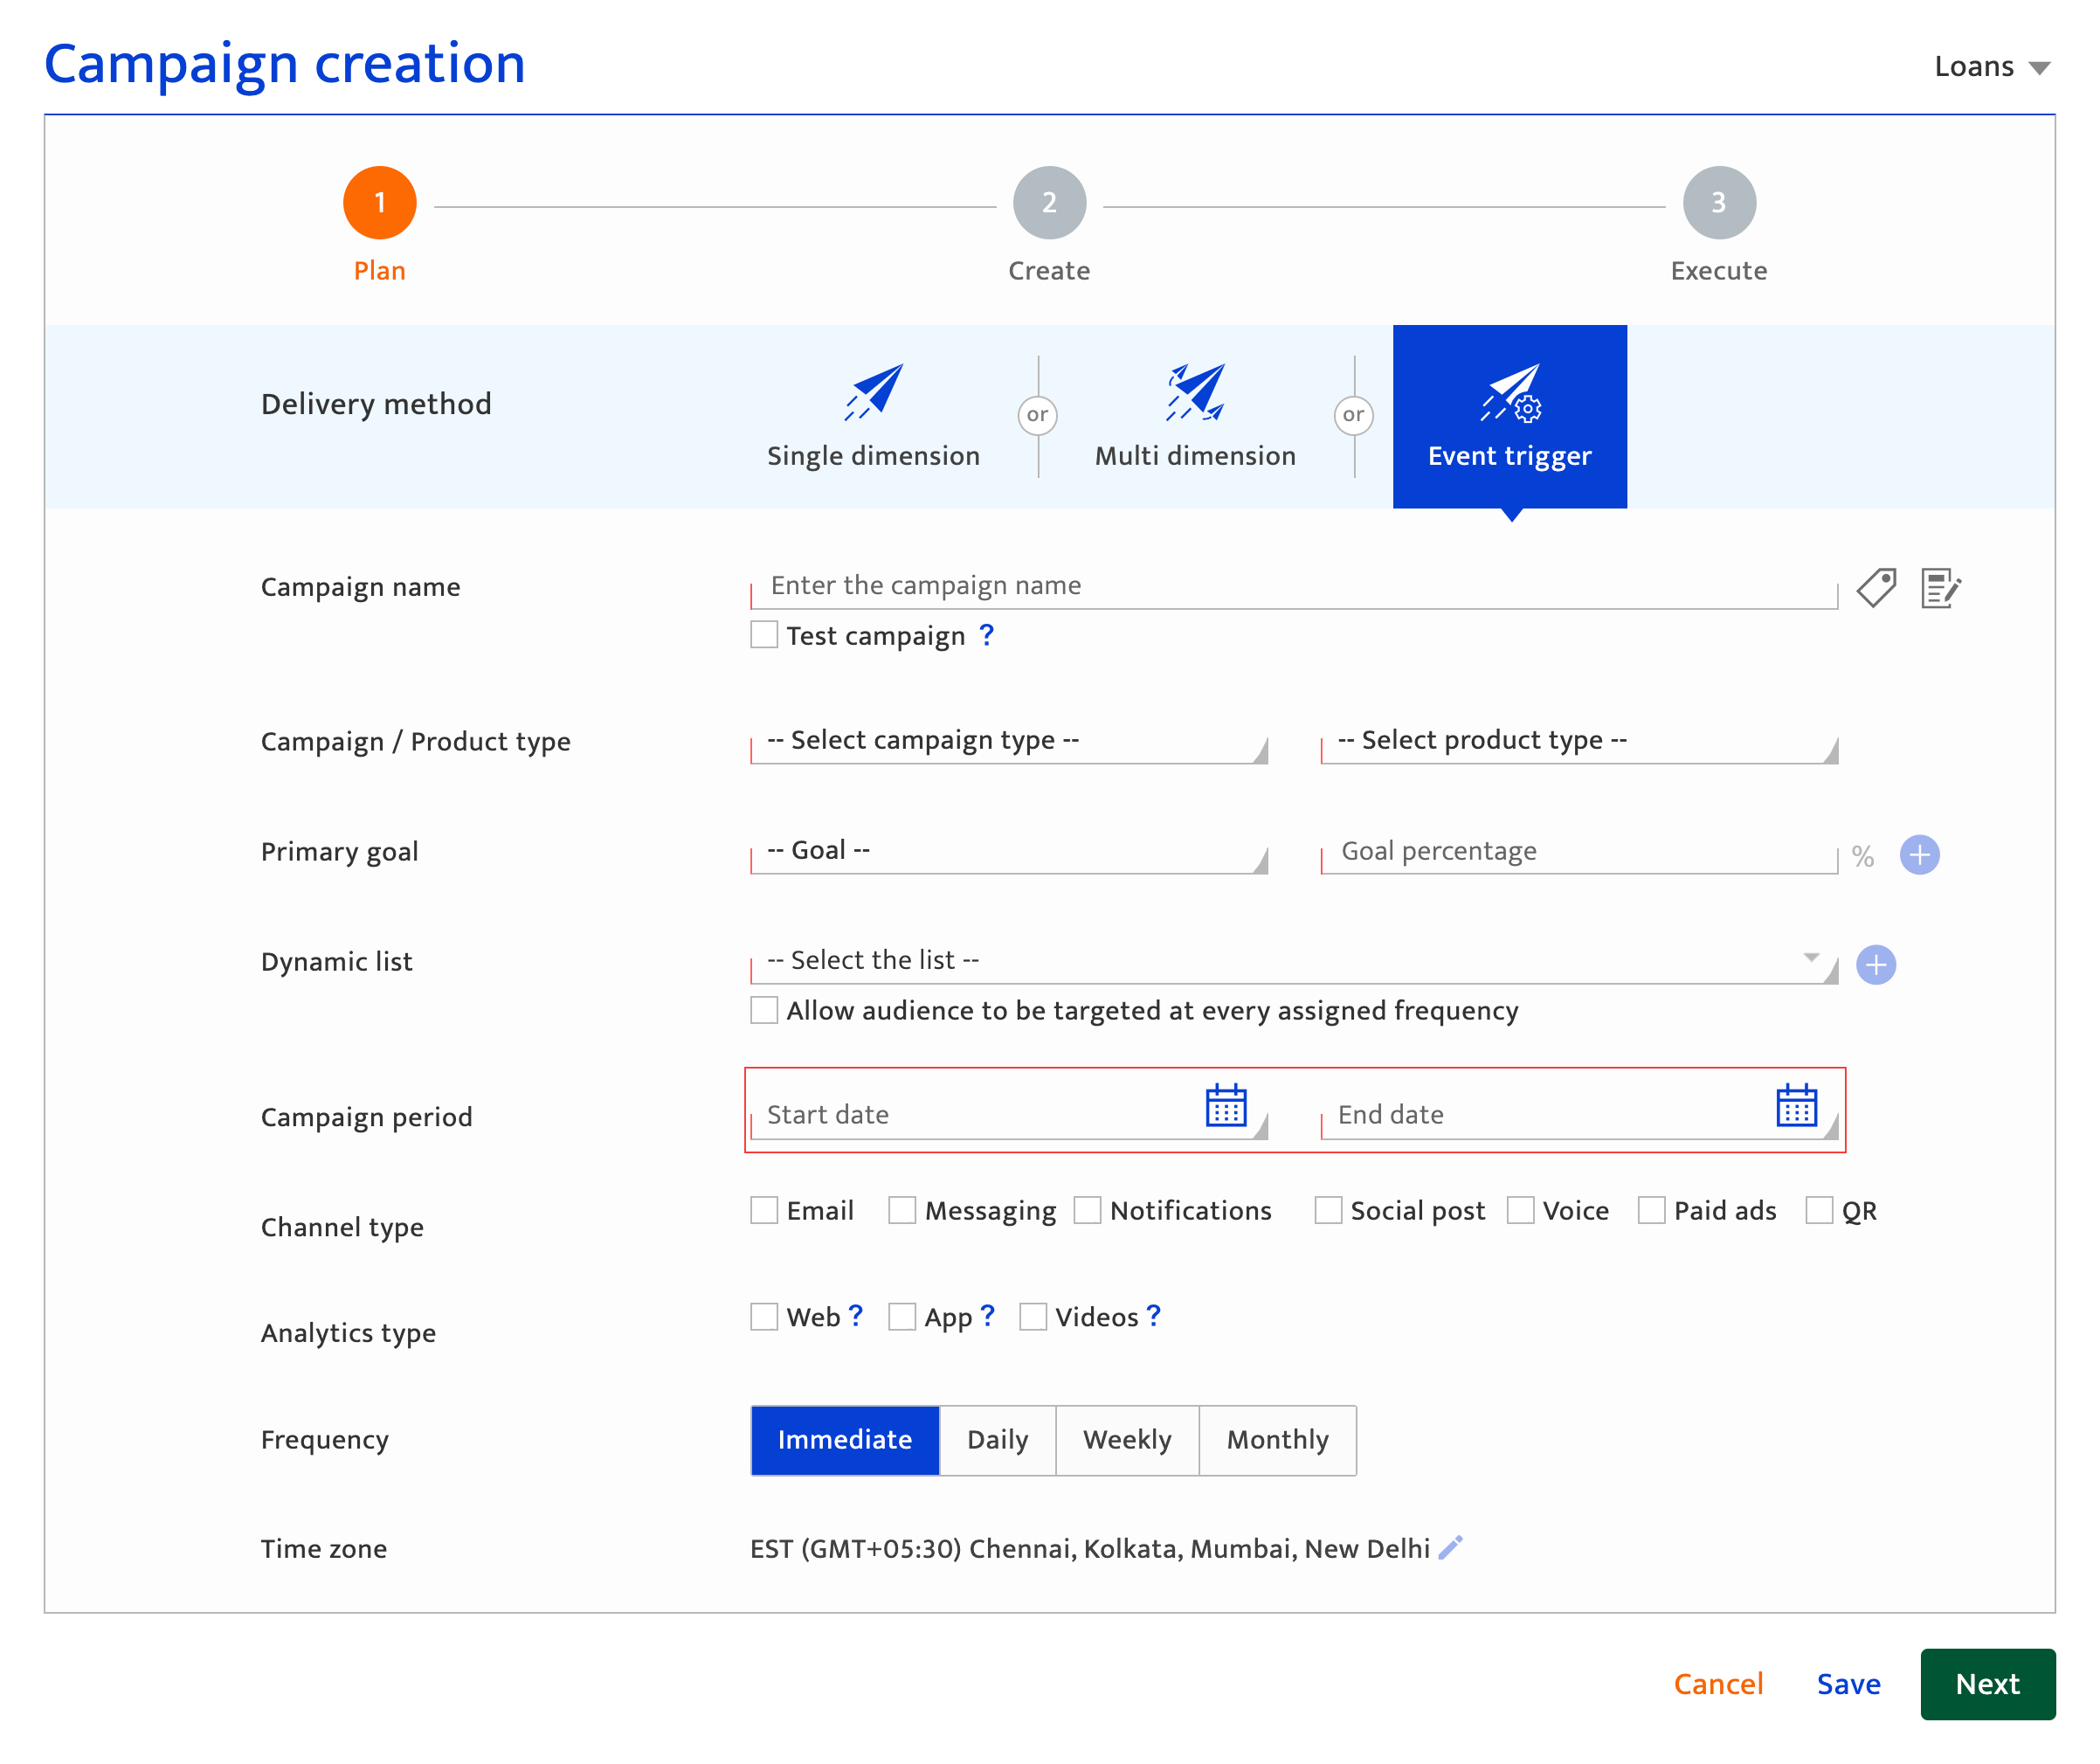
- Specify the communication period with a start and end date. The end date is the last date that analytics for the communication will be captured. Enter the details in the format displayed or use the icons provided.
- Select the channel type(s) through which you want to deliver communications.
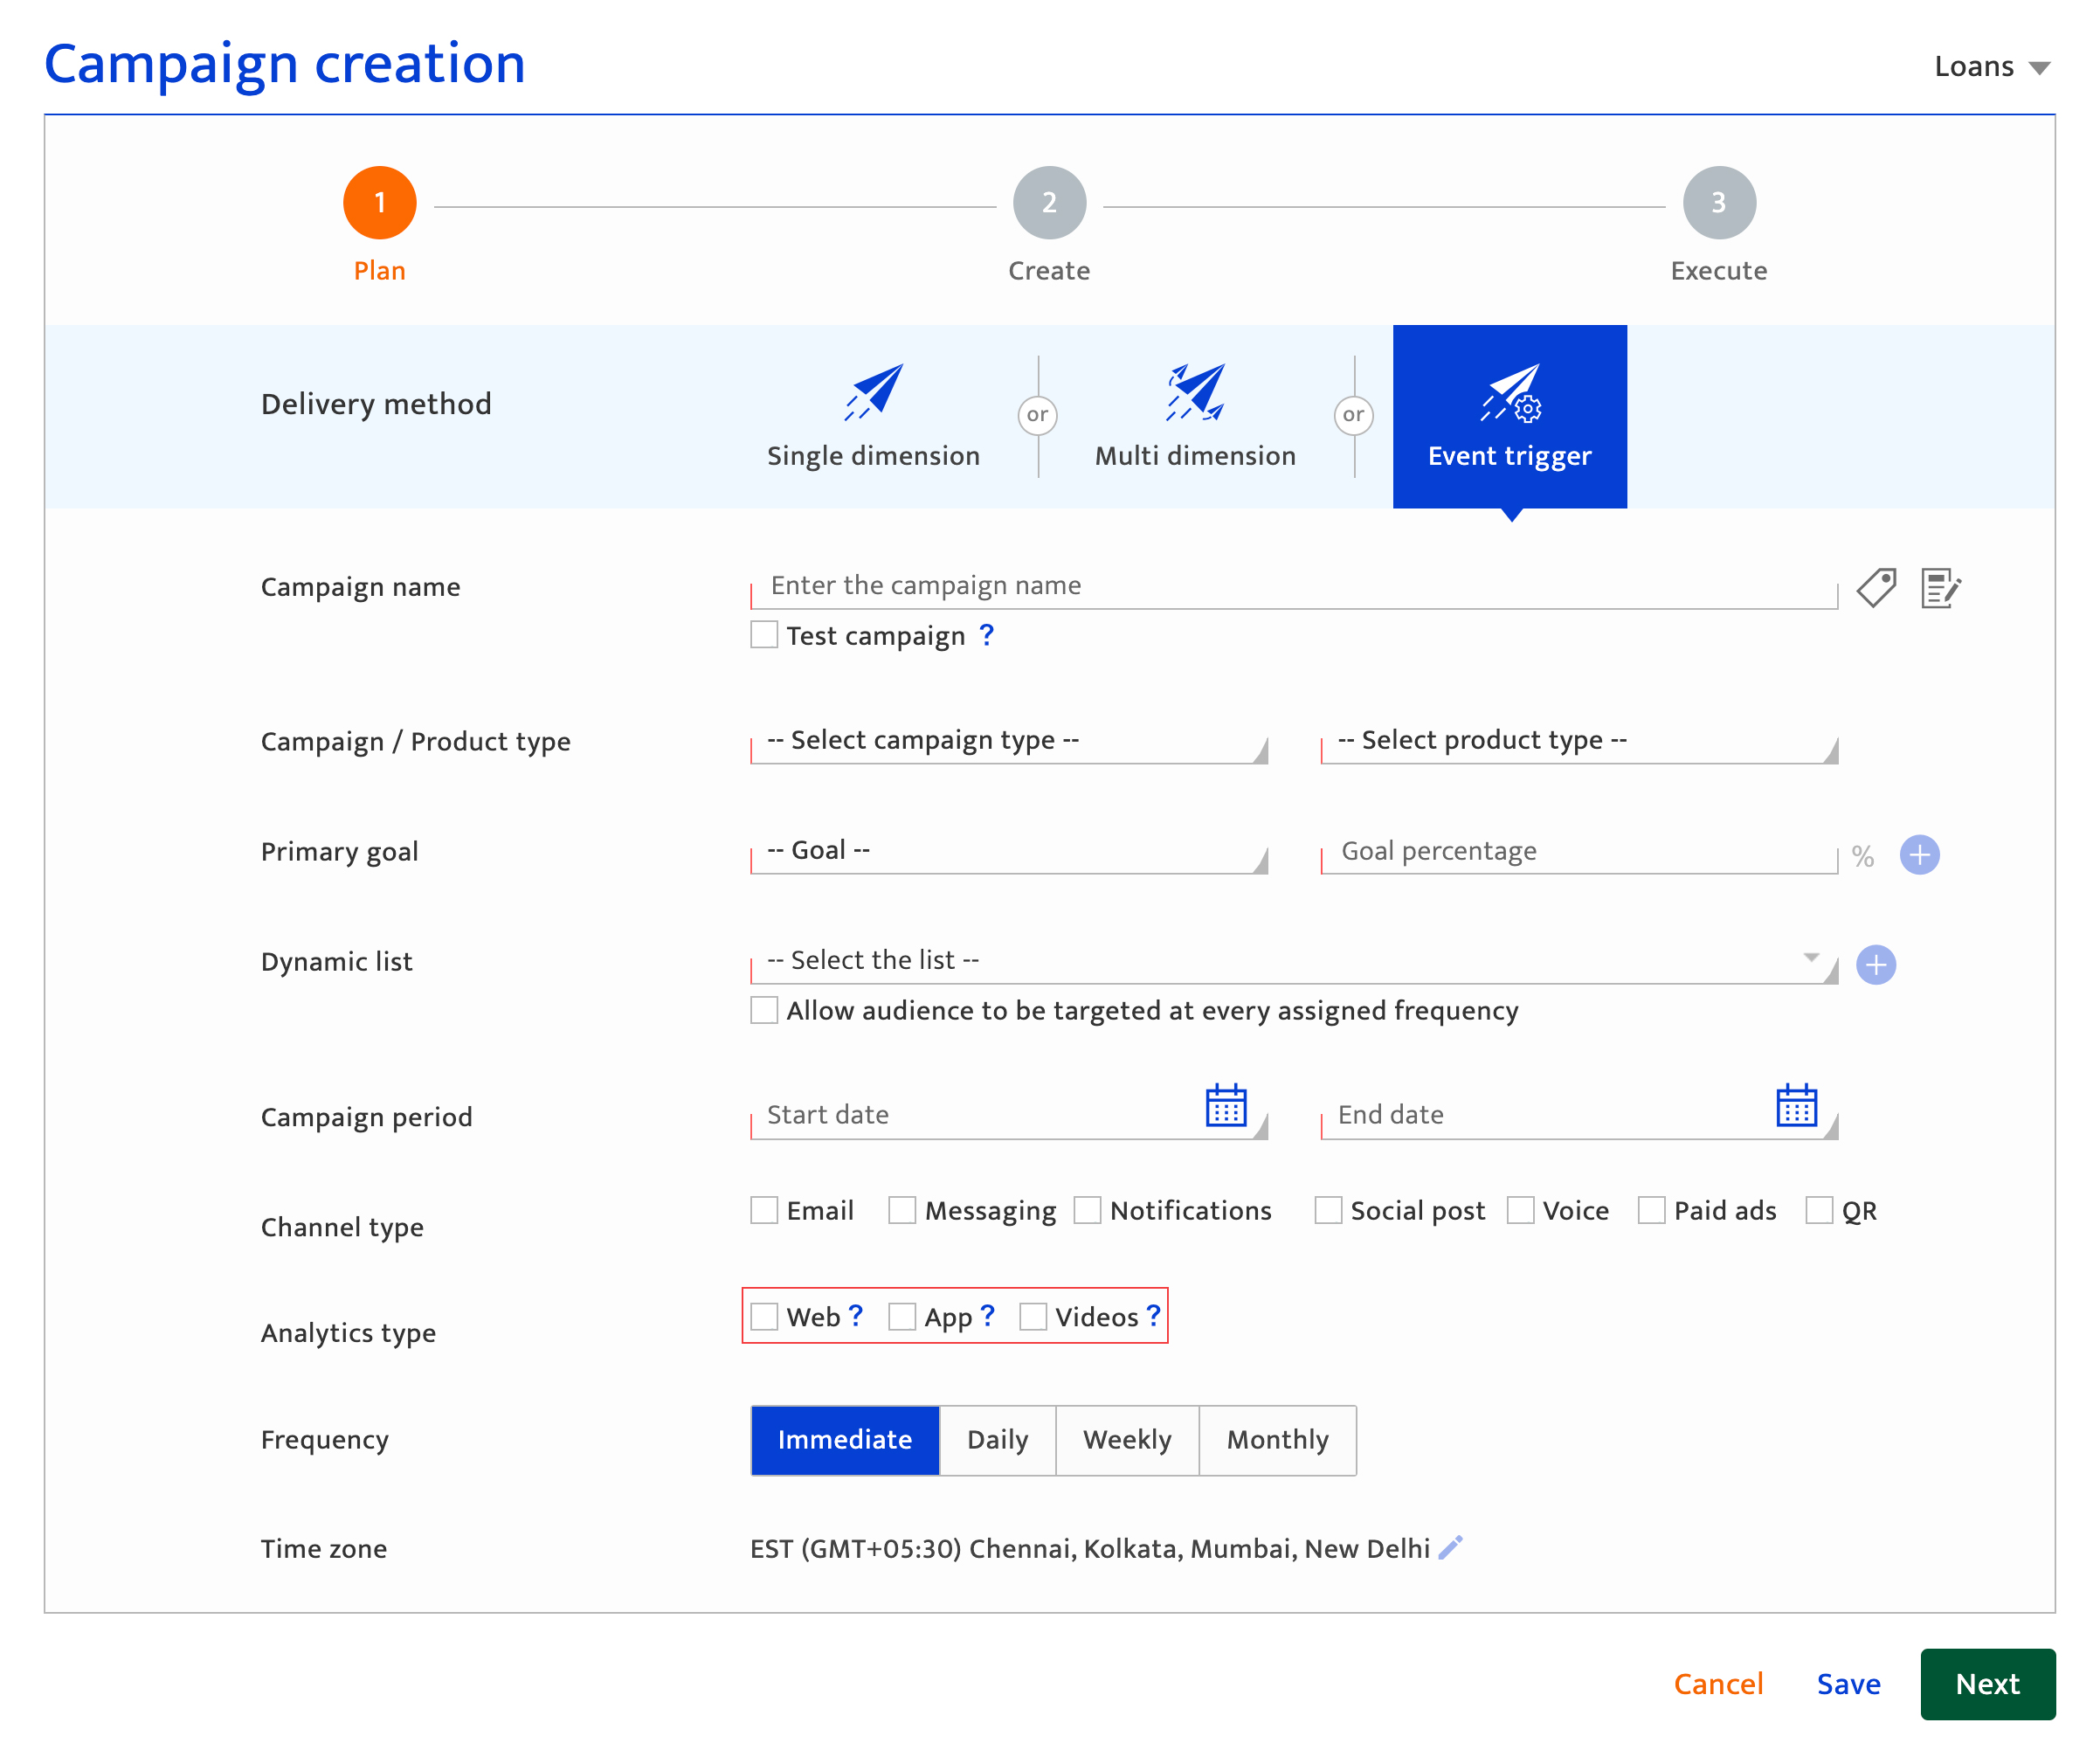
- Specify the type(s) of analytics for tracking the audience journey, taking into account the channel types selected. You can select the specific types of analytics platforms in detailed content creation. Only analytics systems previously integrated through the Data exchange–Analytics module will appear here.
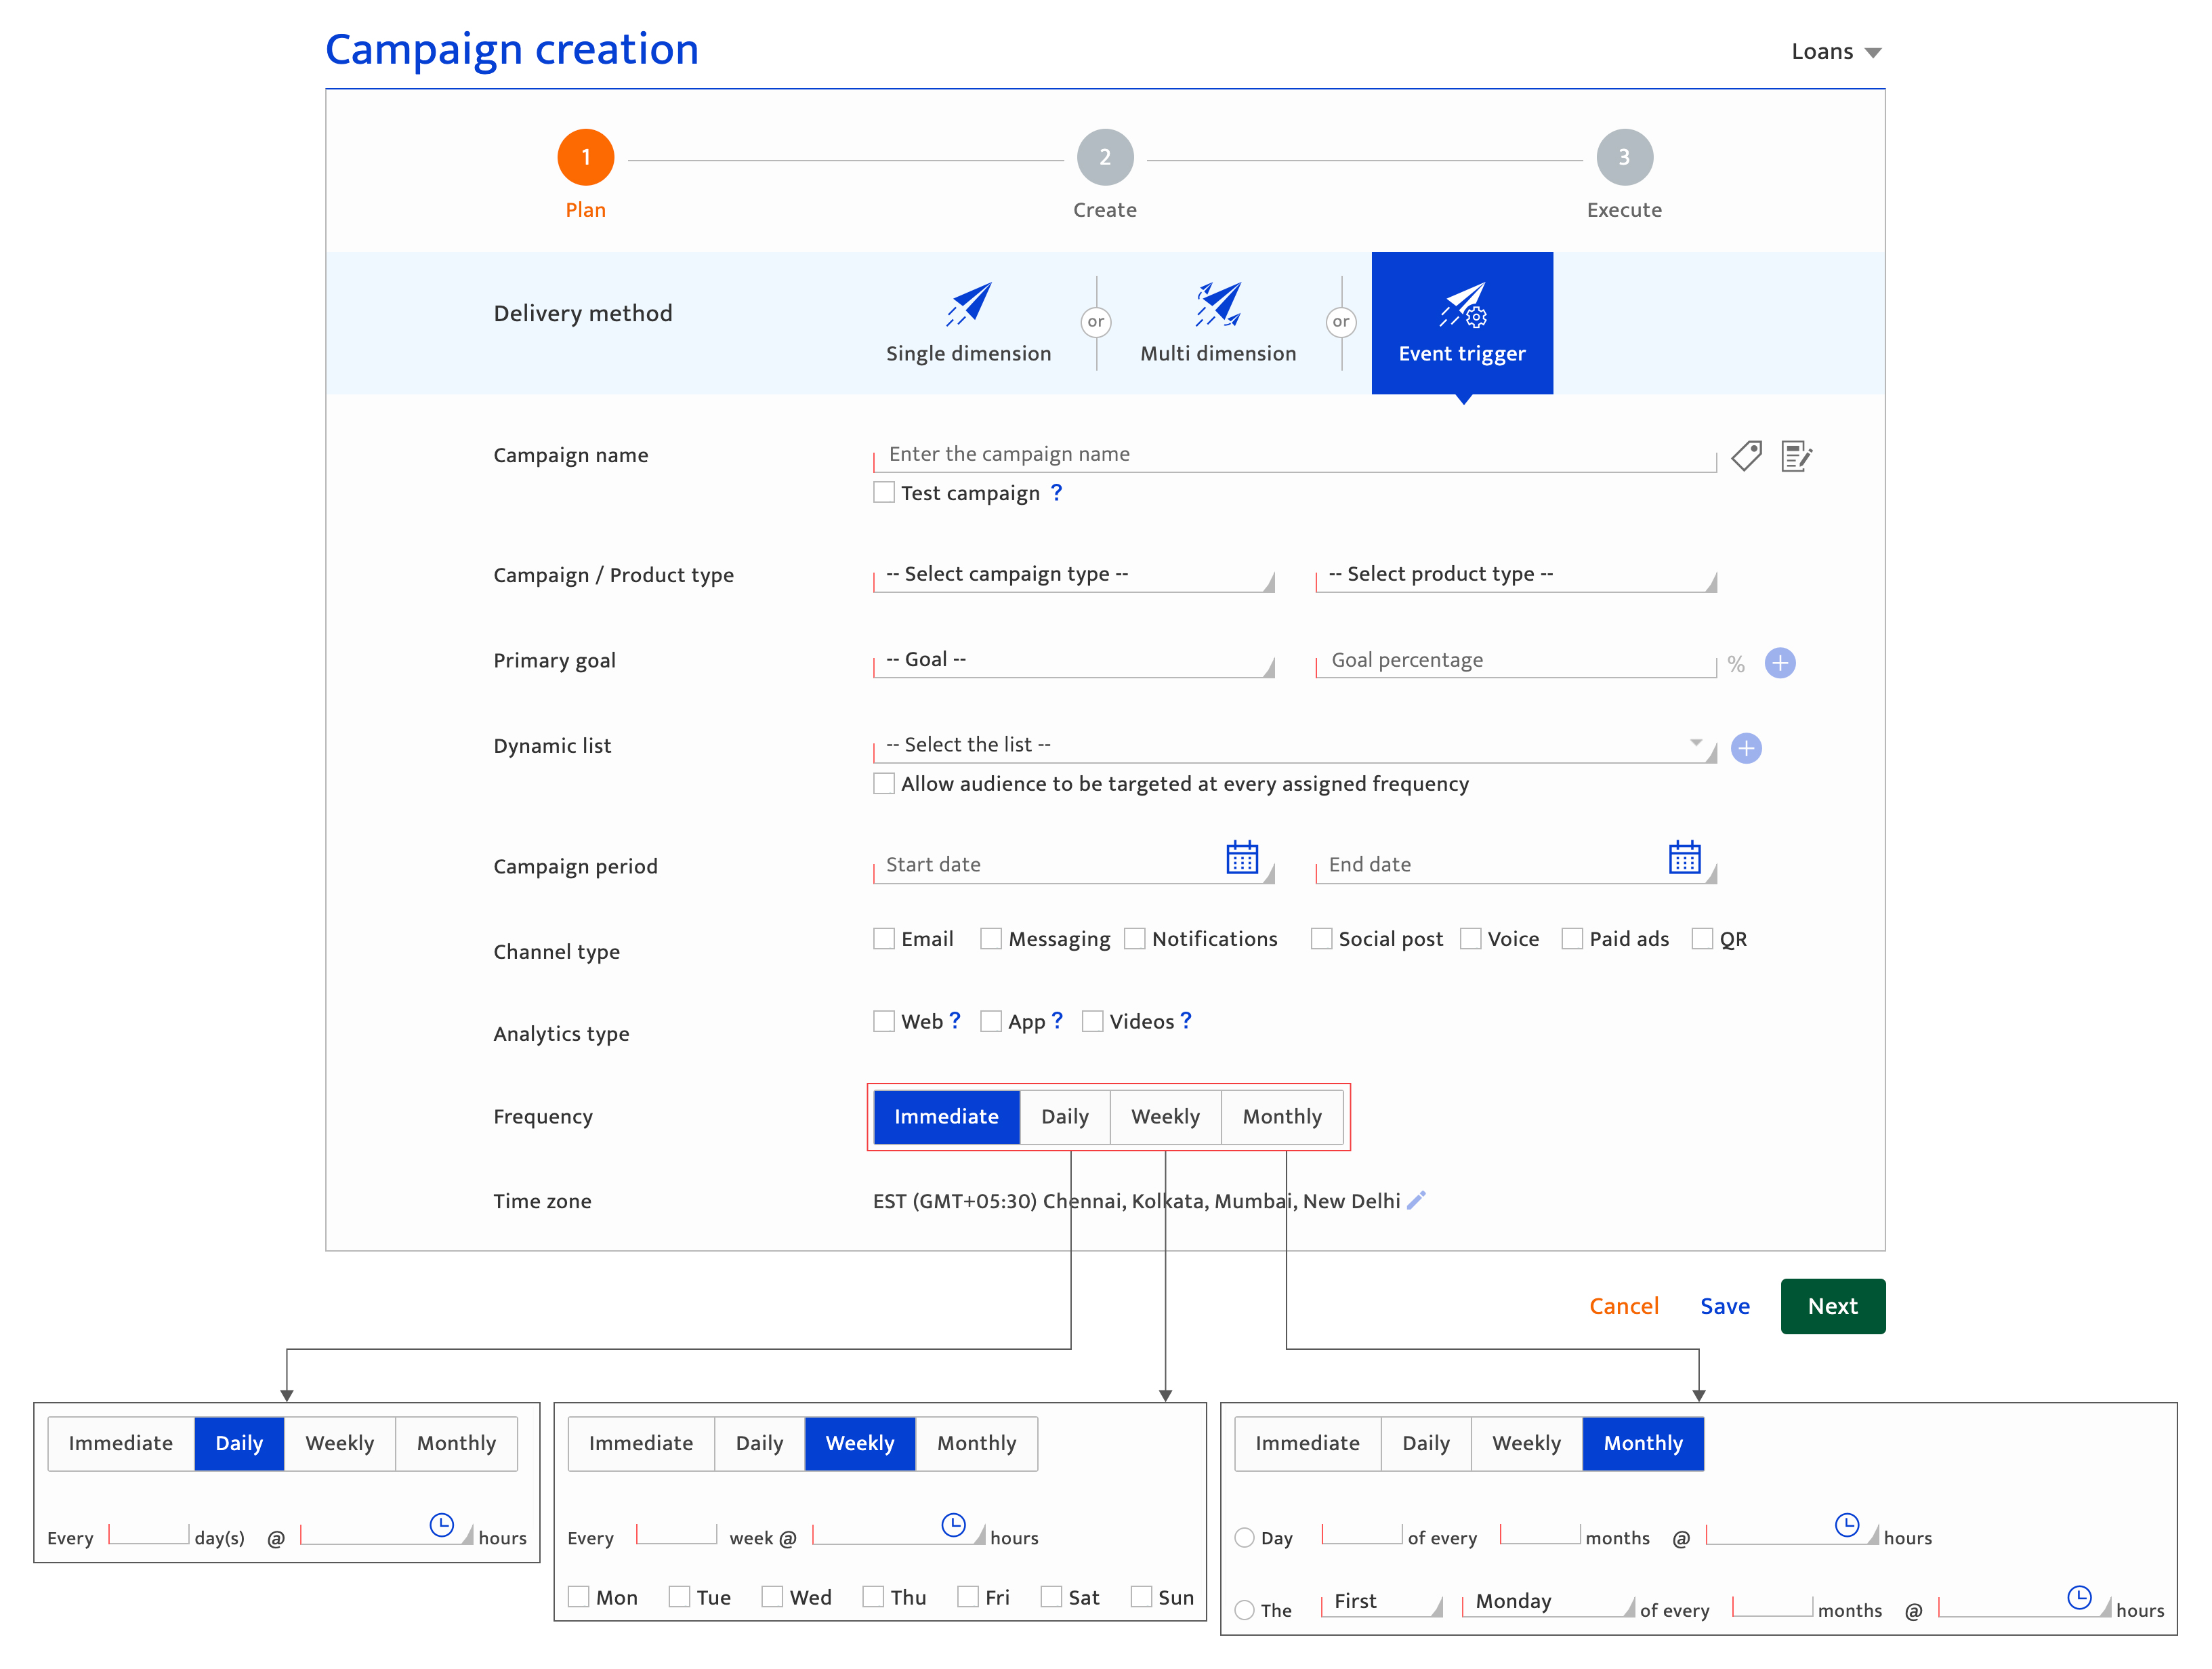
- Set the frequency at which the communications are to be sent out. Select a frequency range. Except for the "Immediate" option, additional inputs need to be provided for all other frequency options which are – Daily, Weekly, and Monthly. These inputs will determine the time of the day when and frequency at which the dynamic list is extracted. The communication communications will be sent at the same time and frequency as the dynamic list extraction.
Note: a maximum of 8 communications on the same channel will be sent to an individual from a single event trigger communication. - Select the time zone for the communication communications by clicking on the pencil icon. You can also enable daylight savings.
- Proceed to the next steps. There are 3 options to proceed:
- Click "Save" to save the current input and return to the communication List. All mandatory fields on the current screen must be completed to save successfully. The platform will highlight any missing mandatory information.
The communication will be saved as "Draft" if it is a new communication. If the user has been editing a "Draft" or "Scheduled" communication, the communication state does not change. - Click "Next" to save the current input and proceed to the next step. The following occurs:
- All mandatory fields on the current screen must be completed and the platform will highlight any missing mandatory information.
- If all mandatory screens are completed, the screen defaults to the communication Creation screen for the first channel selected for the communication. Refer to the Single-dimension modules for communication creation for more information on each channel setup.
- Click "Save" to save the current input and return to the communication List. All mandatory fields on the current screen must be completed to save successfully. The platform will highlight any missing mandatory information.
- Click "Cancel" to return to the communication list screen and discard all current input.