Target list overview
Overview#
Target lists are communication distribution lists extracted from the audience database based on a set of selected data attributes. Target lists can be used in Single dimension and Multi-dimension communications. This tab in the Audience module enables the users to perform following functions.
- Management of target lists
- Downloading target lists
- Adding new target lists
Navigating to target lists#
- Click the Audience module.
- Click the Target lists tab. The Target lists screen will be displayed.
This screen displays the summary information of the most recently created target lists. From this screen, users can perform the following actions.
View target lists#
Go to Audience Module >> Target lists.

This screen displays the list of previously created target lists in grid format. Users can switch the view from grid format to list format using the toggle key.
Grid view#
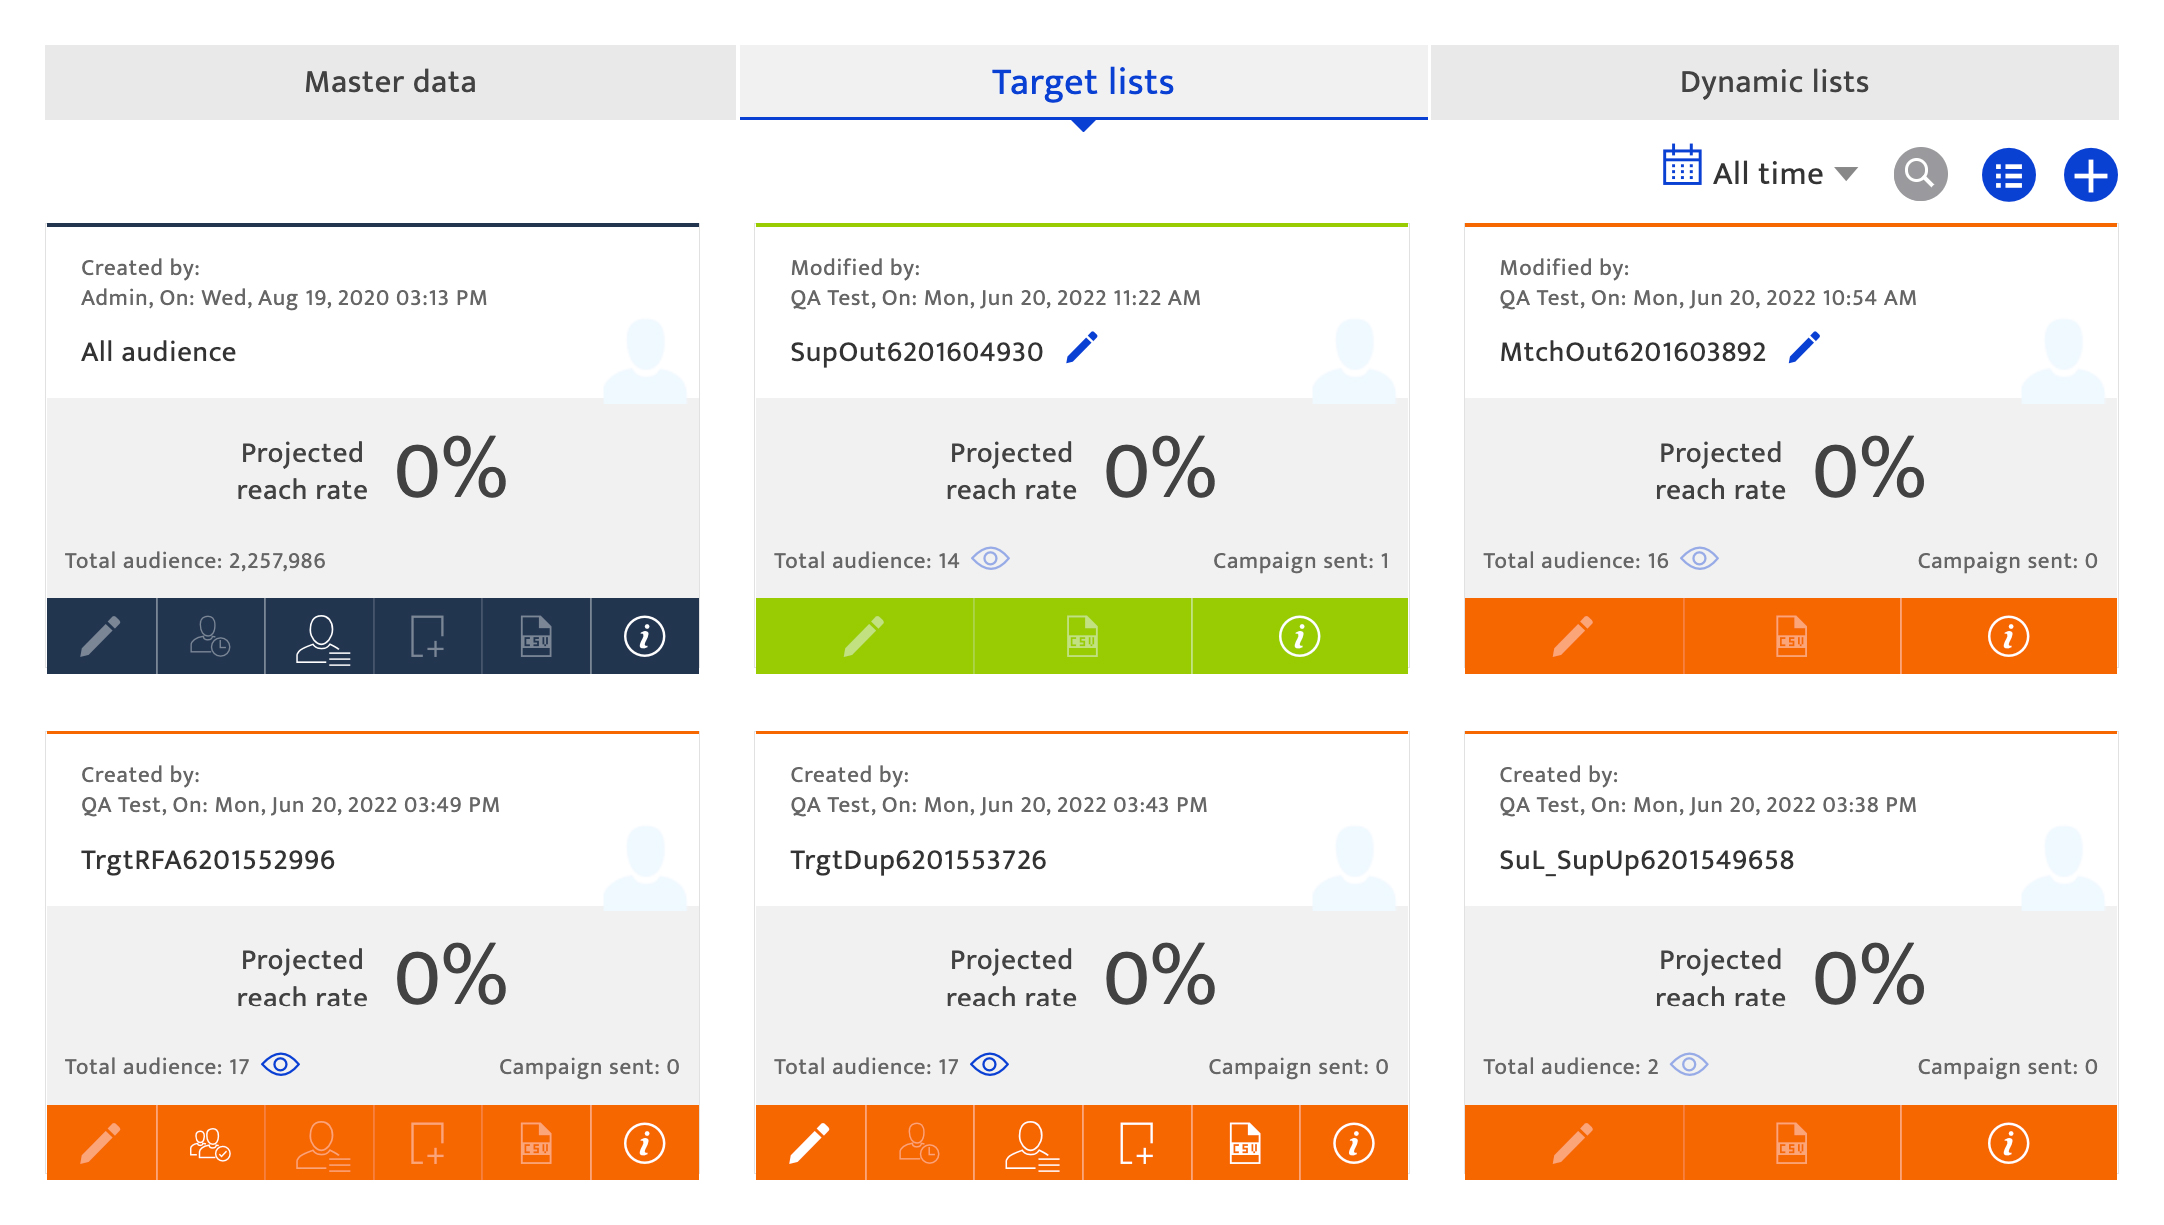
By default, the information is displayed in grid view (Refer above image). In the grid view, each target list displays the following information.
- Target list creation date with time stamp and author name
- Target list name
- Average or projected reach rate for the list
- Average reach rate for the list will be displayed after a minimum of 5 communications have been run and the average reach rate displayed is based on the communication performance.
- The projected reach rate for an audience list is displayed based on communications sent to its contacts. Once the list has been used in communications, the average reach rate based on communication performance is displayed. Until 5 communications are run, it will be shown as Projected reach rate.
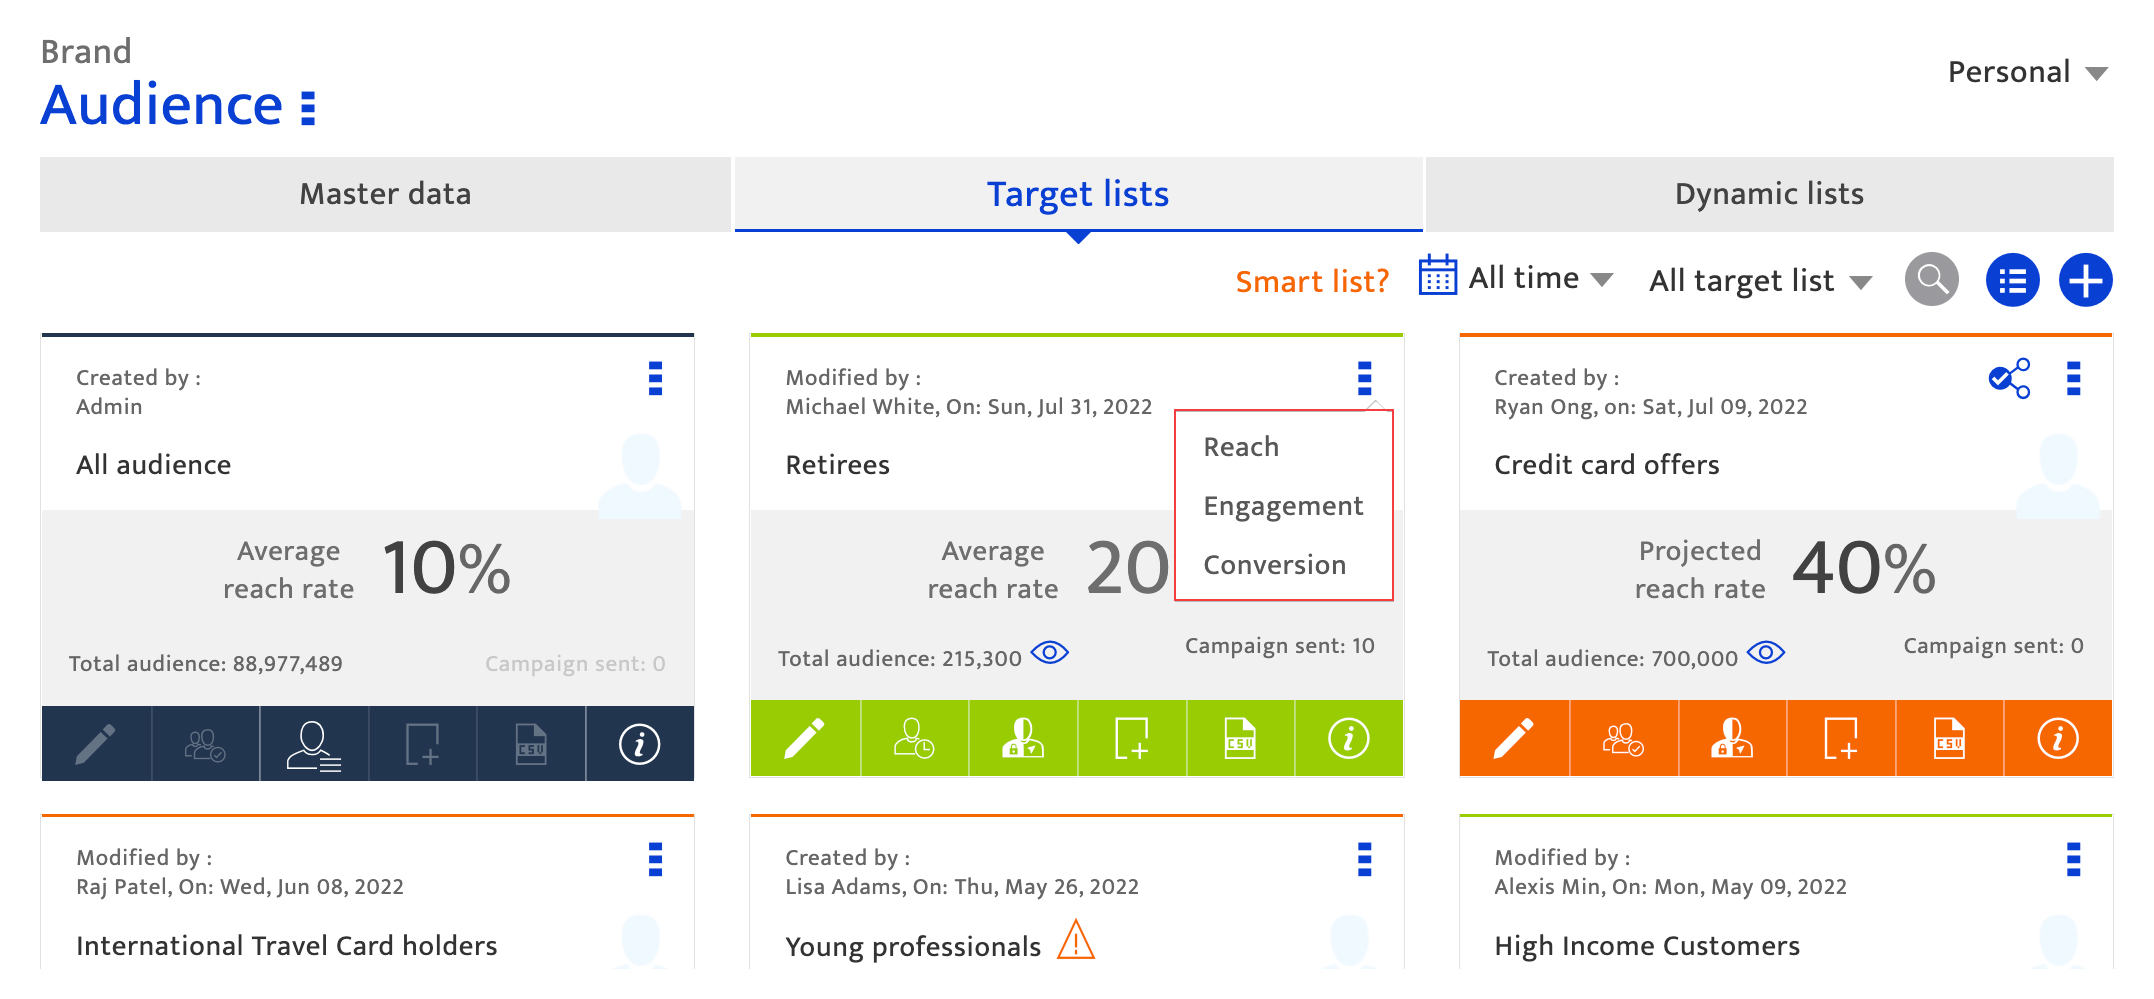
- Average/Projected engagement and conversion rates. To view these metrics for a list, click on the menu option on the top right corner of the tile for each communication.
- Average reach rates and Average engagement/conversion rates are only available after minimum of 5 communications have been run with the list.
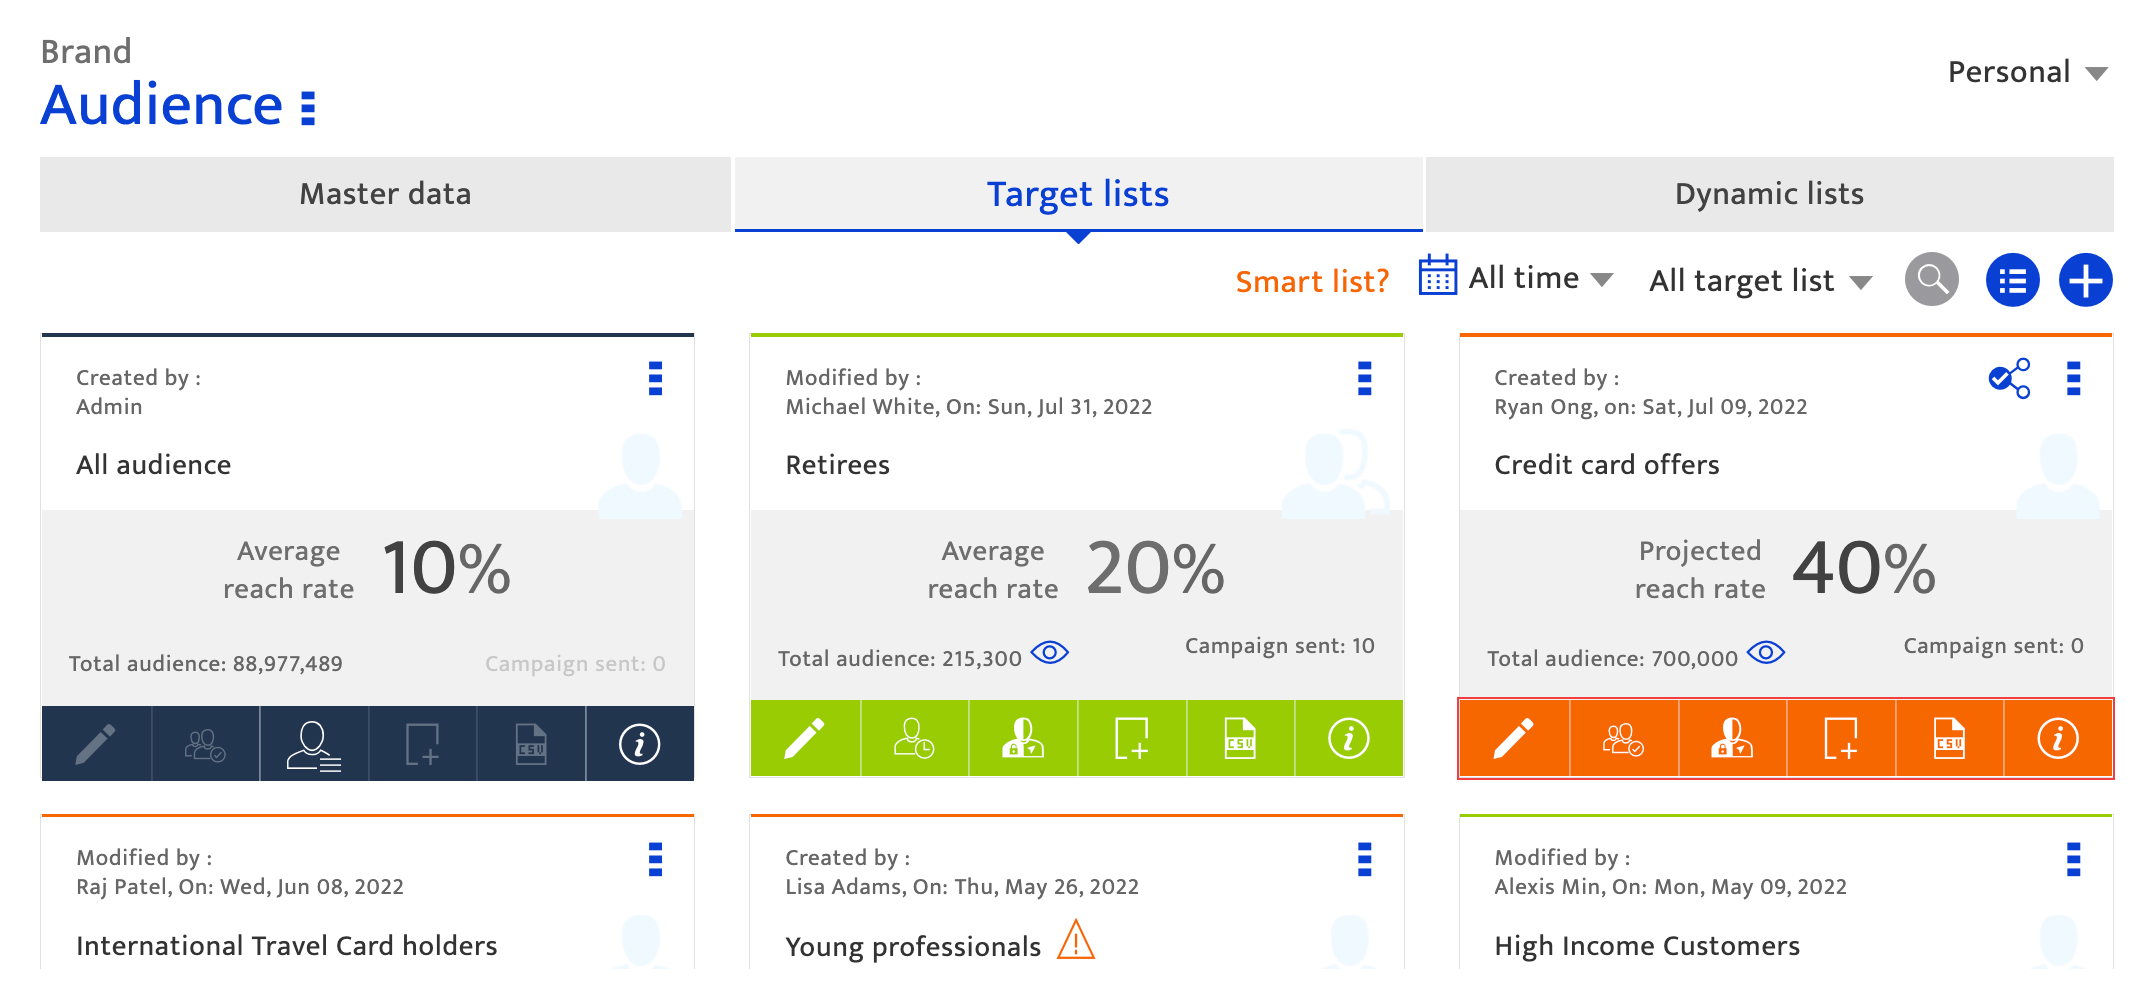
- Click on the preview
 icon to view the target recipients and data attributes in a list format.
 - The number of communications in which the list has been used.
- The options bar to manage the target list. The options bar has the following options & an icon associated with it.
- Edit – To edit the created target lists
- Request Approval - To approve the request for the new lists (this action is done by the approver)
- Split - To enable the split, toggle the switch to ON. Once enabled, move the horizontal slider left or right to set the control group (CG) size (the maximum % of the audience list that can be set as a CG is 20%).
- The control group within the target list will not receive the communication communications, while the target group will receive the communications. Responses from the two groups are compared to evaluate a communication’s impact.
- Click the Save button to retain the settings or Cancel to discard the changes and return to the target list summary.
- Duplicate – To create a duplicate list. A new target list is created and displayed on the target list summary page. Edit the list name and save. The new list is displayed with an orange option bar.
- Request download – To download the target list. The list will be downloaded in CSV format after OTP verification.
- More info – To view more information of the target list.

Note:
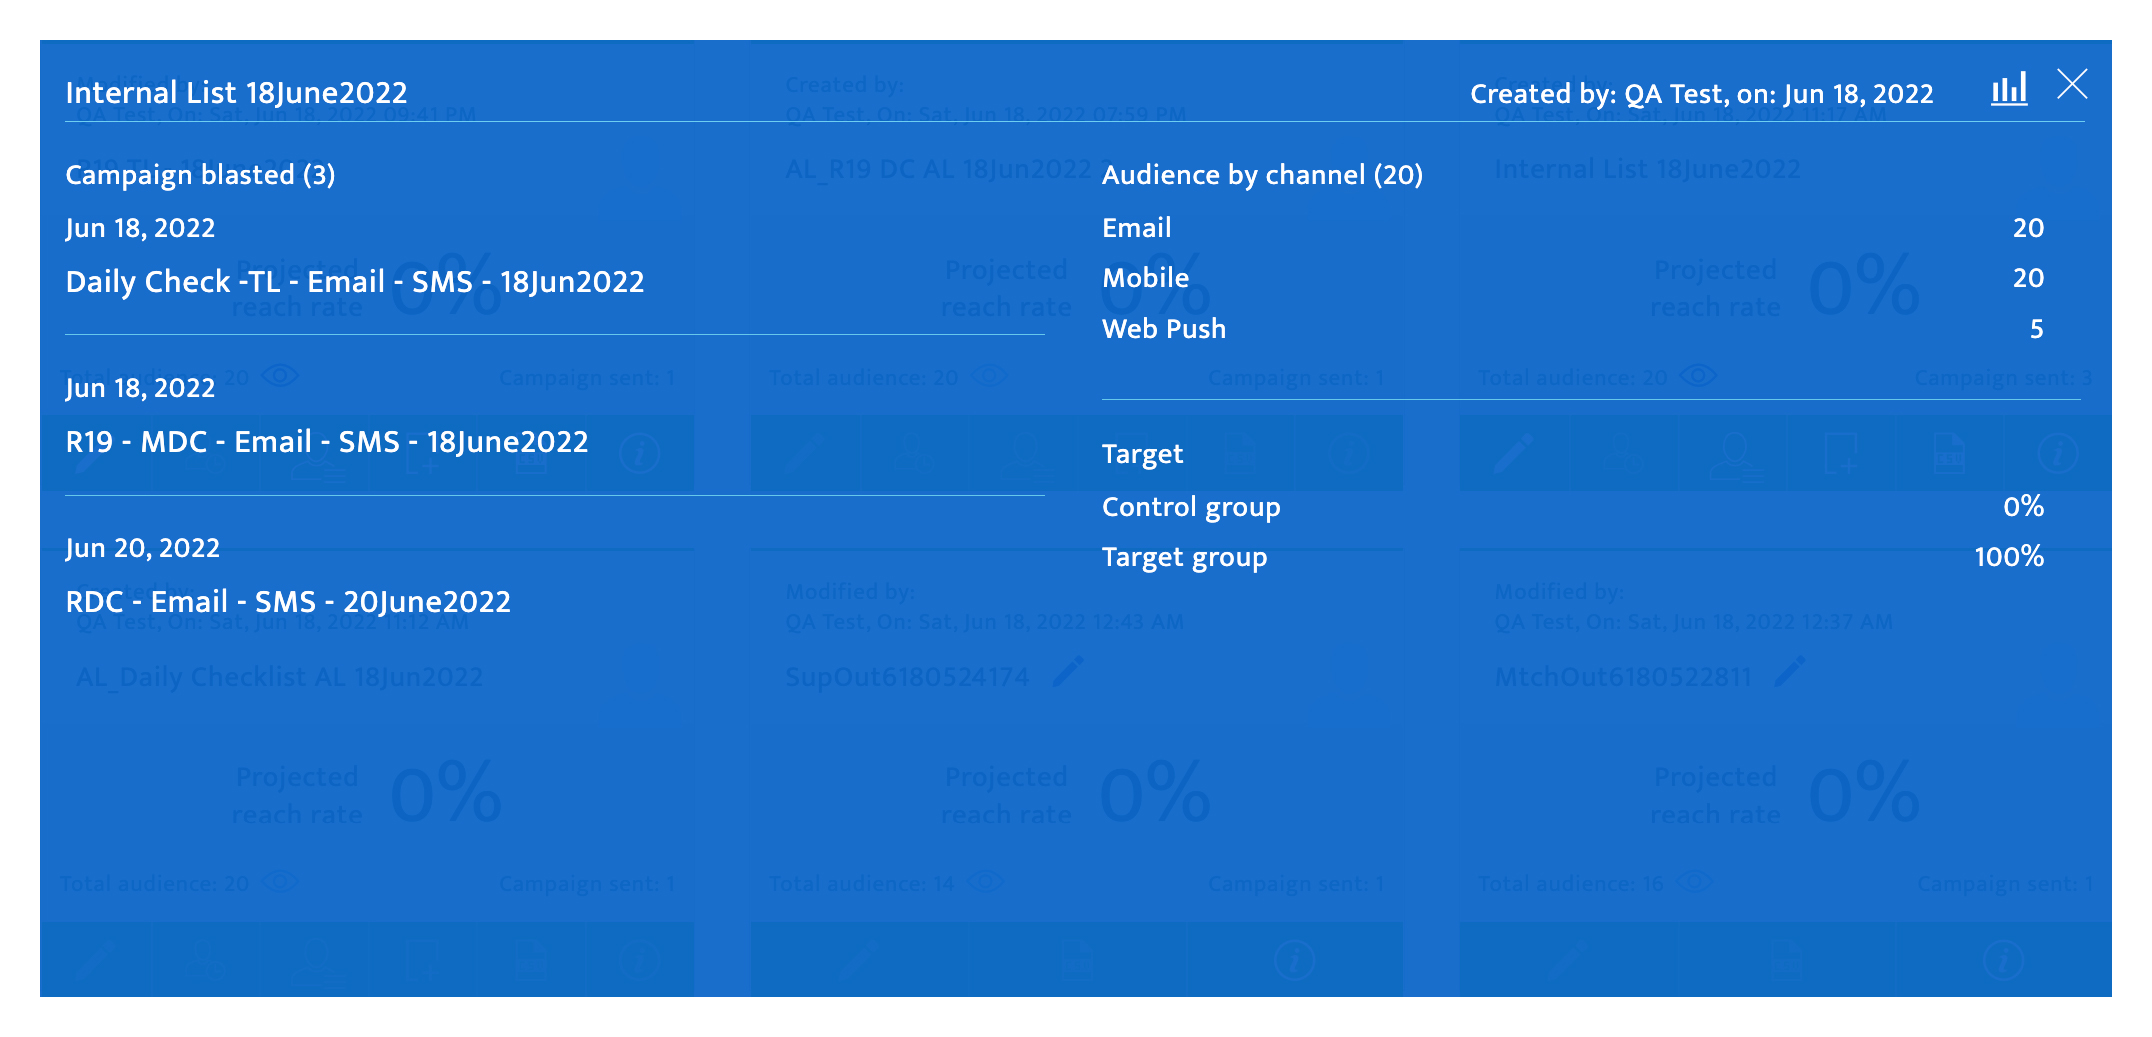
This screen displays the following information of the target lists.
- The number of communications in which the list has been used
- Audience by channel. Note that some contacts from the list may have more than one channel.
- Optimized channels, displaying the audience by channel in percentage.
- Control Group and Target Group (in %)
Note:
A green option bar signifies that the list has been used by past communications, while an orange bar indicates that the list is new.
List view#
Click the List/Grid view toggle key. The view changes from grid to list format.
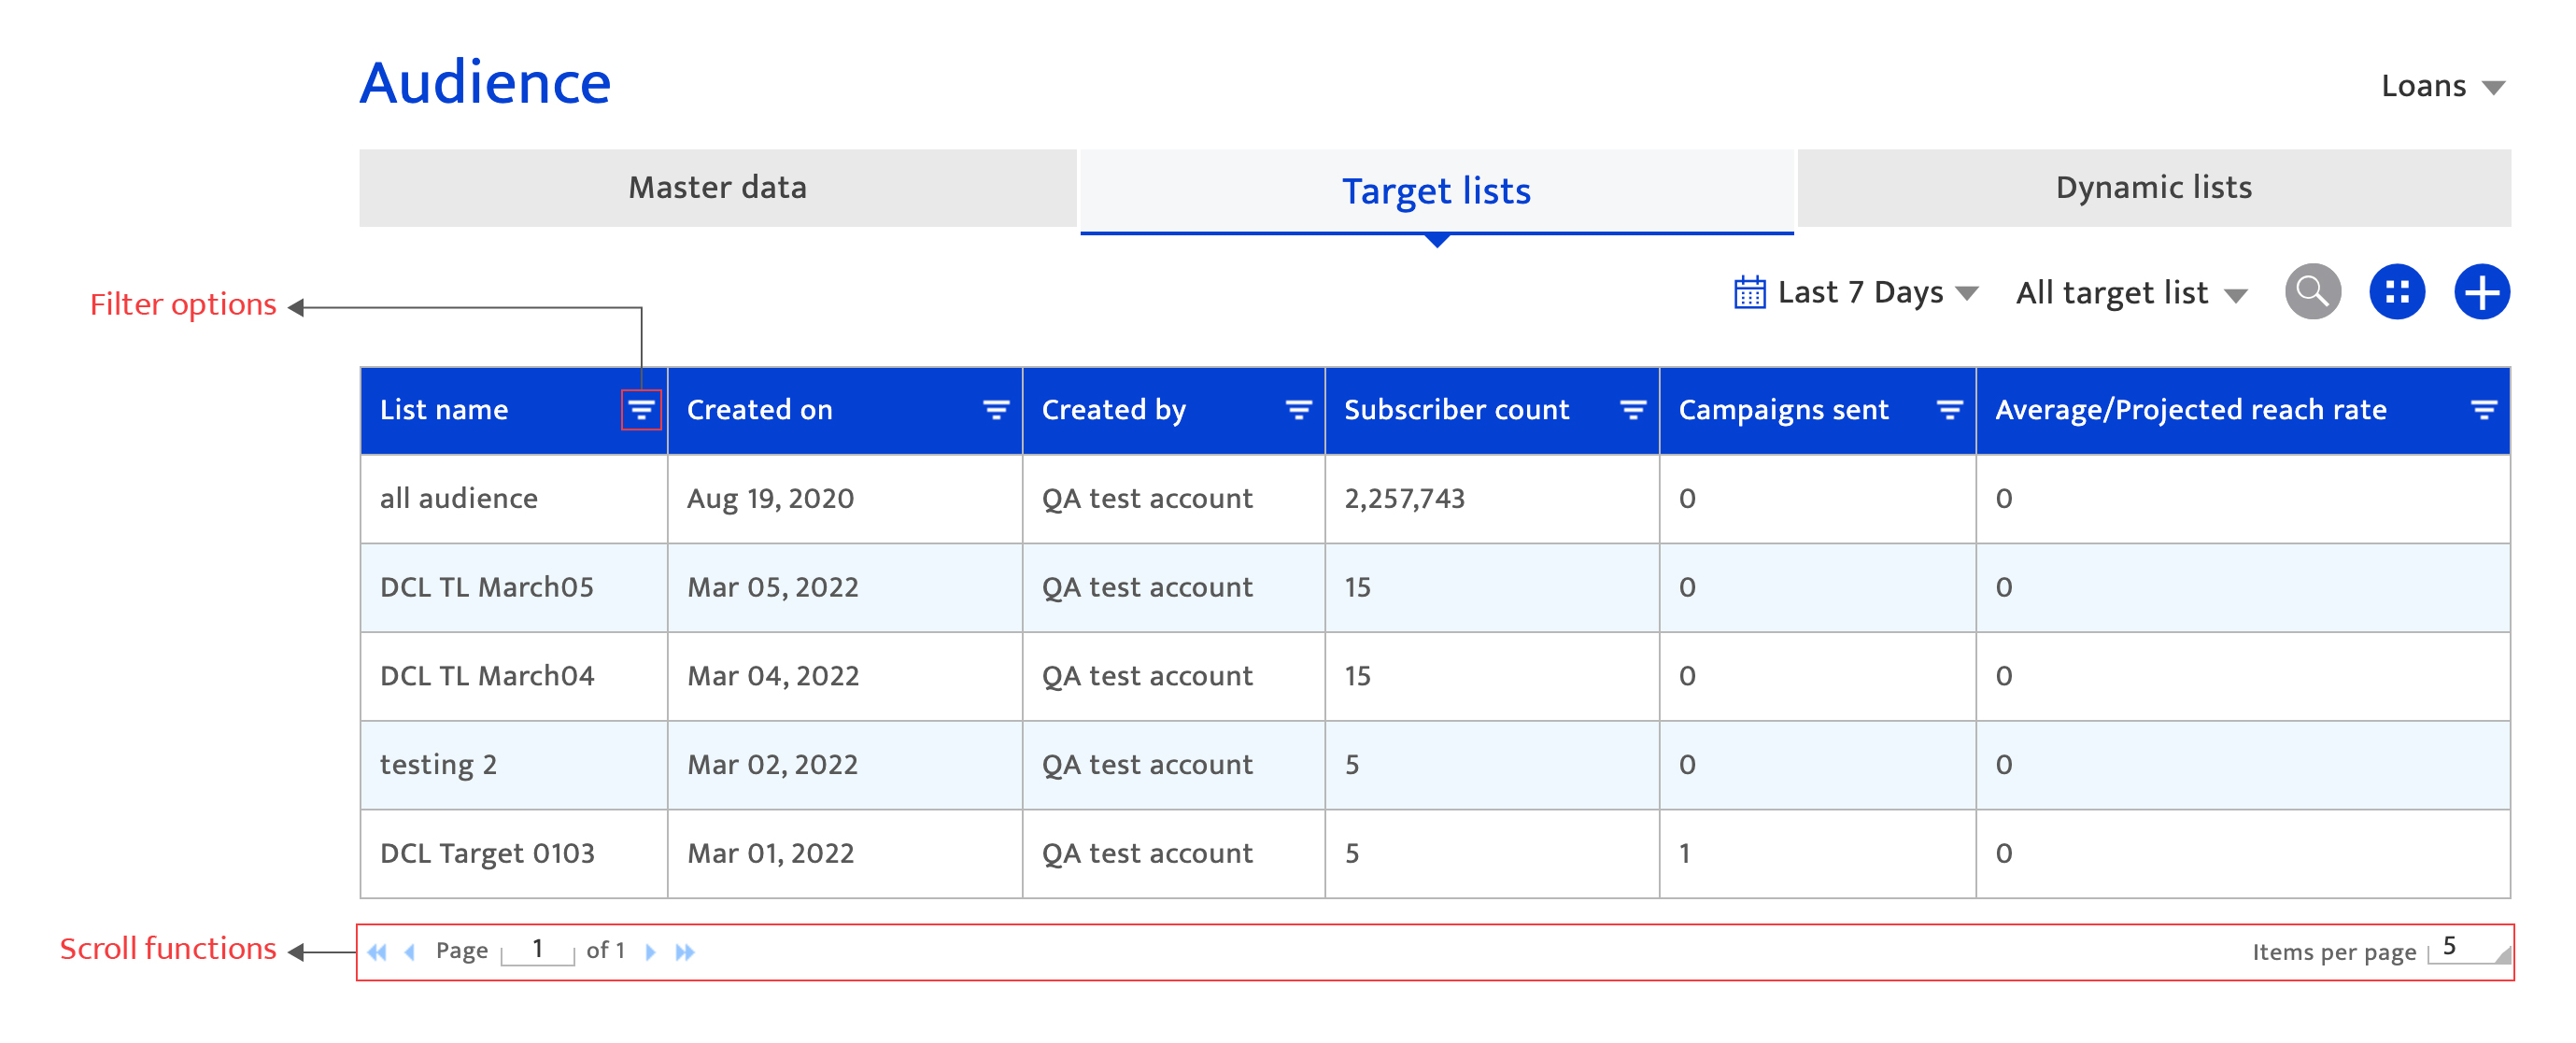
From this screen, users can perform the following actions.
- Sort the list in ascending or descending order by clicking on the column header.
- Filter the list by clicking on the filter icon and entering the appropriate filter criteria.
- Browse through the pages of the list using the horizontal scroll keys.
- Customize the number of the items per page by selecting the number in the drop-down list of Items per page field.
Search target lists#
Go to Audience Module >> Target lists.
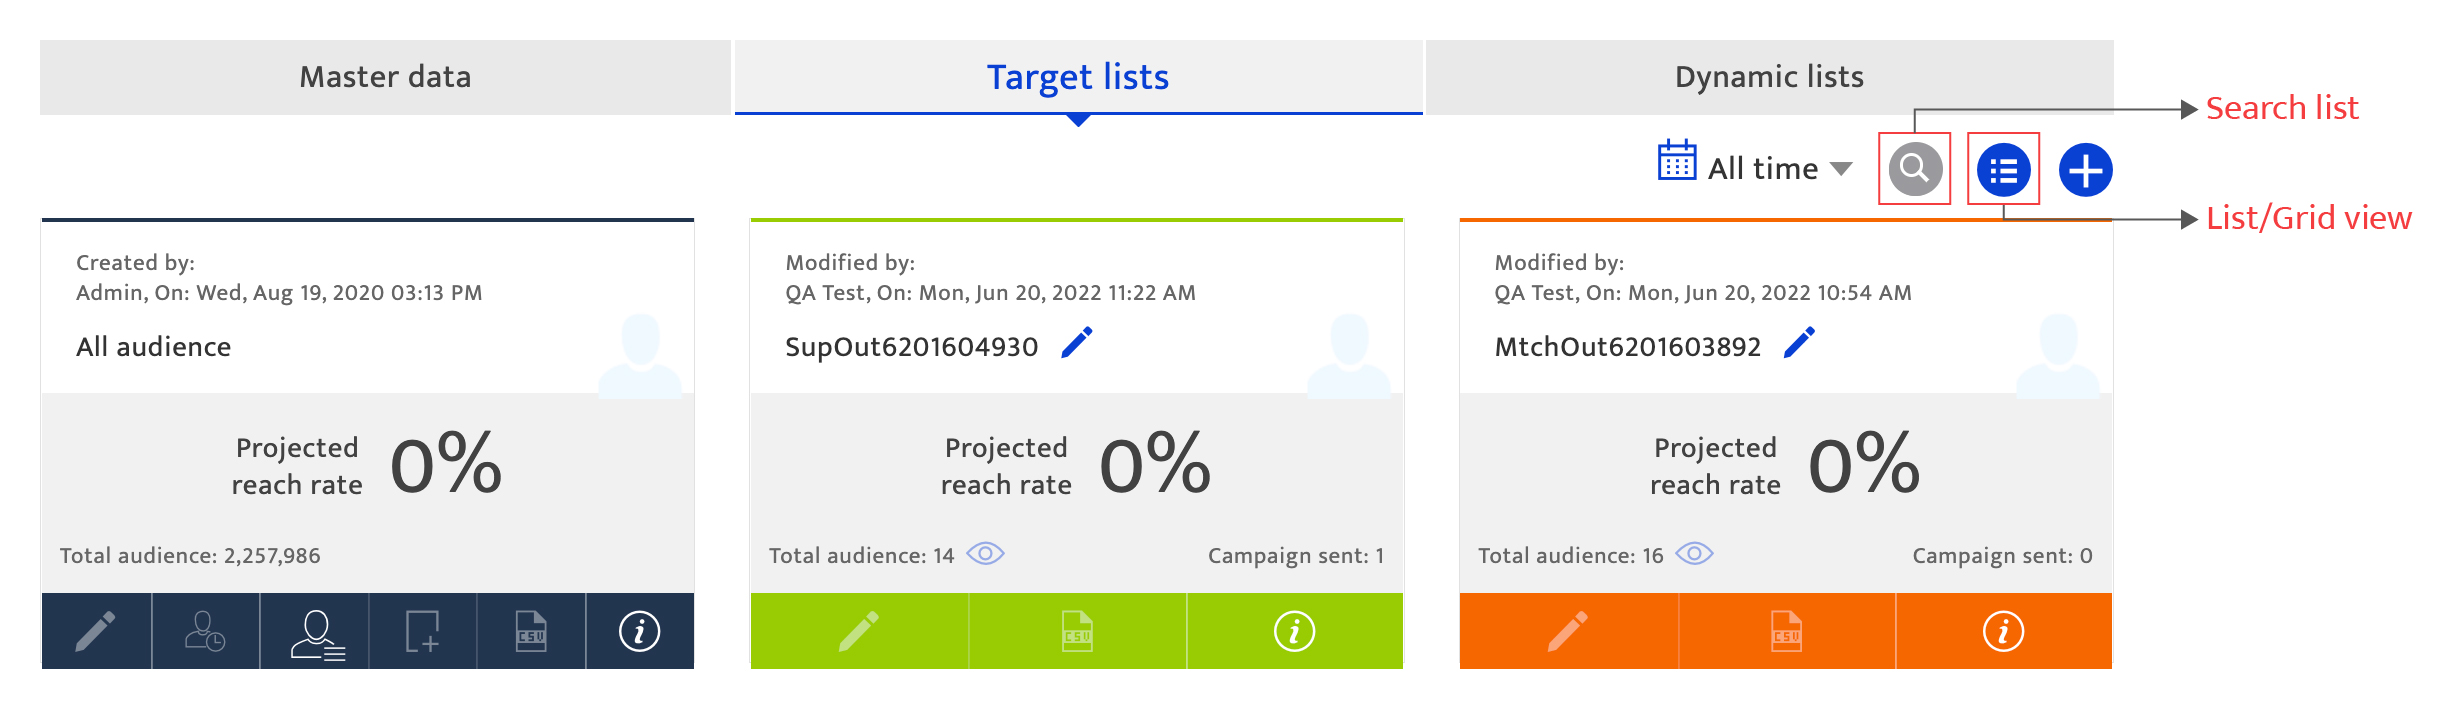
This screen displays all the lists that were created in the past.
Search options#
Users can search the lists using the Timeline filter and the advanced search.
Timeline filter#
Users can filter the lists using the following options.
- Today
- Last 7 days
- Last 30 days
- Custom date range
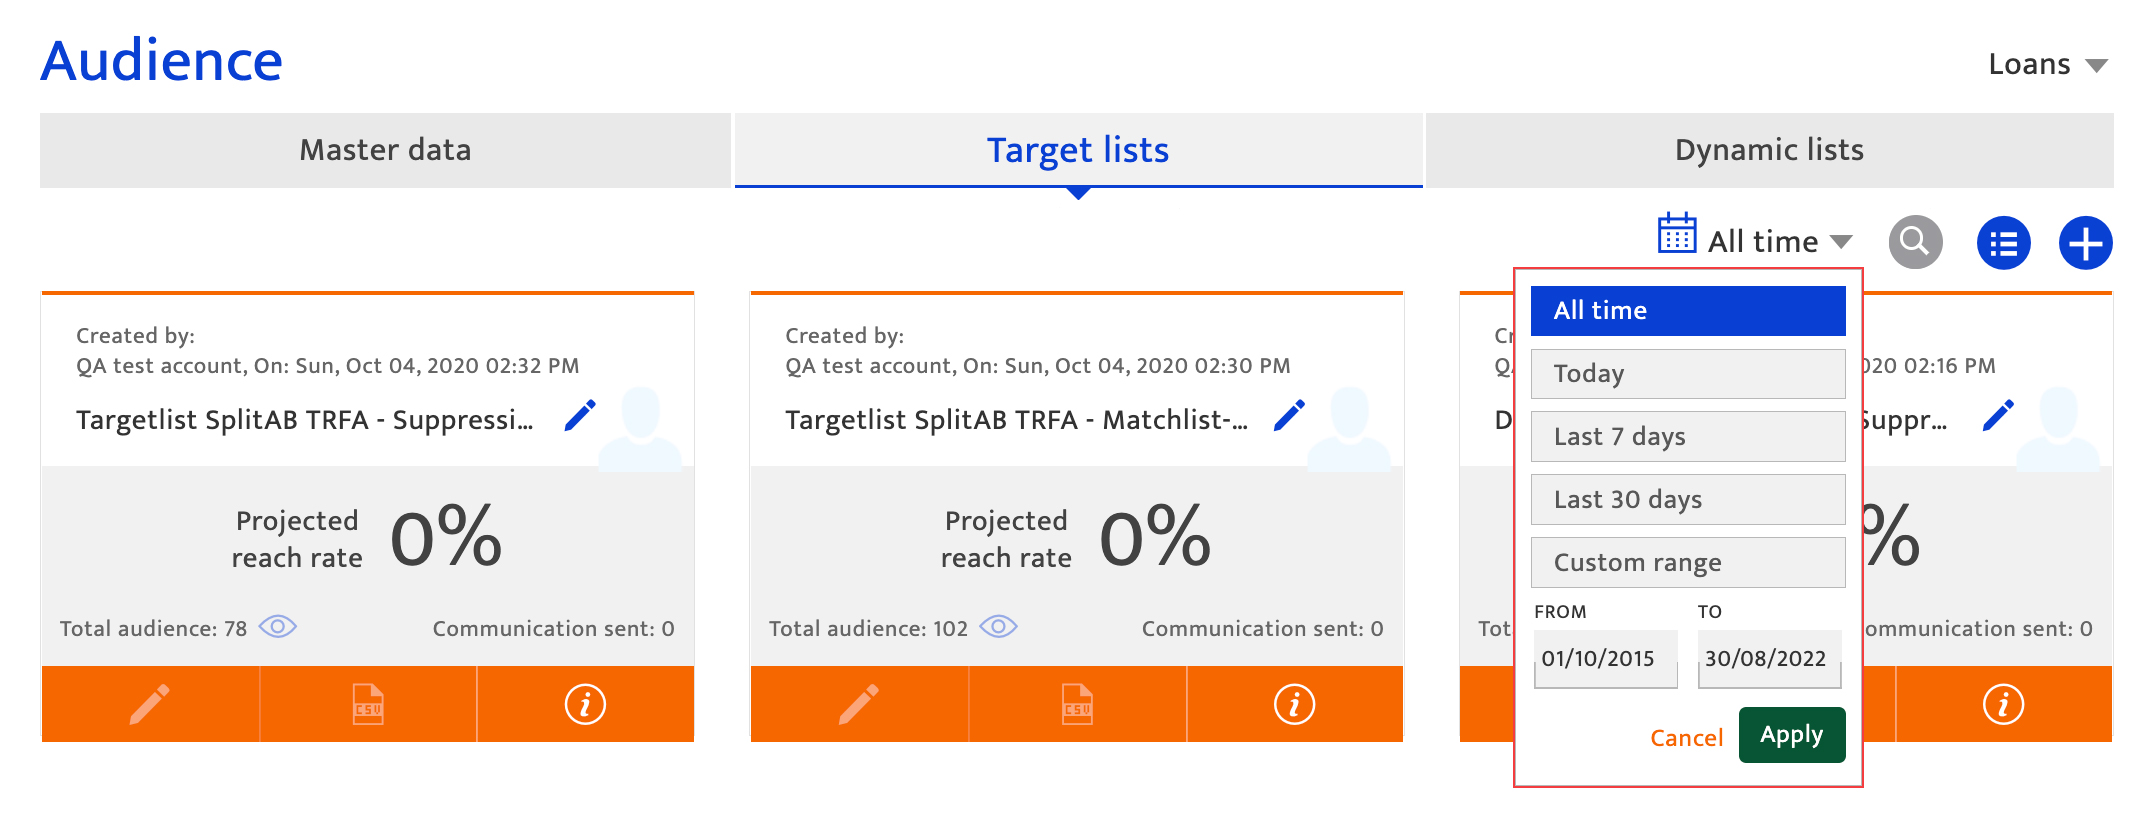
- Click the filter
 key. The drop-down list will be displayed.
 - Select the appropriate option and click the Apply button to view the results.
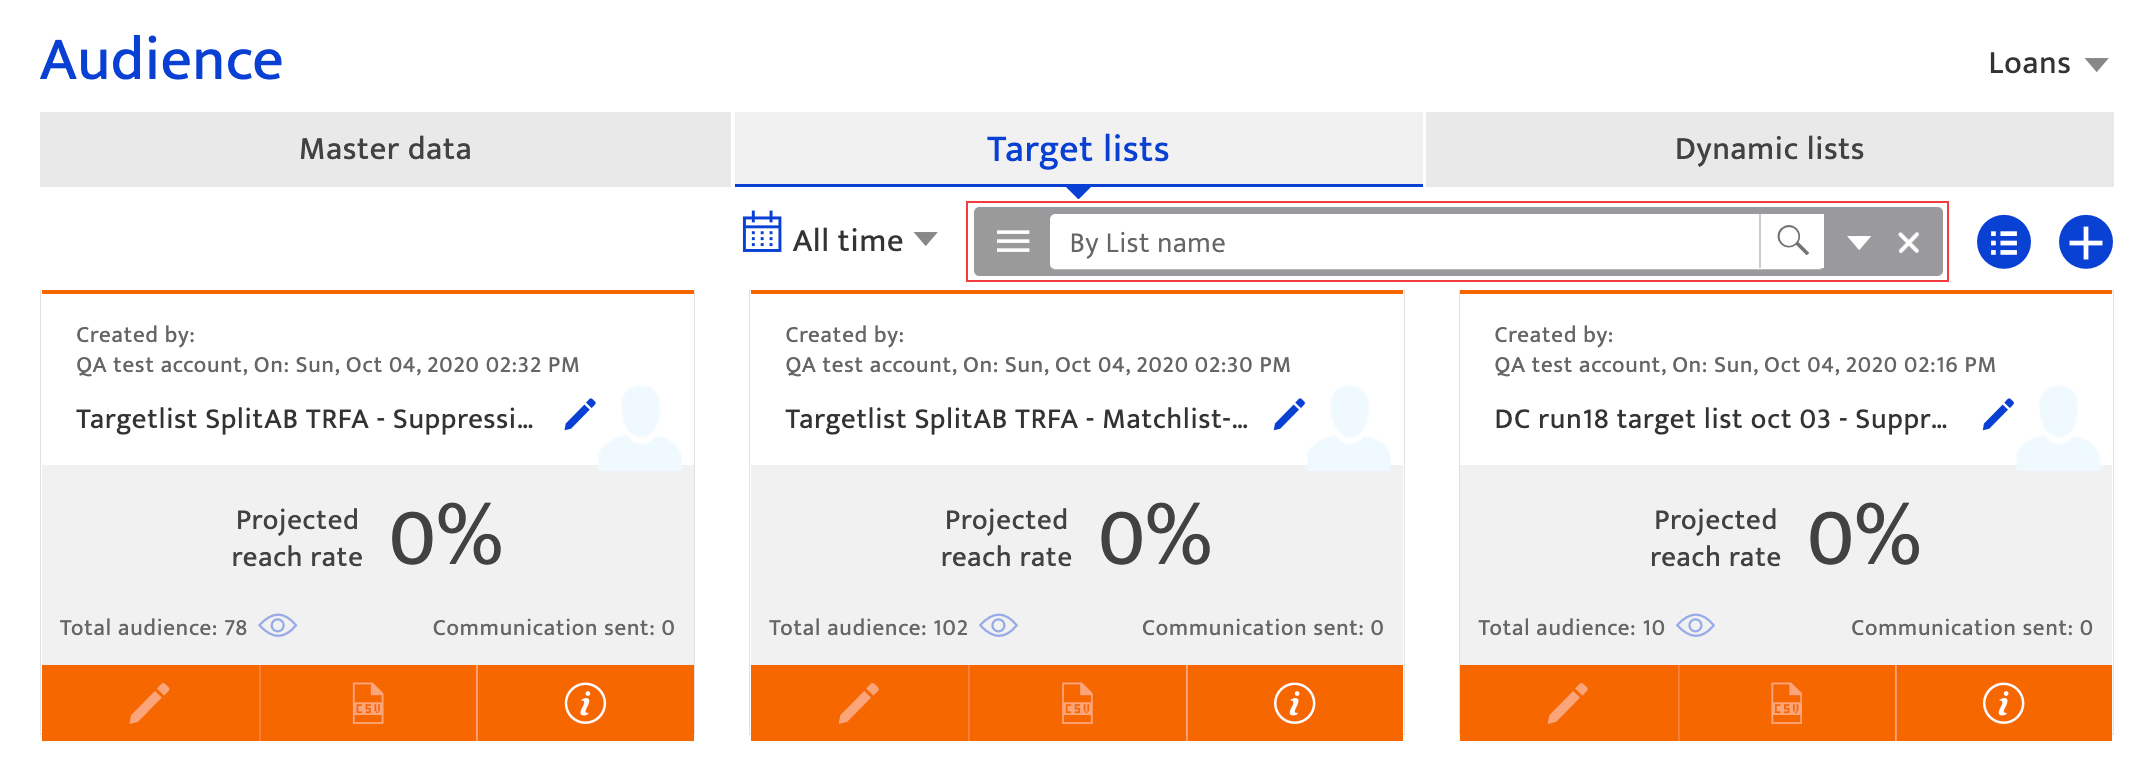
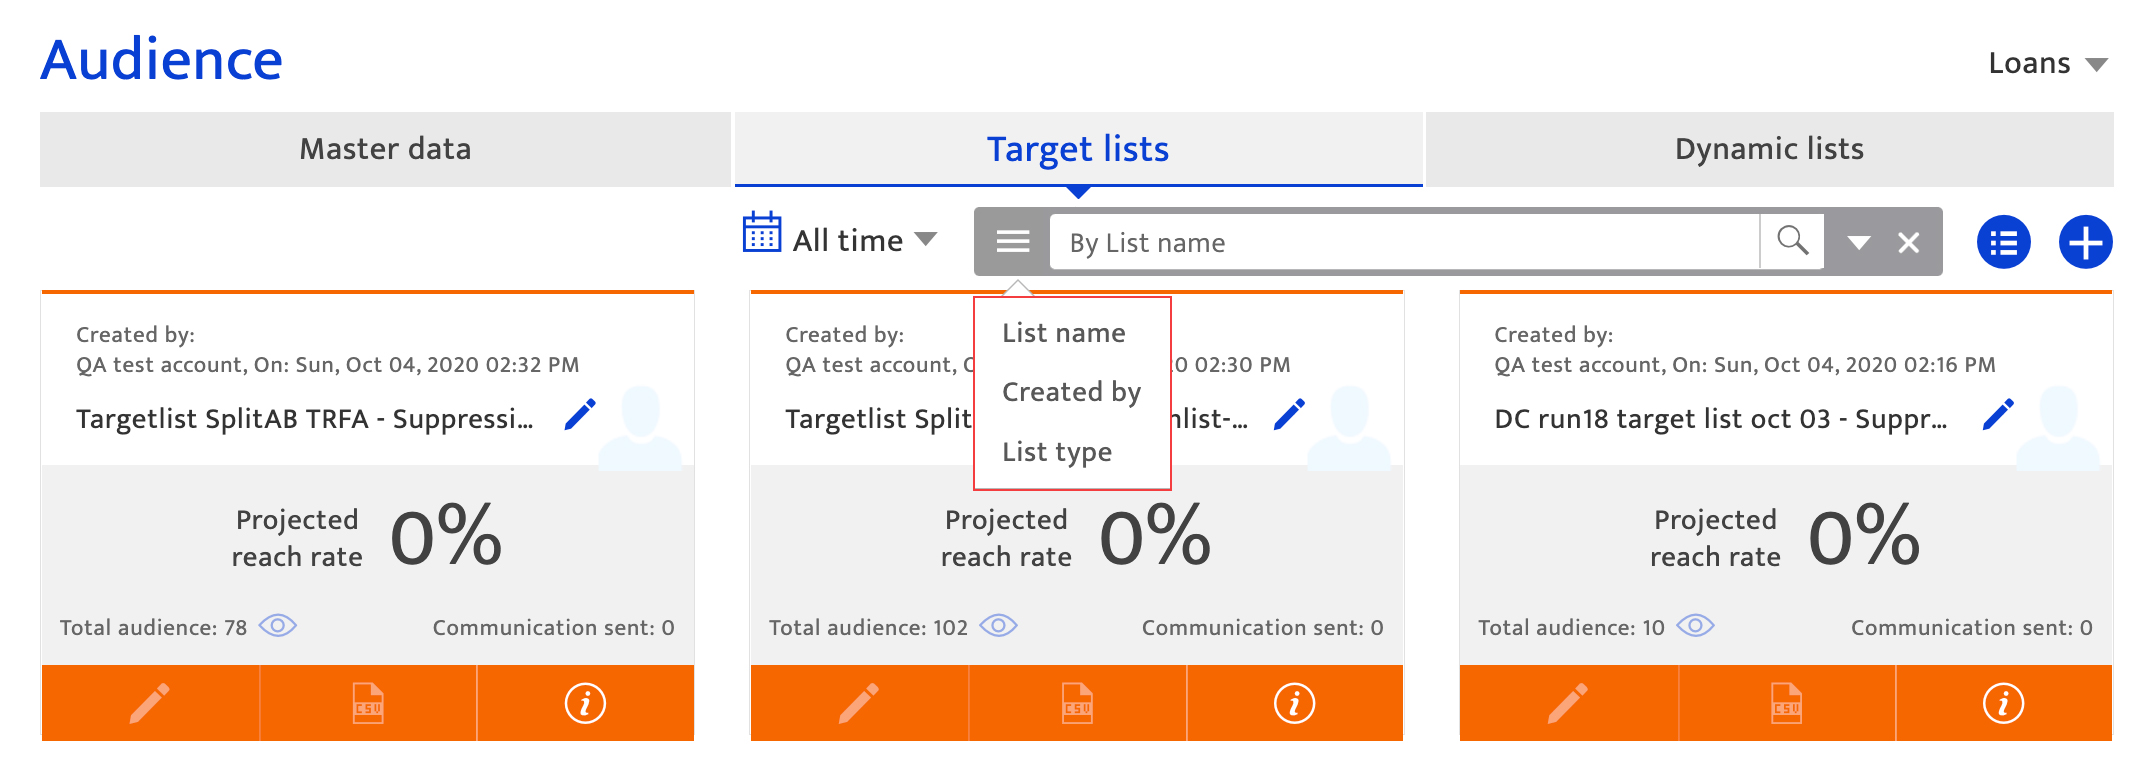
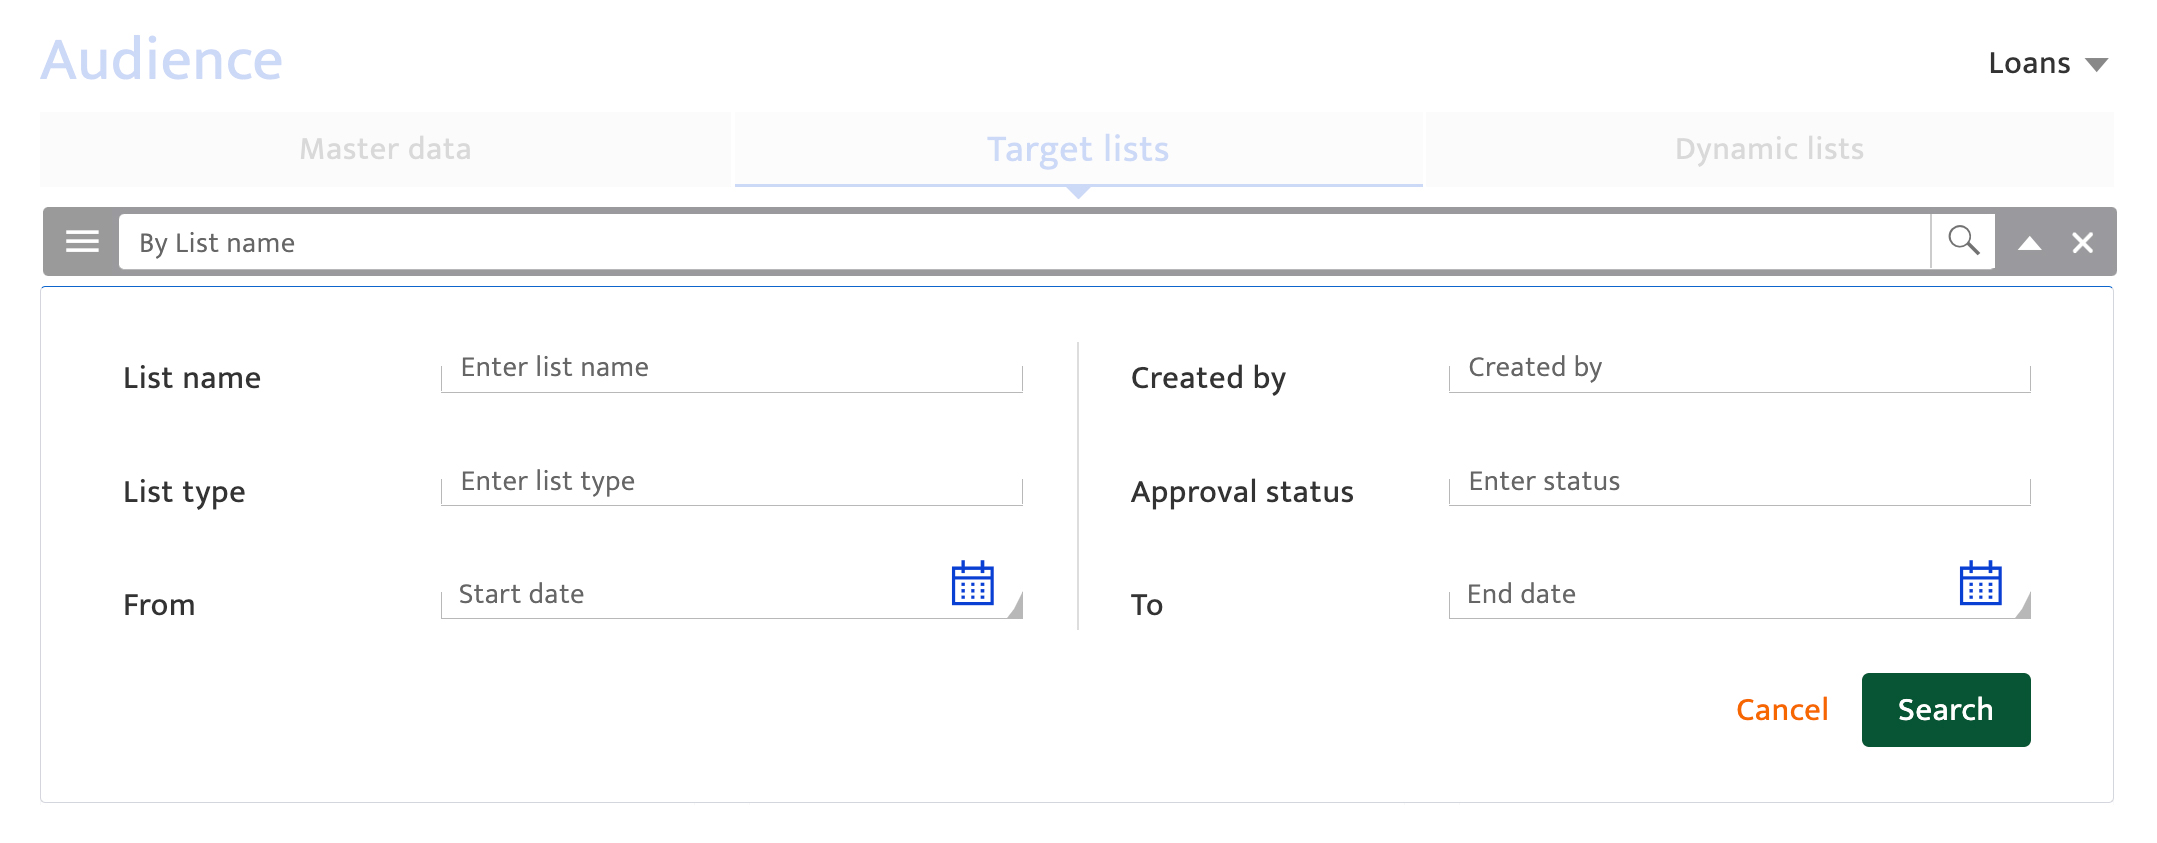
Advanced search#
Users can search target lists based on any of the following criteria.
- List name
- List type
- Created by
- Approval status
- Timeline
Steps to search#
- Click the Search
 icon. The Search bar will be displayed.
 - Click the
 button. The drop-down will be displayed.
 - Select the attribute from the drop-down list (or) click the
 button to view the advanced search options
 - Enter the appropriate search criteria and click the Search button. The search results will be displayed in the Target lists page.
Create lists#
For information, see here .
Module accessibility#
Any user having access to communication creation can create or edit target lists.