QR-Calendar
What is it?#
QR Codes are used in a variety of marketing communications. This is a very effective and inexpensive medium for bridging the offline to an online gap in audience engagement and more.
QR code communication features#
When scanned, QR codes generated by the Resul platform can be used to record individual engagement details by leveraging an embedded Smart Link.
This communication module enables:
- Generation of QR code for different Calendar locations
- Resizing the QR code
- Linking it to a Know Your Customer form for lead capture
- Provide the option for the double-opt-in mechanism for communications
Authorization and making changes#
Setting up a single dimension QR Code communication can be done by a Super User, Administrator, or the Key Contact for the account.
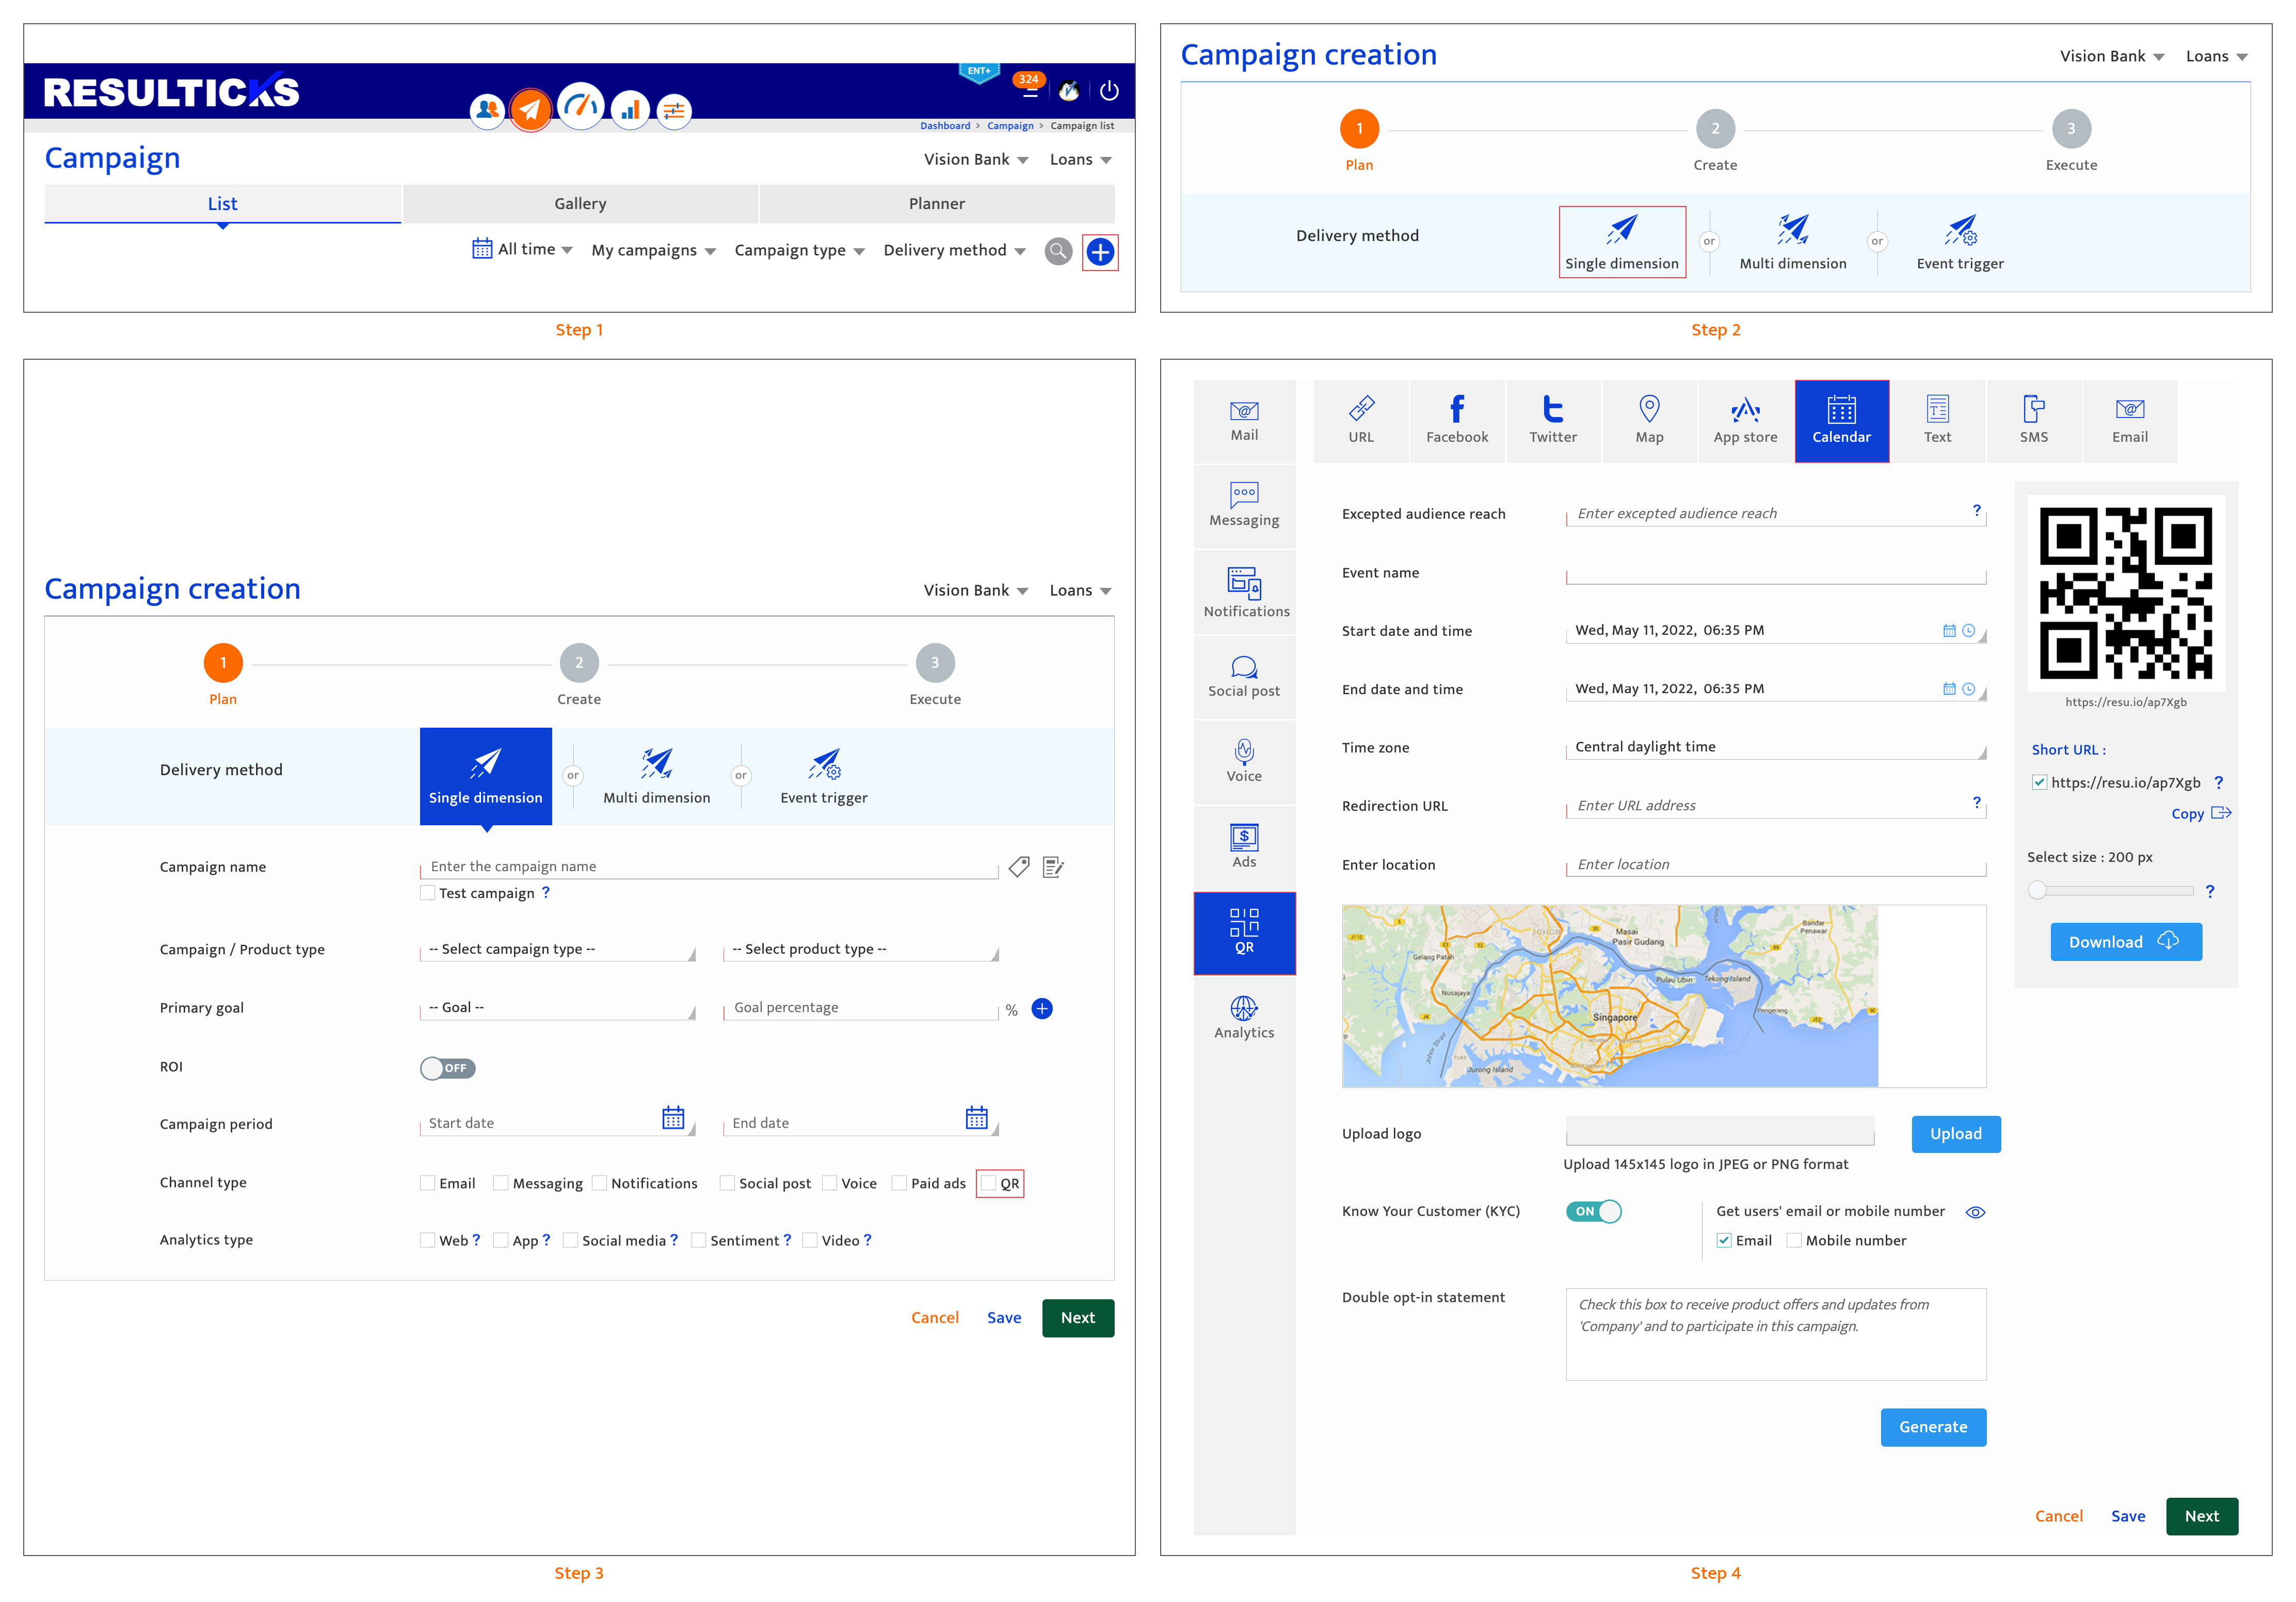
Three-step process#
Managing QR Code communications follow a three-step process in Resul.

In this module, we only address Step 2. For step 1, access detailed guidance at Plan a single dimension communication. For step 3, access detailed guidance at Execute a single dimension communication.
Accessing QR code communication creation for calender#
- Select the communication module and click on the "+" icon to add a communication.
- Then select Single dimension delivery method.
- Select QR in the communication plan screen.
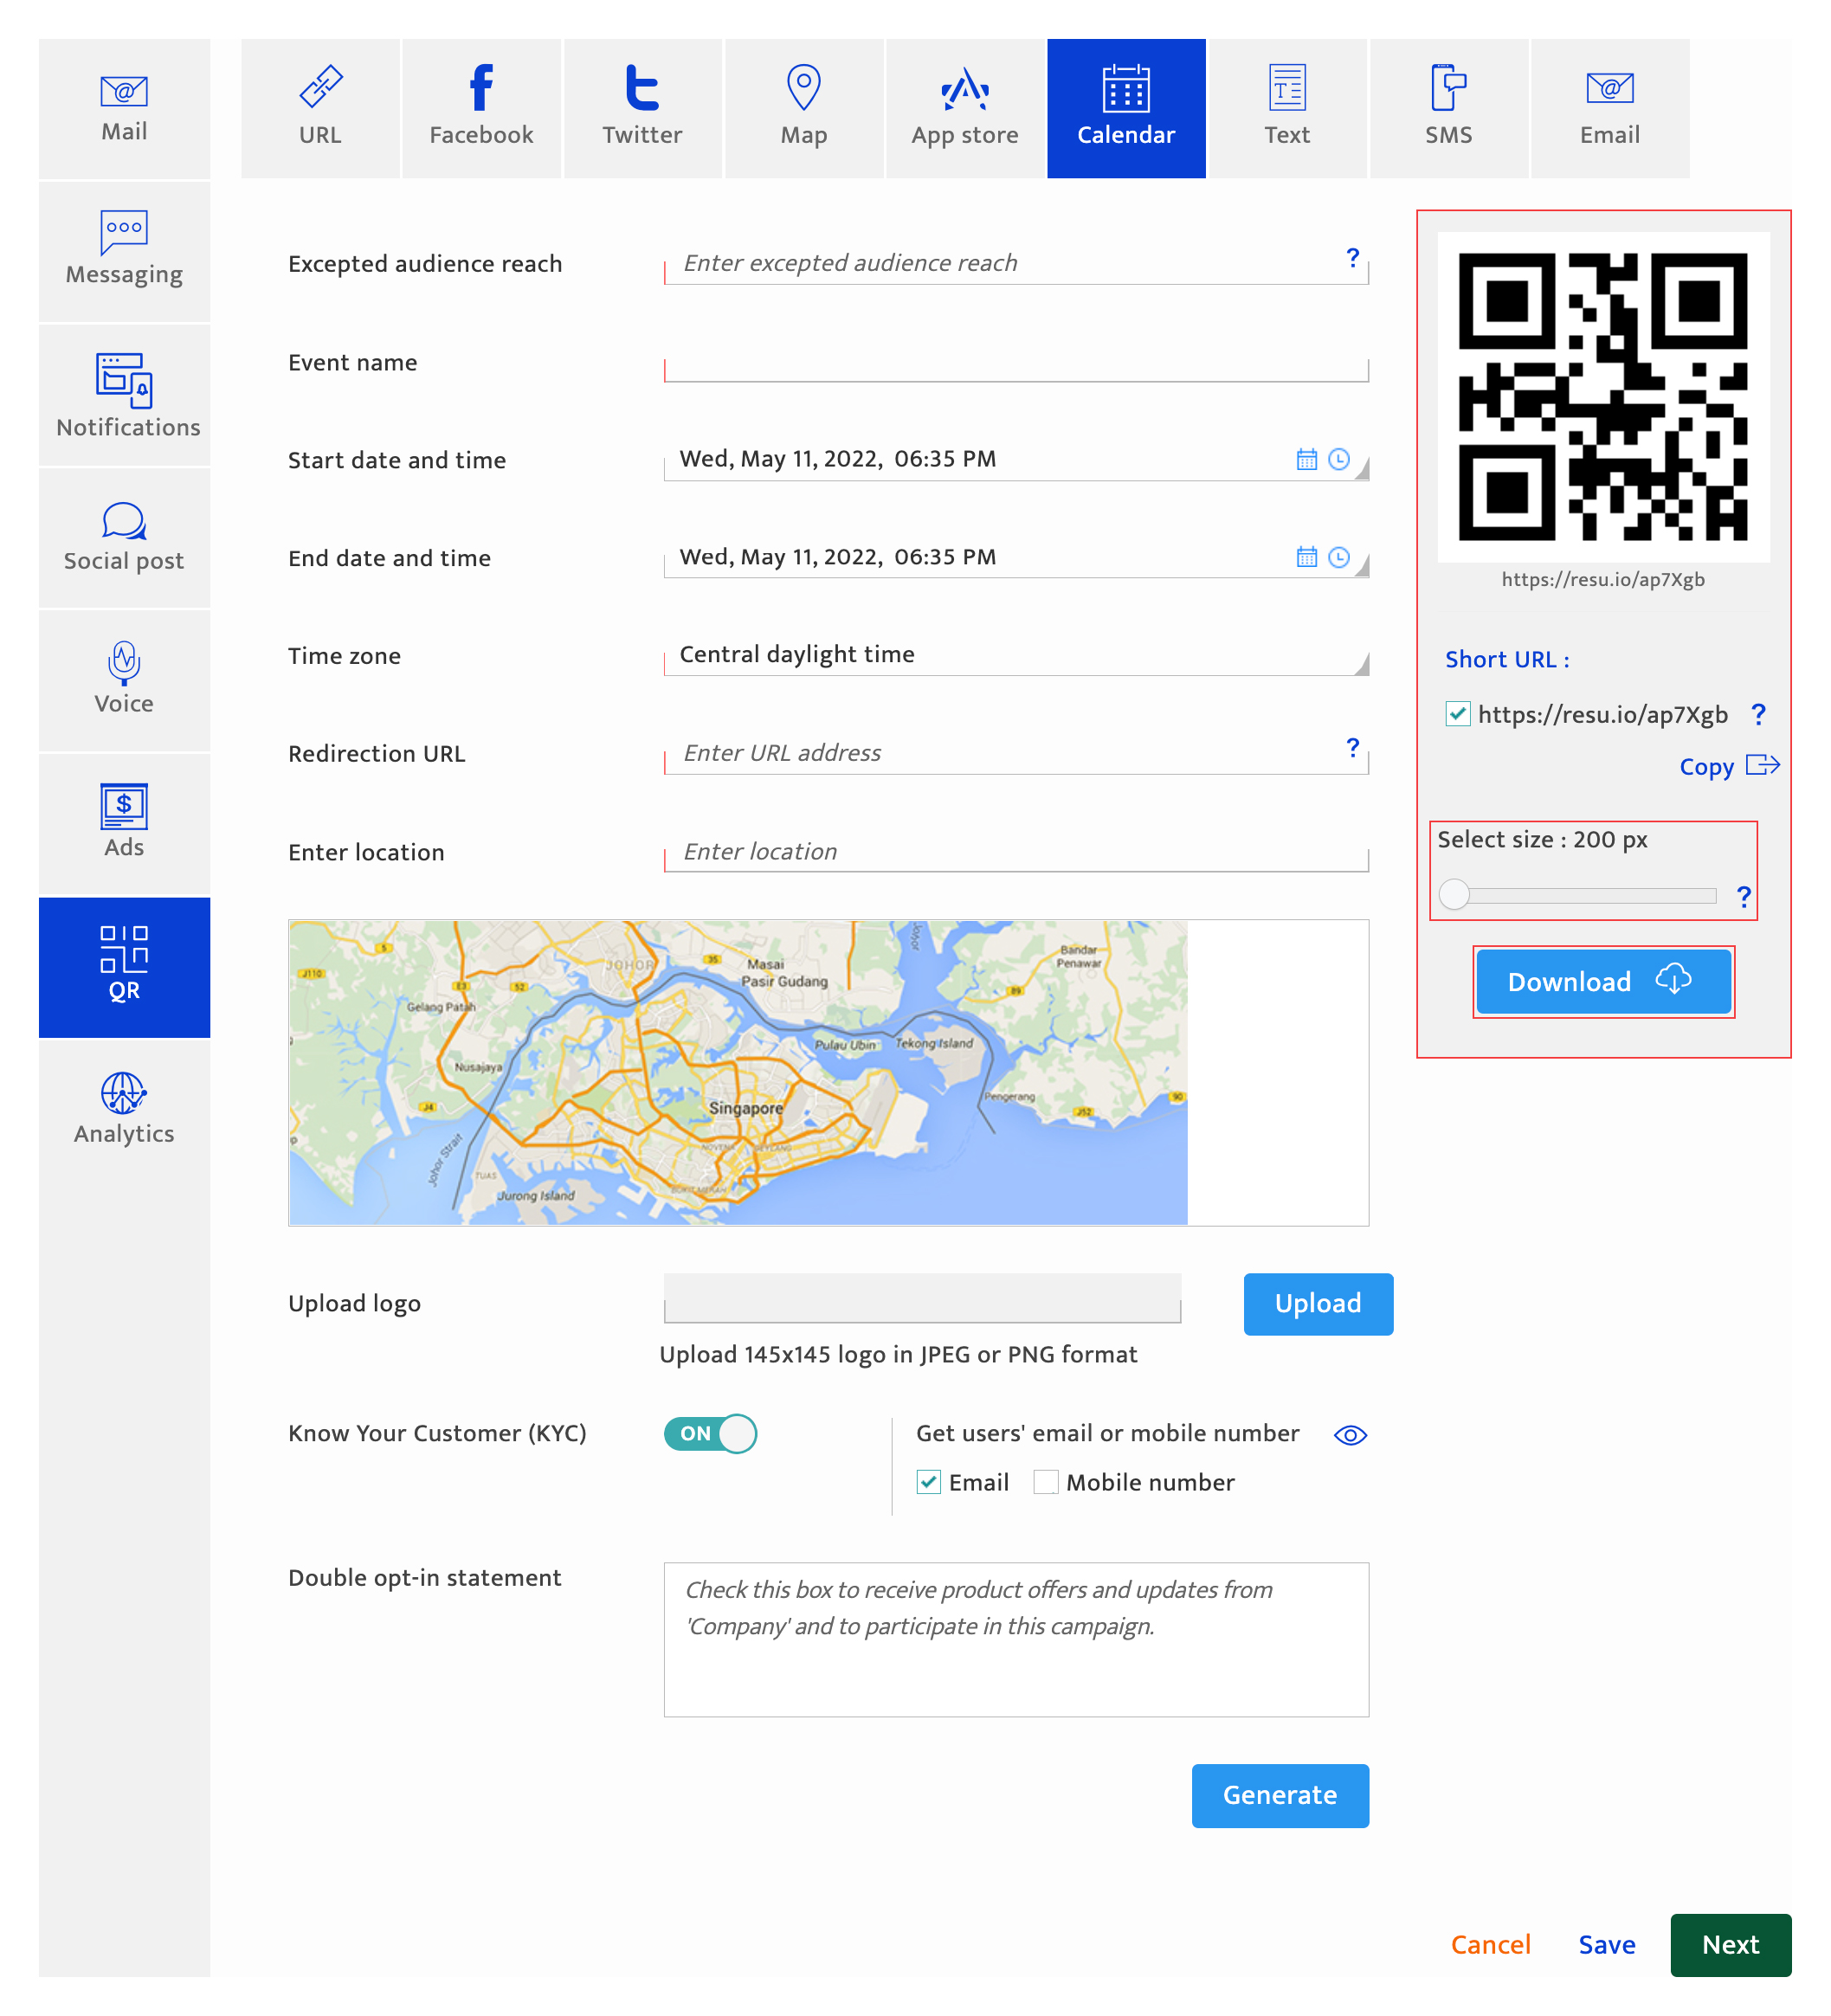
- Select Calendar within the communication creation section, after selecting QR on the left panel.
Creating a QR code communication for calender#
Next, follow the steps below to create a Calendar QR code.
- Refresh content by clicking the refresh icon. This will allow the user to restart the setup or move on to create a QR code for a different destination.
- Enter the audience size for the QR code. Potential audience reach number is used for reporting and communication performance purpose. The numbers entered here will be used to calculate communication performance/goal achievement.
- The communication name will be the same as one specified during communication planning and is prepopulated here.
- Enter the event name.
- Select the start and end date & time for the event using the date and time picker.
- Enter a redirection URL to redirect the audiences if they scan the QR code after the specified communication duration. The URL will be validated based on the platform’s built-in algorithms.
The user must enter a redirection URL if they want to:- Adjust the size of the QR code
- Download the QR code
- Save or move on to the next part of the communication
- Enter the location's google maps URL that you want the audience to be redirected to if they scan the QR code during the communication duration. You can preview the location below.
- Adjust the size of the QR code by sliding the bar. Click the "Apply" icon to save it. Click the cloud icon to download the QR code.
- Switch on the know your customer (KYC) option to link to a KYC form.
- Select the attributes you would like the KYC form to collect using the checkboxes. The form can collect, in addition to the customer’s name, other defined attributes such as their email and/or mobile number.
- Click on the Preview to view the KYC form.
- Enter a text-only double opt-in message to be displayed to audiences on clicking the QR Code. There is a 150-character limit.
- To the next step in the communication creation process.
There are 4 options to proceed:- Click "Save" to save the current input and return to the communication-list. All mandatory fields on the current screen must be completed to save successfully. The platform will highlight any missing mandatory information.
- The communication will be saved as "Draft" if it is a new communication. If the user has been editing a "Draft" or "Scheduled" communication, the communication state does not change.
- Click "Next" to save the current input and proceed to the next step which is sequenced as follows:
- All mandatory fields on the current screen must be completed and the platform will highlight any missing mandatory information.
- If there are other channels integrated within this channel type (e.g. Social media), the input screen for the next available channel is displayed.
- If there are no more channels for the current channel type, the input screen for the next channel type selected during the planning step is displayed. Note that analytics is treated as a channel type.
- If setup for all channel types has been completed, the communication execution screen (pre-communication analytics) is displayed.
- Click on another channel type. Only channel types selected during the communication planning stage will be available. Input for the current channel type is discarded unless the user clicks "Save" or "Next".
- Click "Cancel" to return to the communication-list screen. Any current input since the last time "Next" button was clicked is discarded.
- Click "Save" to save the current input and return to the communication-list. All mandatory fields on the current screen must be completed to save successfully. The platform will highlight any missing mandatory information.