Create a subscription/KYC form
What is it?#
A Subscription/KYC form is used to collect:
- New contact details for subscription purposes (e.g. for a newsletter or notifications)
- Additional contact information for existing contacts
- Creation of progressive profiling Subscription/KYC form that:
- Pre-populate existing contact information
- Progressively displays fields for entry of only new information
- Embedding of the created form into websites and mobile apps.
Authorization and making changes#
Super users, Administrators and the Key Contact for the account can use this capability.
Accessing the form generator#
- Select the preferences module.
- SelectForm Generator to be taken to the Form List.
- Click the “+” icon on the Form List.
- Select the subscription/KYC form.
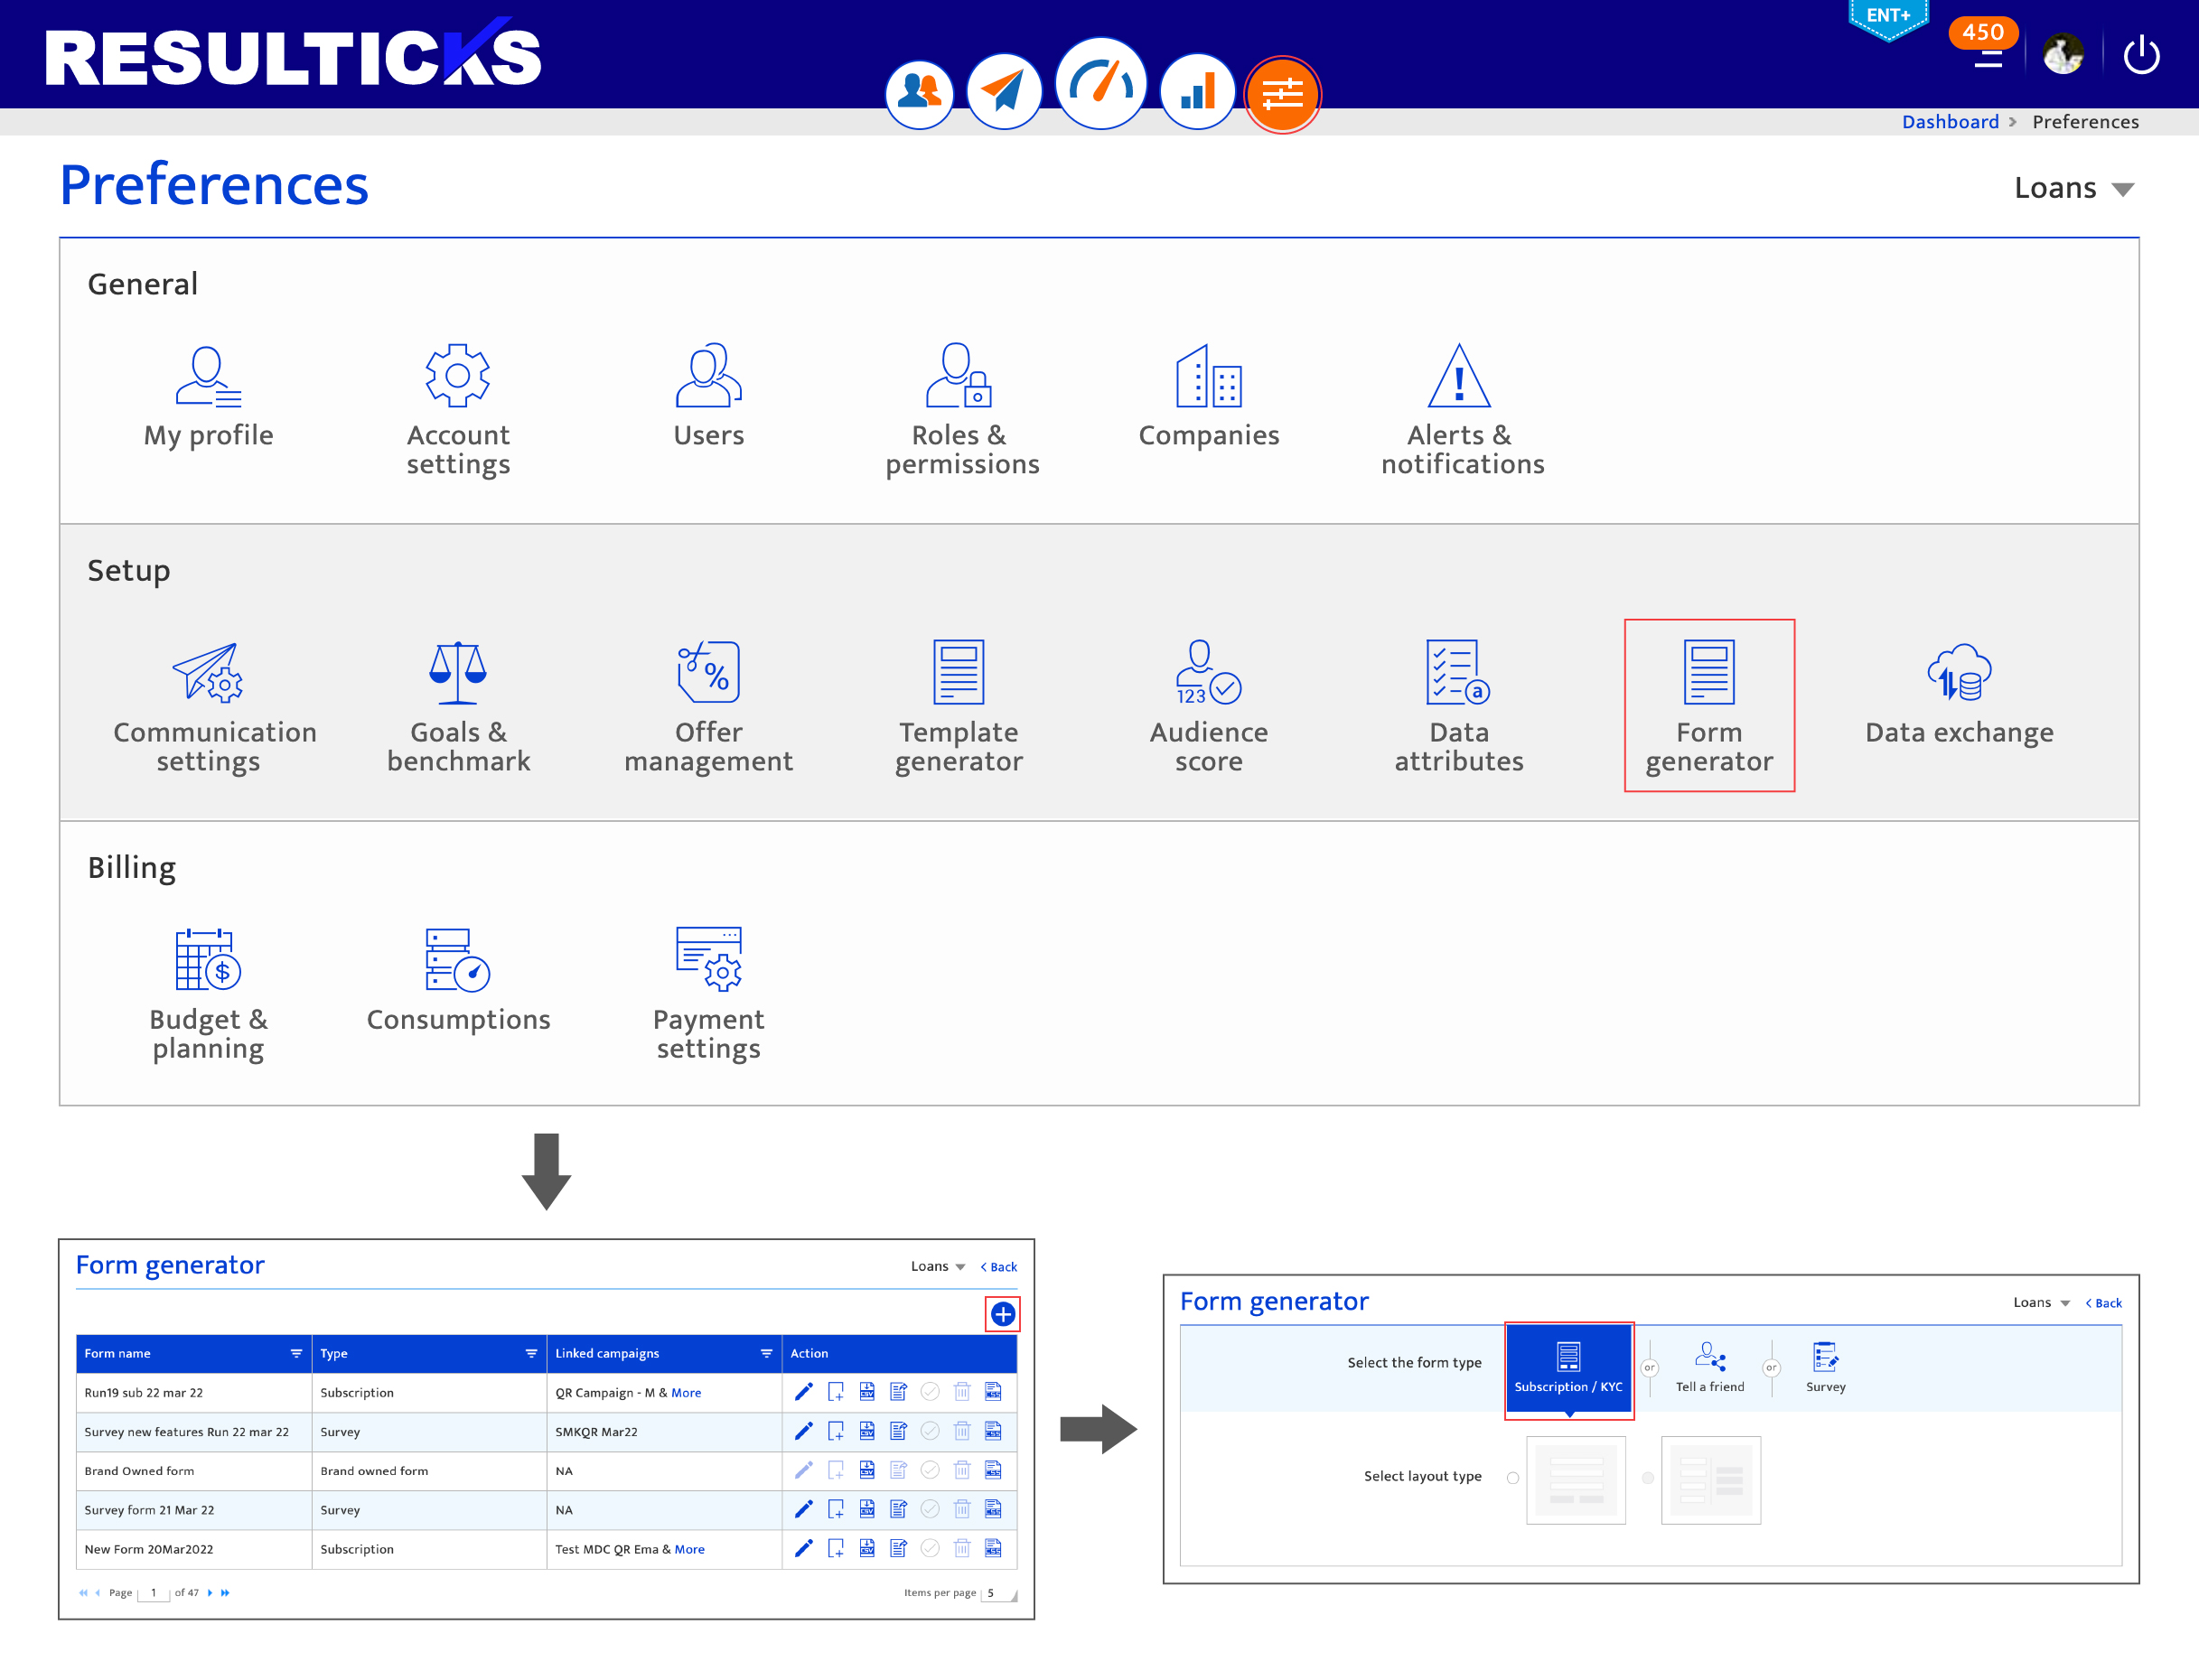
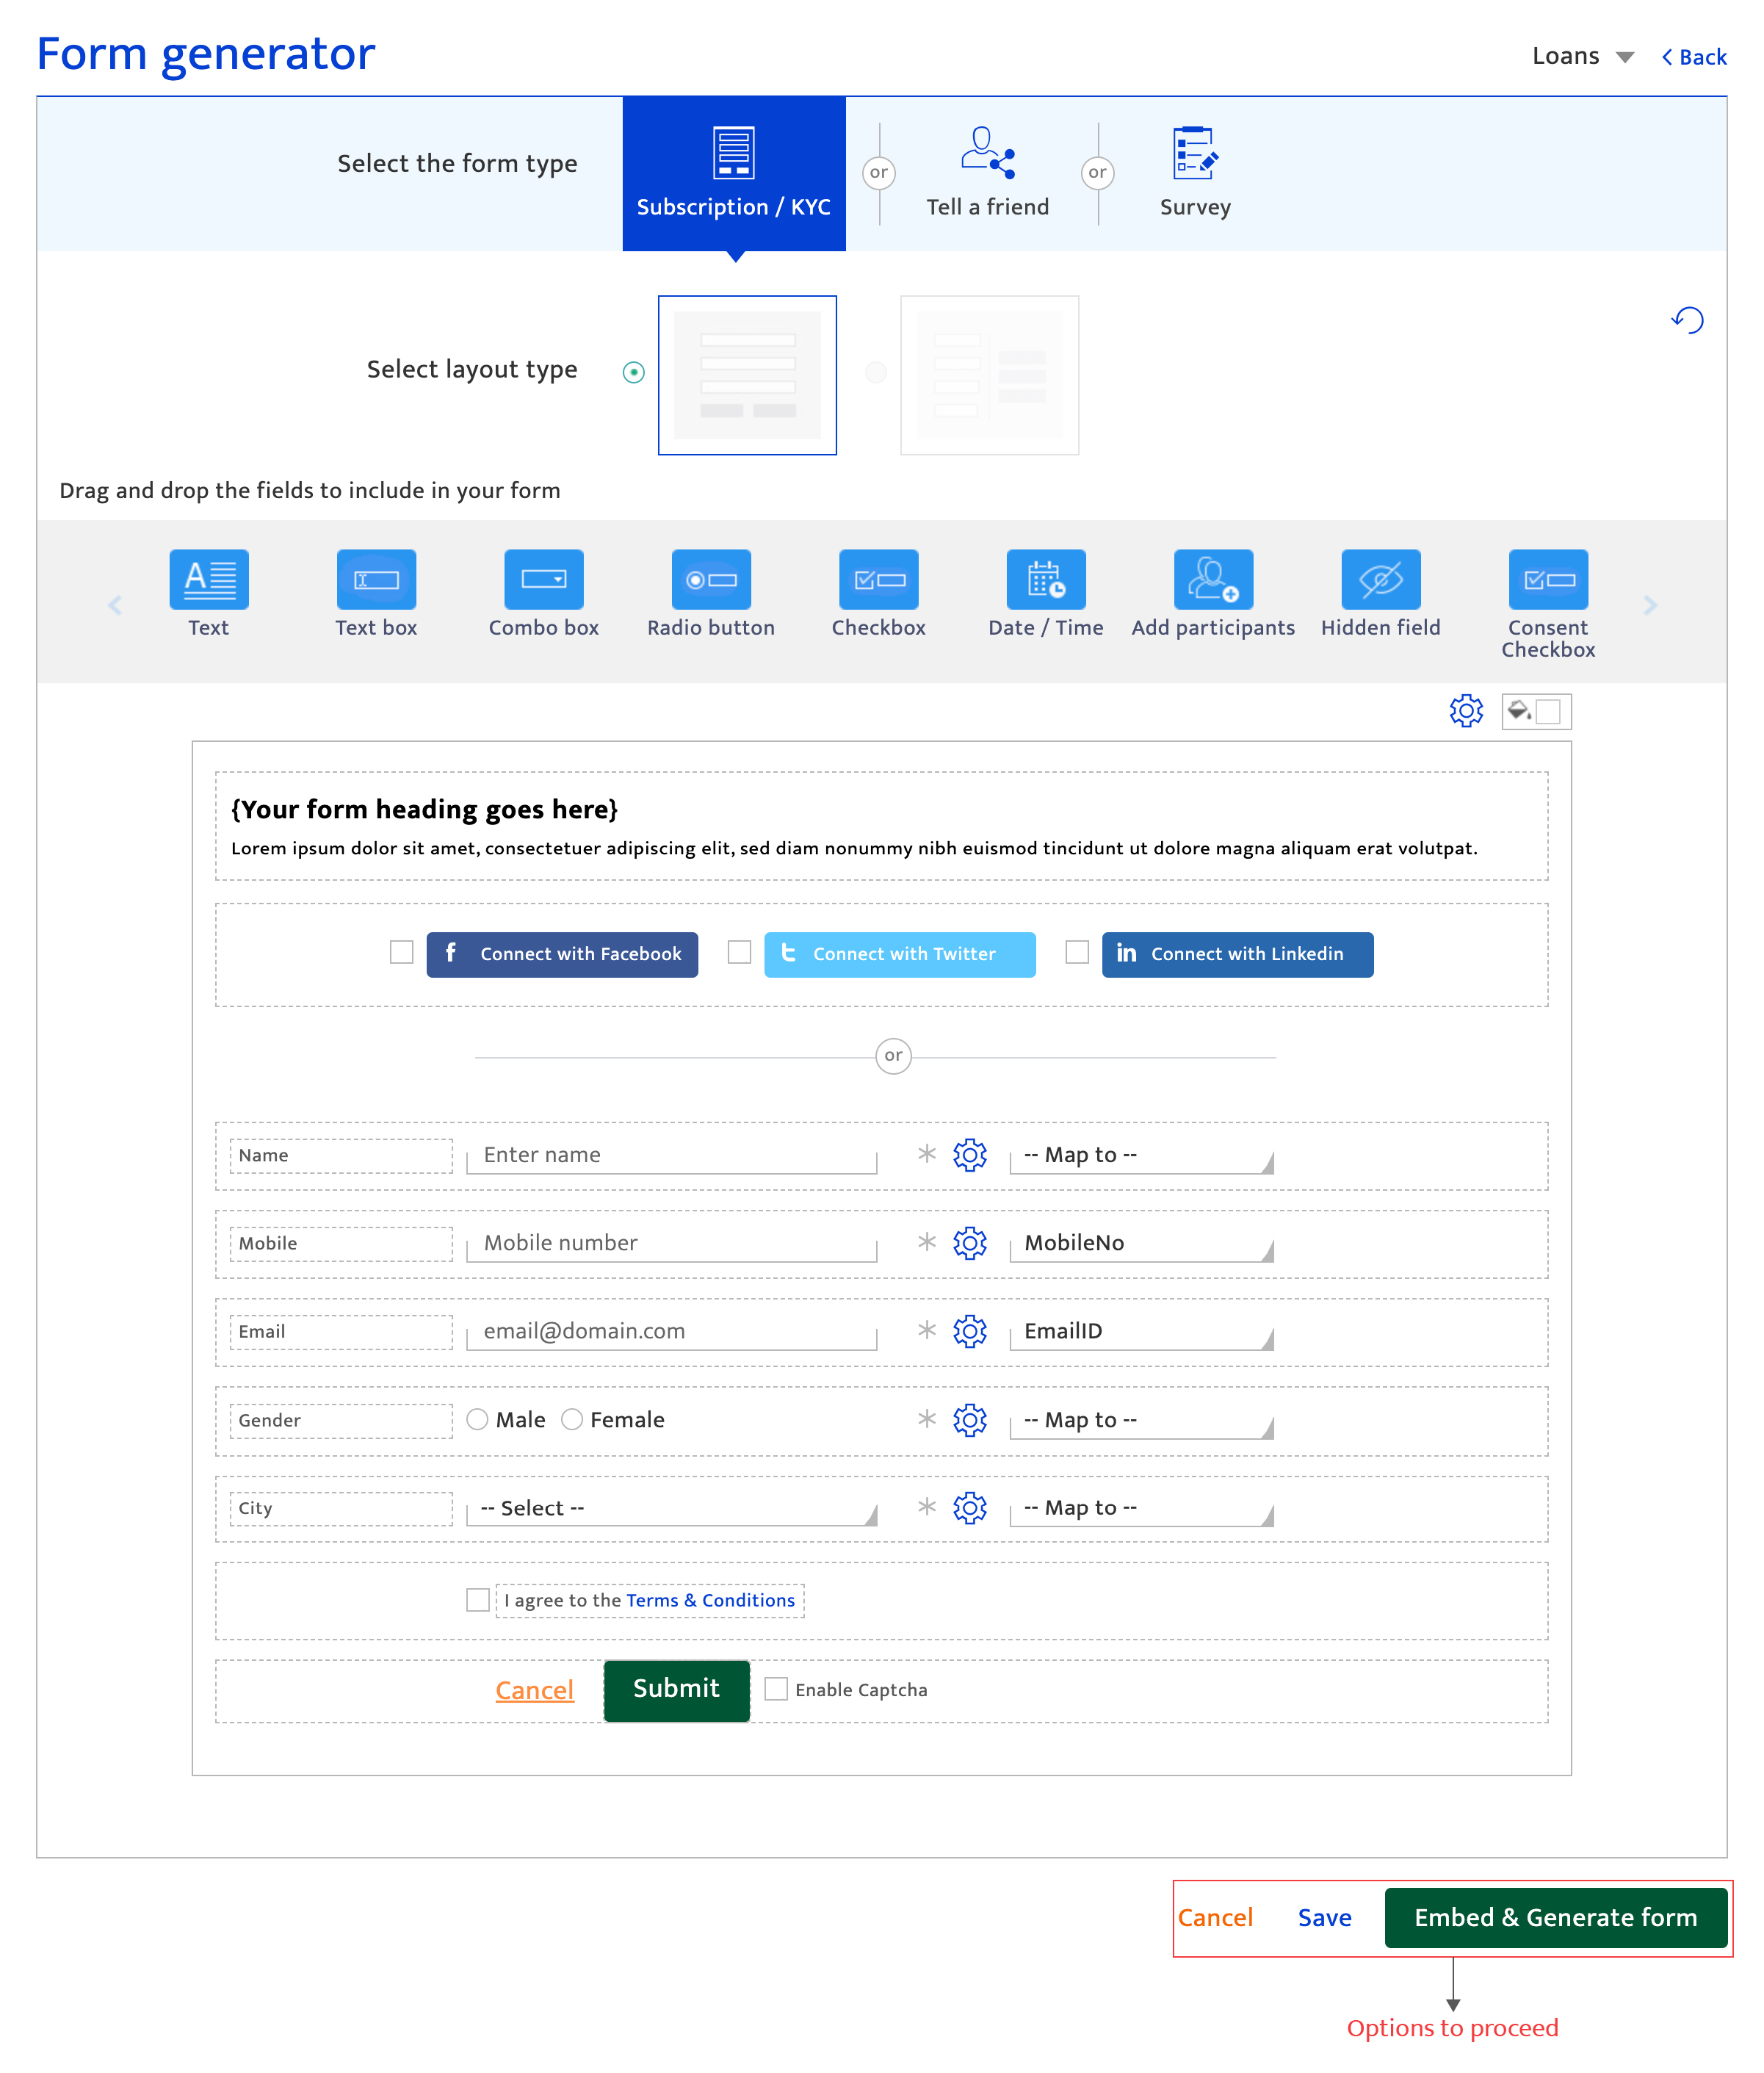
Creating a Subscription/KYC form#
- Select the layout. There are two choices that differ only in layout
- Edit the default form displayed
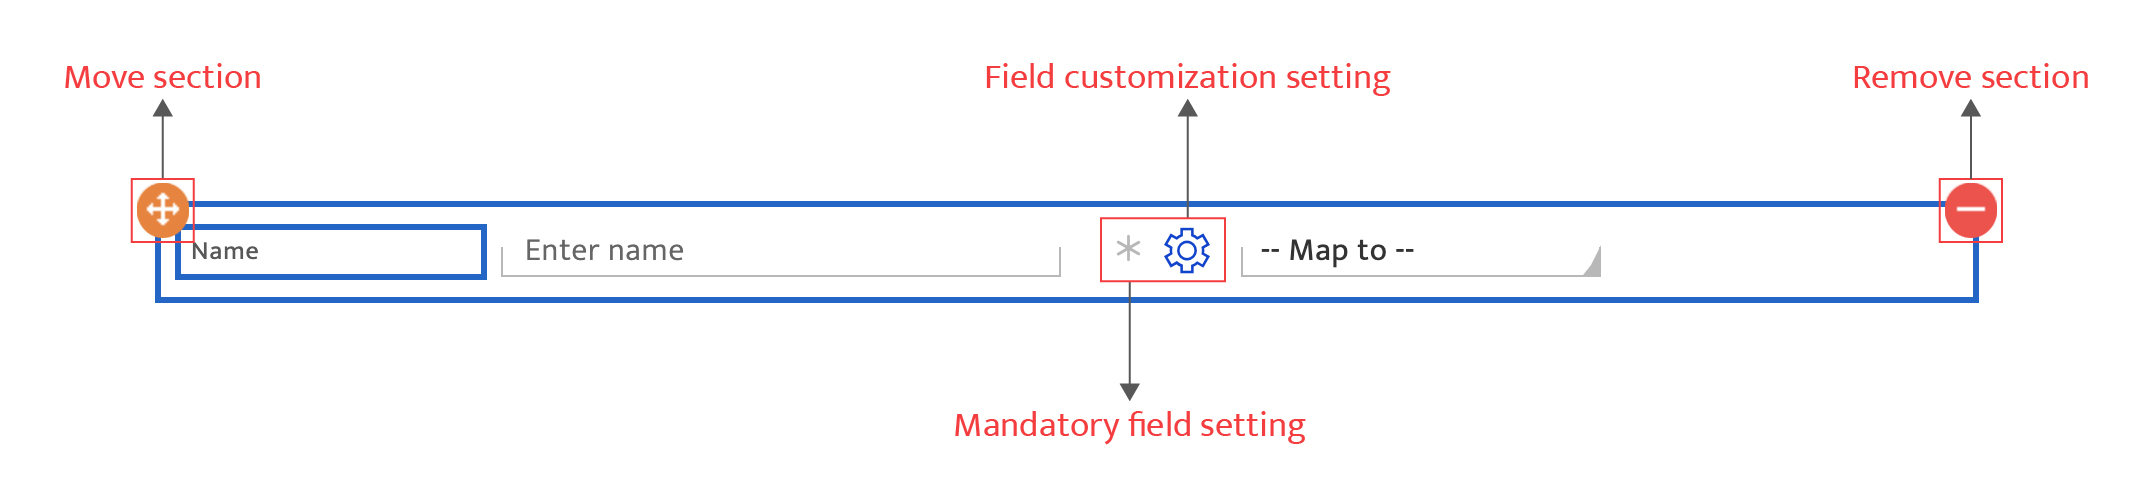
The form is divided into two sections which contain a number of default content elements which can be:- Moved, by hovering over the form element and clicking on the drag icon
- Deleted, by clicking on the delete icon.
- Made mandatory by clicking on the star icon for some form element types
- Customized in terms of content using the text editor for some form element types.
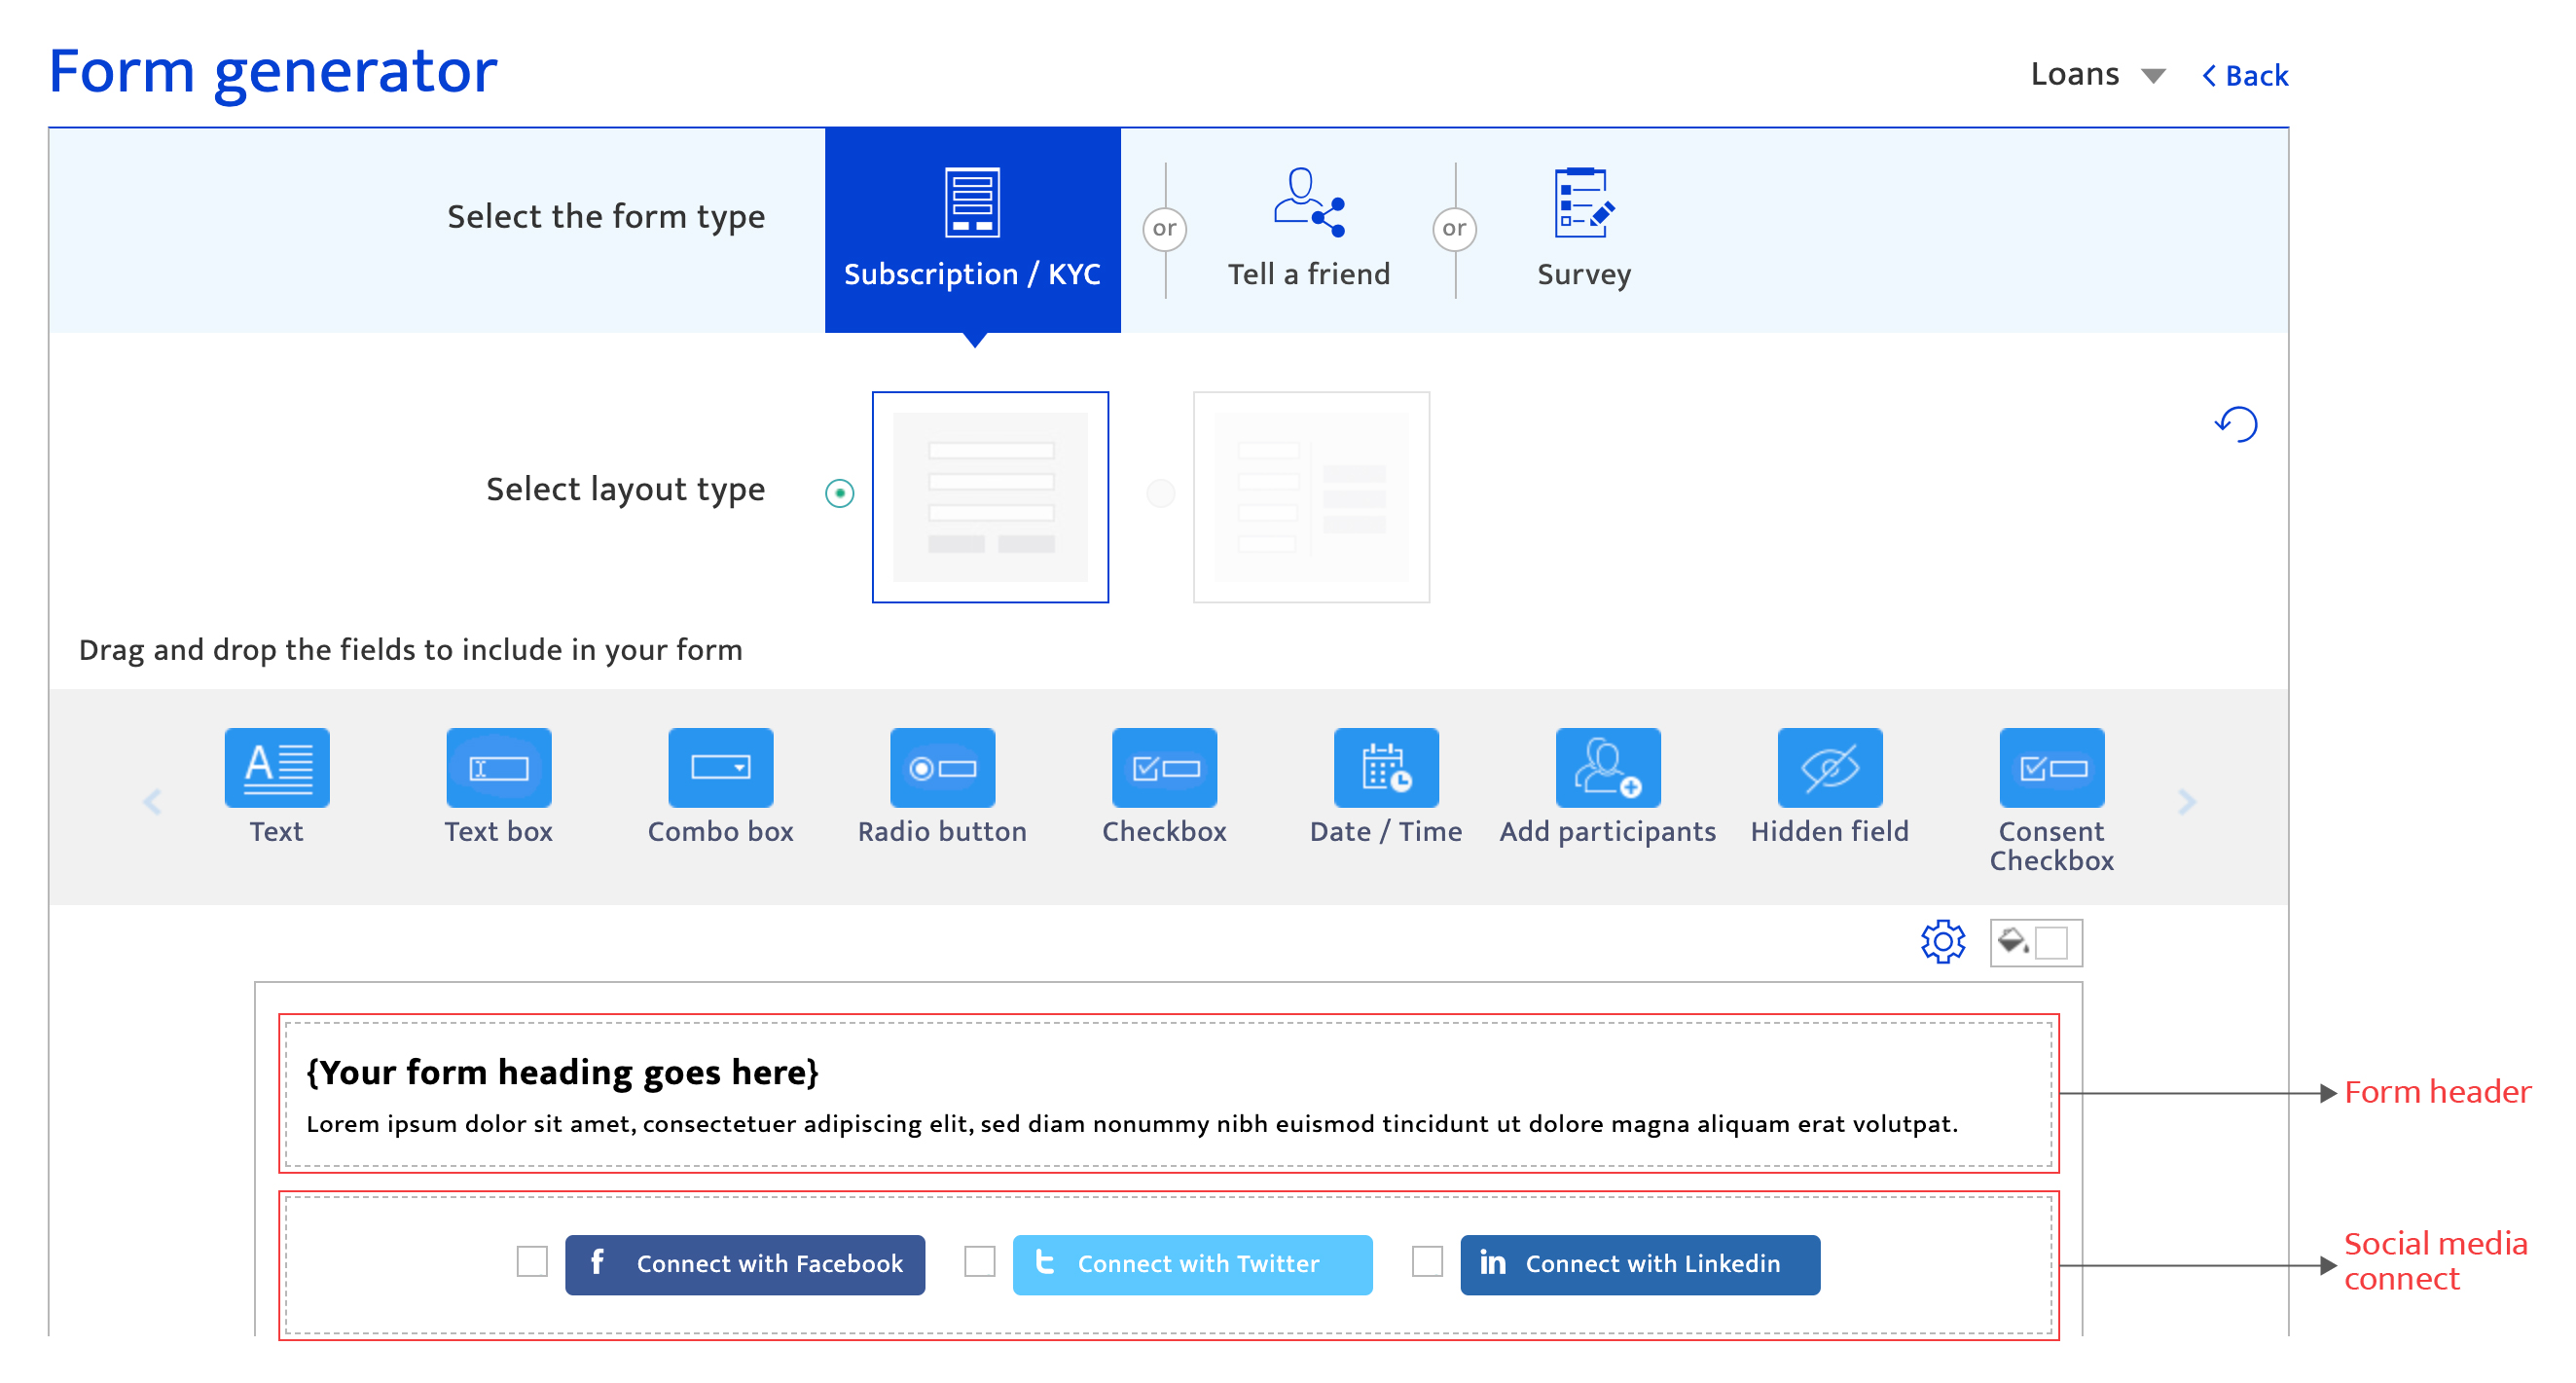
- Edit the top section.
However new form elements can be inserted anywhere in the bottom section. See Customizing Form Elements below. This section contains the following default form elements which can be edited:- Form heading: The specialized form element in the header is used to state the purpose of the form and provides instructions on using the form. It comes with an industry-standard text editor. Input text in this field. There is no character limit.
- Social media connectors: This specialized form element enables audiences to use their social media account to complete the form while providing consent to access their social media profile. Select any or all the integrated social media channels displayed using the checkboxes. If also providing the option to use a personal login in the bottom section, the word “or” will be displayed after this section.
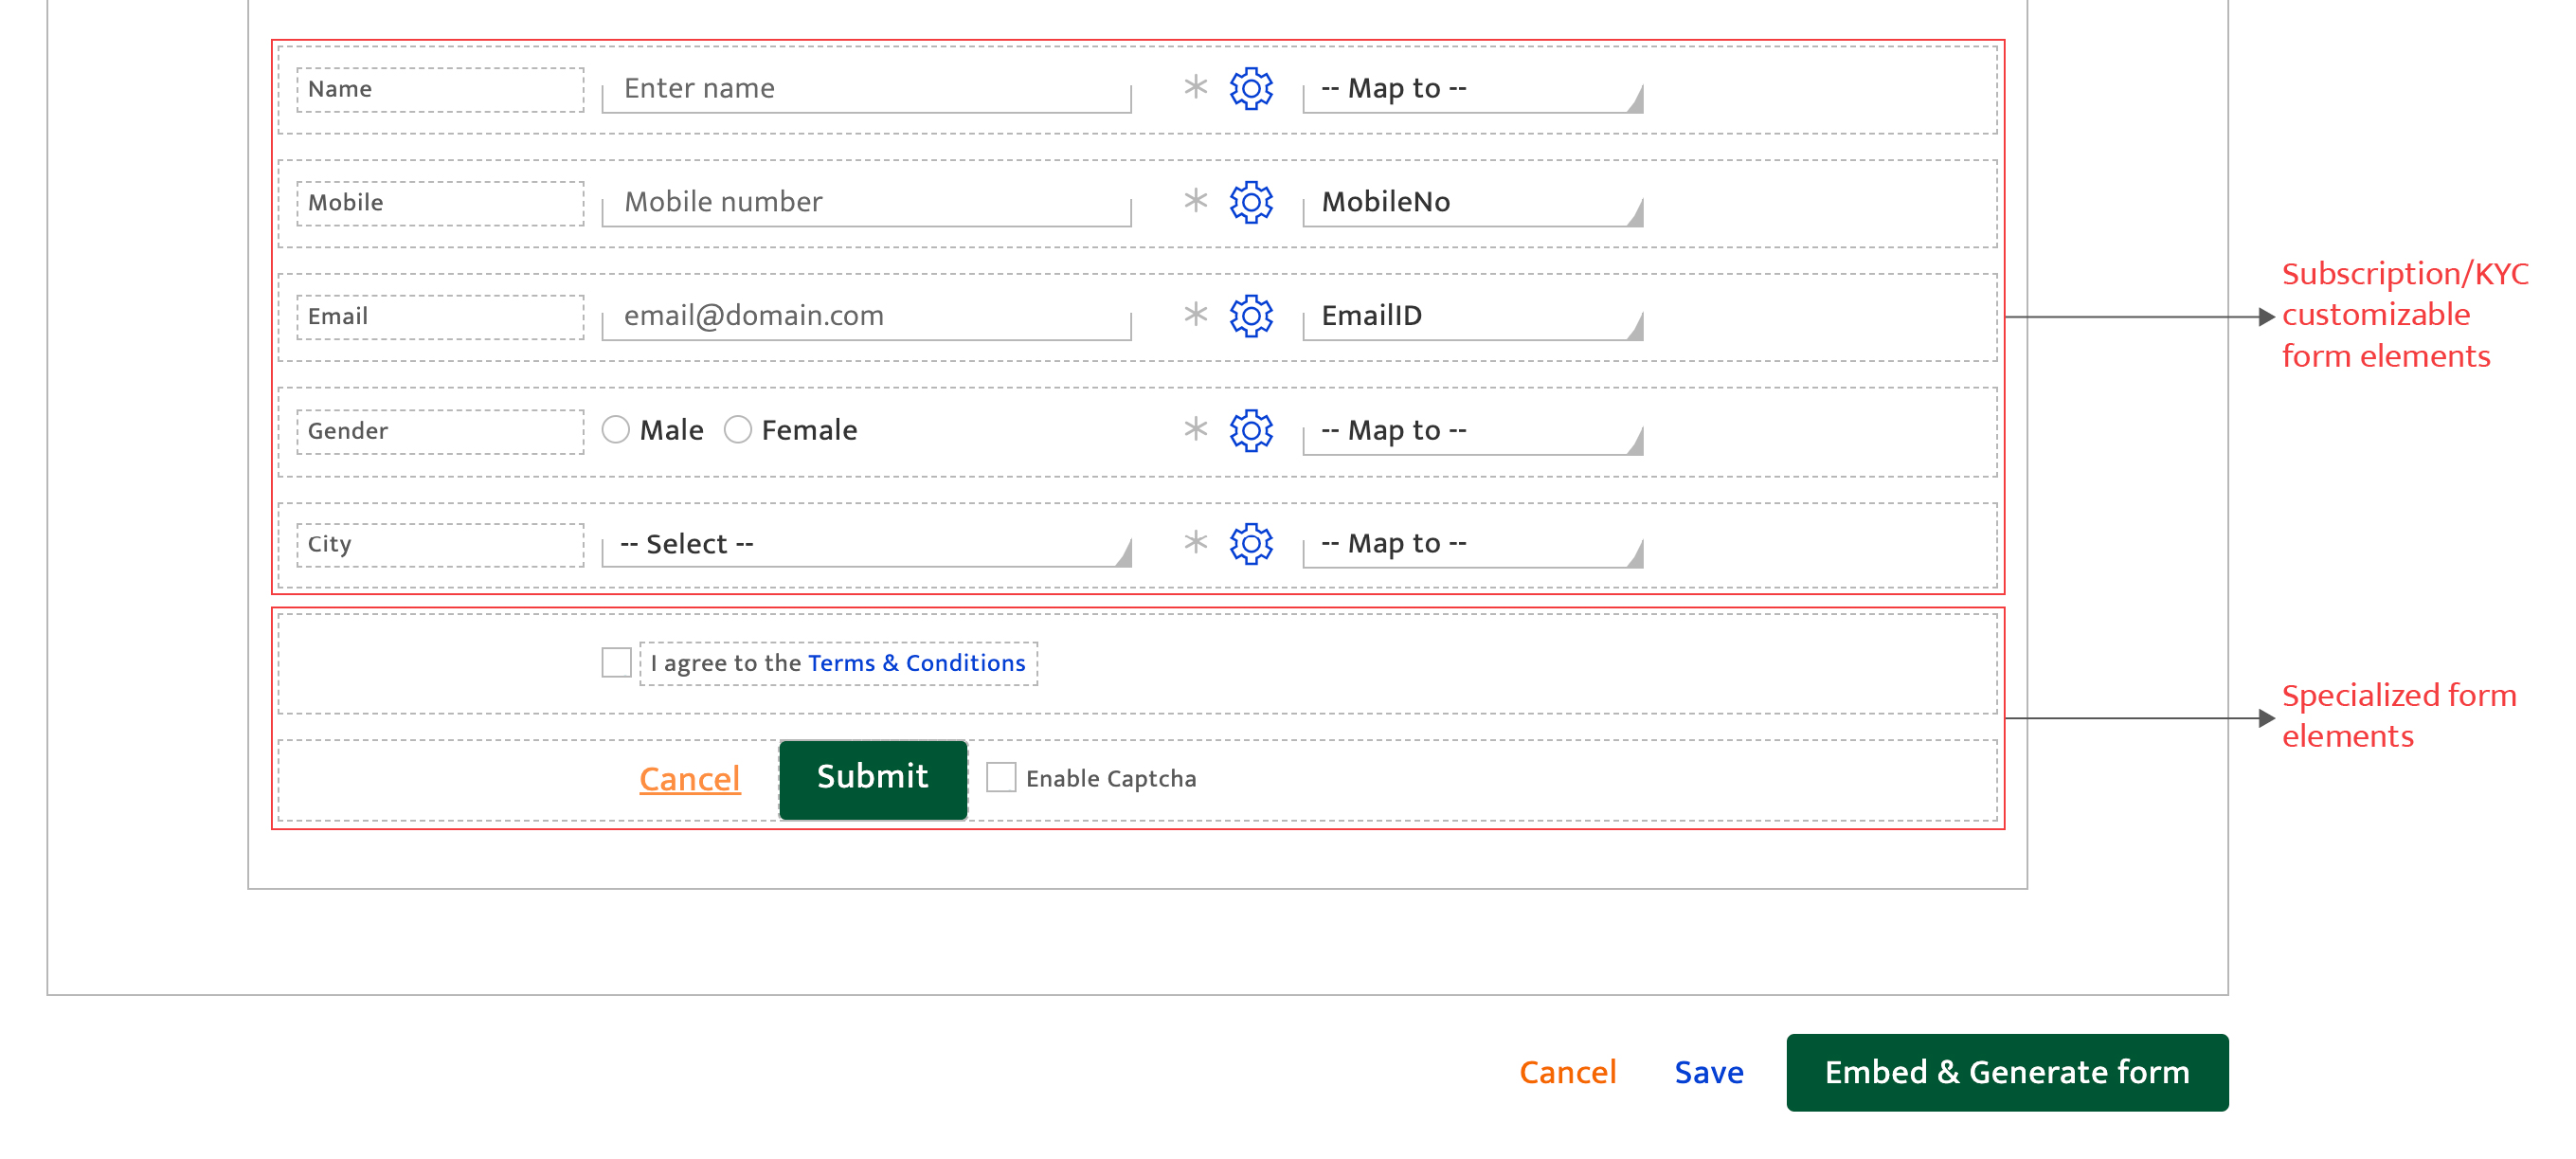
- Edit the bottom section.
This section contains a number of default form elements relevant to a subscription /KYC form. They are all customizable to an extent.
New form elements can also be inserted anywhere in this section and customized. Some of the specialized form elements in this section are:-- Agree to terms: This is a specialized form element that is used to receive consent on subscription or KYC terms and is usually hyperlinked to a document or URL with the details. It is usually marked as a mandatory field.
- Submit/Cancel: This is a specialized element displayed as a button and if clicked submit the form data for storing in Resulticks. If “Cancel” is clicked, all input will be discarded and no data will be collected. If this form element is deleted, the form data cannot be captured.
- Use other options
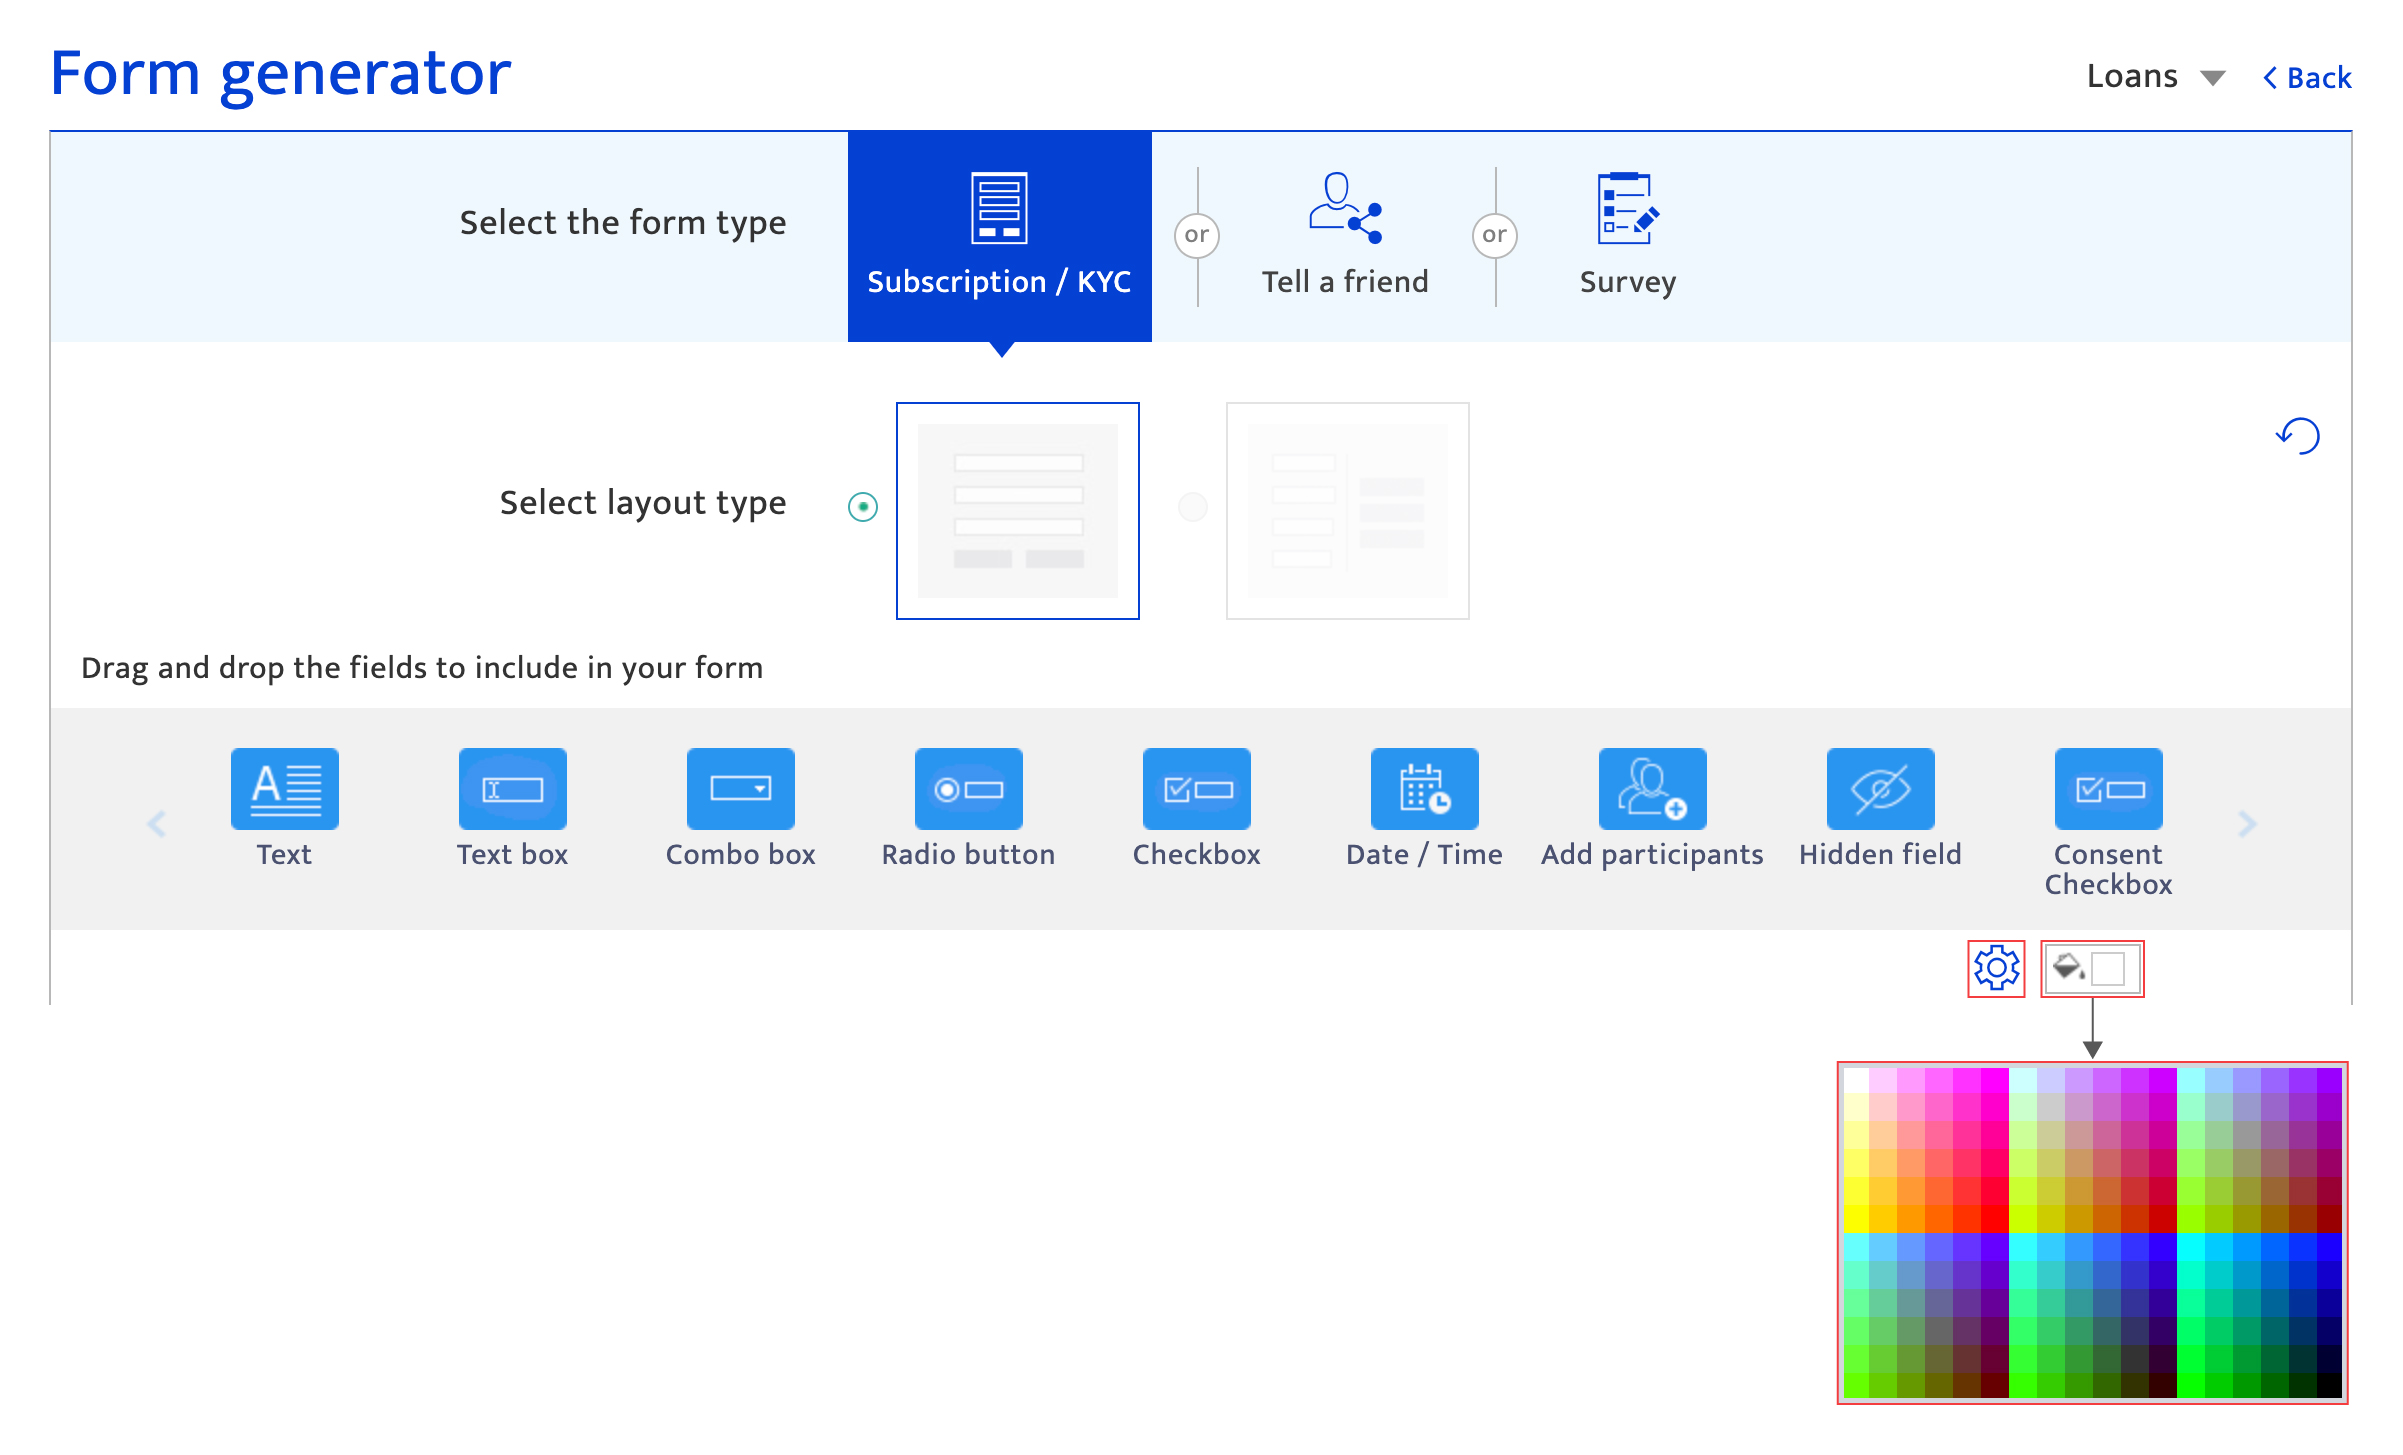
- Add a background color for the entire form by clicking on the color icon and selecting a color from the drop-down color palette.
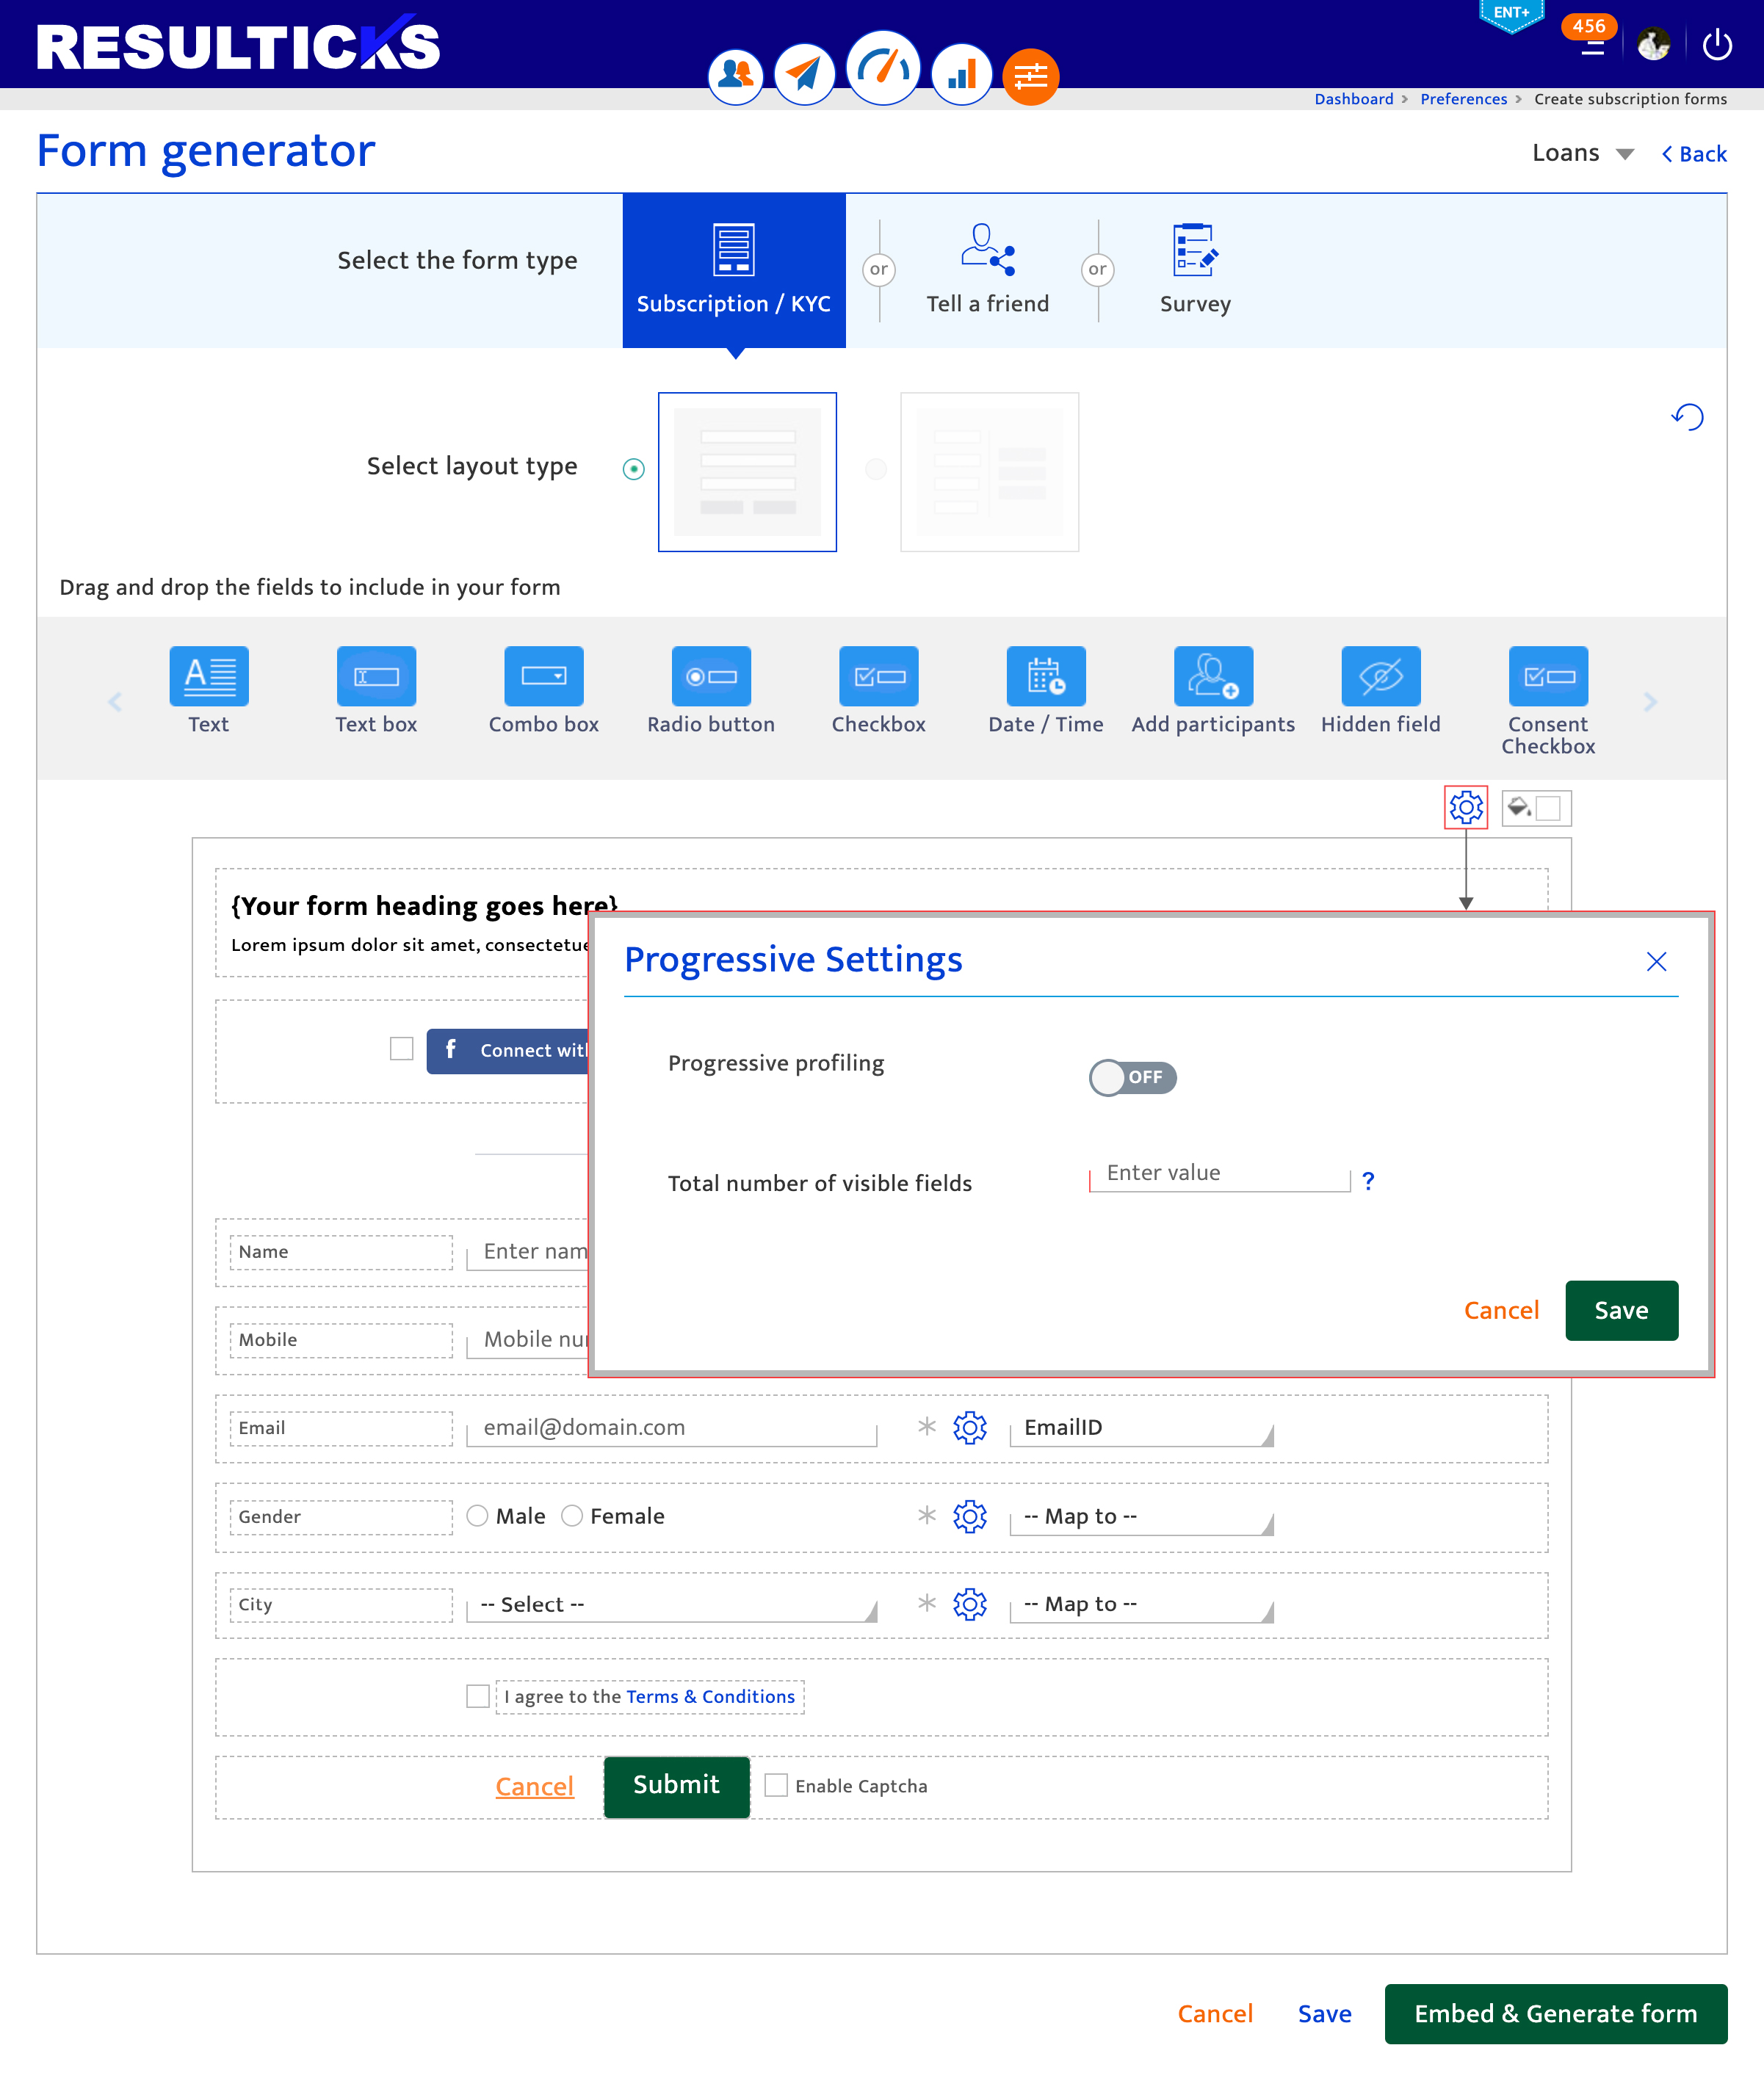
- Activate progressive profiling. Progressive profiling is a process used to augment audience data. It pre-populates existing data for contact and prompts the entry of data for new fields only. To do this:
- Toggle switch to On in the pop-up window.
- Select to pre-populate known fields using the toggle switch.
- Select to auto-save filled fields using the toggle switch. This will automatically save any information put into these fields, even when the form is not submitted.
- Set the total number of visible fields to be included in a form when using progressive profiling. This is used to ensure the defined number of fields is displayed every time to a contact when they are requested to complete the form.
- Click “Save” to keep the settings.
- Proceed to the next step
- Click “Cancel” to discard all input and return to the Form List.
- Click “Update” to save the form settings, after validation for any missing information by the platform.
- In the pop-up screen, give the form a name that will be saved in the form library.
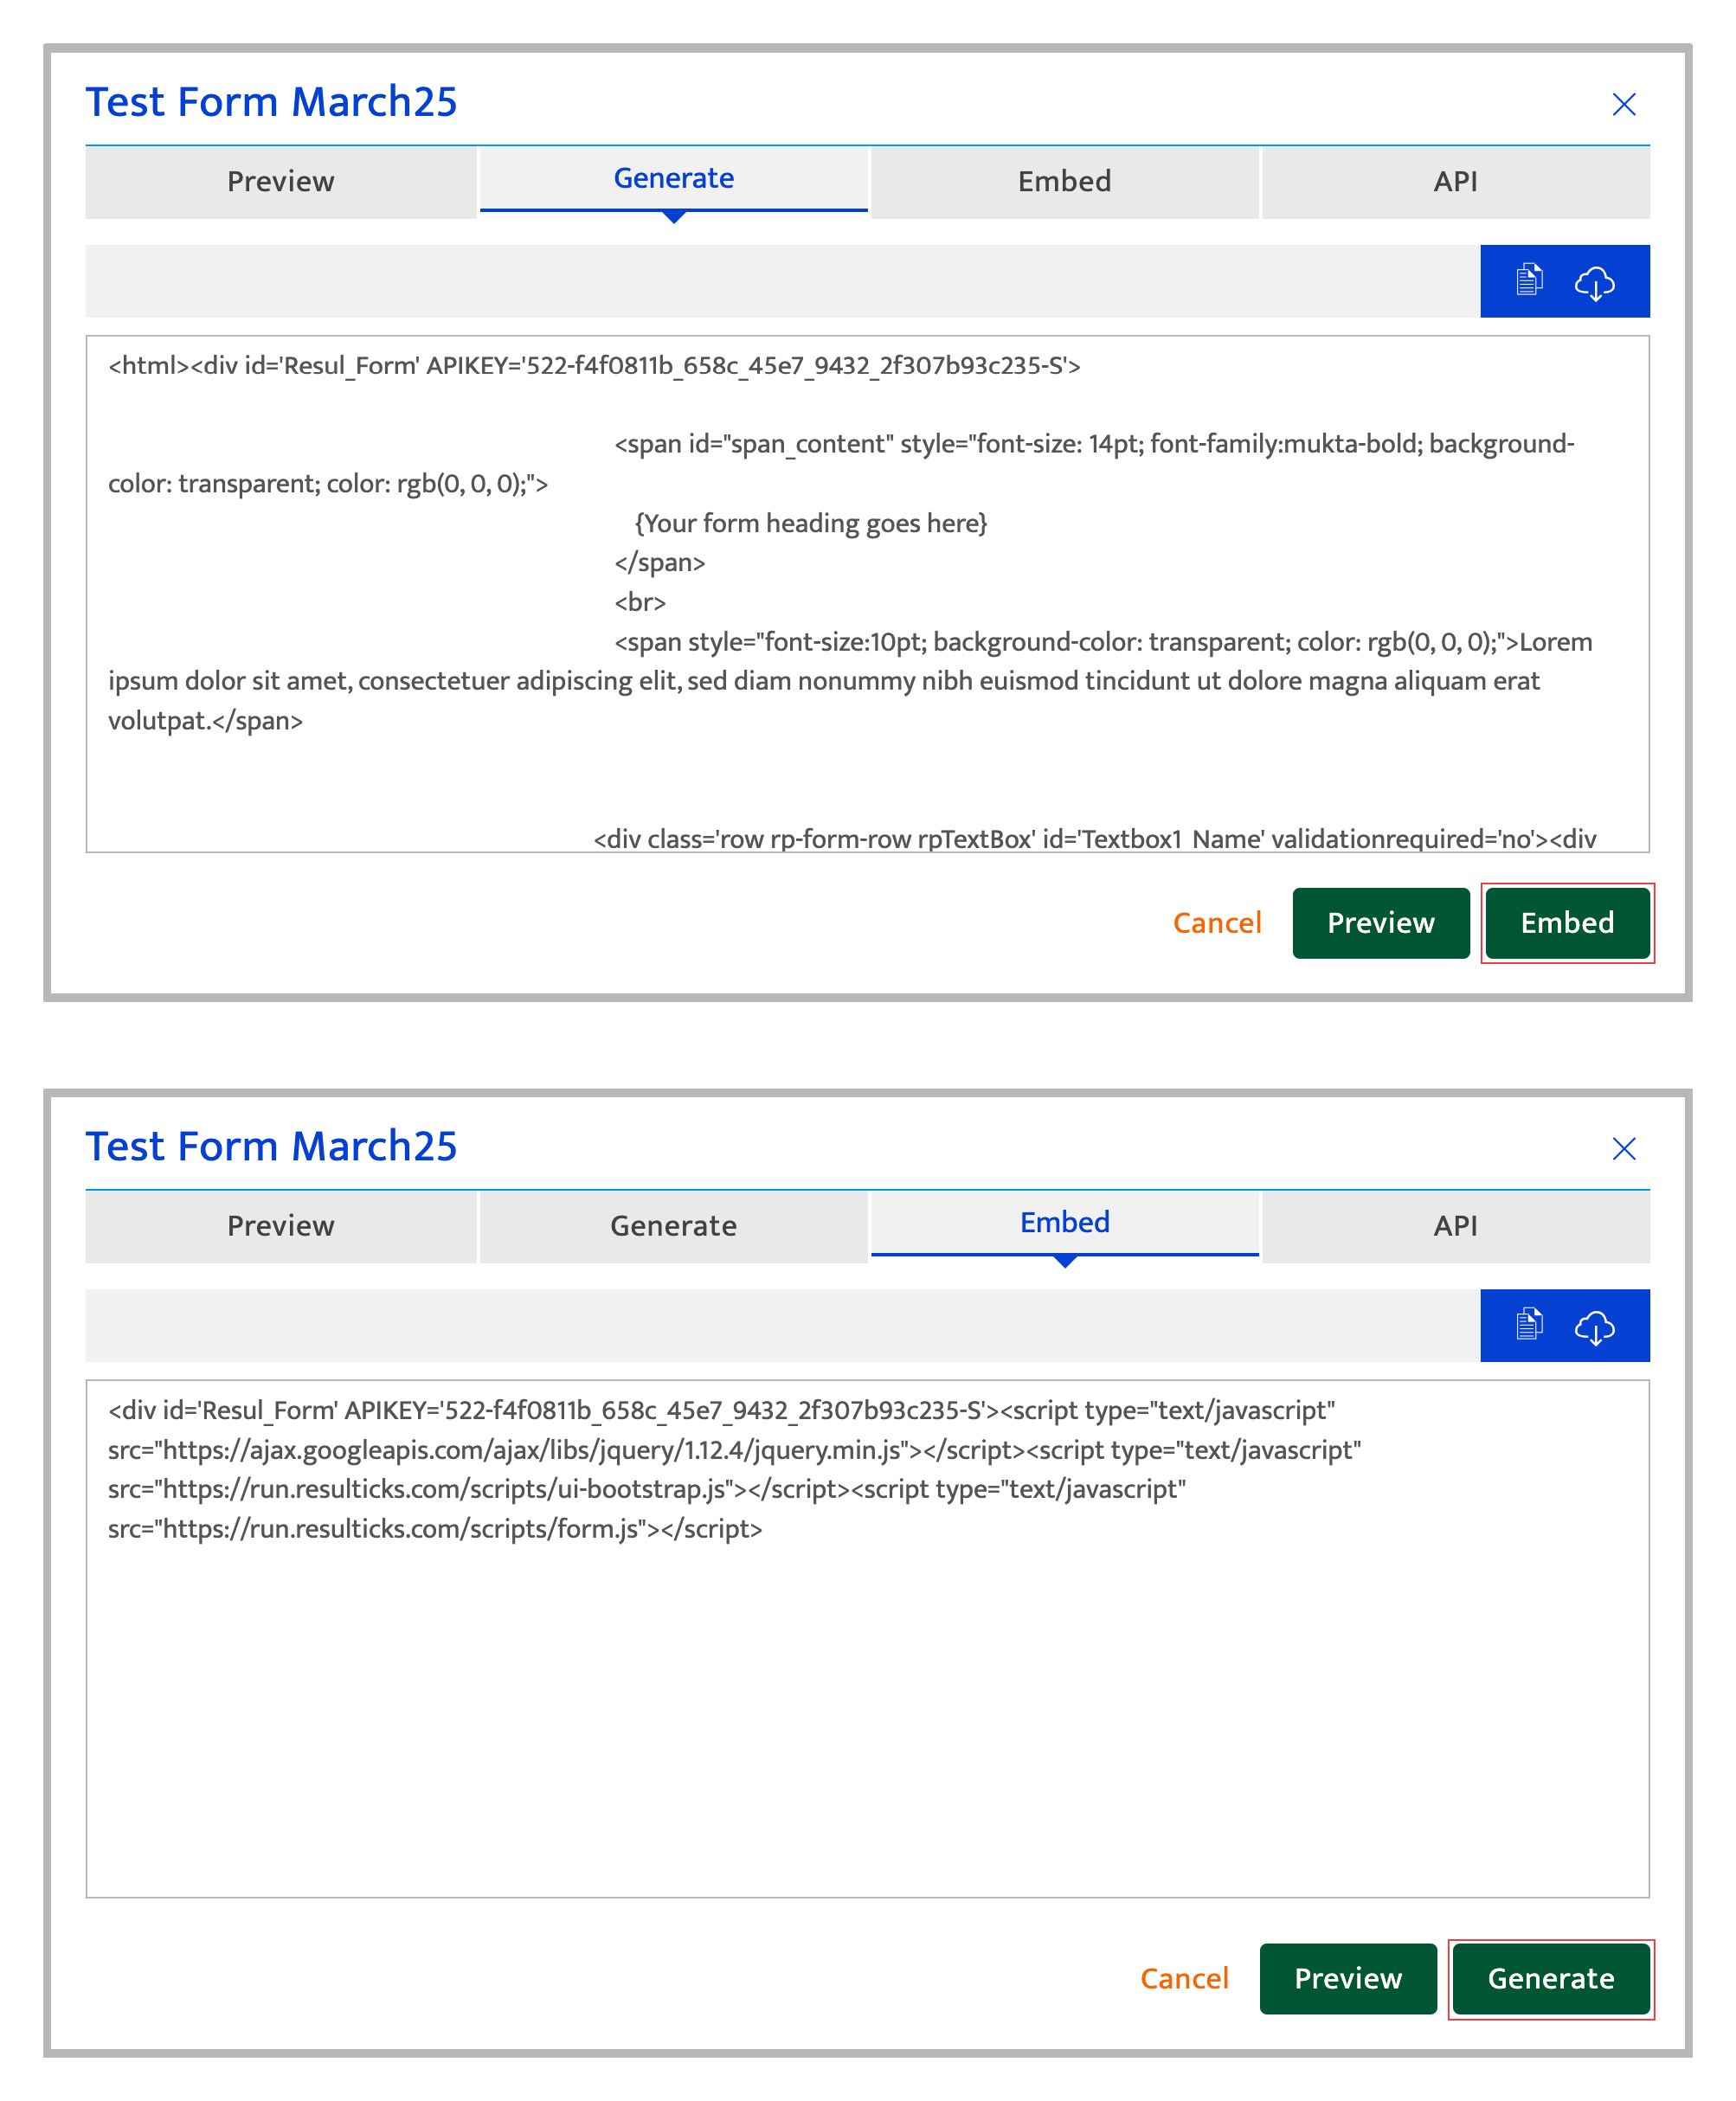
- Embed and generate form
The form configured must be generated as HTML code for embedding into web and mobile sites. To do this:- Click on embed and generate the form. If the form is not yet saved, the “Save form” popup will appear to save and proceed.
- Preview the form design on the “Preview” tab.
- Create the HTML code for the form using one of two options:-
- Click the “Generate” tab or button, to generates code that can be copied and pasted into web or mobile sites. If there are any changes to the form, the website code must be updated manually by copying the updated code from Resulticks.
- Click the “Embed” tab or button, to generate code that can be copied and pasted into web and mobile sites. If there are any changes to the form, the form will be automatically updated.
- Use the copy or download icons, in either case, to port the code
- Click “Cancel” to discard any unsaved changes and be redirected to the form.
Adding customizable form elements#
- Select the type of form element by clicking on the icon from the template bar.
- Create the content according to the type requirements.
- Make the form element mandatory by clicking the asterisk icon. Except for text, all customizable form elements can be flagged as mandatory.


Using form elements#
The form elements and specific capabilities are detailed below.
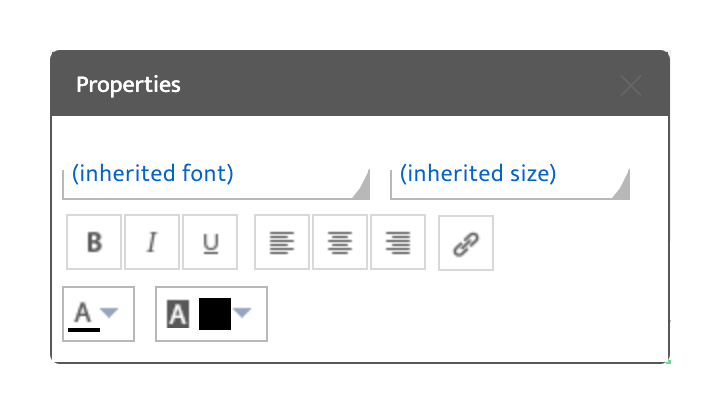
Text
Use this element to provide additional information.

The text field includes an industry-standard text editor to update font type, size, color, alignment, hyperlinking, and so on. Use the editor’s tooltip for guidance on the options available.
The editor offers an option to insert personalized content, based on the setup done in the Data Attributes section in Preferences.
Text box
Use a text box to collect information from a contact (e.g. name, email ID, and address). To utilize this element :-
- Enter the text box label, which is a user-friendly description of the field during display. There is no character limit.
- Enter the default field value by clicking the setting icon. There is no character limit.
- Map the field to a selected data attribute for storage.

Combo box
Use when the contact needs to select one pre-defined answer from a drop-down list (e.g. city). To use this element :-
- Enter the text box label, which is a user-friendly description of the field during display. There is no character limit.
- Set the drop-down values by clicking the setting icon. Use commas to separate the entries; there is no limit to the number of entries.
- Map the field to a selected data attribute for storage.

Radio button
Use when the contact needs to select one of several pre-defined options (e.g. Yes/No). To use this element:
- Enter the text box label, which is a user-friendly description of the field during display. There is no character limit
- Set the radio button options text by clicking the setting icon. Use commas to separate the entries. There is no character limit. This field allows for a minimum of 2 and a maximum of 3 options.
- Map the field to a selected data attribute for storage.

Checkbox
Use when the contact needs to select more than one option from a pre-defined list (e.g. preferred new products).
- Enter the text box label, which is a user-friendly description of the field during display. There is no character limit.
- Set the checkbox options text by clicking the setting icon. Use commas to separate the entries. There is no character limit. This field allows a maximum of 5 options.
- Map the field to a selected data attribute for storage.

Date/Time
Use to collect the contact’s specified preferred dates & time, say, for an event or a call.
- Enter the text box label, which is a user-friendly description of the field during display. There is no character limit.
- Enter the default date and time to display by entering it into the text box or select the time and date using the icons.
- Finally, map the date and time collected to a particular data attribute. This attribute is normally specially created for the event.

Add participants
Use to give contact the ability to add referrals.
- Enter the text box label, which is a user-friendly description of the field during display. There is no character limit.
- Specify what information should be collected by clicking the setting icon and selecting from the fields displayed (salutation, full name, email, and mobile number) in the popup screen.
- Specify the total number of people that can be invited, limited to a maximum of 5. Note that the contact will be able to click a “+” icon embedded in the form to create new rows, based on this number.
- Map the date and time collected to a particular data attribute.

Hidden field
Used for sensitive information. whether the information for this field is prefilled or entered by the user, the value will not be splayed.
- Enter the text box label, which is a user-friendly description of the field during display. There is no character limit.
- Map the field to a selected data attribute for storage.

Consent checkbox
Use to obtain consent from the contact
- Enter the checkbox label, which is used to briefly define what you would like to obtain consent for.
- Map the field to a selected data attribute for storage.

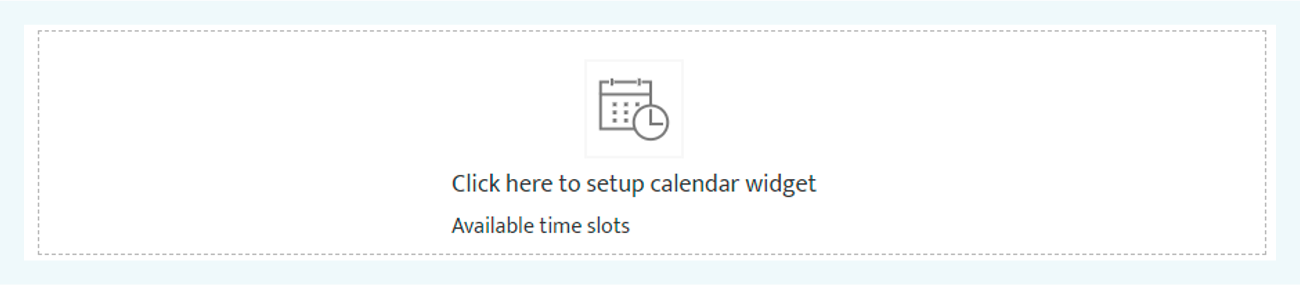
Calendar widget
Use to get contact to schedule an appointment by defining a time slot
- Click on the section. In the popup that opens up fill the following information
- The period start and end date
- Appointment duration
- Working hours
- Time format
- Timezone
- Name/ email (Click + button to add additonal names)