Create target lists
Create a new target list#
Go to Audience Module >> Target lists. The Target list screen will be displayed.
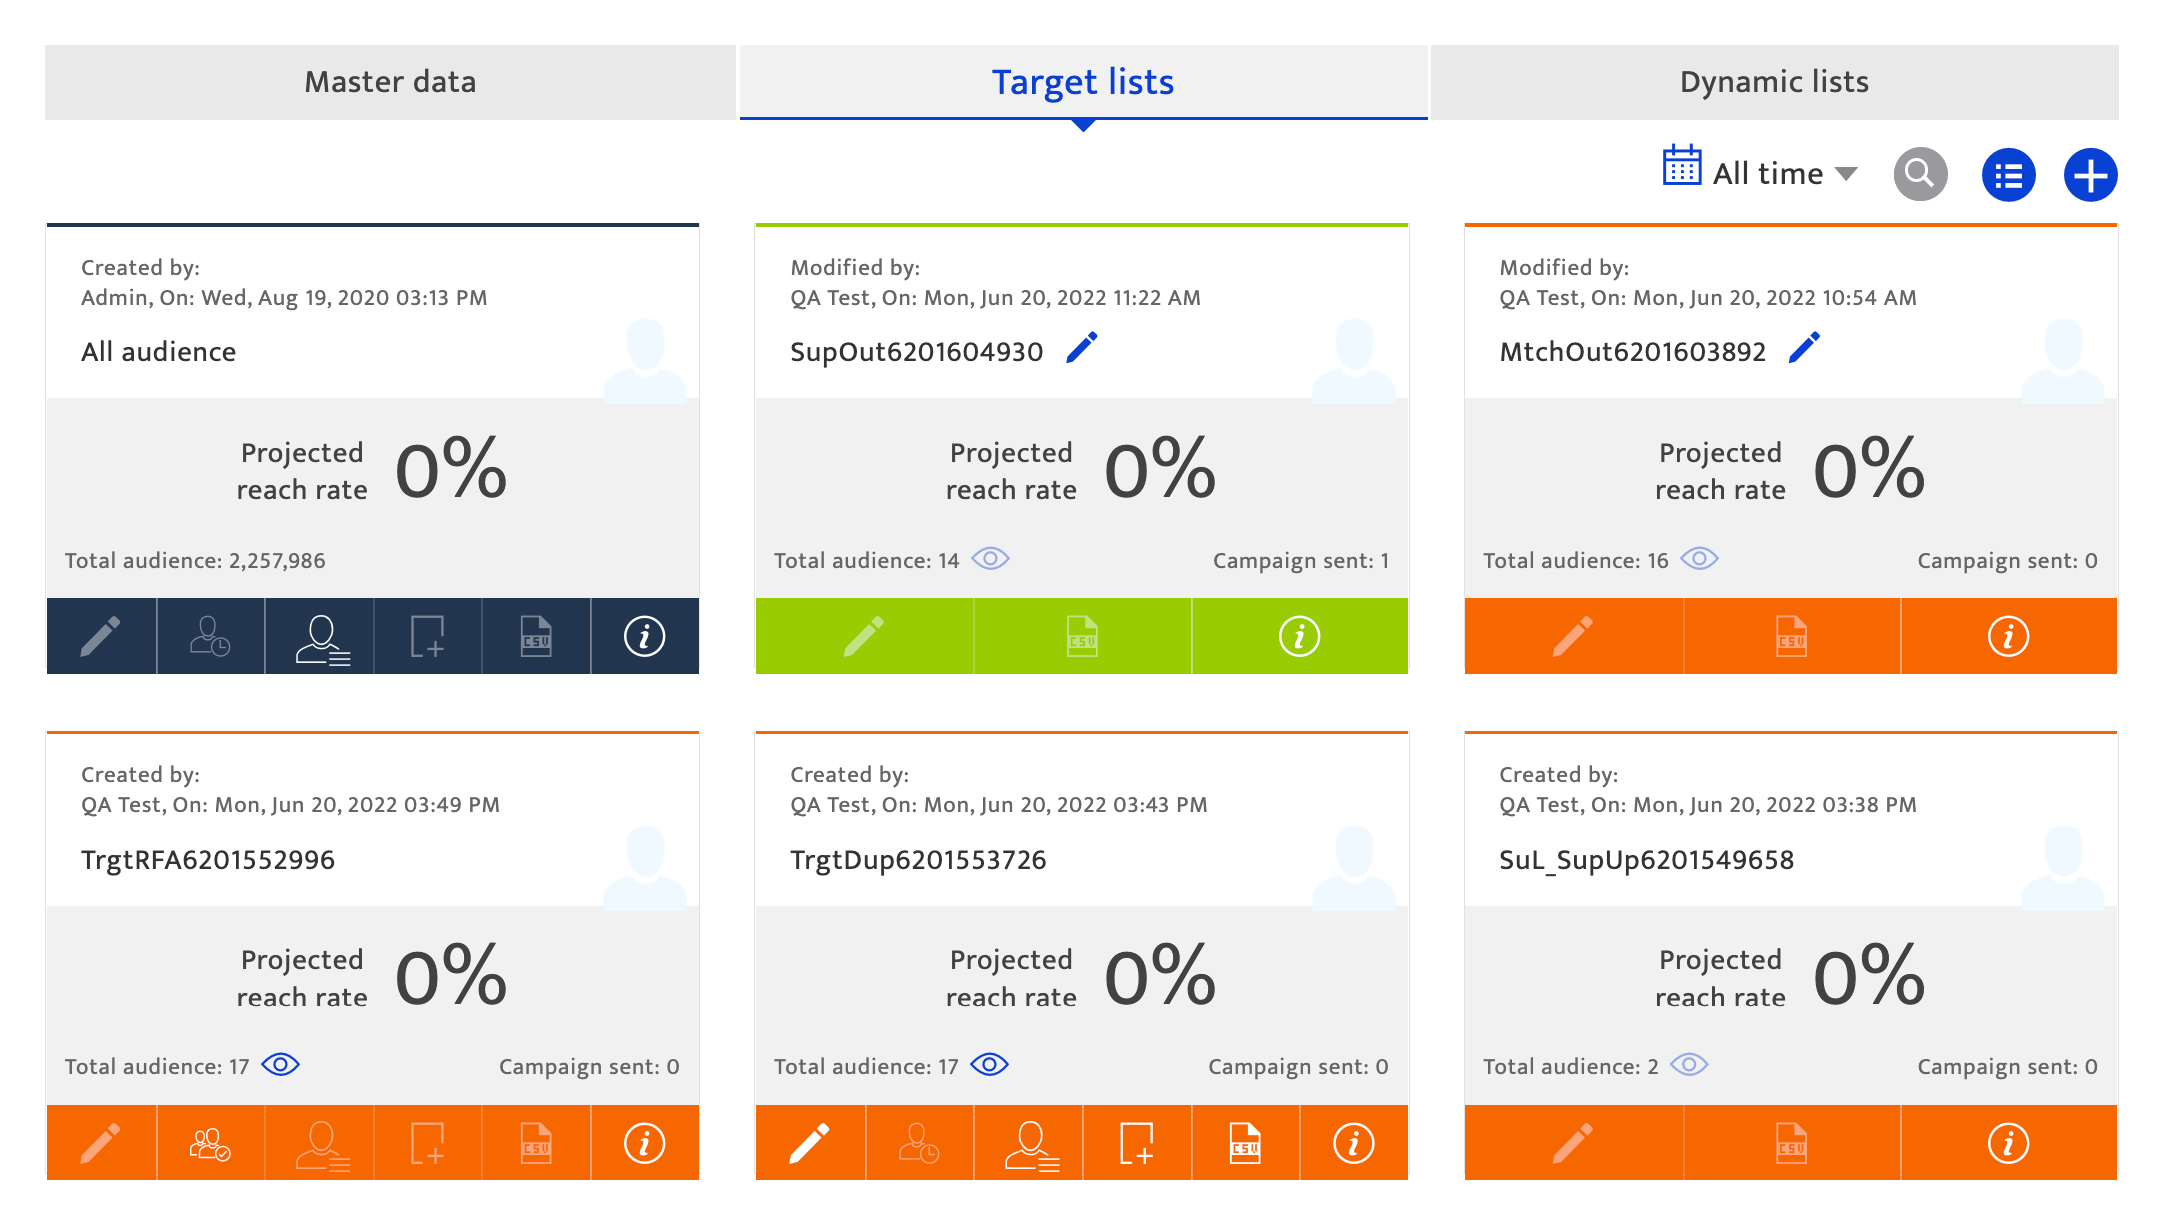
From this screen, users can create target lists by performing the below steps.
Steps to follow:#
- Click the
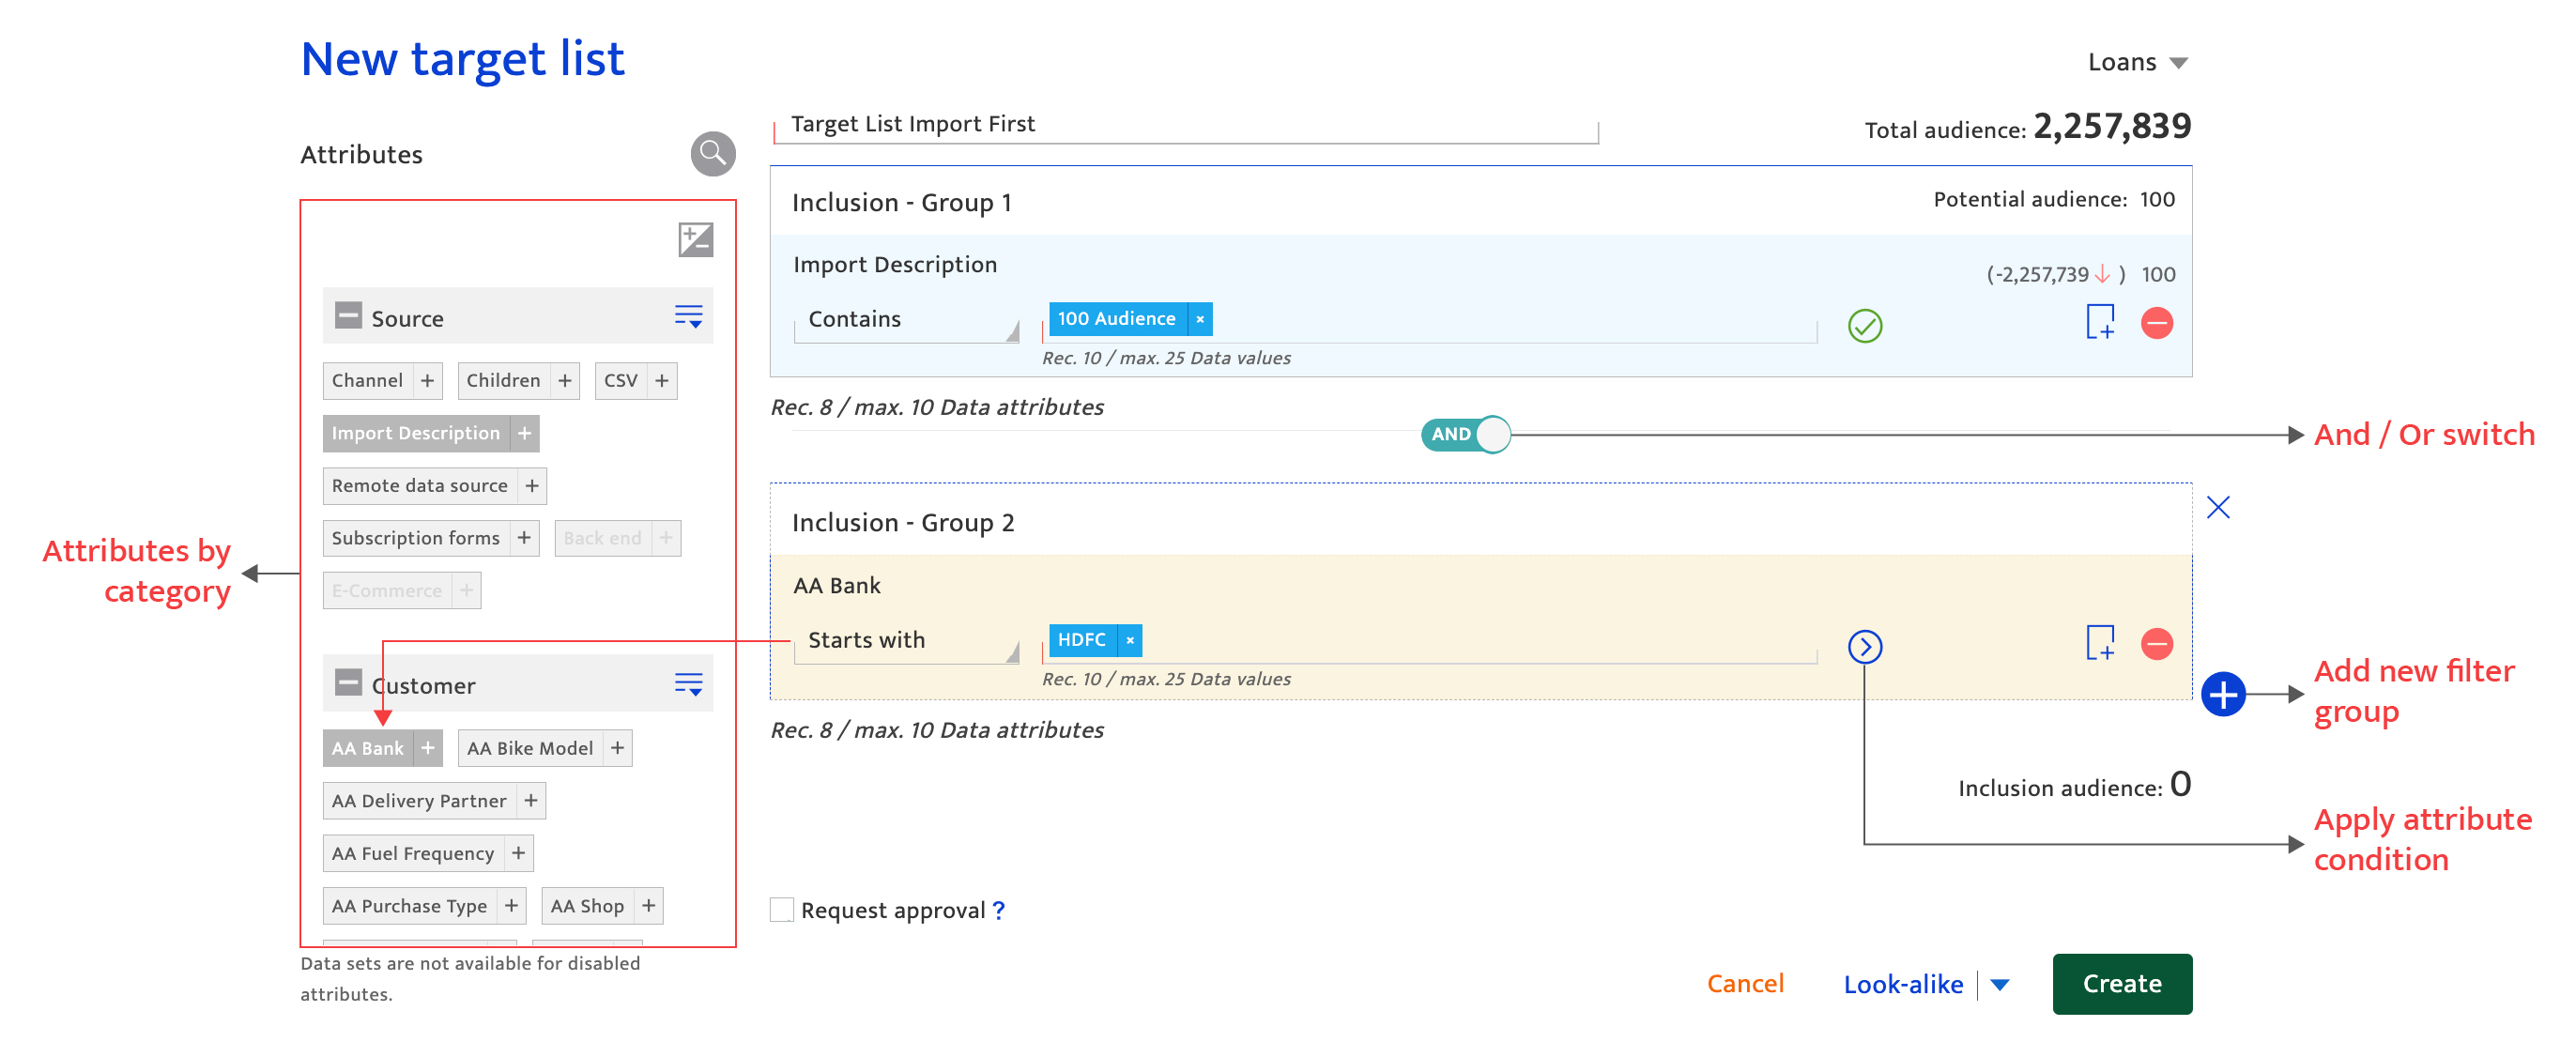
 icon on the top-right pane of the Target list screen. The New target list screen will be displayed.
 - Enter a name for the Target list.
- Create a Filter
- Select an attribute from the left pane to add in the Filter section.
- For each attribute, select the values from the respective drop-down lists or enter appropriate values manually.
For attributes having numerical value, the filter options displayed are shown in the below image.
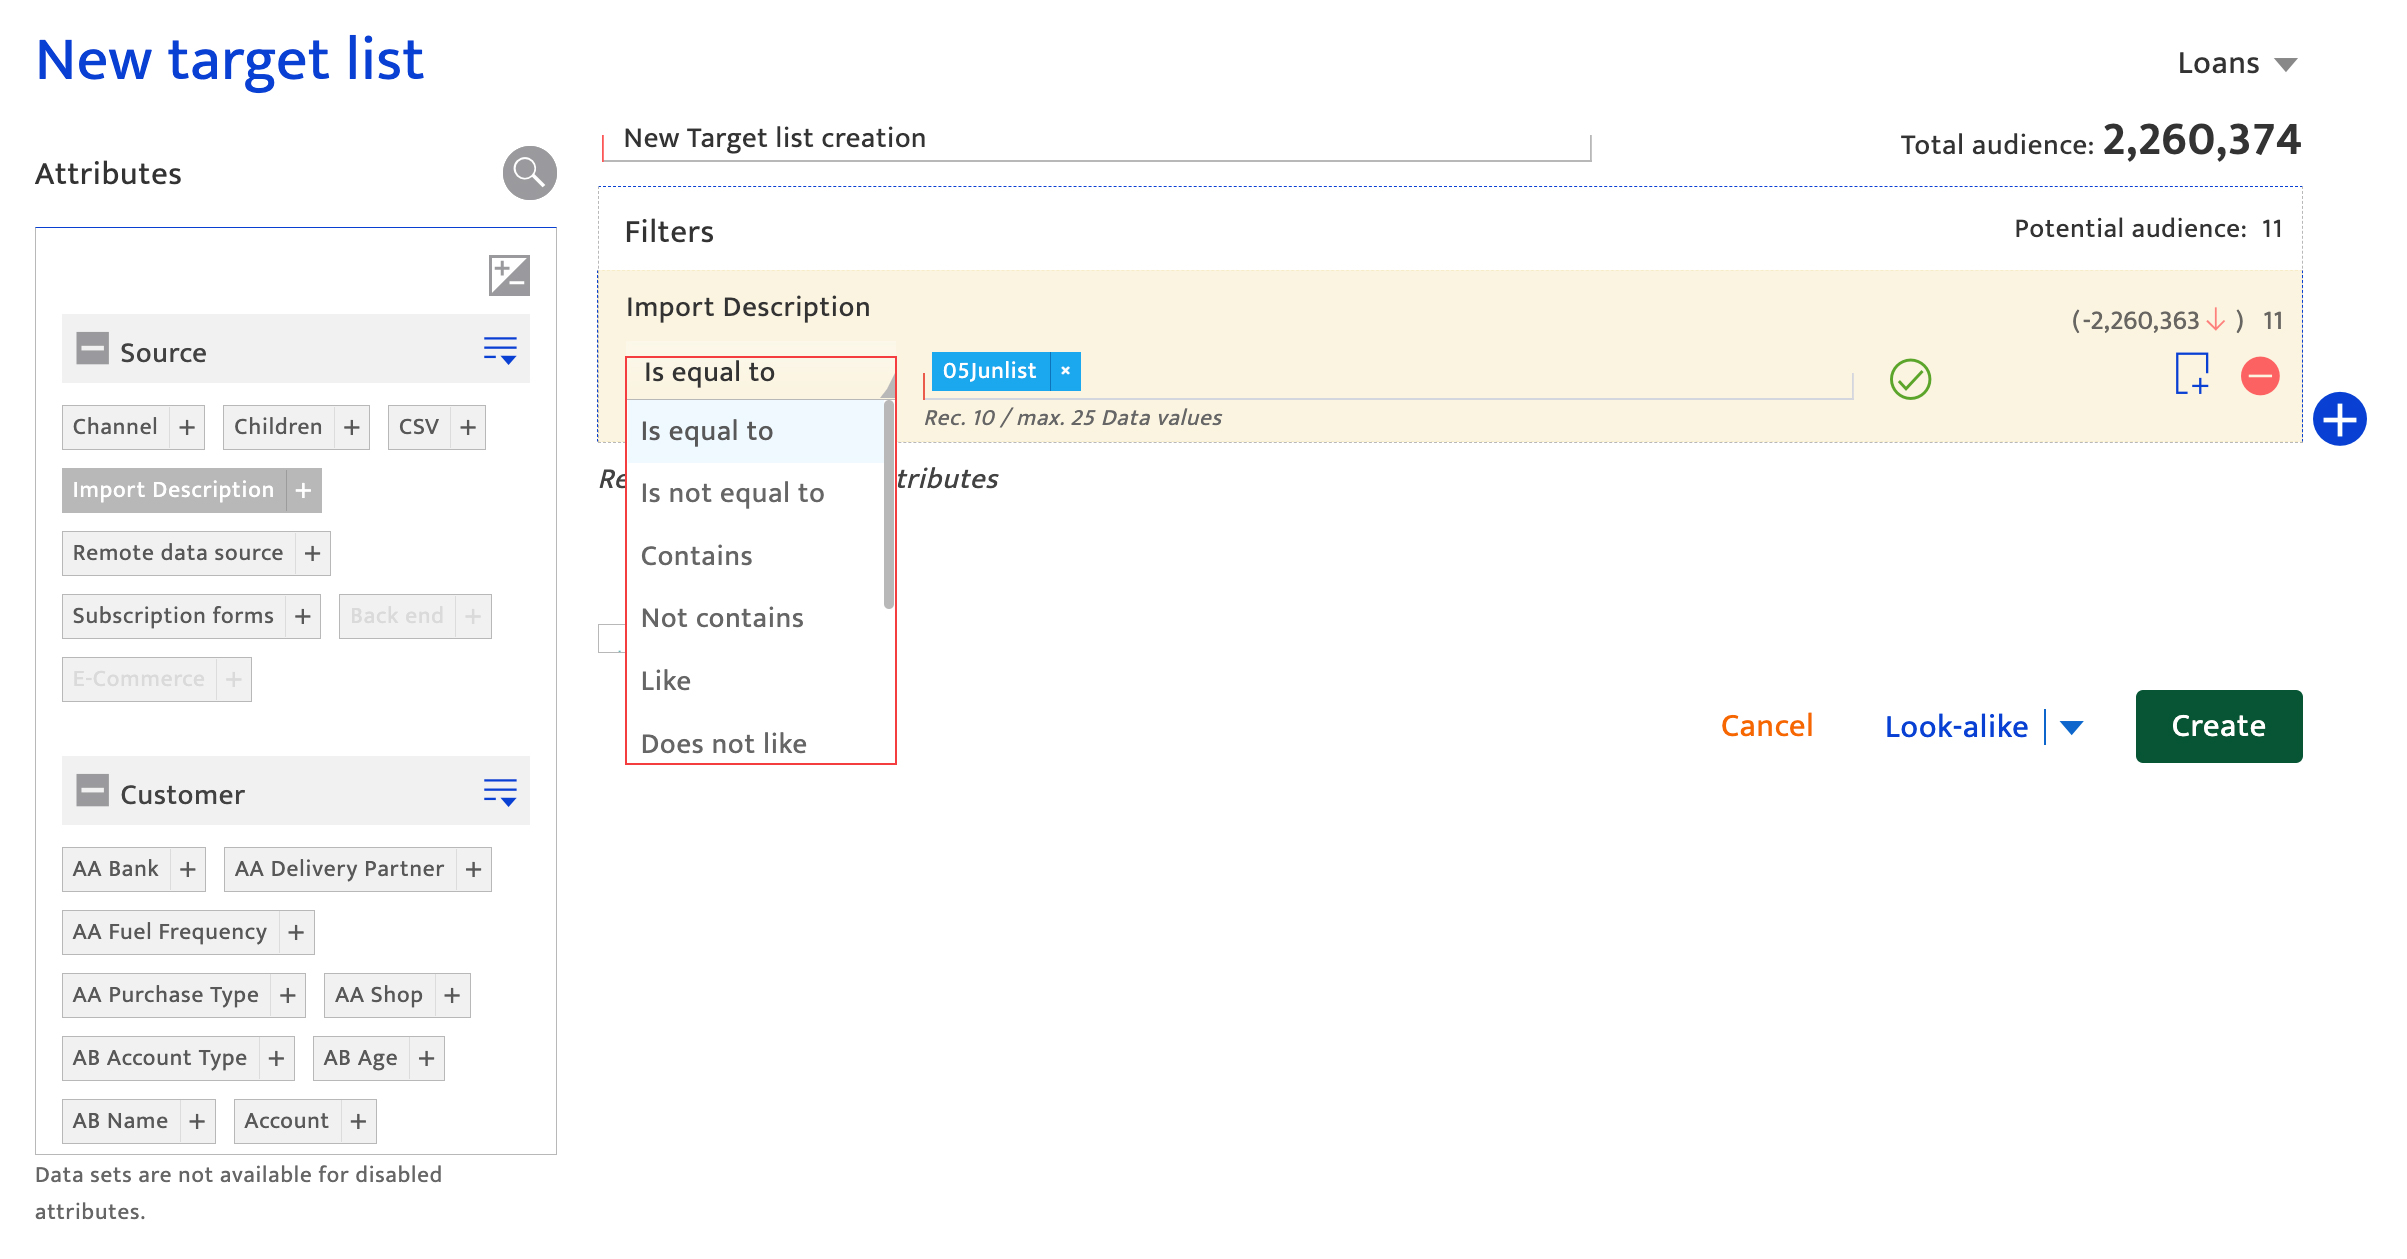
For attributes that involve only characters but no numerical value, the filter options displayed are shown in the below image.
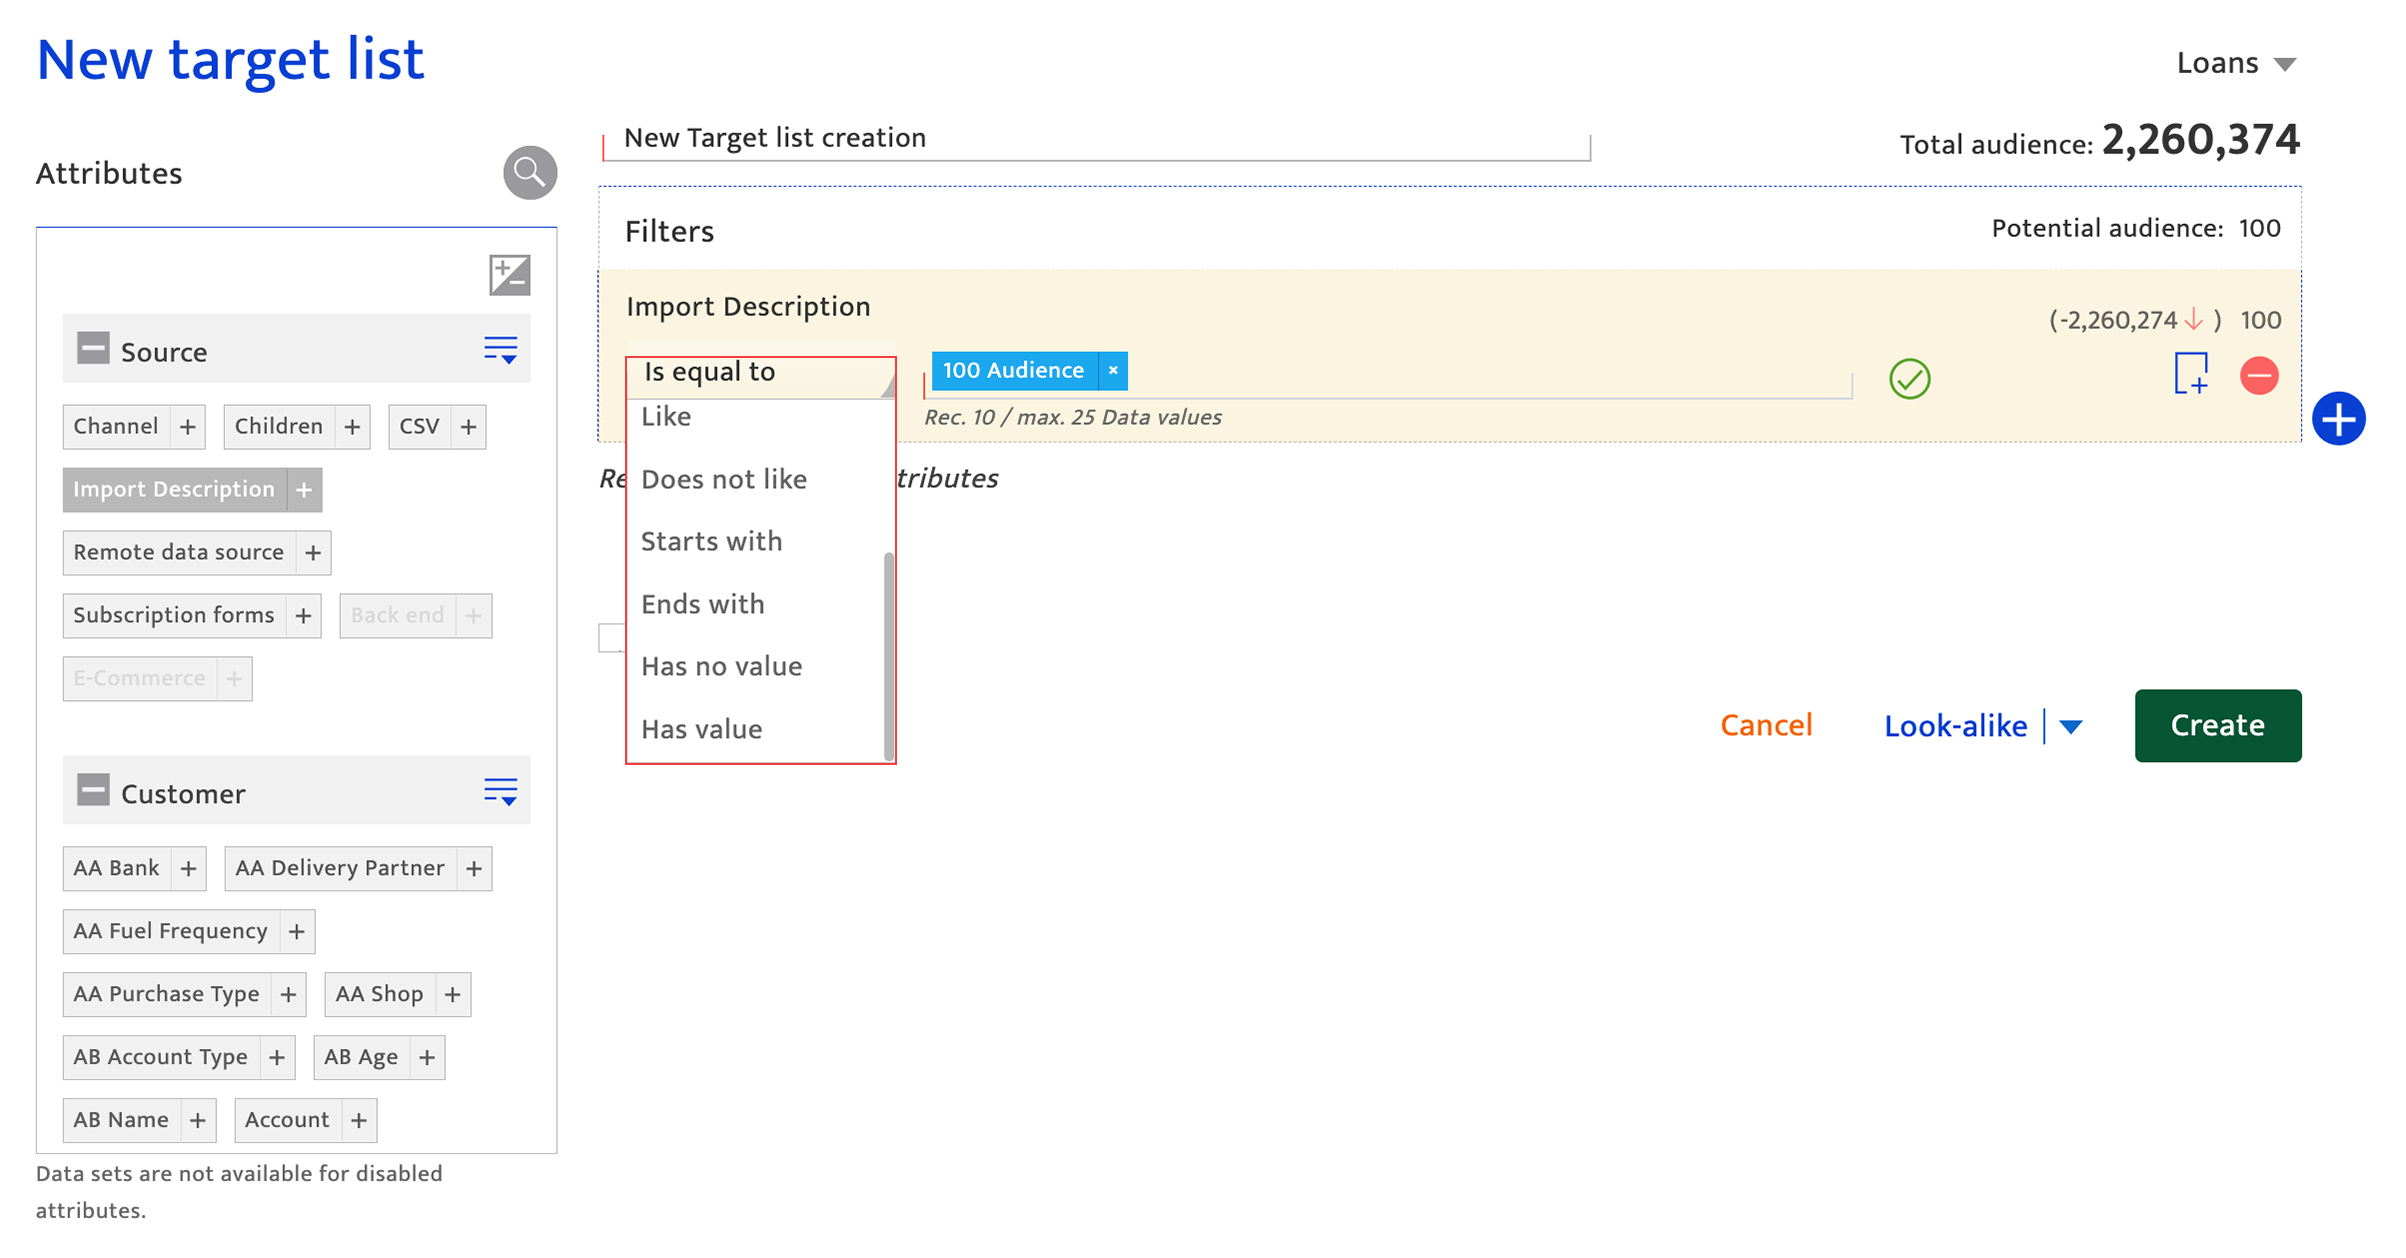
- Click the
 icon (enabled after selecting the values) to view the count. The values are automatically calculated and displayed on the right side of the attribute column.
- Click the
 icon to add a second filter.
 - Select the option as Inclusion or Exclusion for the second filter.
- Select Inclusion to include the conditions specified for the attributes in the filter group for the target list creation.
- Select Exclusion to exclude the audiences satisfying the conditions specified for the attributes for the list creation.
- A maximum of 2 Inclusion filters can be created and only one exclusion filter can be created.
- Users can add multiple attributes in the Filter section.
- Add the attributes in the second filter (as mentioned in step 3).
- Use the AND/OR toggle key to use a combination of attributes in the inclusion filter groups.
- Select AND to include both the attributes in the filter group.
- Select OR to consider either one of the attributes added in the filter group.
- Click the Filter button to view the final list for verification.
- Click the Create button. A pop-up window will be displayed for the list name.
- Enter the name for the new target list.
- Click the Save button. The target list is created.
Note:
Screen options#
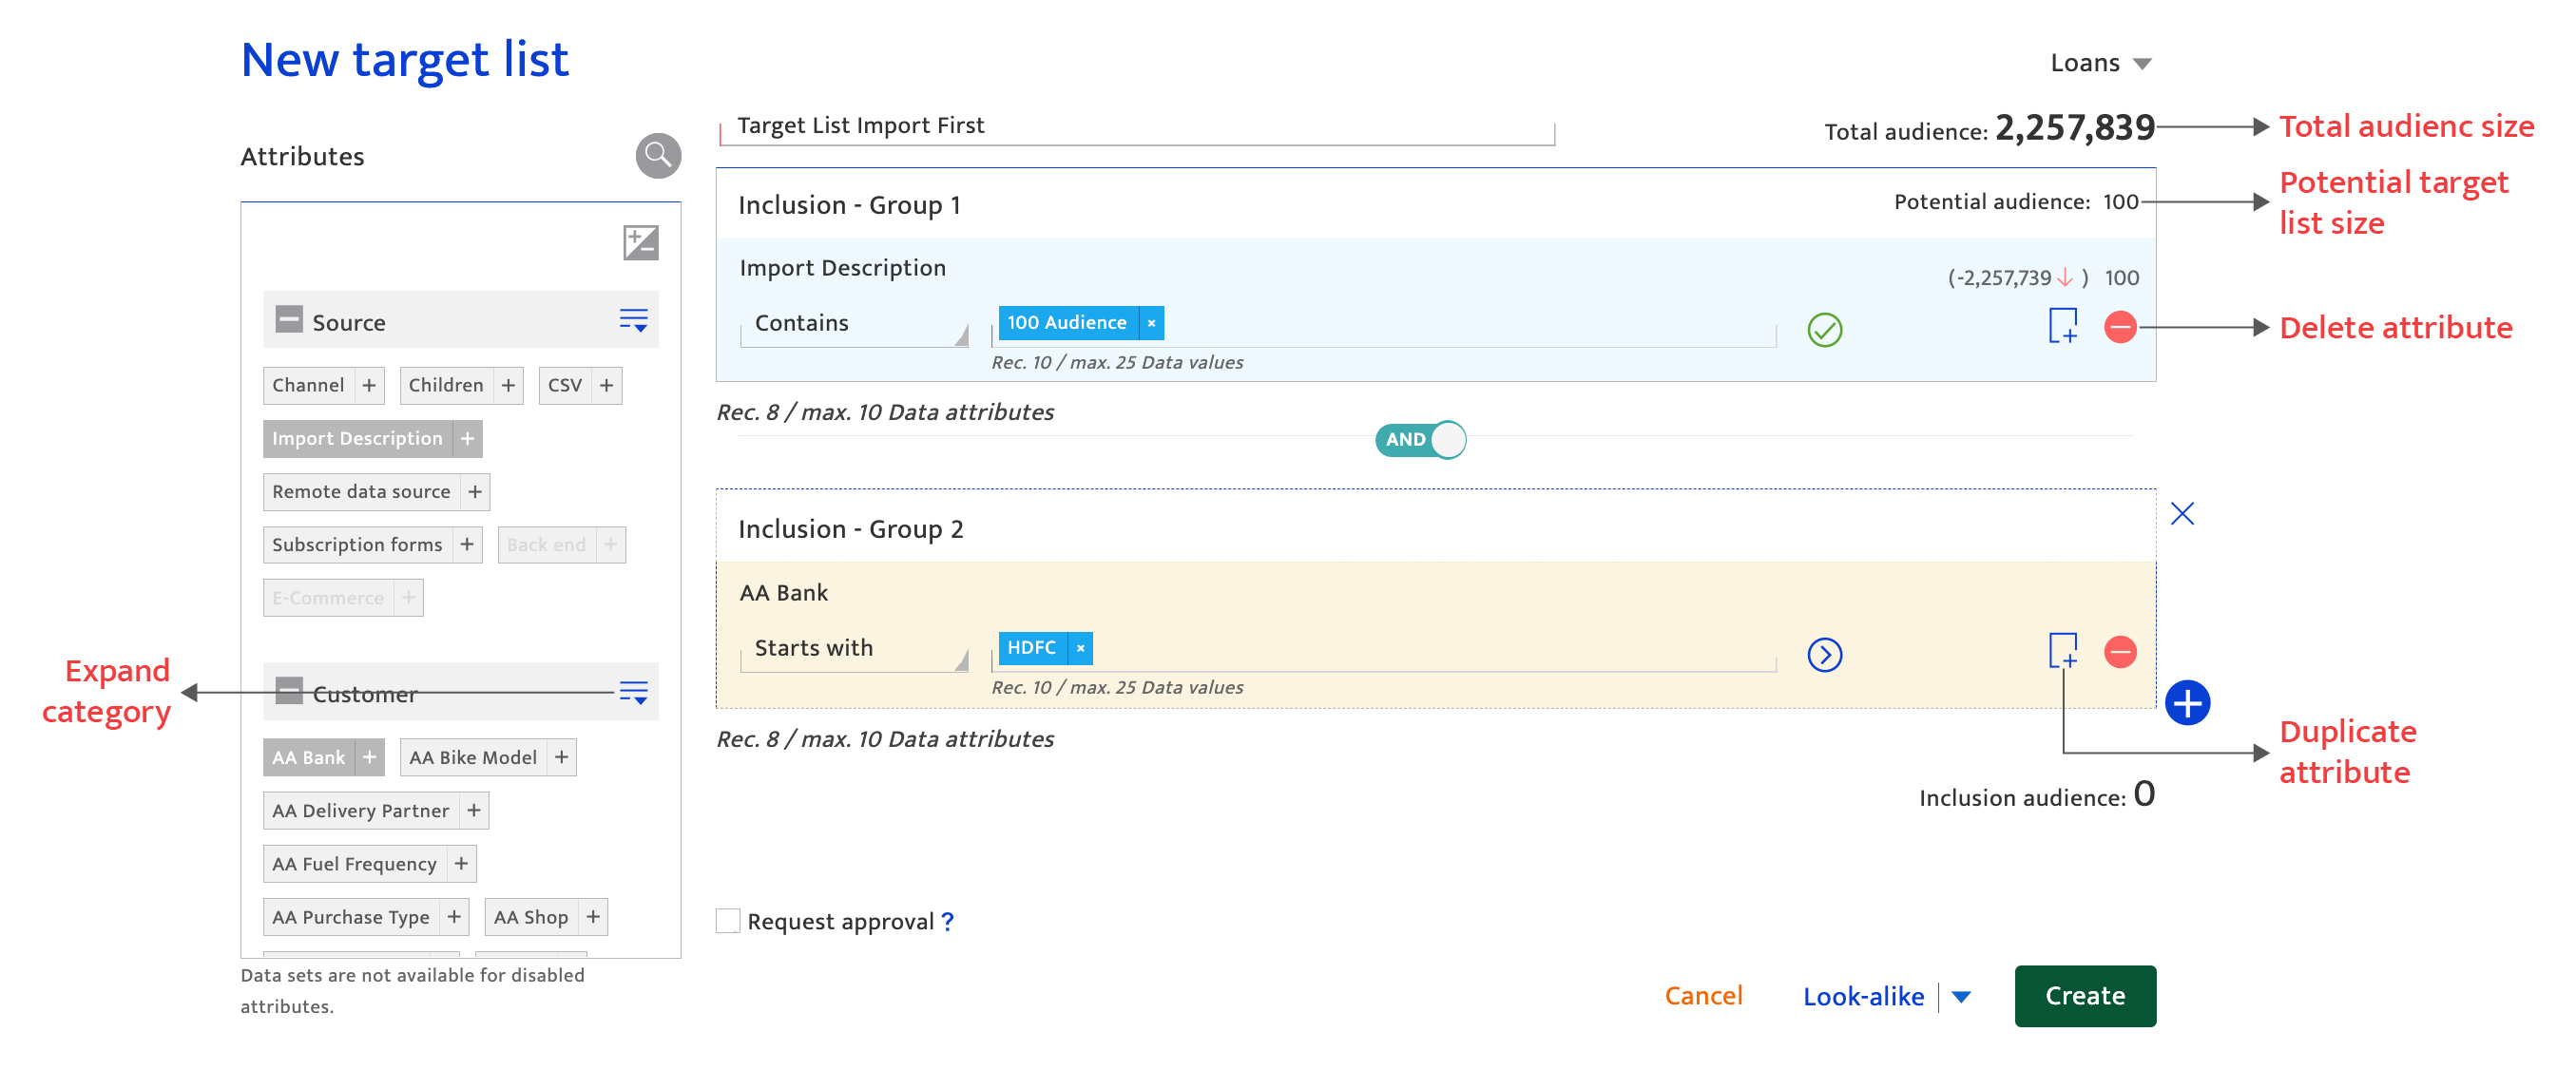
From this screen, users can perform the following actions.
- The list of attributes is available in the left pane. Users can expand/collapse the view of the attributes using the
 button
 - Look for a specific attribute using the search
 option
 - View the total number of contacts in the Audience database
- Duplicate selected attributes using the
 icon and to re-use in the filter.
 - Delete attributes from the filter using the
 icon.
icon. - View the potential target list size
- Recalculate the potential audience list size
Using the look-alike option#
Look-alikes are audiences who may have the same reach potential as the currently selected target list. Using the look-alike option identifies additional attributes that can be used to add new filter criteria.
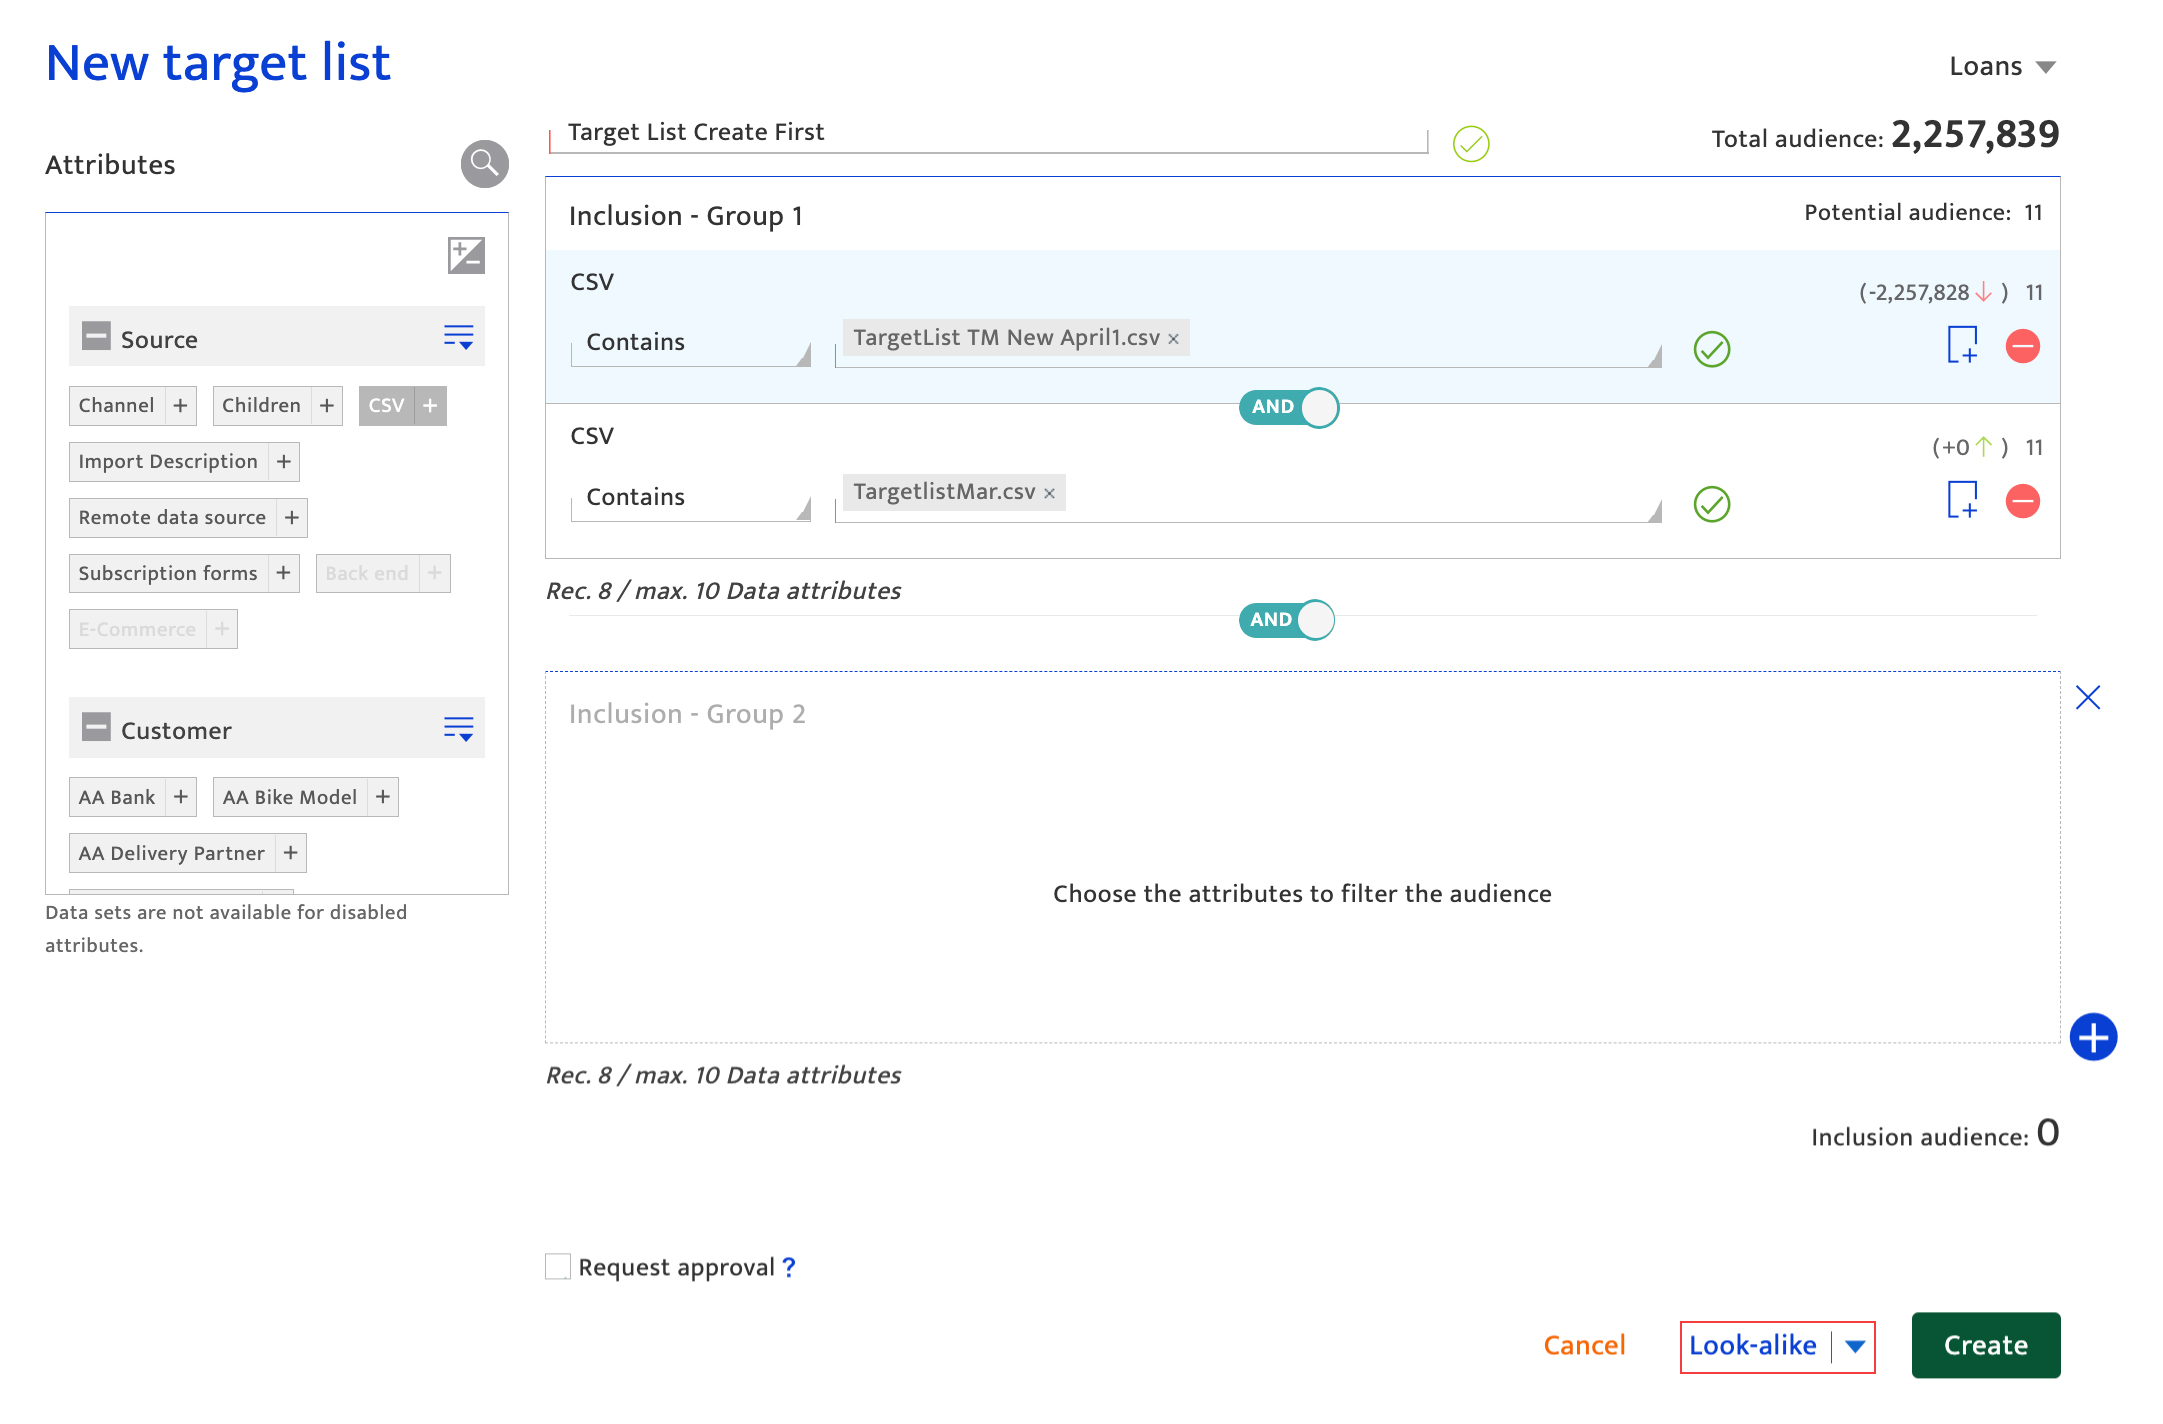
To use this option, follow the below steps.
- Click the
 button and select the option Attributes from the drop-down list.
 - Upon selecting Attributes, the look-alike attributes are highlighted in blue in the Attributes panel.
- Add the attributes to the filter section.
- Click the Filter button. The list of audience will be displayed.
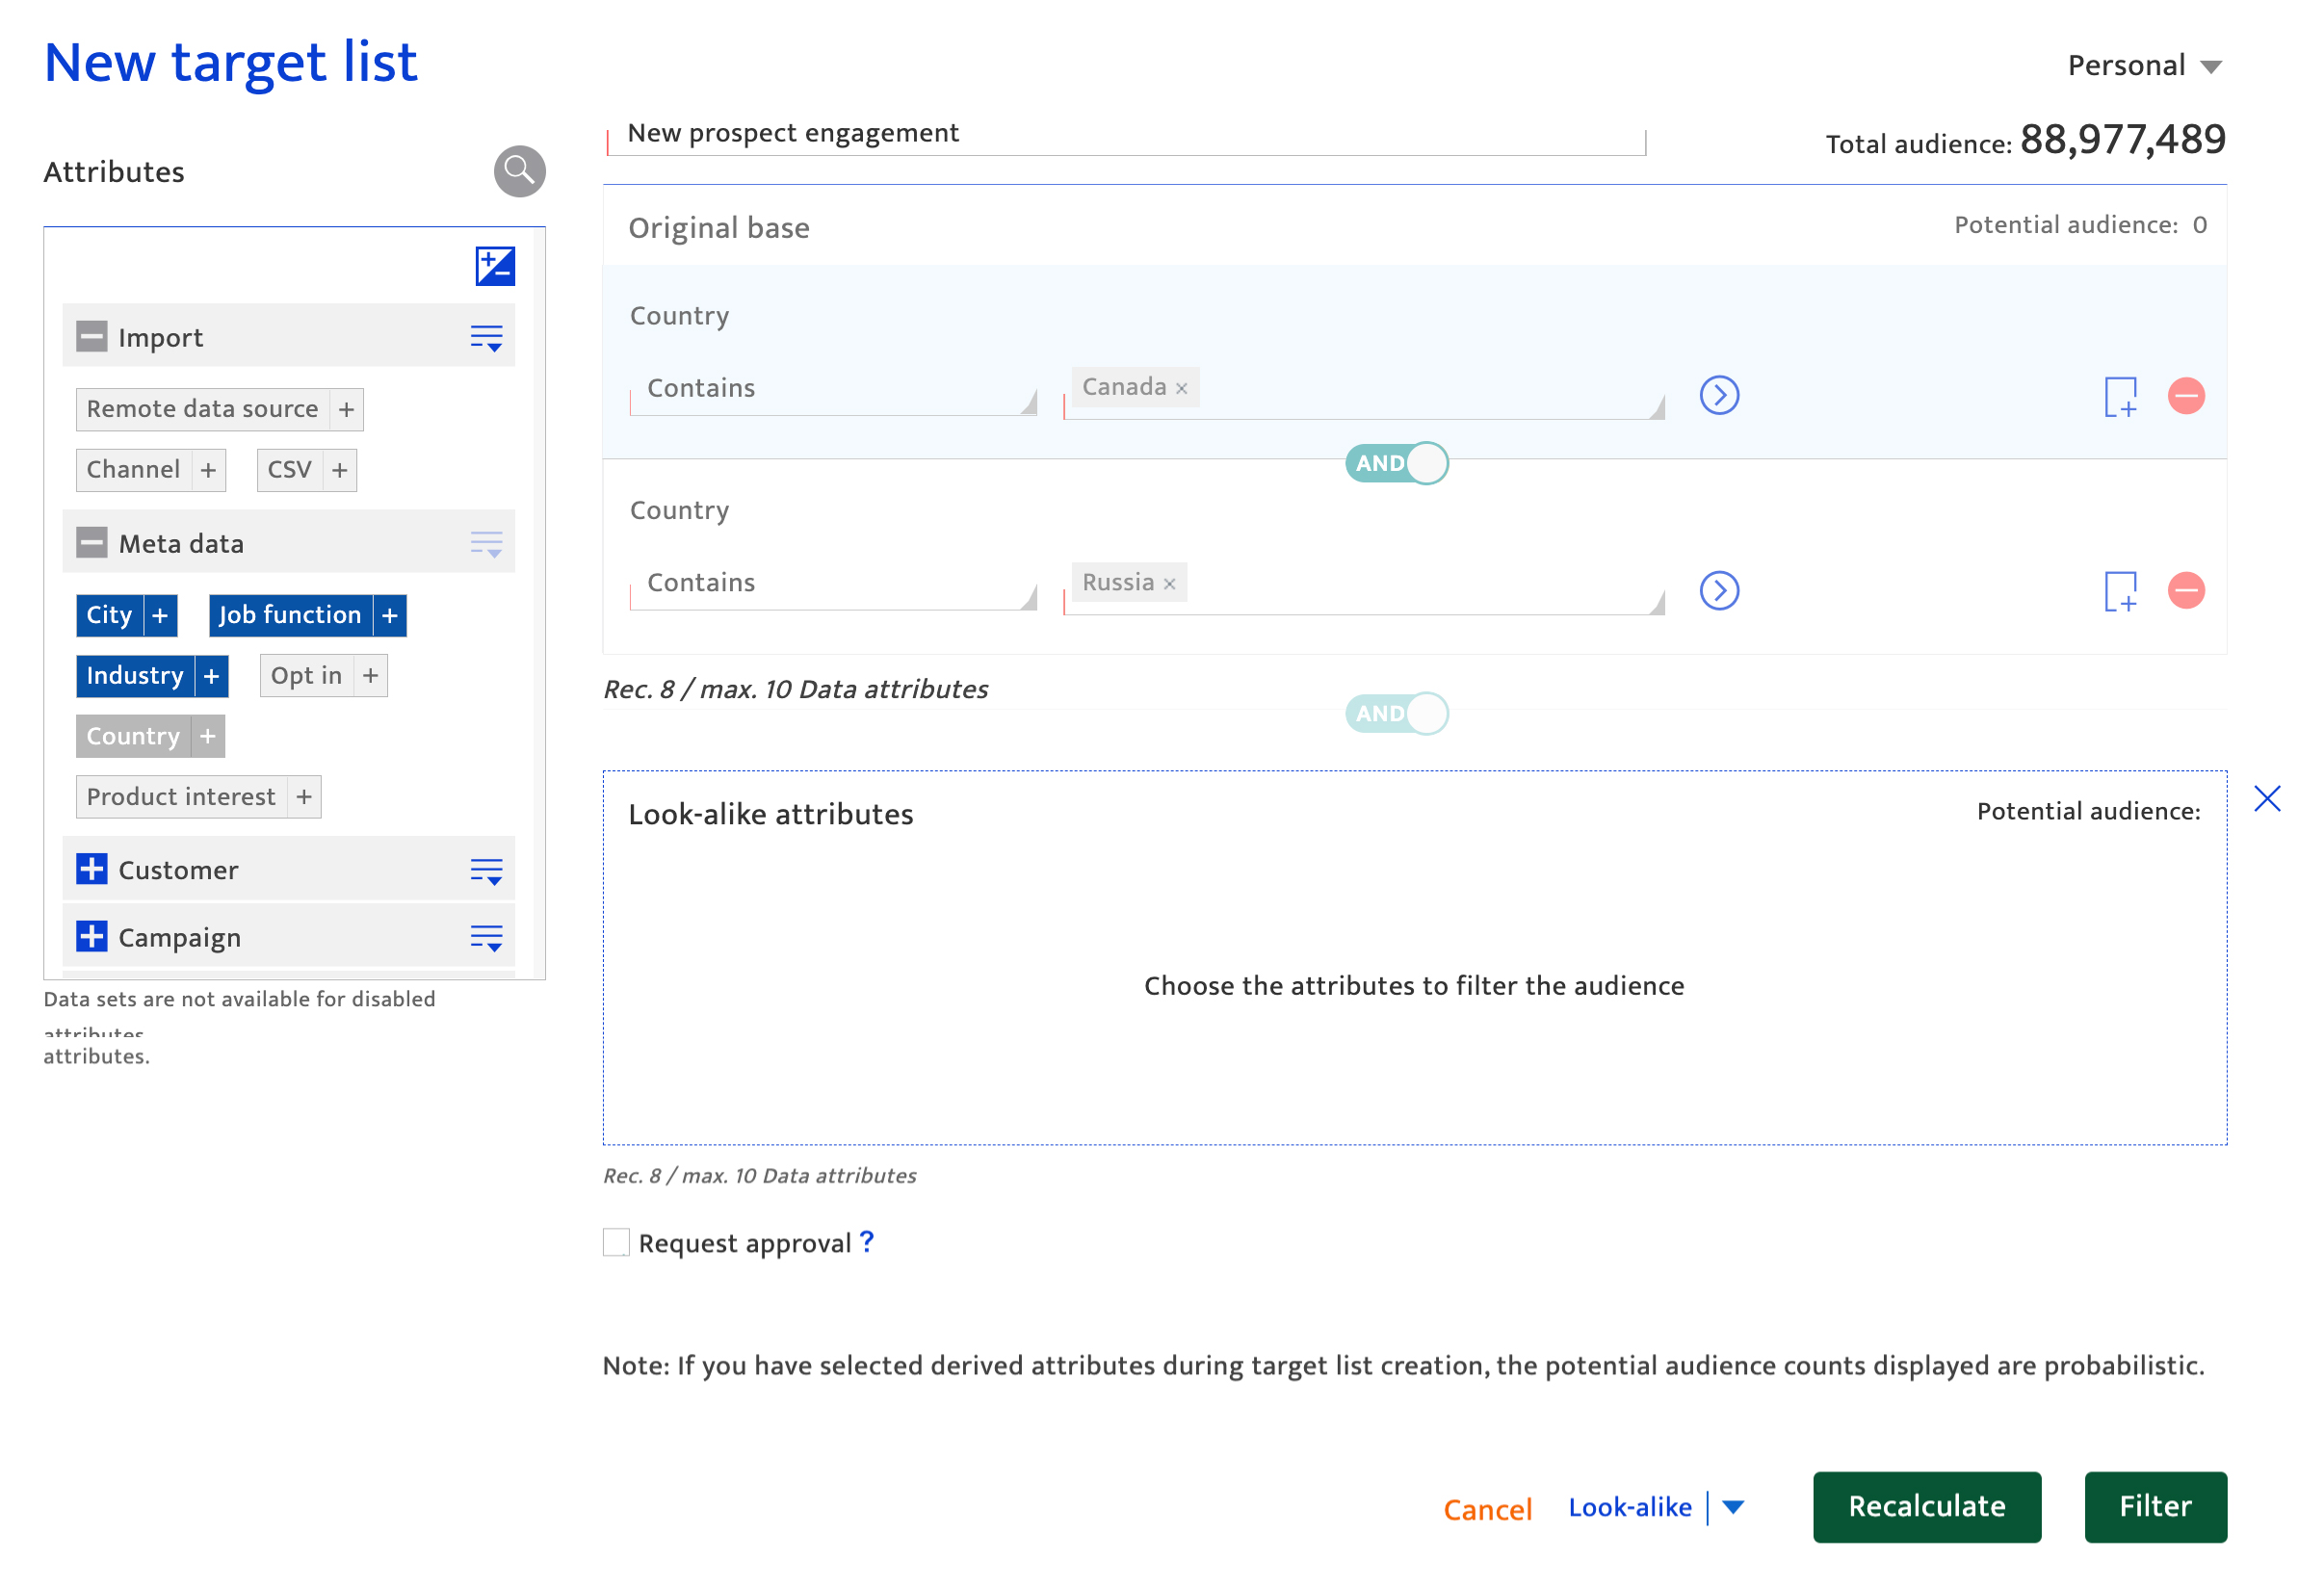
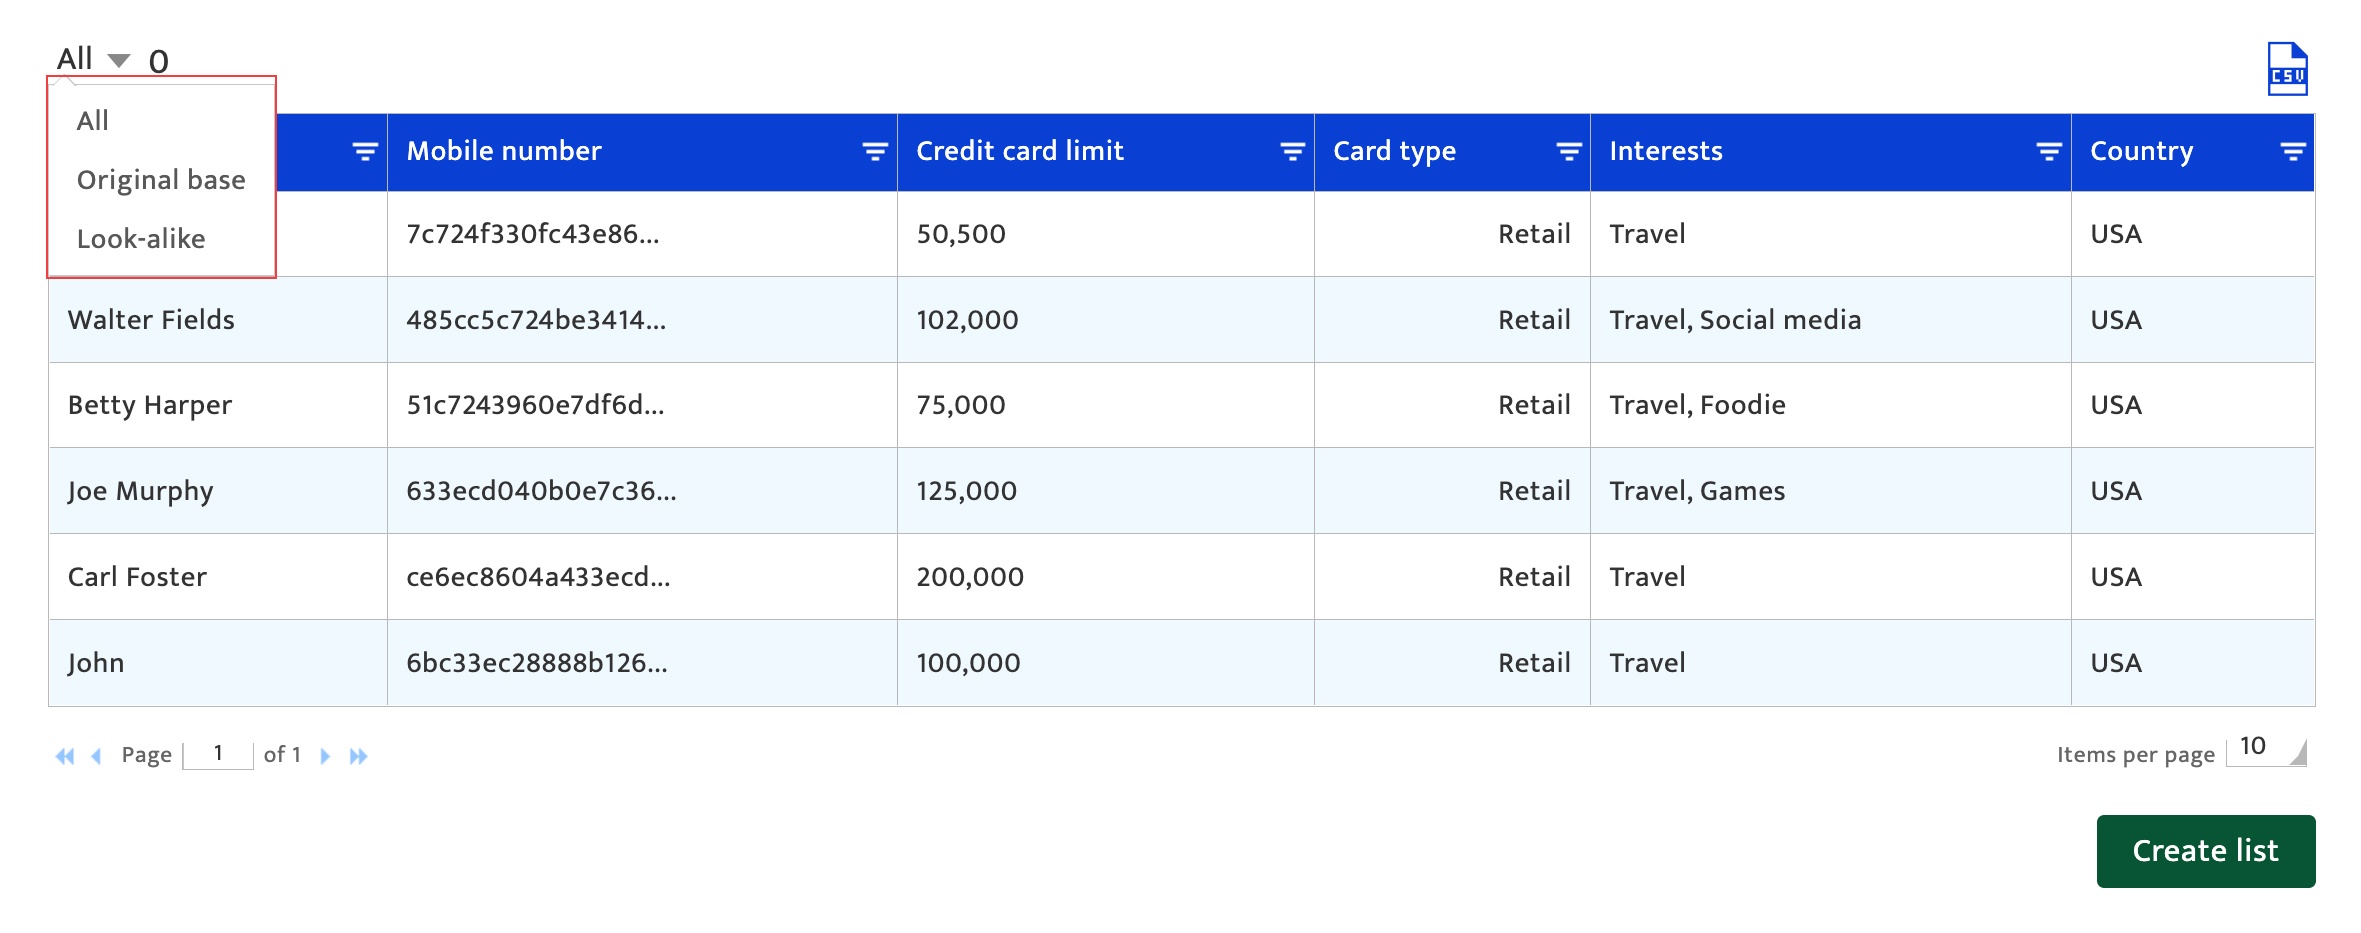
Users can also view the audience of the original base by selecting the option from the filter.
Screen options#
Users can perform the following actions.
- To sort the columns in ascending or descending order by clicking on the column header.
- To filter the list using the filter function on each column header.
- To view the list in the subsequent pages using the horizontal scroll keys.
- To customize the number of items displayed in a page by defining the number in Items per page field.
- To download the total list. Users can view the entire list in the downloaded file.
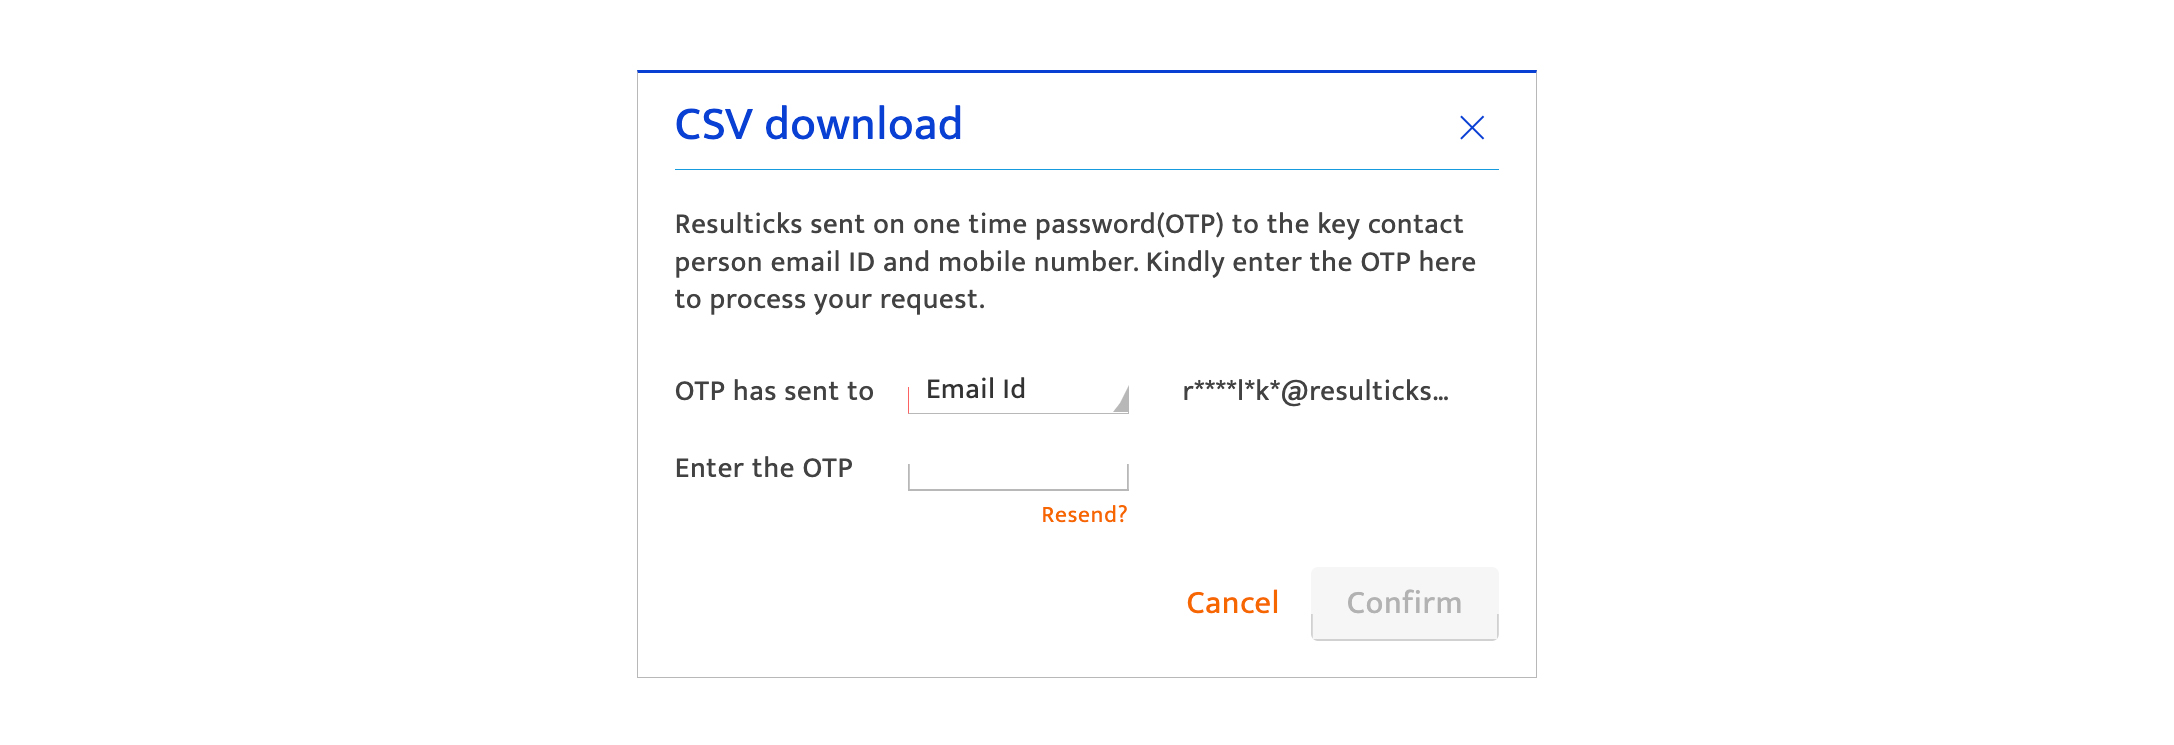
- Click the Download
 icon. A one-time password (OTP) will be emailed to the Key contact person for OTP authentication.
 - Enter the OTP and click the button to complete the download.
- Click the Download