Overview
What is it?#
Key information from contacts themselves is collected through customized forms that are sent or presented to the contacts. The Resulticks form generator section facilitates this with:
- Creation and management of progressive profiling forms that:
- Pre-populate existing contact information
- Progressively prompt entry of only new information
- Generation of forms to embed within the web and mobile sites
- A library of forms that have been created by the organization
Types of resulticks forms#
- Subscription / KYC form which is used to collect:
- New contact details for subscription purposes (e.g. for a newsletter or notifications)
- Additional contact information for existing contacts
- Tell a friend form which is used to capturing referral contact information.
Authorization and making changes#
Superusers, Administrators and the Key Contact for the account can use this capability.
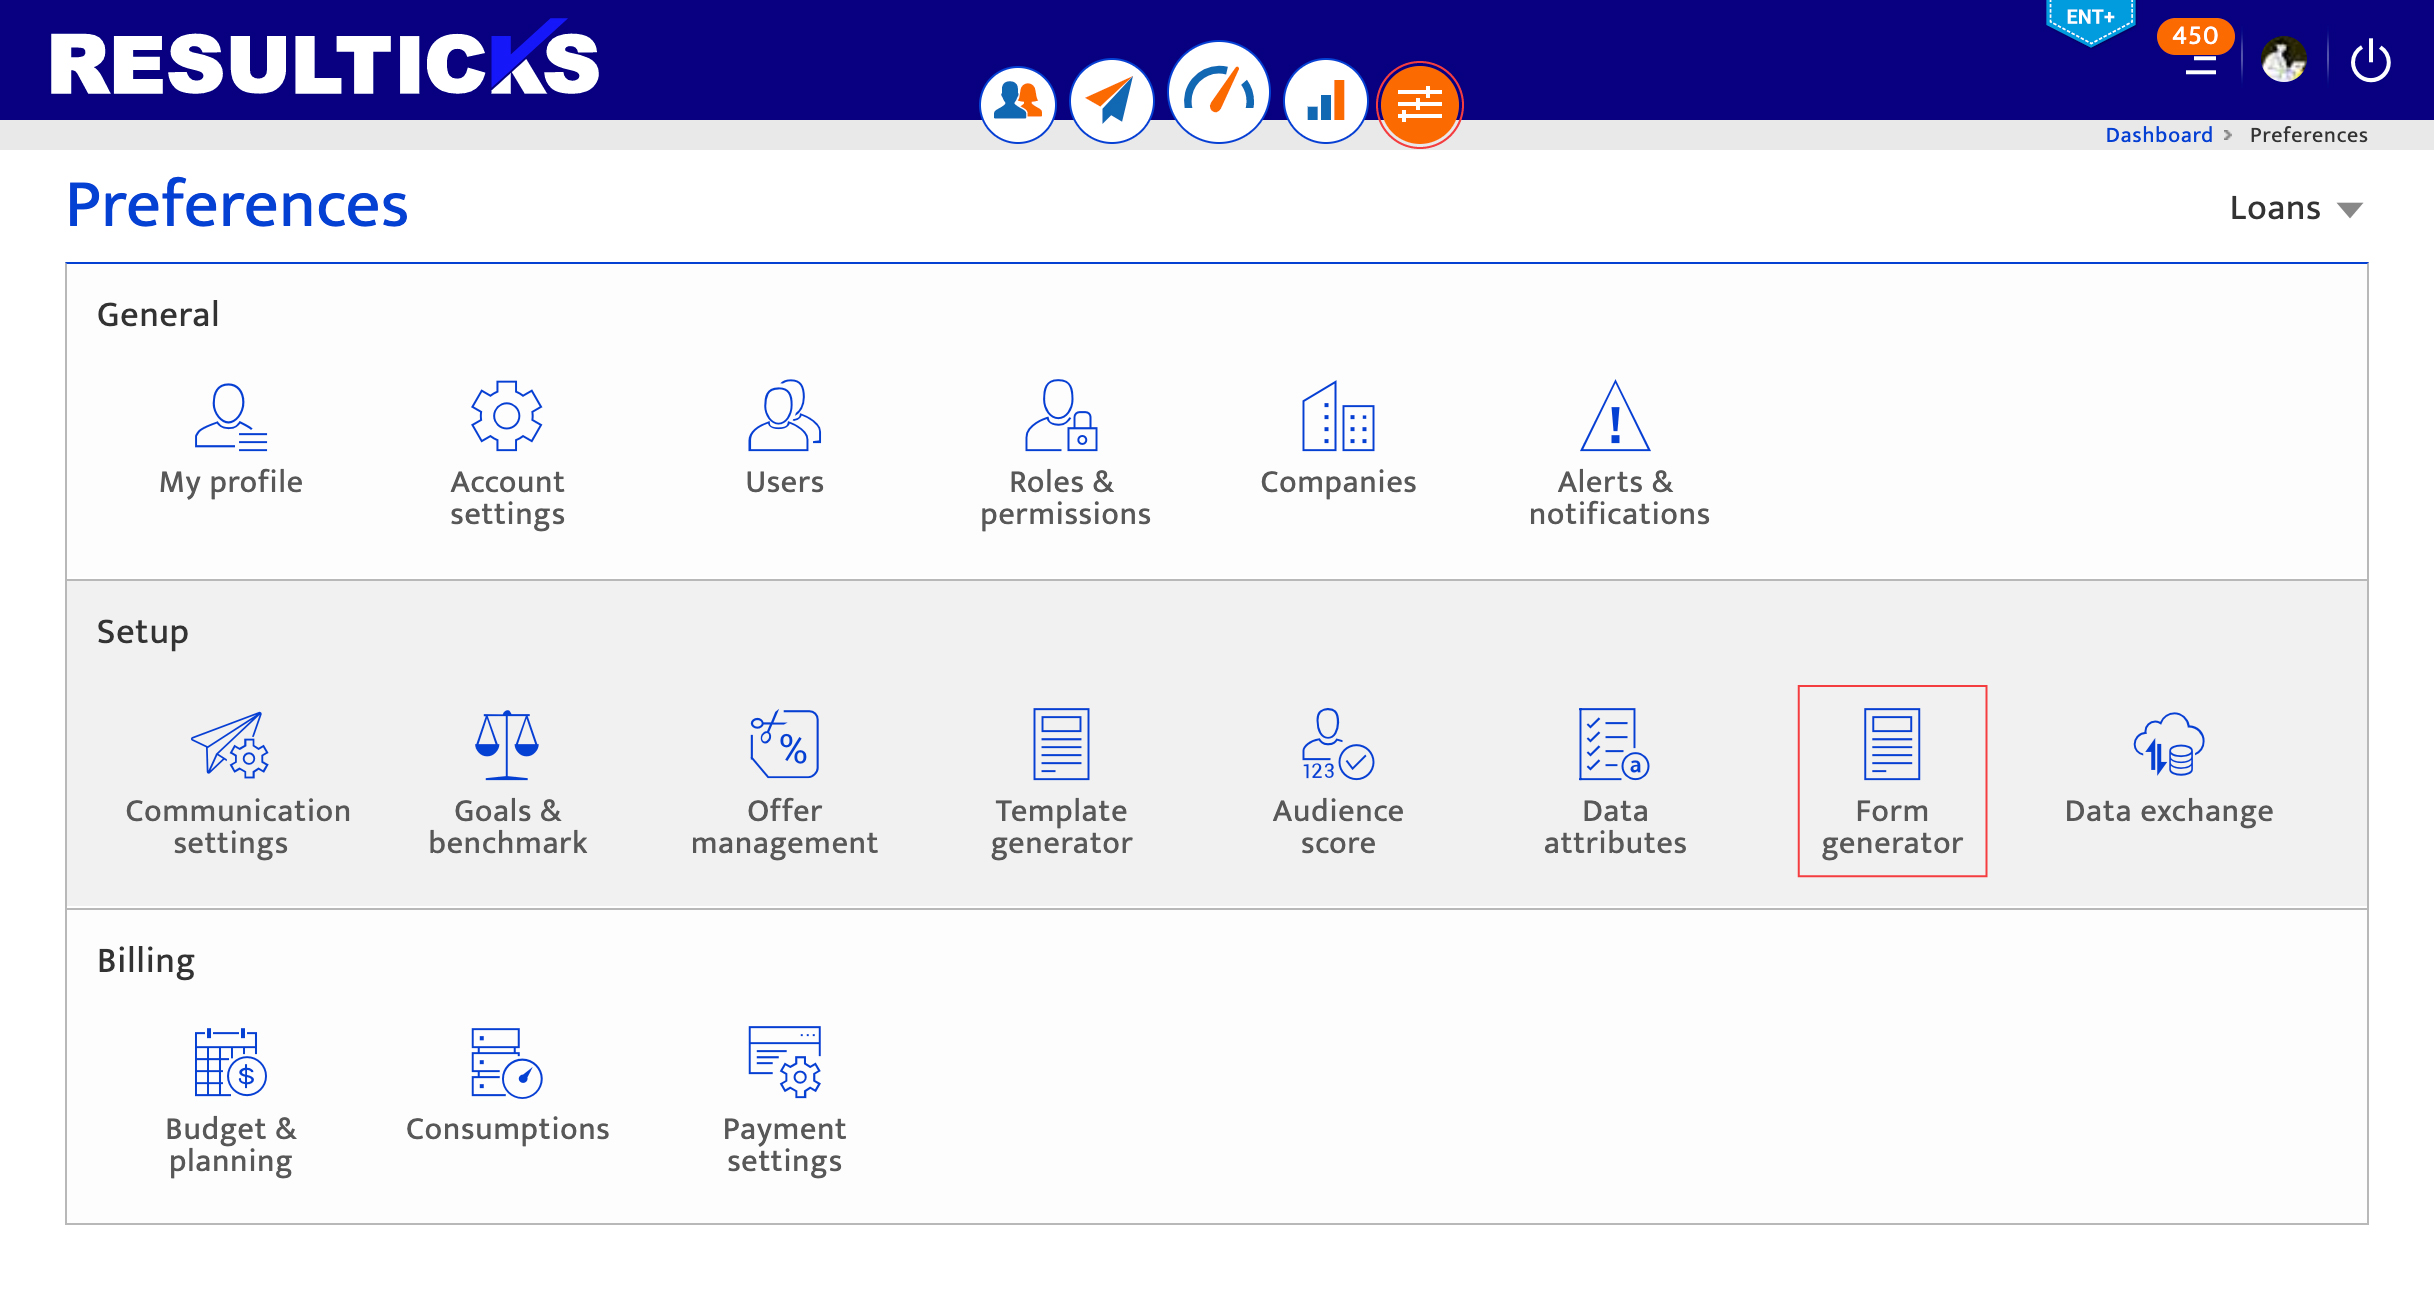
Accessing the form generator#
- Select the preferences module
- Select Form Generator from the Setup category.
Using the forms library#
This list of forms displays all the forms created for this Resulticks account and summary information. The status of form indicates if the form has been linked to a campaign. Forms not used in campaigns will display “NA”.
Actions that can be performed on this list :-
- Create a new form by clicking the plus icon
- Edit a form to open an existing form and change specifications
- Duplicate a form to create a new form. A new form is created just above the existing form. Enter the new name and edit.
- Download data captured through the form, in CSV format. A pop-up is displayed where the data to download is specified by:
- Selecting the form fields to download from the drop-down
- Entering the campaign for which the form was used
- Selecting the time period for which data is required
- Defining automated download schedules using the toggle switch
- Publish the form with the creation of a link that is copied to user’s clipboard and can be embedded in web or mobile sites
- Delete a form, that has not been published yet. Forms linked to in-progress campaigns must not be deleted, to avoid errors
- Sort the form list by clicking on the column headers, to toggle between ascending and descending sorts
- Browse the list using the scroll icons
- Adjust the list size per page using the drop-down

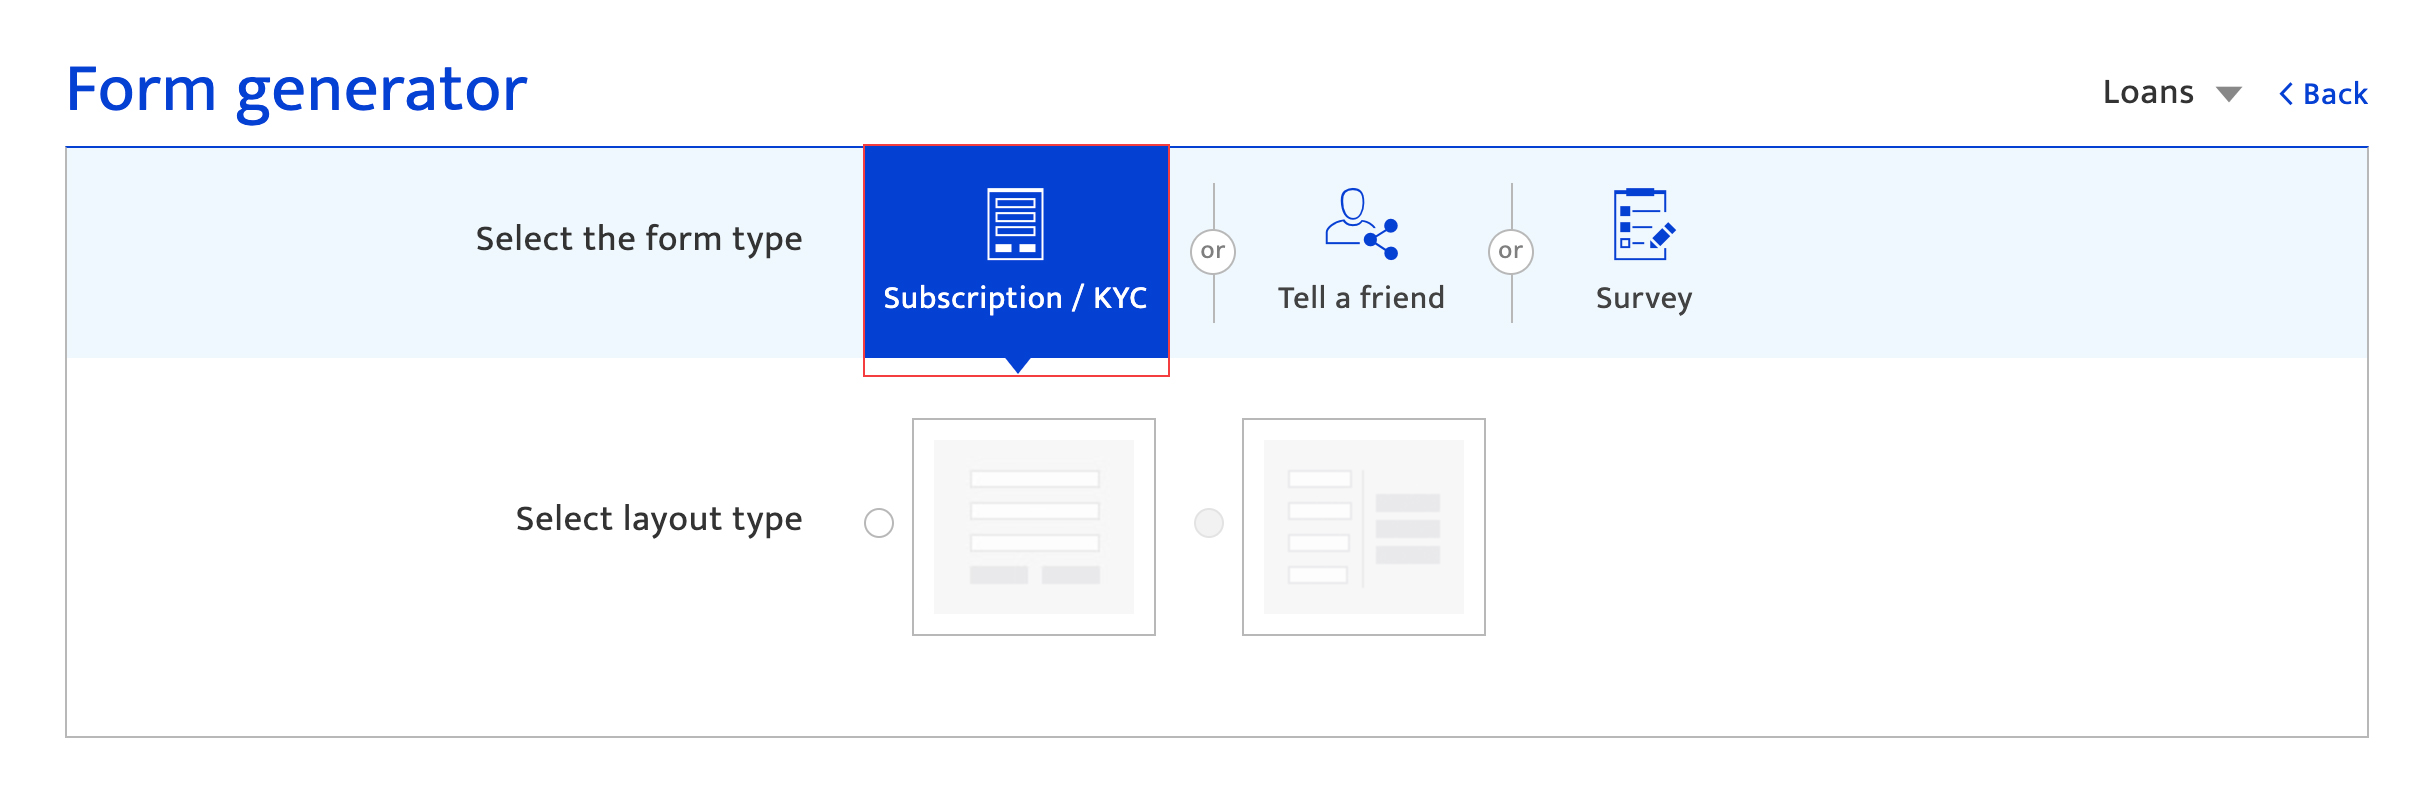
Creating a Form#
- Click the “+” icon to show the form selection screen.
- Select a form type from the options available.
- Select a layout type.
- Customize form content using the form editor. Each form and layout has unique requirements. A default form is presented which can then be edited using the editor capabilities.