Add audience
What is it?#
The Import audience function is used to import new contacts as well as new attributes for existing contacts into your Resulticks database.
Here you can:
- Select audiences to import using various methods
- Map imported attributes with those existing on the platform
- Import audiences
Making changes and authorization#
Only Super users, Administrators, and the Key contact for the account can use this module.
Accessing audience import#
- Select the Audience module.
- Select the Master data tab.
- Click on the "+" icon.

Choosing a method#
You can choose from different methods to import audiences, and each has its own unique requirements.
- Manual entry
- CSV/XML
- Remote data source
- FTP/SFTP
Selecting audiences via manual entry#
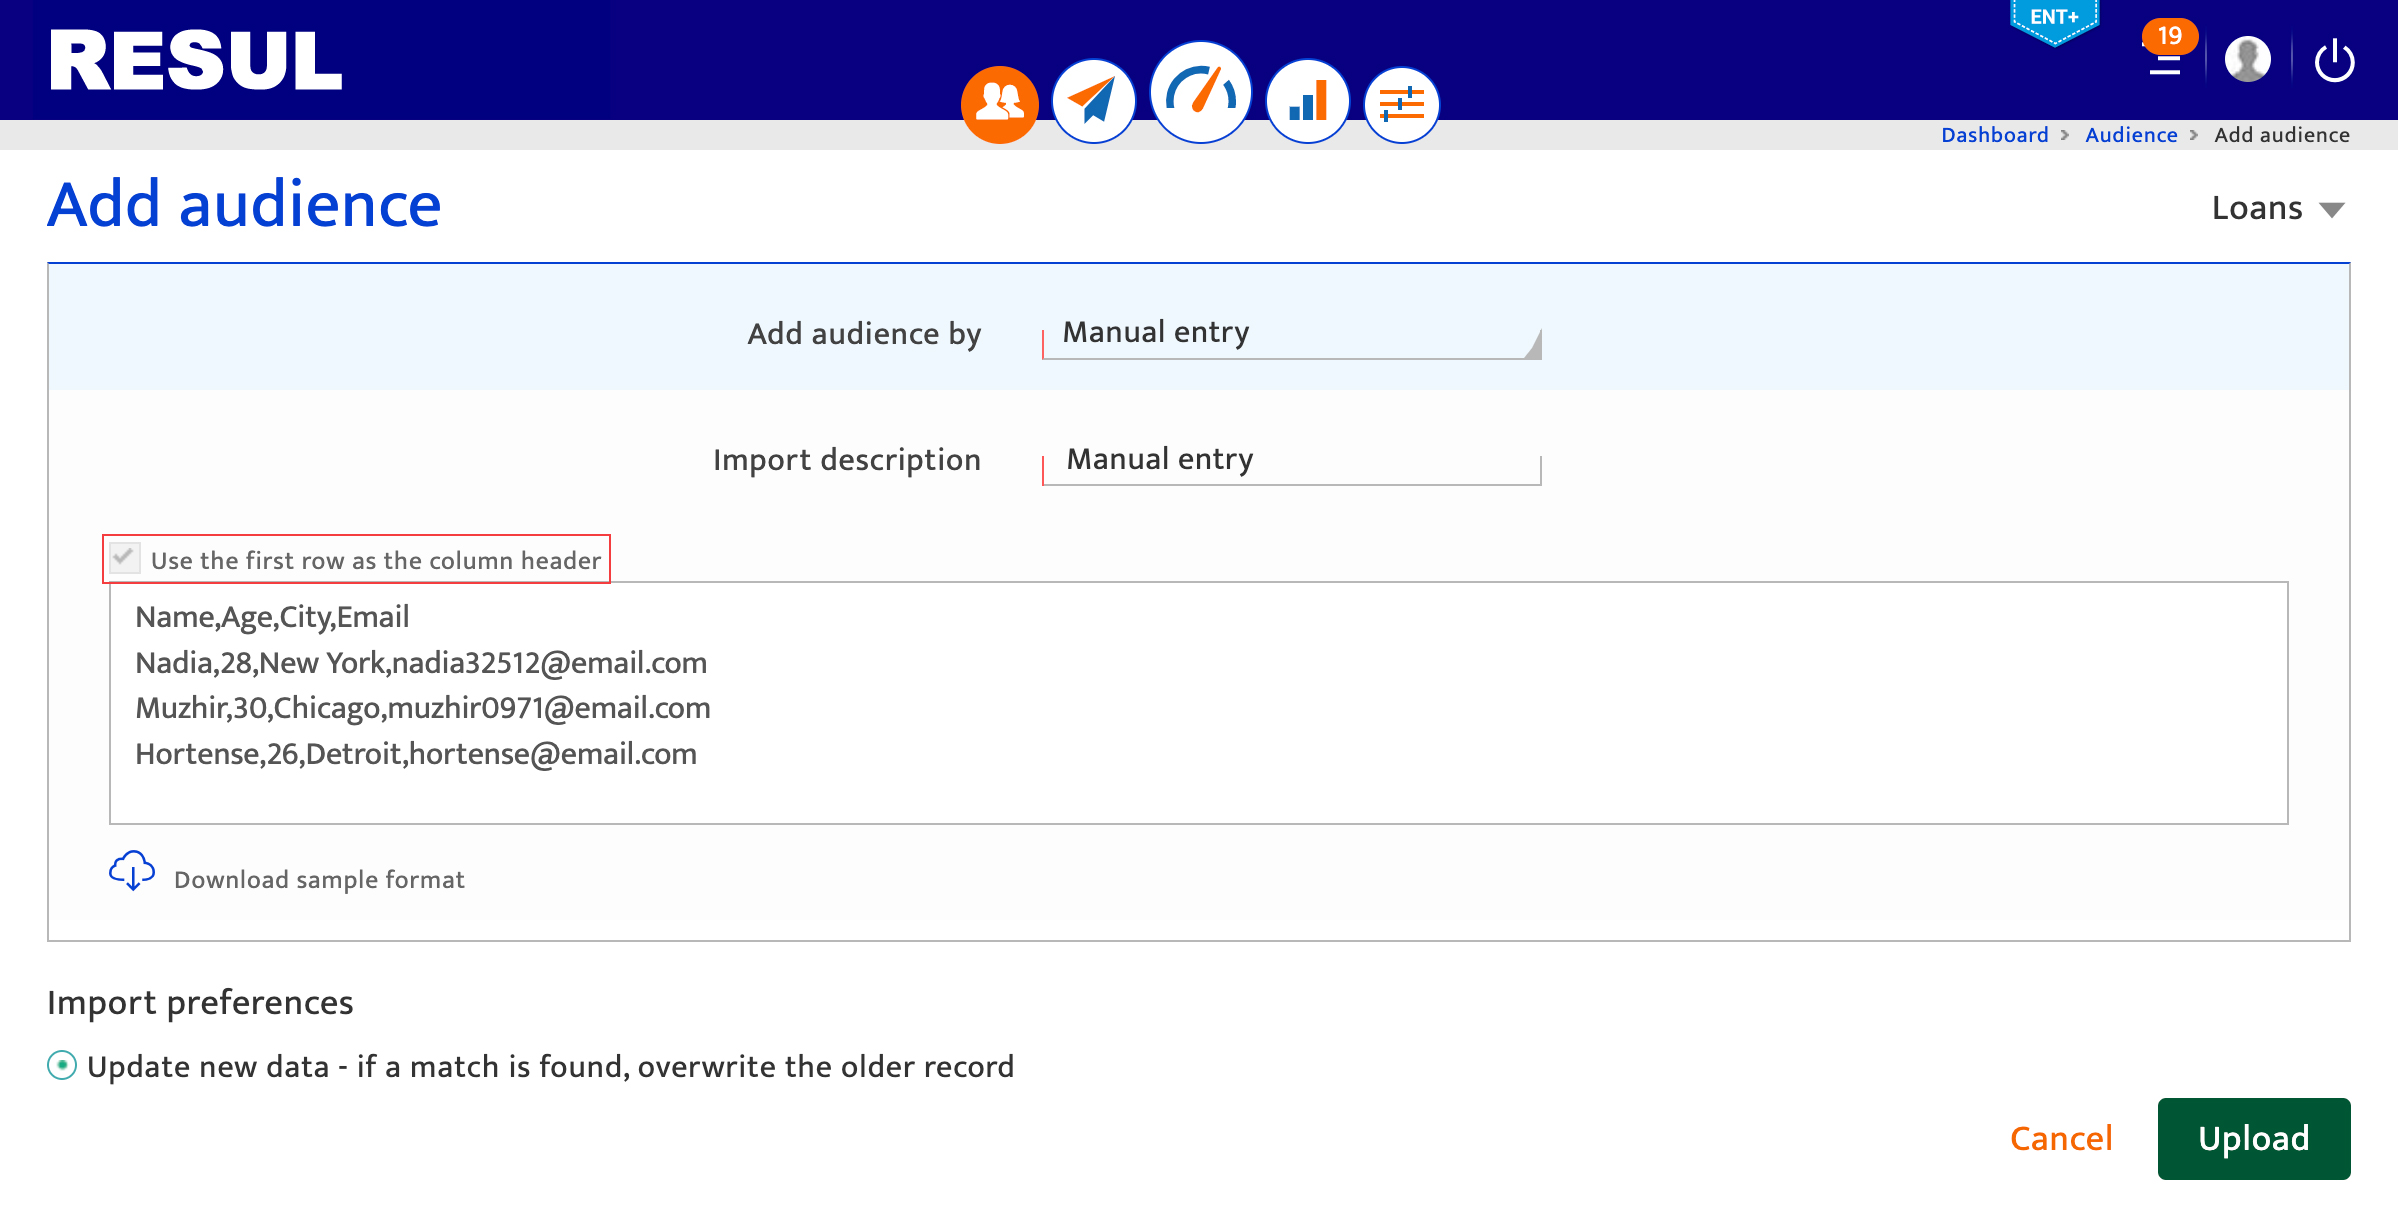
To import a new audience list via manual entry, select this option from the drop down and follow the steps below:
- Provide an import description. You can use up to 50 characters, including a combination of numbers, text, and special characters. The import description is used to identify the source of the audience record and for display in Master data import history.
- Enter the data attribute names for each column, using a comma to separate the entries.
- Tick the checkbox shown to use the first row of data as the column header. These column headers will define the data attributes.
- If not ticked, the first row of data will simply serve as values.
- Download a sample format to see how the audience data must be entered.
Selecting audiences via CSV or XML file upload#
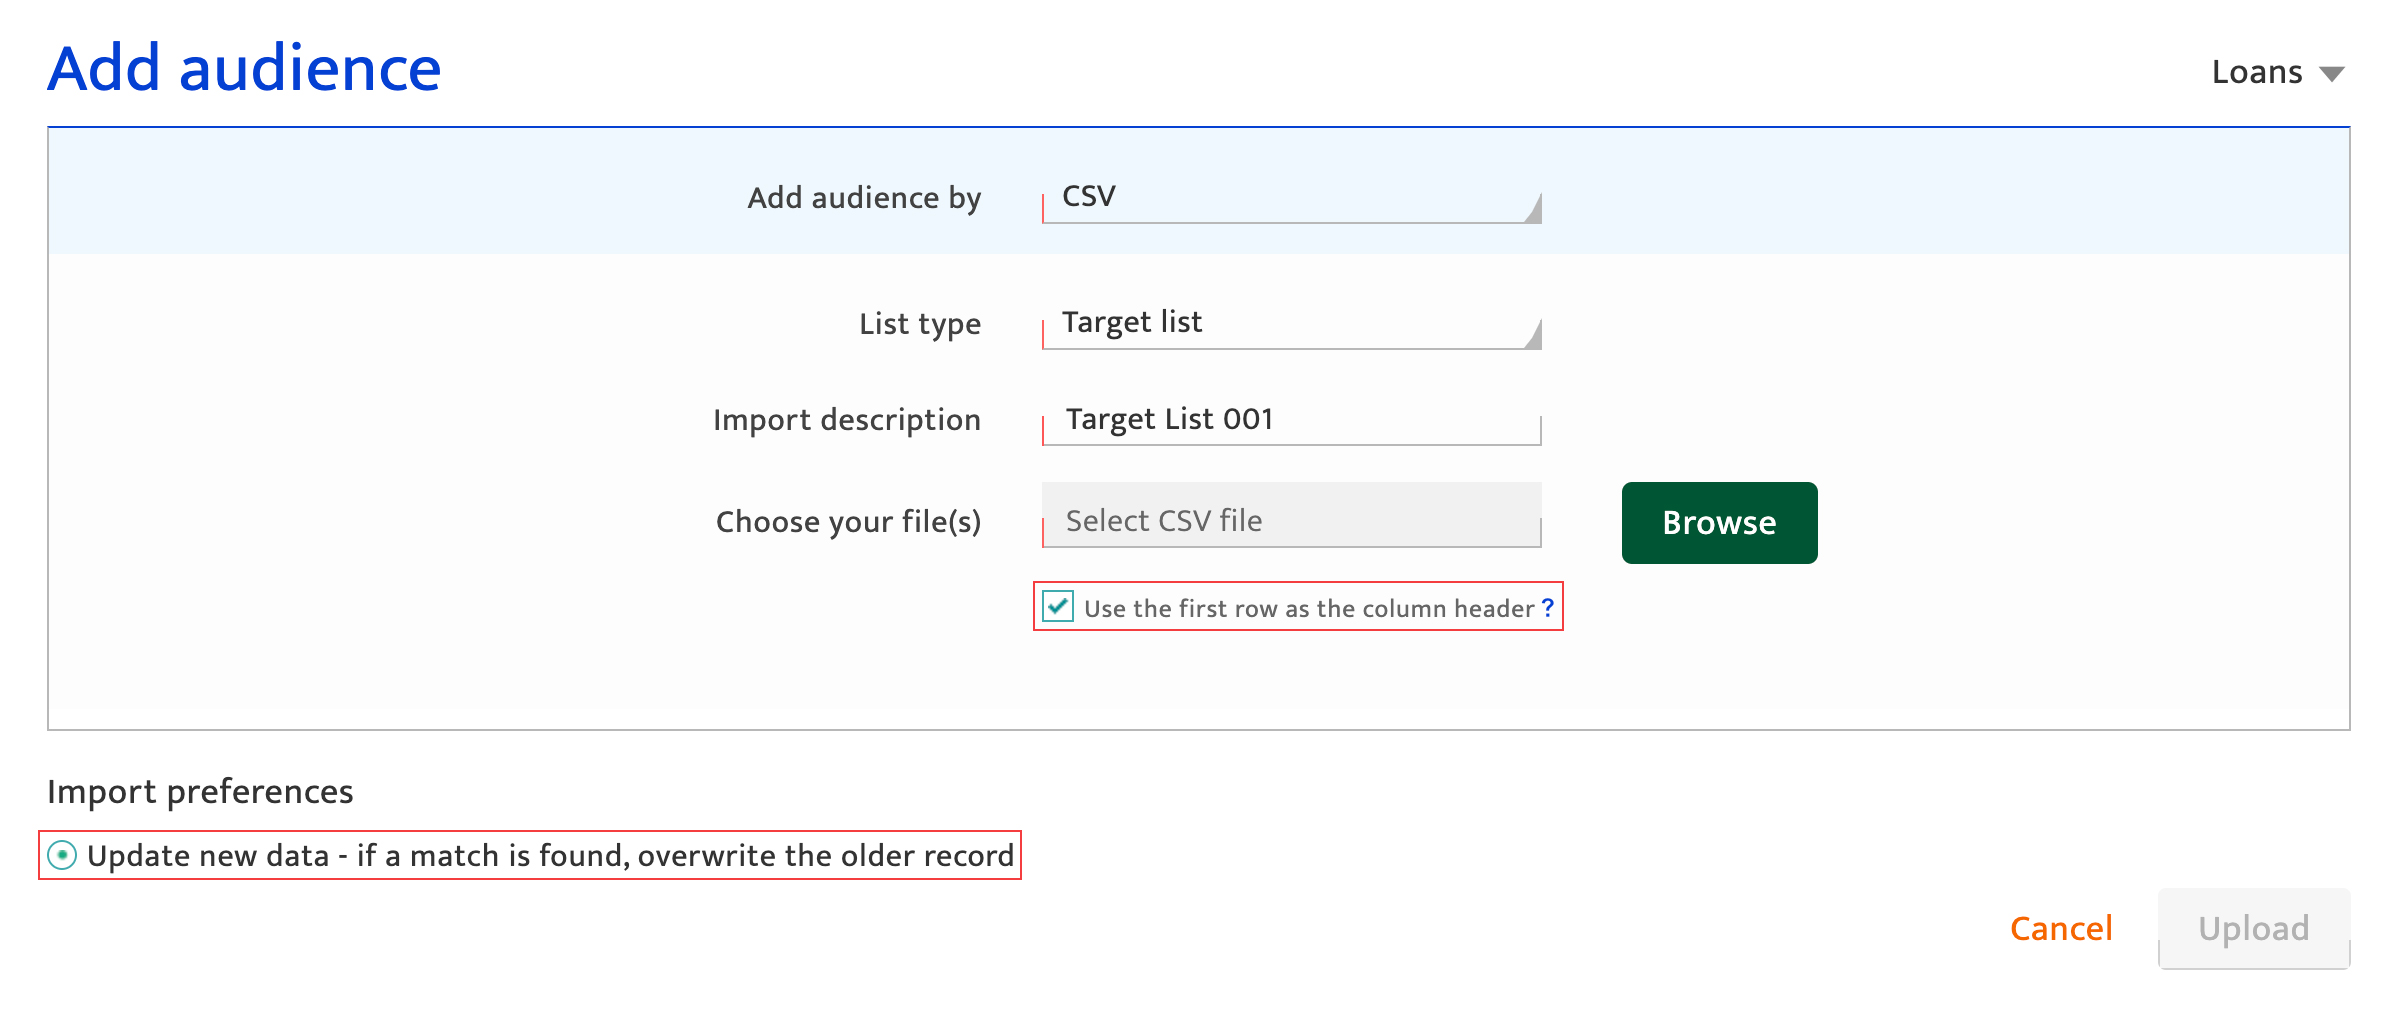
To import a new audience list via CSV or XML file uploads, select the corresponding option from the drop down and follow the steps below:
- Select List type using the drop-down provided. Available list types are:
- Target list - Refer Create target list page.
- Ad-Hoc list – Refer Ad-Hoc list page.
- Seed list- Refer Seed list page.
- Match list – Refer Match list
- Suppression list – Refer Suppression list page.
- Click I Agree & proceed once you have selected your list type. Note this step will be skipped if you have selected target list.
- Provide an import description/list name with a 50-character limit. It can be a combination of alphanumeric and special characters. The import description is used to identify the source of the audience record and for display in Master data import history whereas the list name is used to identify the list during campaign orchestration and segmentation.
- Choose the file(s) by clicking the "Browse" button.
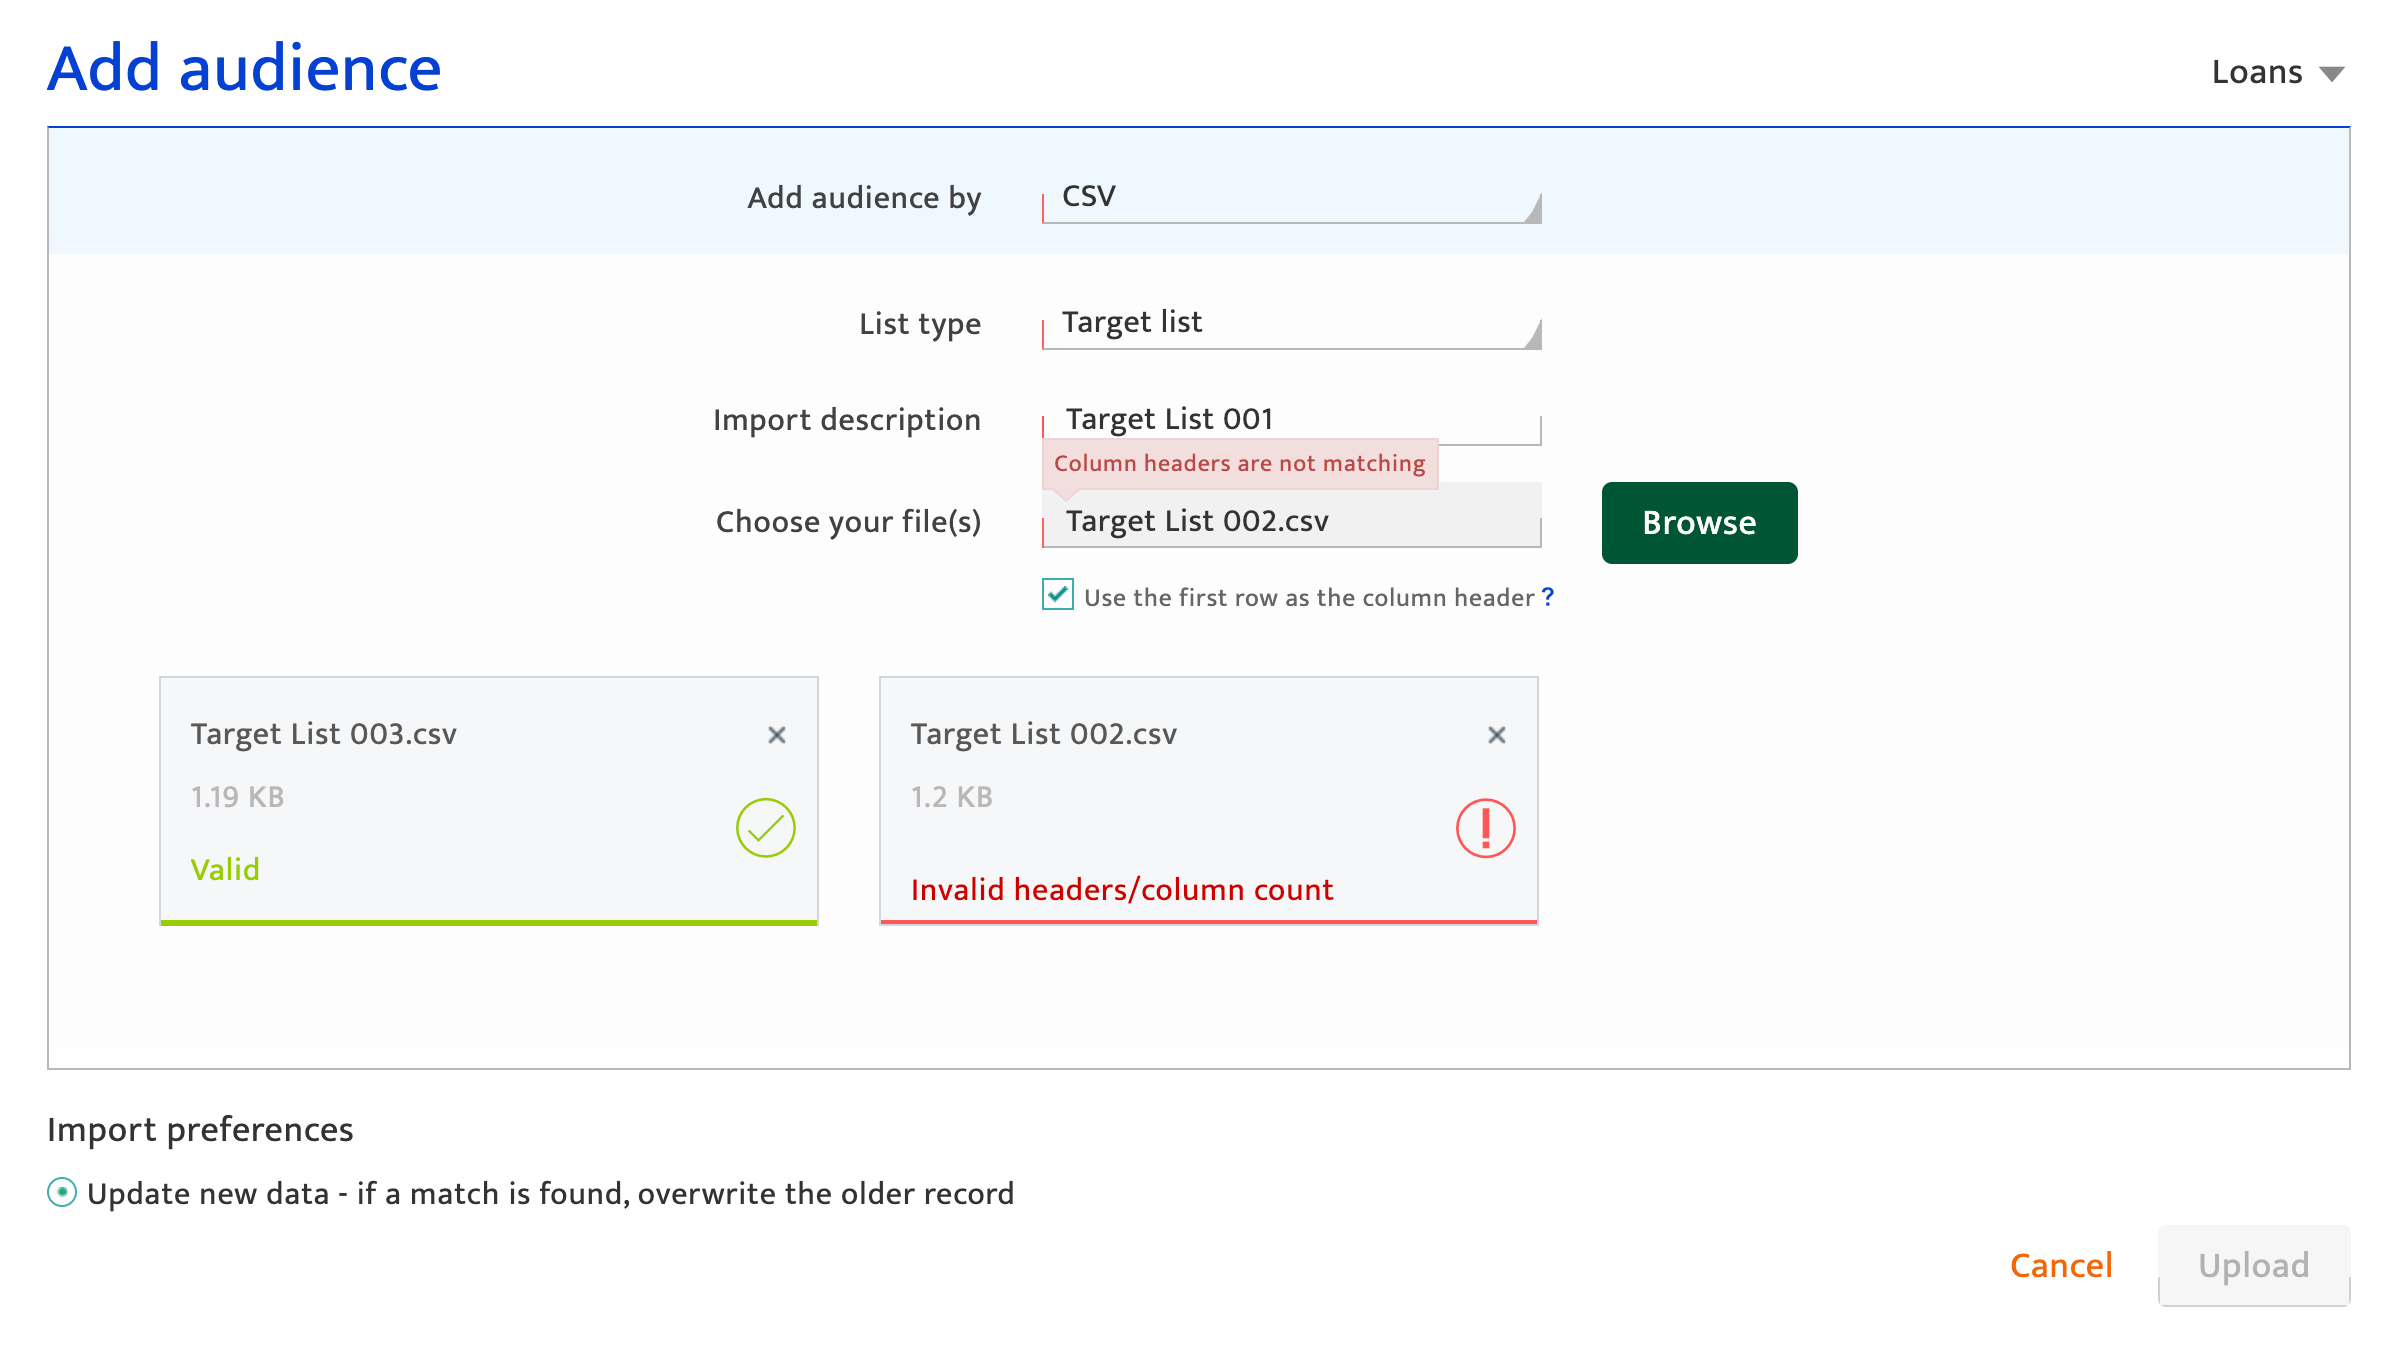
- If it is a CSV file import, a maximum of 6 files can be selected per import. Each file should not be larger than 10MB, and the overall file size should not exceed 60MB. The column headers should be consistent across the multiple CSV files.
- If it is an XML file import, only one file no larger than 10 MB size can be uploaded.
- Choose whether the first row of the imported data will serve as the column header by ticking the box.
- Choose to overwrite old or existing data with the new import by clicking the radio button.
- Click "Upload" to import the data. Verify the upload status of each CSV file using the status bar against each. The statuses could be:
- In progress: Still uploading
- Verified as valid: Successfully uploaded into the Audience database
- Error with a summary message shown: The file was not uploaded due to errors relating to invalid or missing data. Click on the "!" icon to see the detailed error message on how to address them.
Selecting audiences from a remote data source#
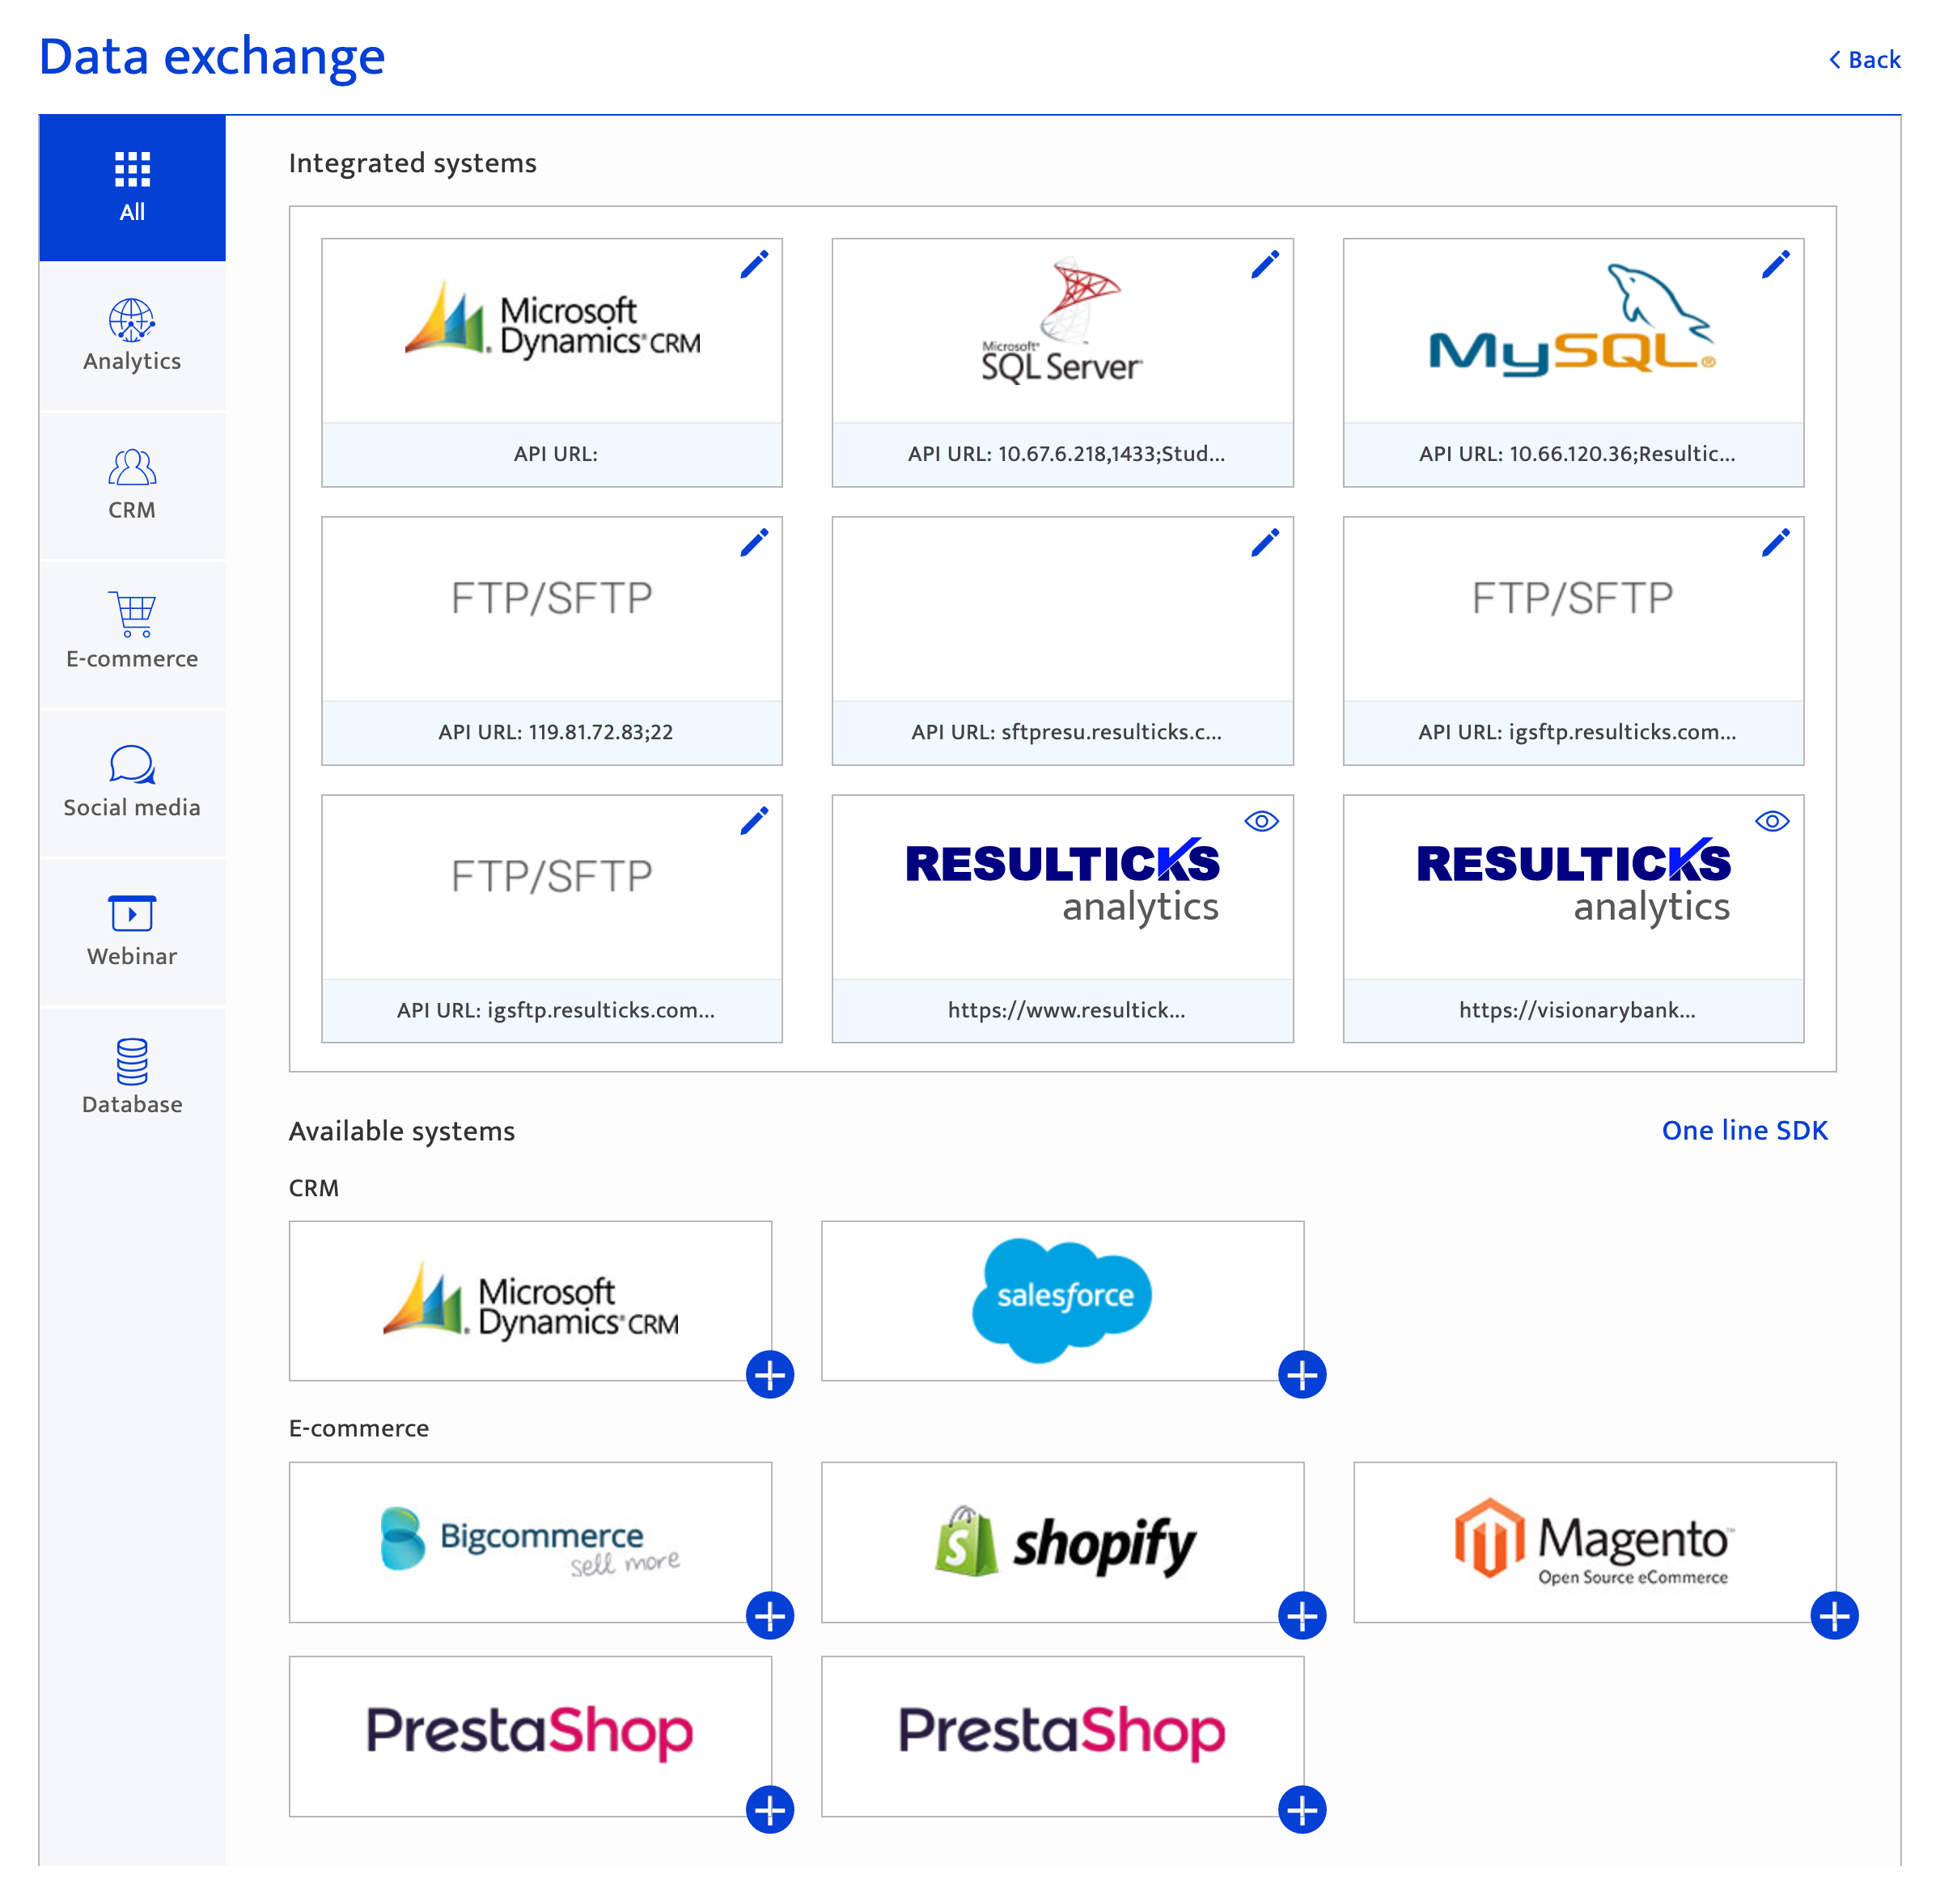
To import a new audience from a remote data source, select this option from the drop down and follow the steps below:
- Select the remote data source from the Integrated system panel on top or create a new data exchange connection.
- If an already integrated system is selected, click "Edit" and select the required tables and data fields to be mapped into the Resulticks platform.
It is recommended that the brand seek Resulticks support when integrating a remote data source for the first time.
Selecting audiences via an FTP or SFTP connection#
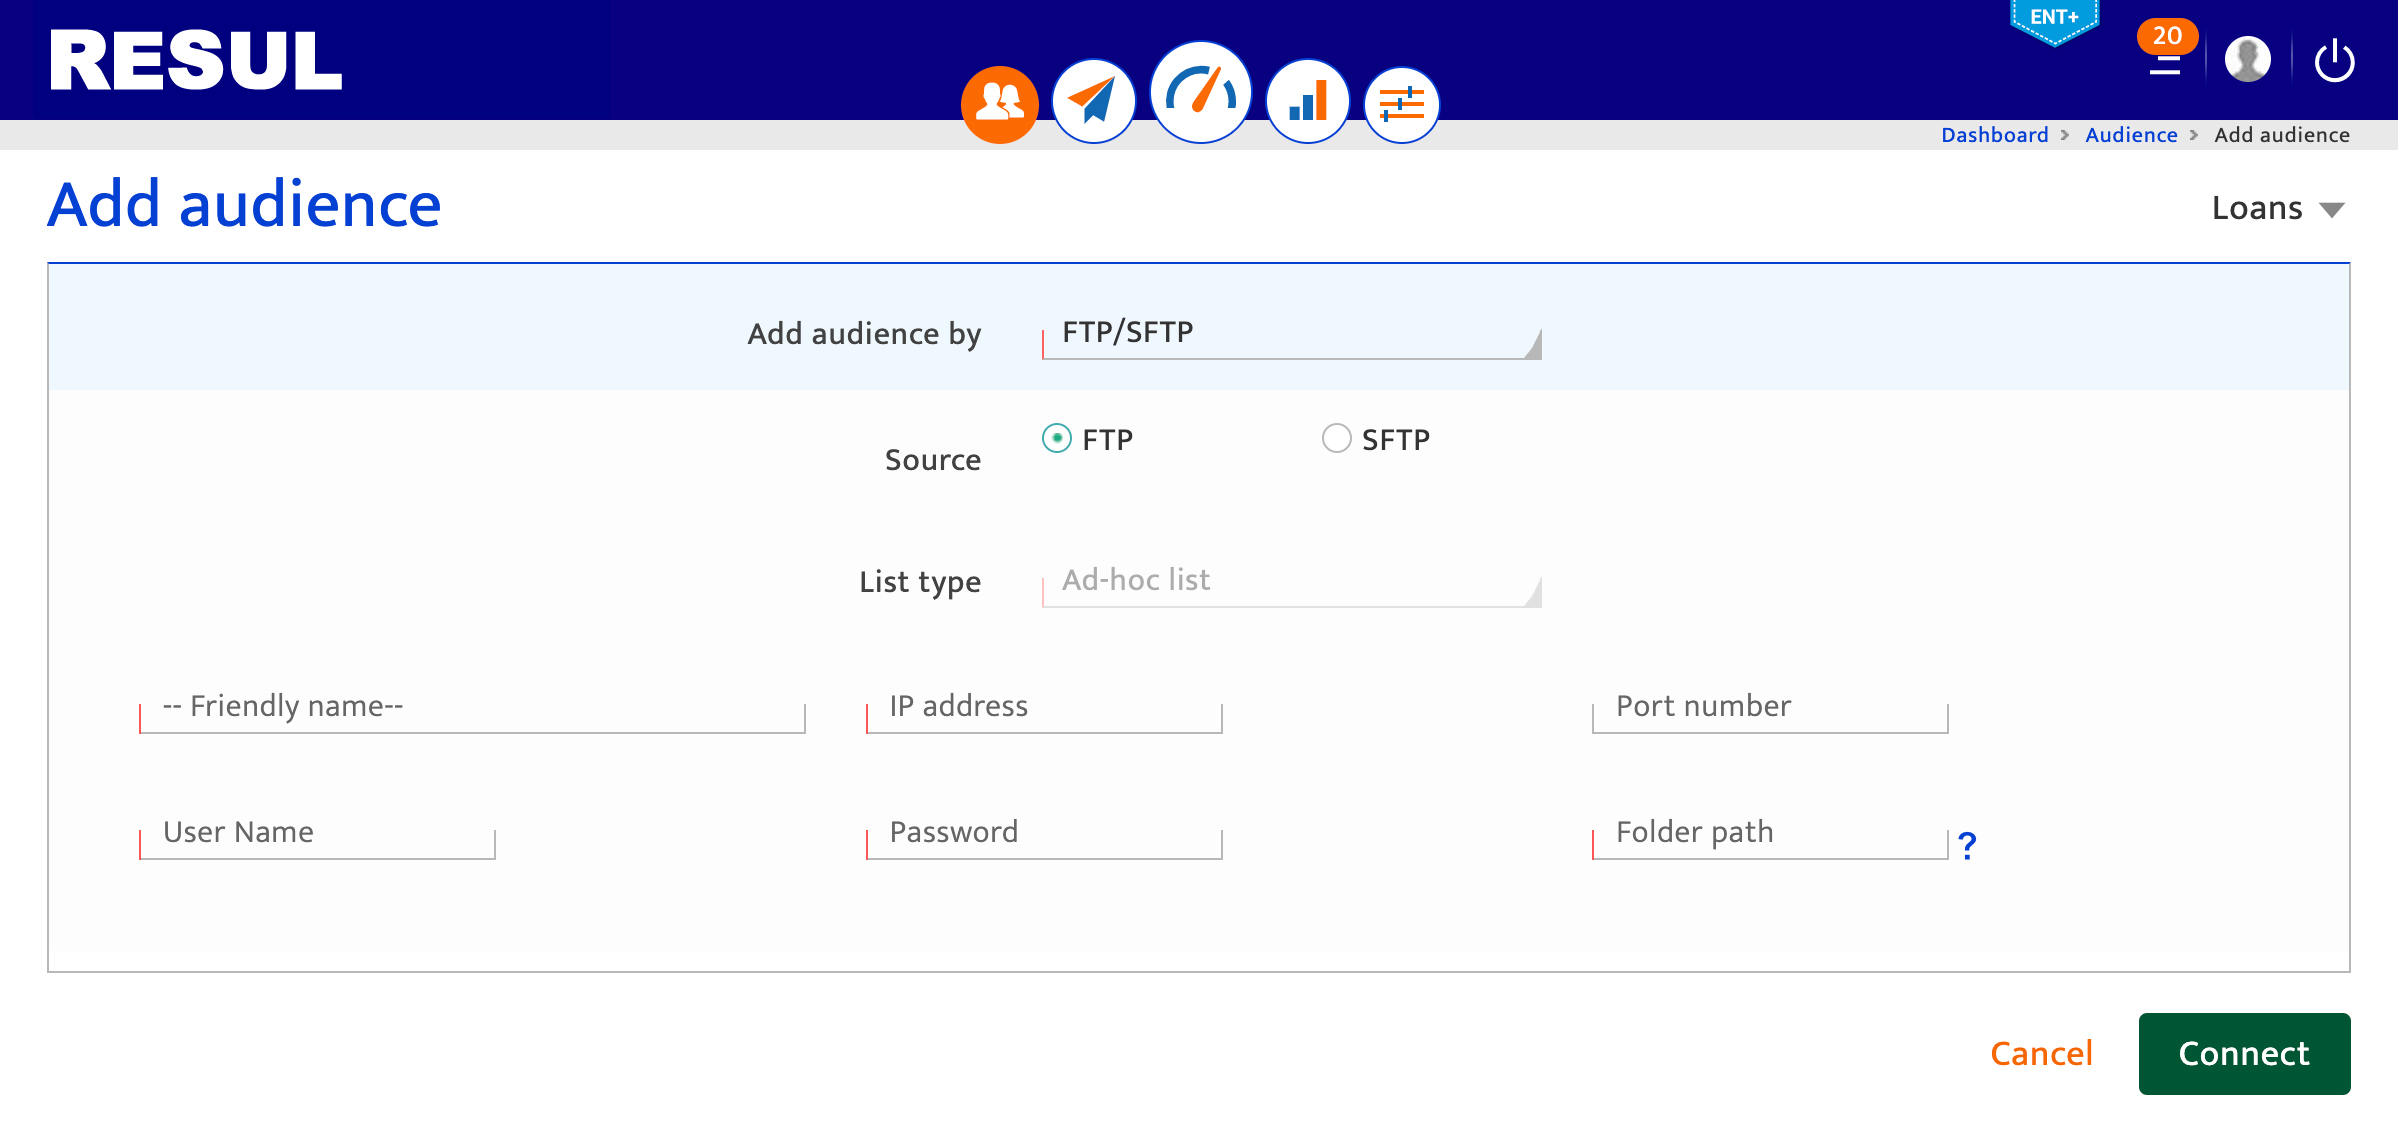
To import a new audience list via an FTP or SFTP connection, select the corresponding option from the drop down and follow the steps below:
- Enter the necessary details of FTP/SFTP connection.
- Click "Connect' and import the data by clicking connect.
Mapping imported data#
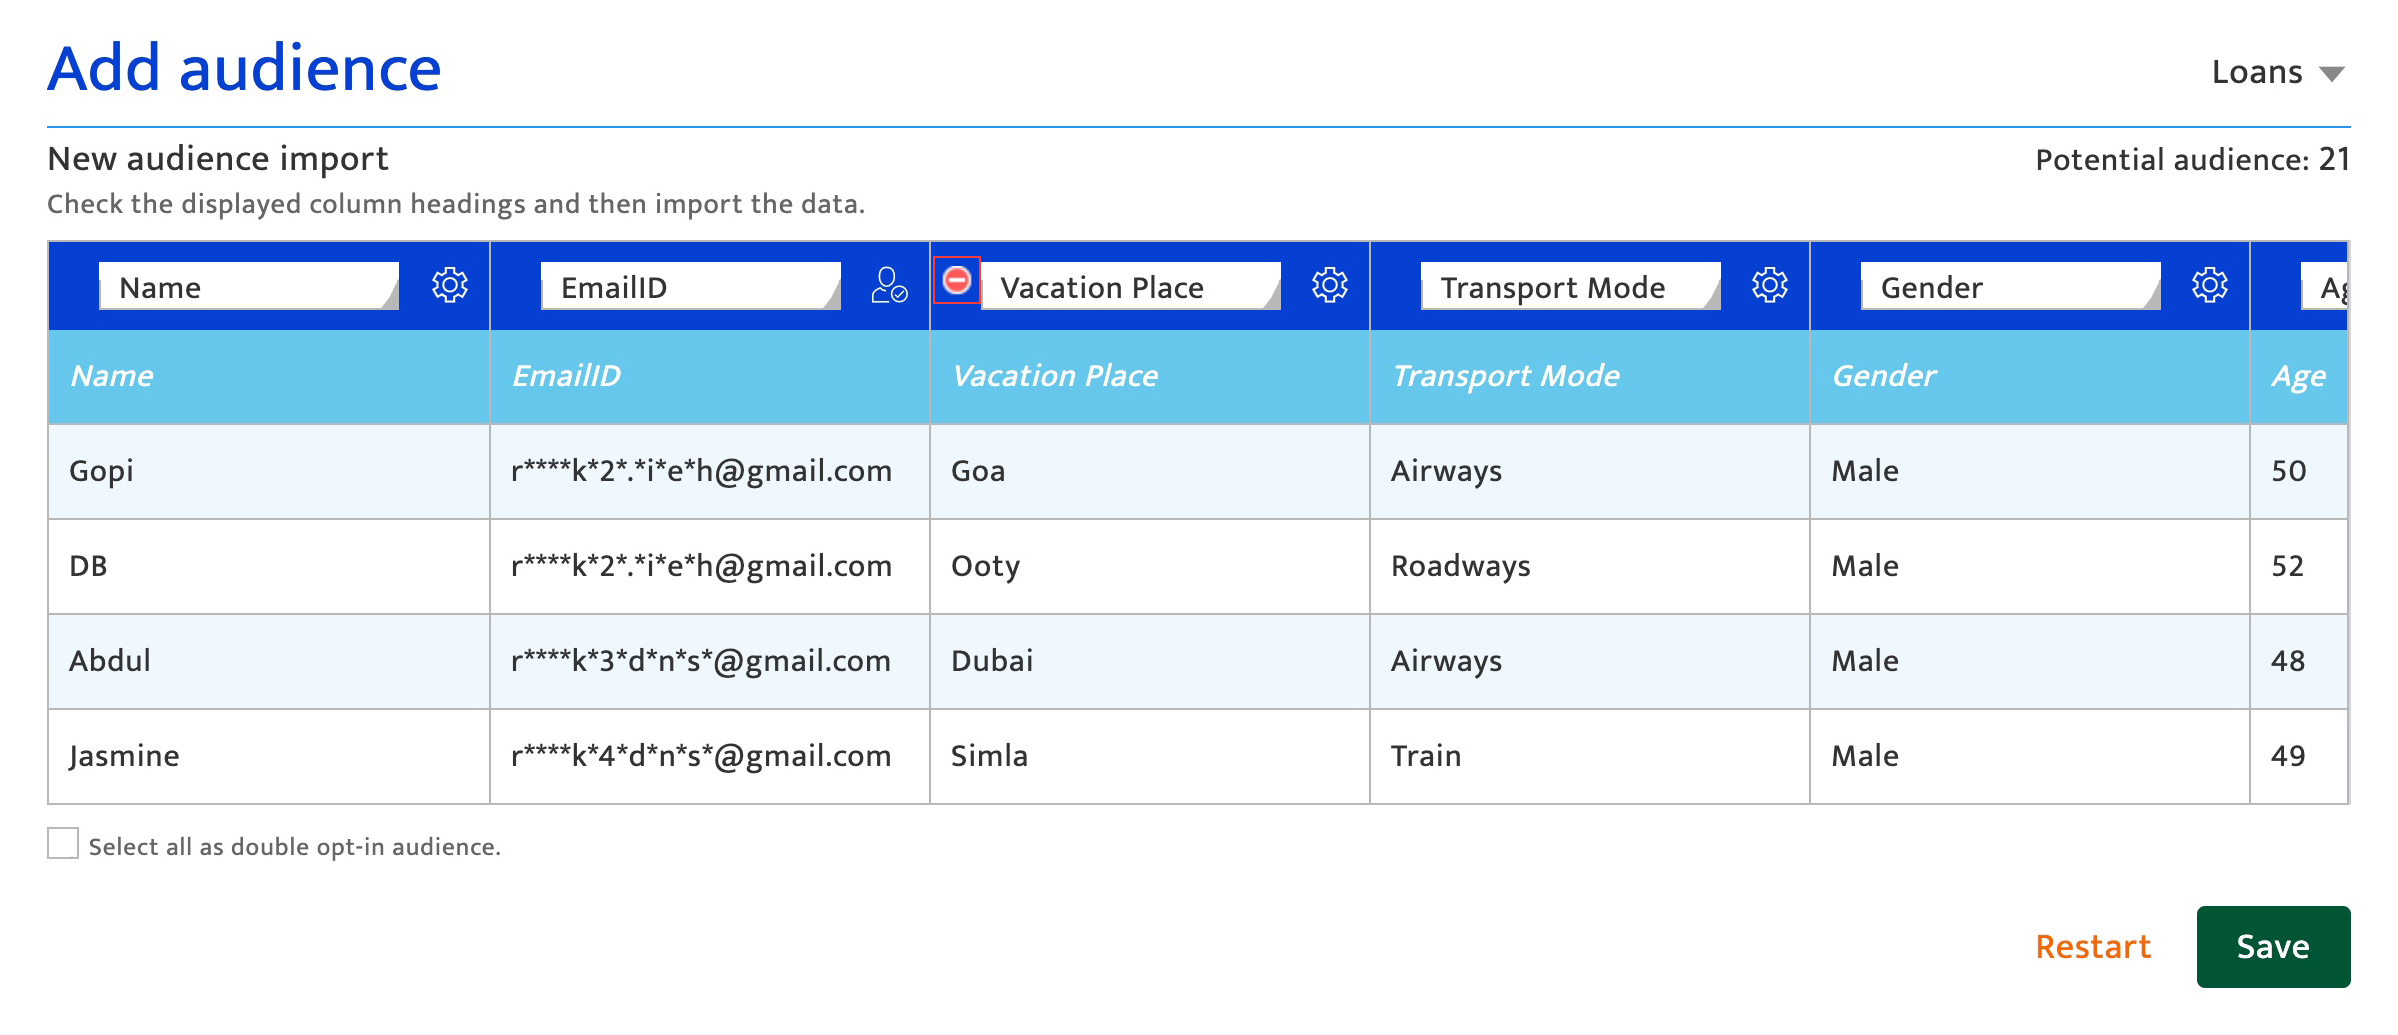
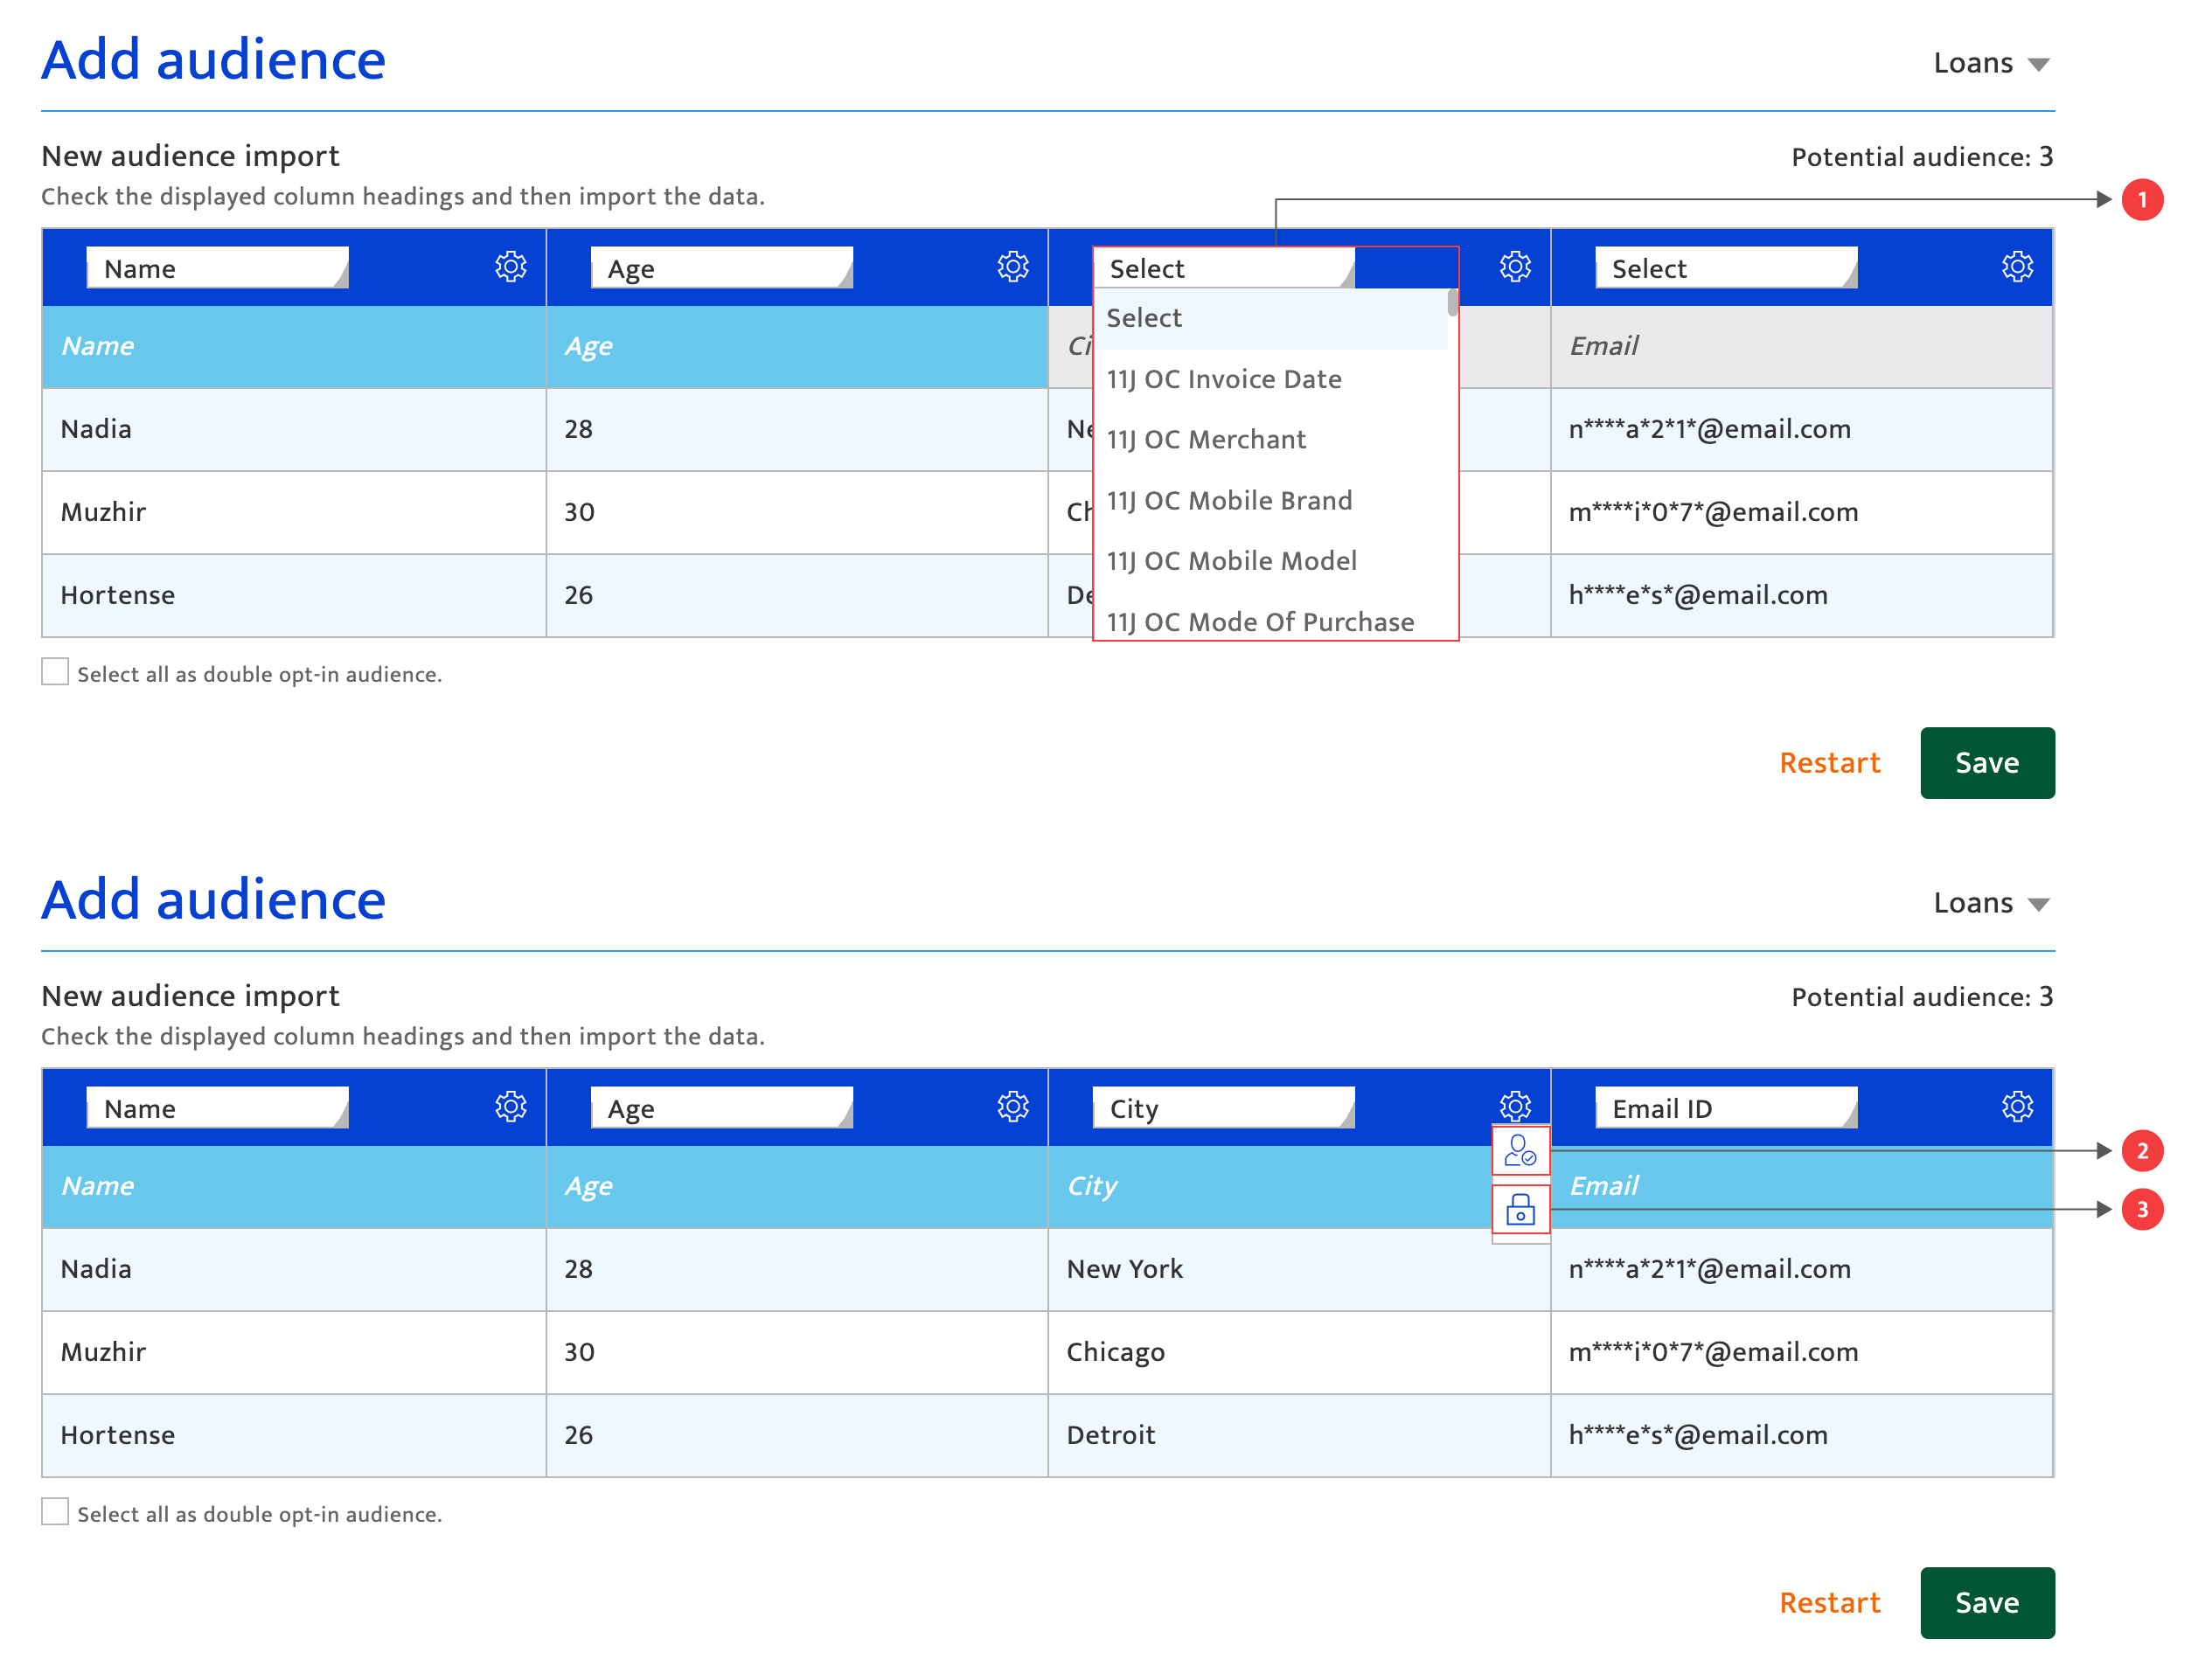
Map the data attributes being imported using the following options:
- Map each imported data attribute (column header) to an audience data attribute from the platform using the drop-down lists.
- Identify an attribute as the unique identifier for the audience by selecting the highlighted icon.
- Identify an attribute as sensitive data by selecting the safe box icon.
- Flag double opt-in for the entire list by ticking the checkbox below the table. Note that if the box is checked the Resulticks platform will reject data during upload without contact consent.
- Delete a column of attributes by clicking on the "Delete" icon.
Confirming audience import#
- Upload the data by clicking "Save".
- Click "Restart" to discard the data import and return to the Add audience screen.
- Confirm the data import is in progress by viewing the in-progress popup notice. Validate the import status in Import history.
- Click "Import again" to add more audience data.
- Click "Return to master list" to return to the Master data screen.
