Analytics-Web
What is it?#
Web Analytics incorporated on web pages in conjunction with the Resulticks Smart Link can be a valuable source of behavioural information such as:-
- Traffic source
- Pages viewed
- Time spent per page
- User interaction at each page
The three-step process#
Setting up web analytics follows a three-step process.

- Setup a data connector to integrate the relevant Web Analytics platforms and domain using the Data exchange section under Preferences.
- Configure analytics setting the relevant primary goal for a Single dimension, Event trigger, or a conversion Multi dimension campaign.
- Then track at the individual level by optionally using the Resulticks Smart link as part of the campaign. Please refer to creating a Smart link, for more information.
Authorization for campaign creation#
All users with campaign access can set up analytics for the campaign.
Accessing campaign analytics configuration#
To configure analytics for a campaign:-
- Access "Add a Campaign" through the Campaign module.
- Select Single dimension delivery method.
- Tick analytics types checkbox in the Campaign plan stage.
Note: In order to view analytics for engagement/conversion set it up as the primary goal for the campaign on the plan page. - Select the analytics channel type and select Web.
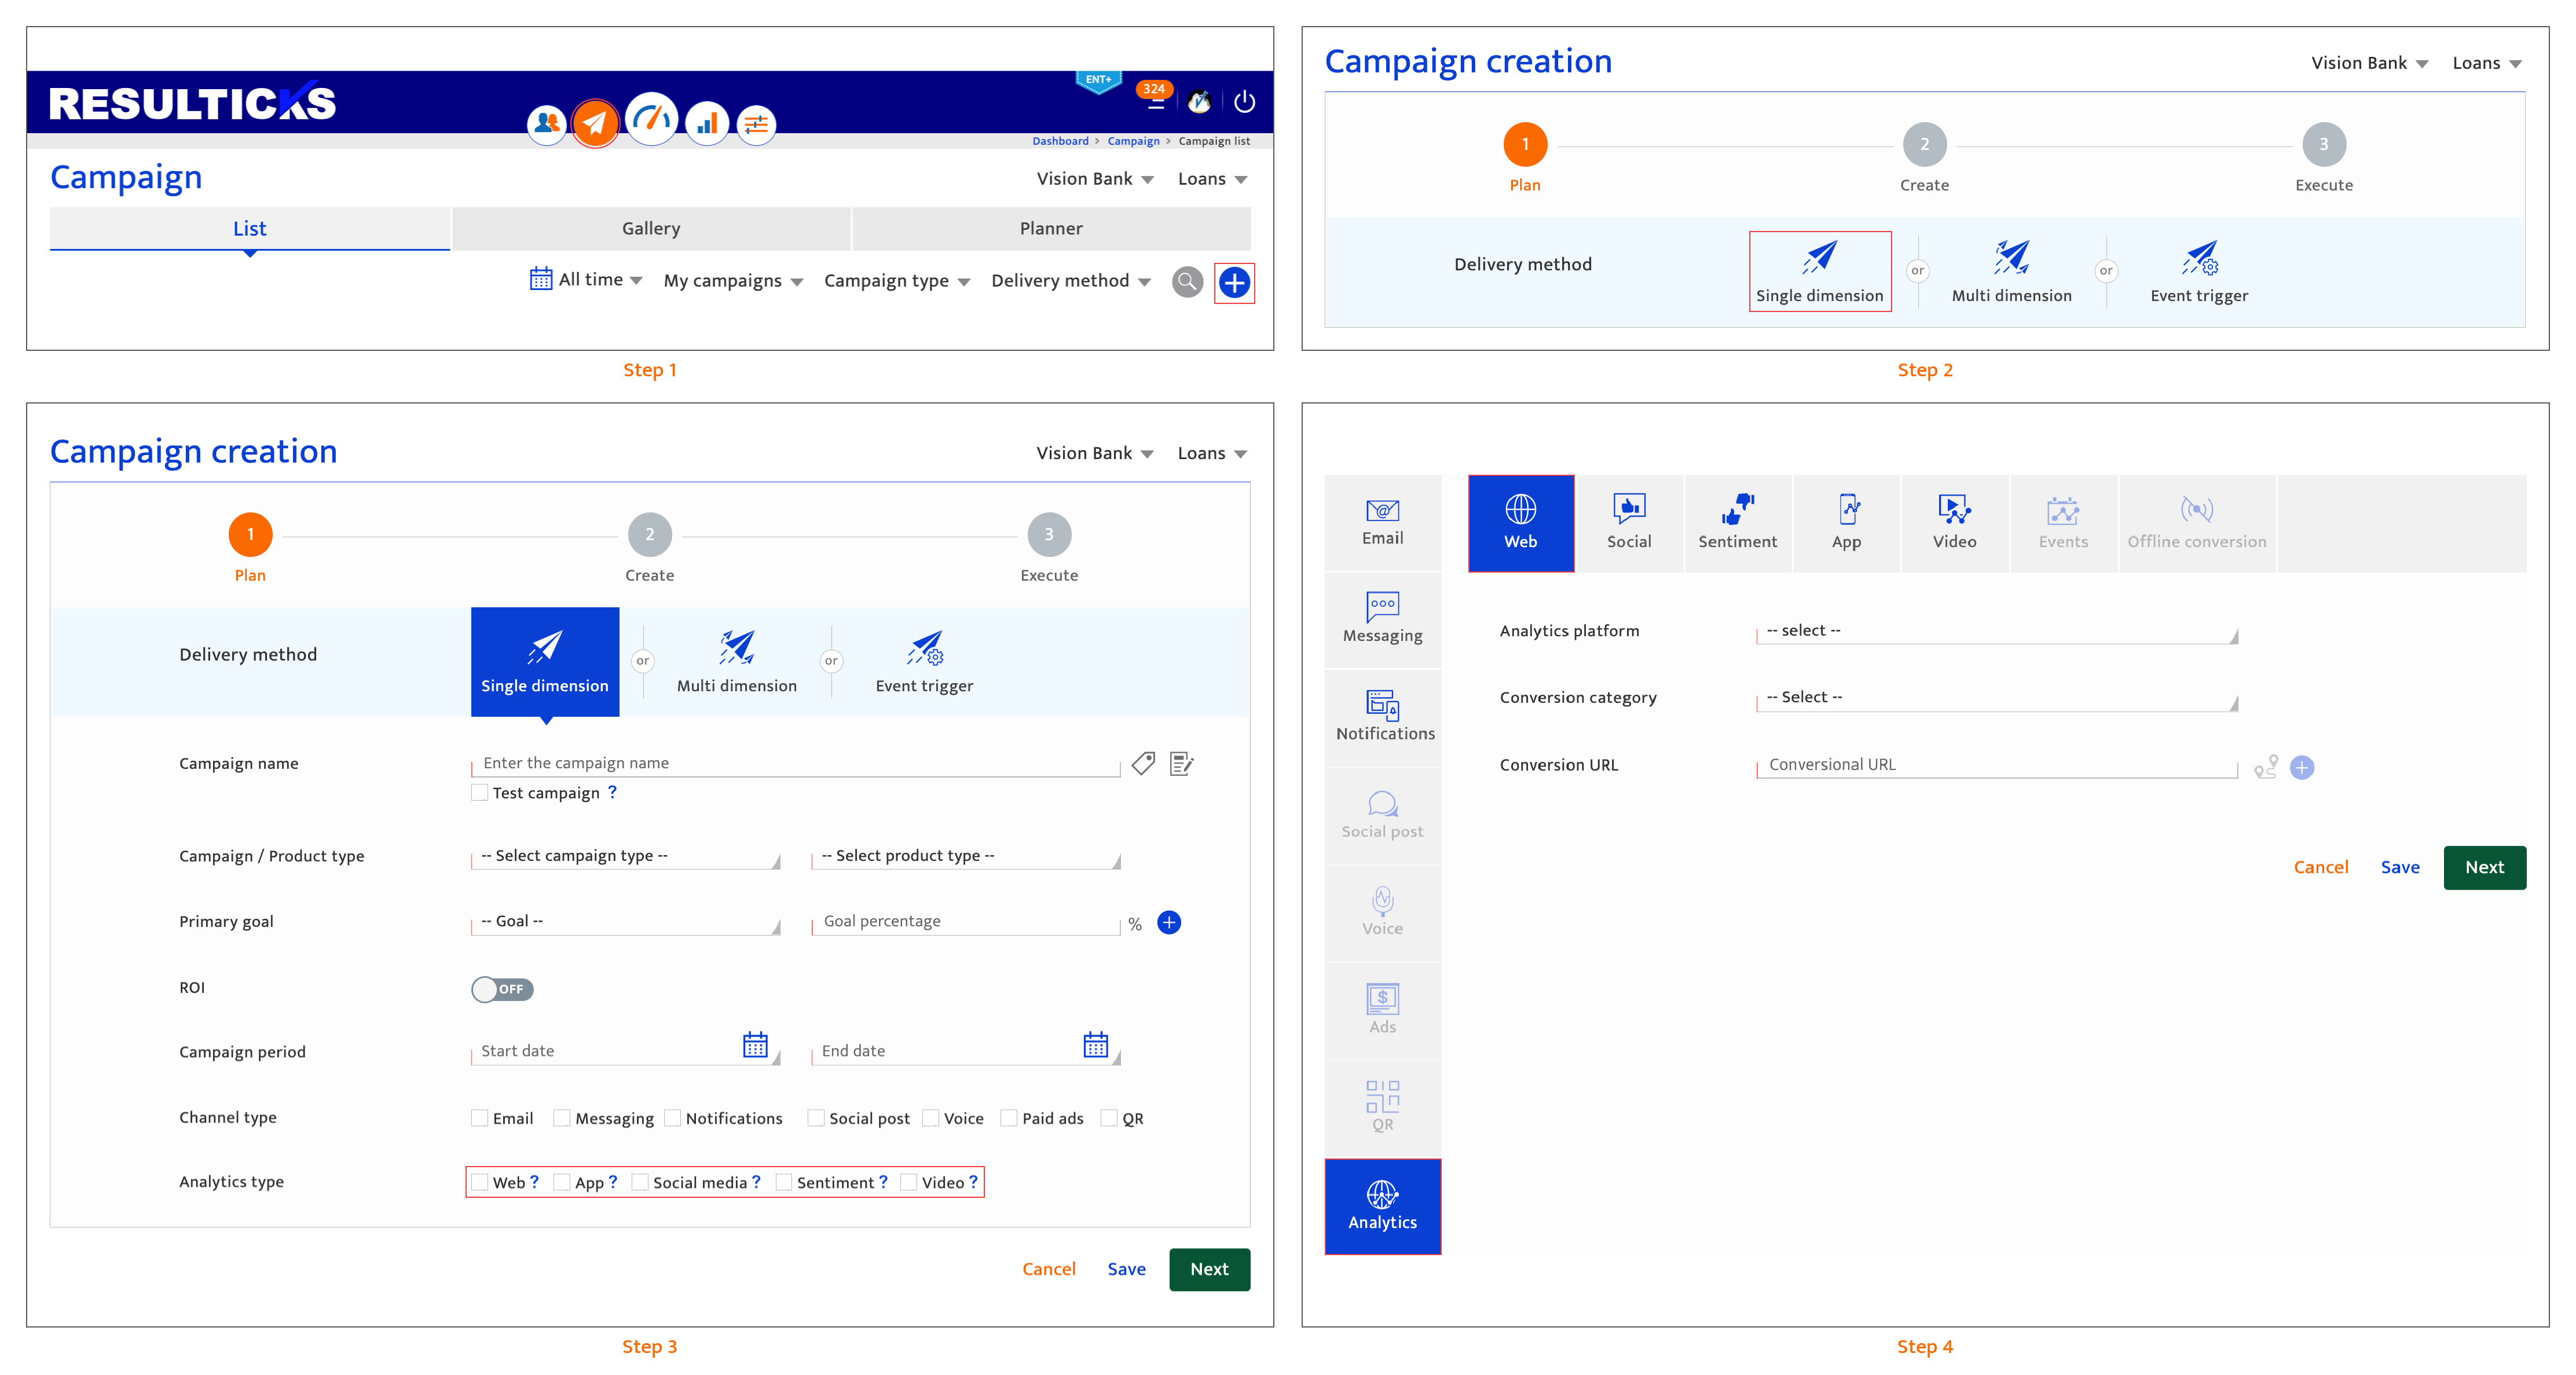
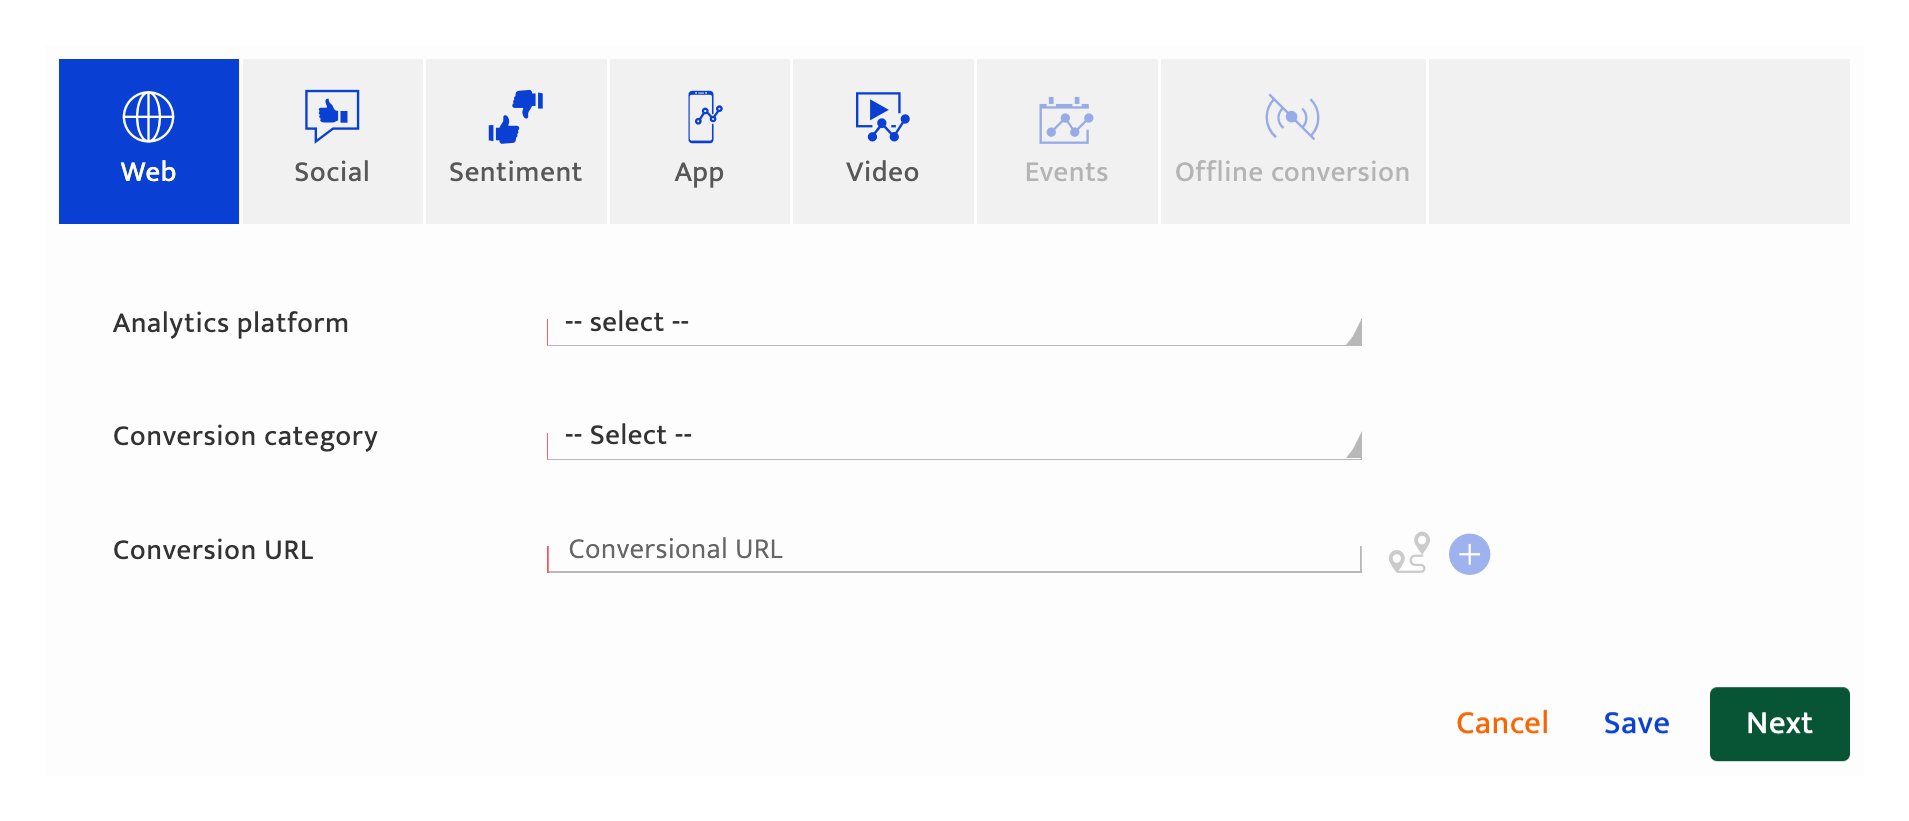
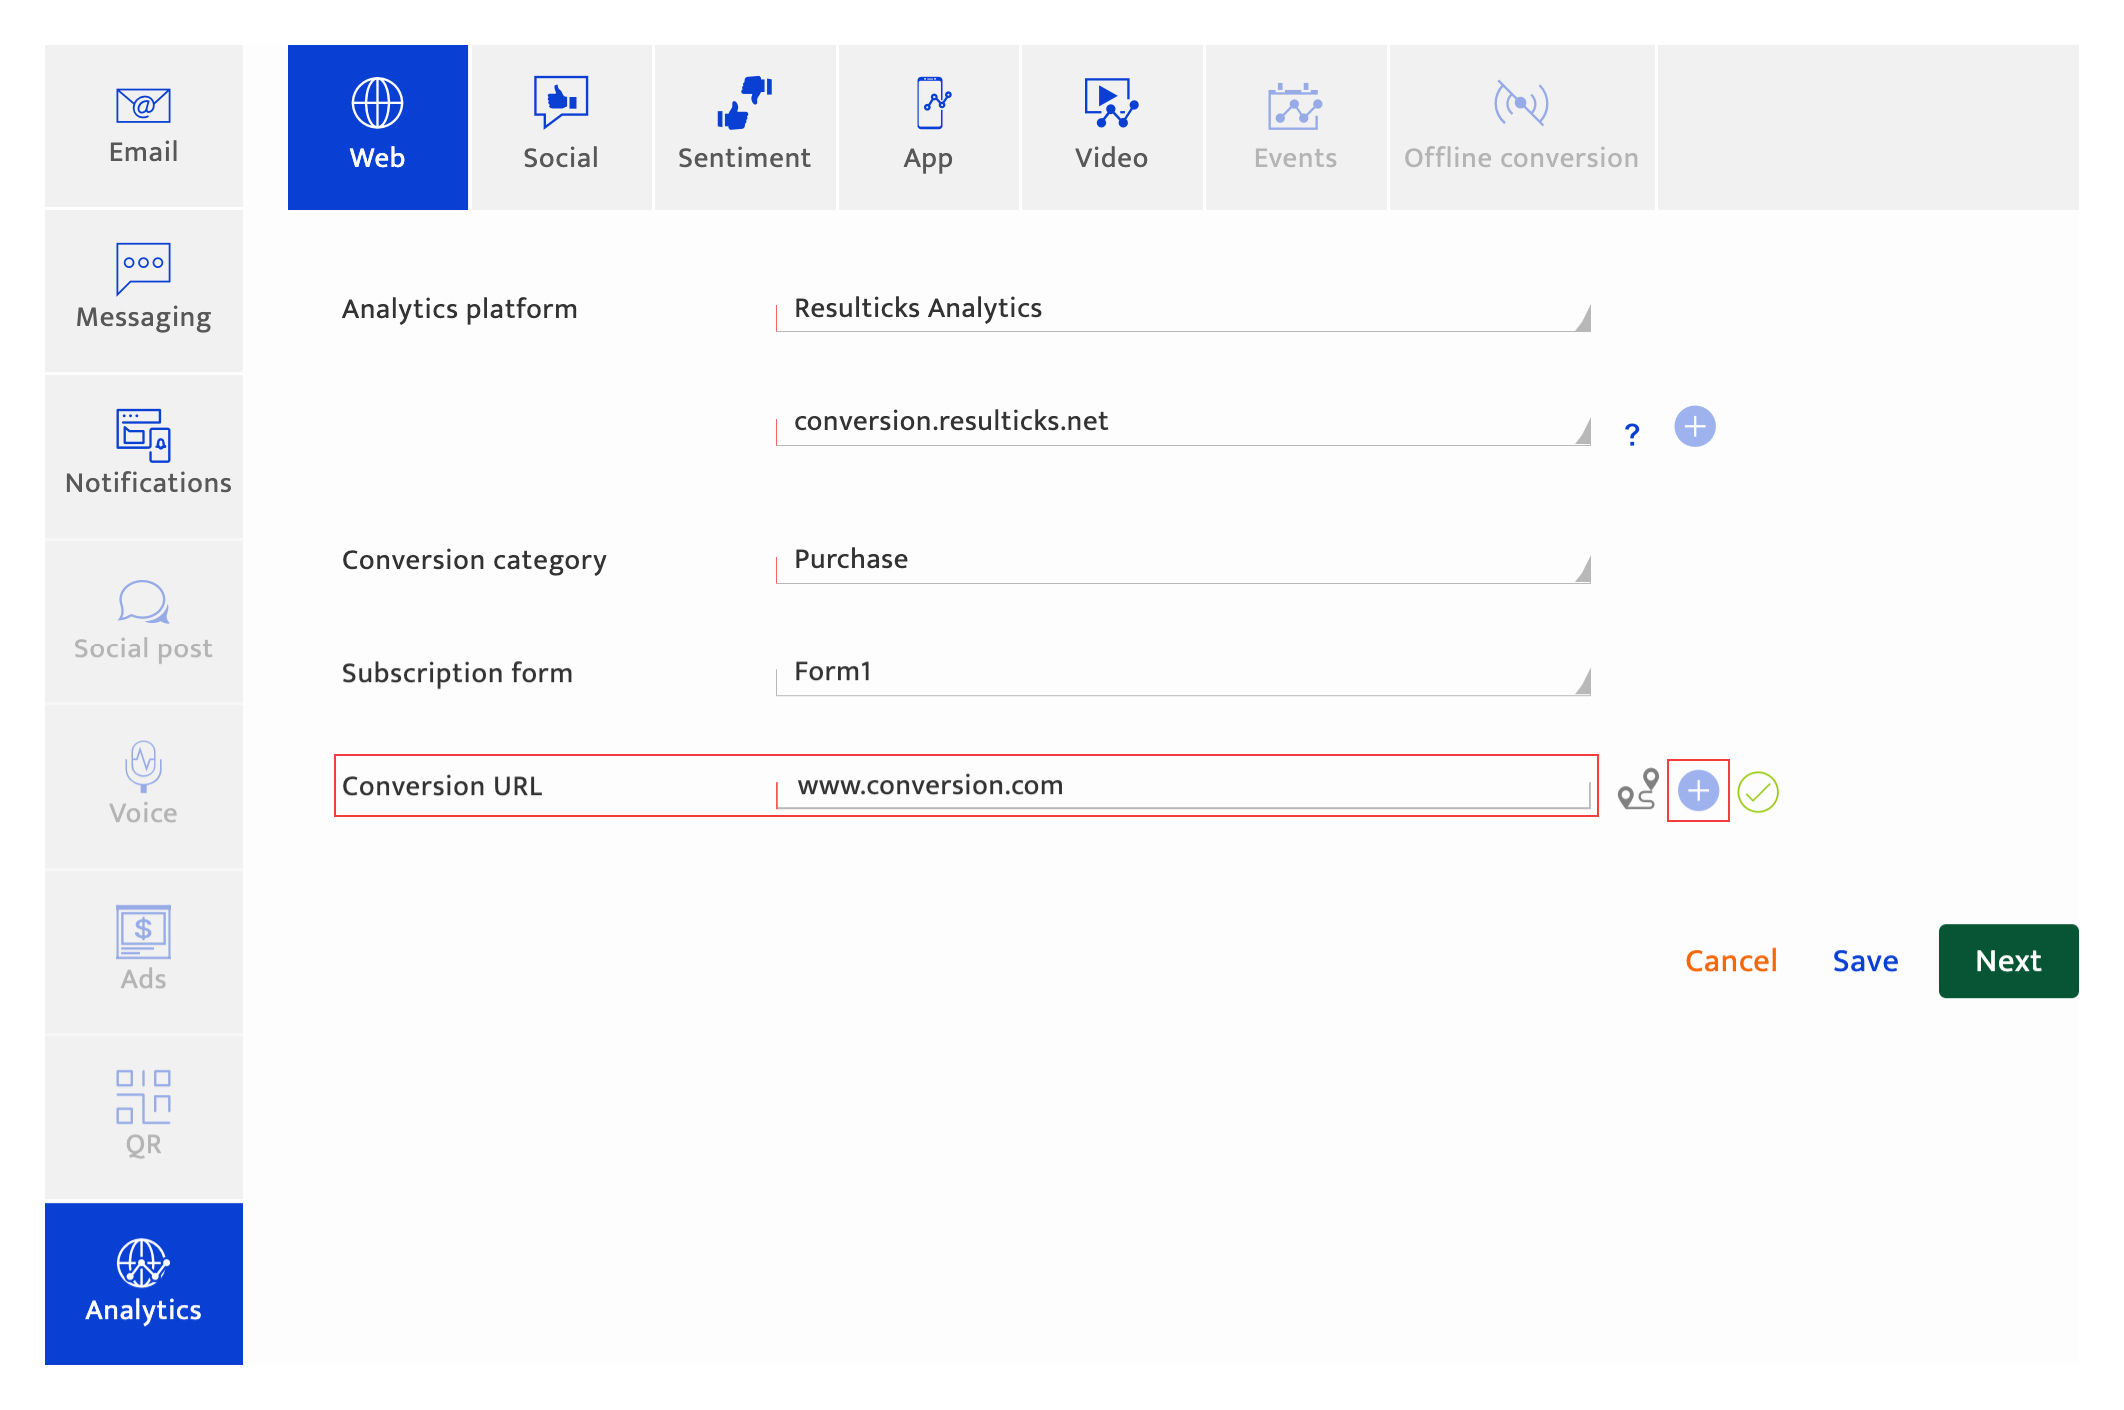
Configuring campaign analytics#
To set up web analytics, follow these steps:
- Select an analytics platform from the drop-down list, displaying all the analytics platforms integrated through the Data exchange section under Preferences.
- Select a domain from the drop-down list, displaying those integrated along with the analytics platform. Additional domains from this list can be selected by clicking the "+" icon.
- Set up engagement tracking if the campaign goal is Engagement, enter the URL associated with it here. To track additional URLs for engagement you can click the "+: icon.
Note: Up to 4 URLs can be tracked. If the campaign goal is Conversion: - Select a conversion category from the drop-down list.
- If Signup or lead conversion is selected (a), choose the subscription form to be completed from the drop-down list. The subscription form can be created and edited in the Form generator section under Preferences. Enter the associated conversion URL.
- If Purchase conversion is selected (b), enter the conversion URL. Note that the purchase conversion URL must be within the company domain.
- Click the "+" (c) icon to enter additional URL details, when there is more than one conversion point. Each of these URLs must relate to the selected conversion action.
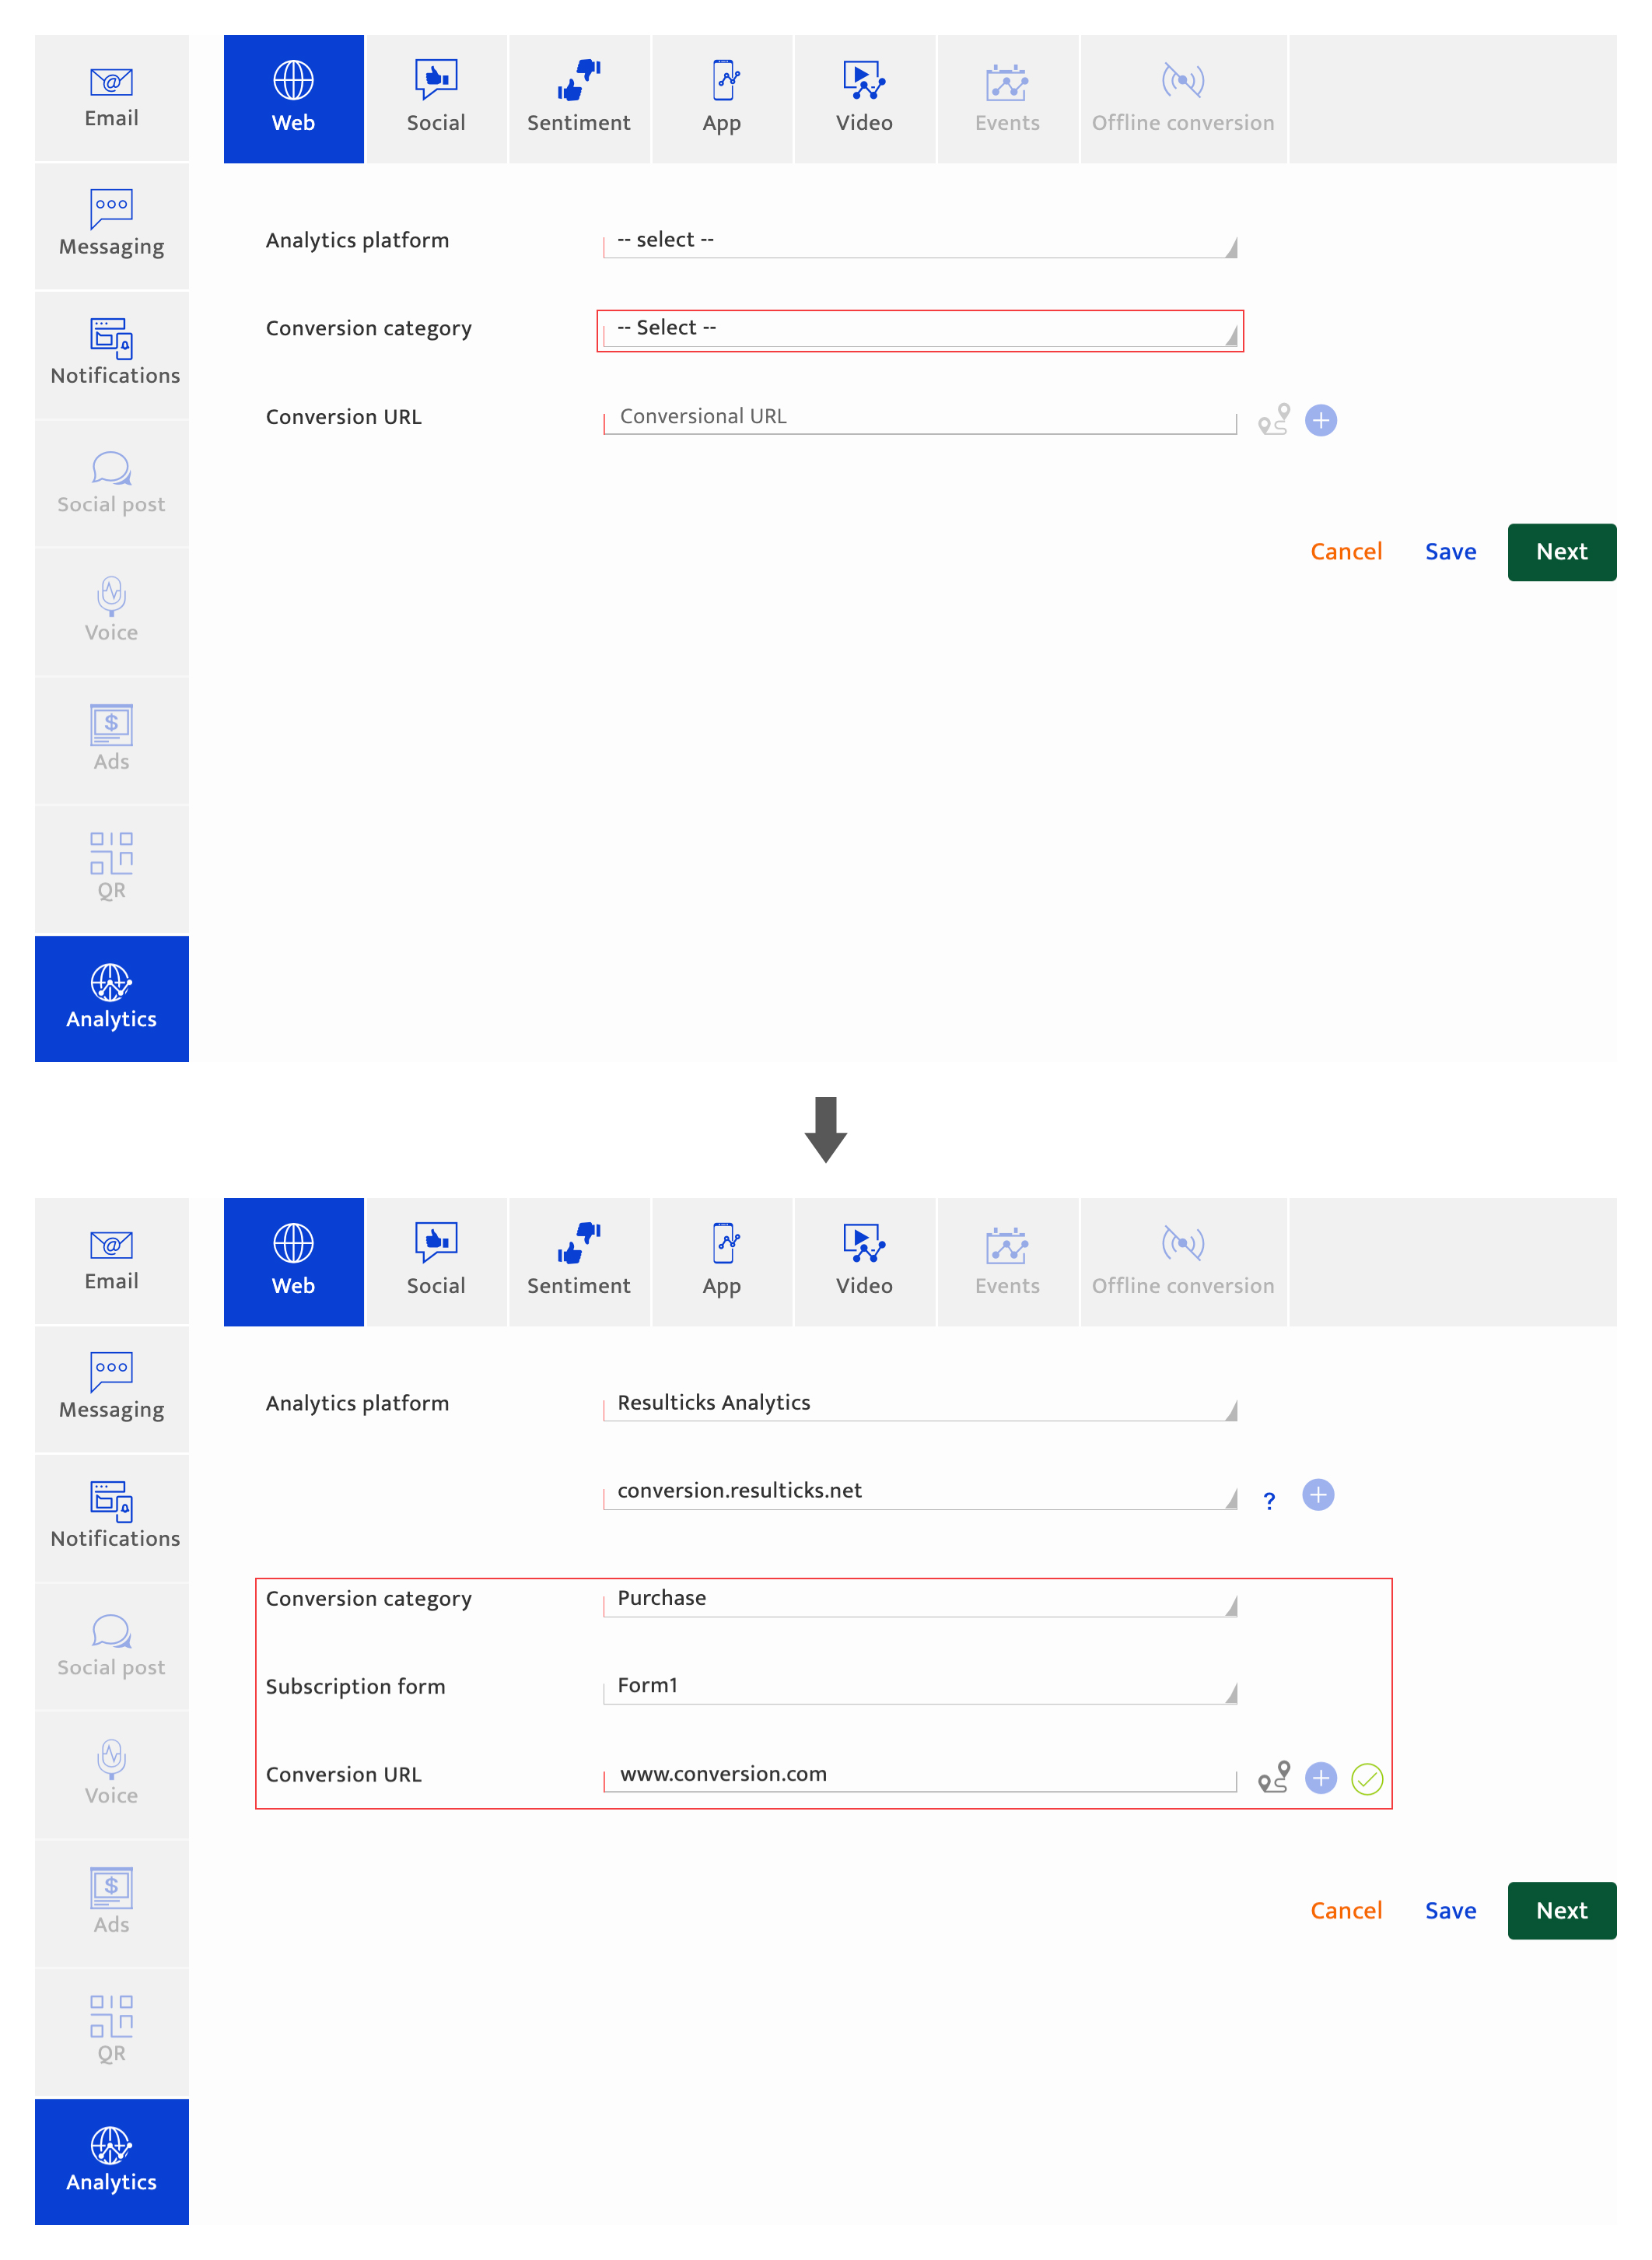
- Proceed to the next step. There are 4 options to proceed:
- Click "Save" to save the current input and return to the Campaign list The platform will highlight any missing mandatory information.
The campaign will be saved as "Draft" if it is a new campaign. If the user has been editing a "Draft" or "Scheduled" campaign, the campaign state does not change. - Click"Next" to save the current input and proceed to the next step which is sequenced as follows:
- The platform will highlight any missing mandatory information.
- If other analytics have been selected during the campaign planning stage, the input screen for the next analytics that was selected during campaign planning is displayed.
- If setup for all channel types has been completed, the Campaign Execution screen (pre-campaign analytics) is displayed.
- Click "Save" to save the current input and return to the Campaign list The platform will highlight any missing mandatory information.
- Click on another channel type. Only channel types selected during the campaign planning stage will be available. Input for the current analytics type is discarded unless the user clicks "Save" or "Next".
- Click "Cancel" to return to the Campaign-list screen. Any current input since the last time "Next" button was clicked is discarded.