Analytics-Sentiment analysis
What is it?#
Sentiment analysis is incorporated into a number of modules with the Resulticks platform, including Campaign Analytics, Audience 360, and Lead Scoring. It can be a valuable source of social information such as:-
- Mentions of defined keywords
- Positive, negative or neutral sentiments around a brand
Authorization for campaign creation#
All users with campaign access can set up analytics for the campaign.
Accessing the sentiment analysis setup#
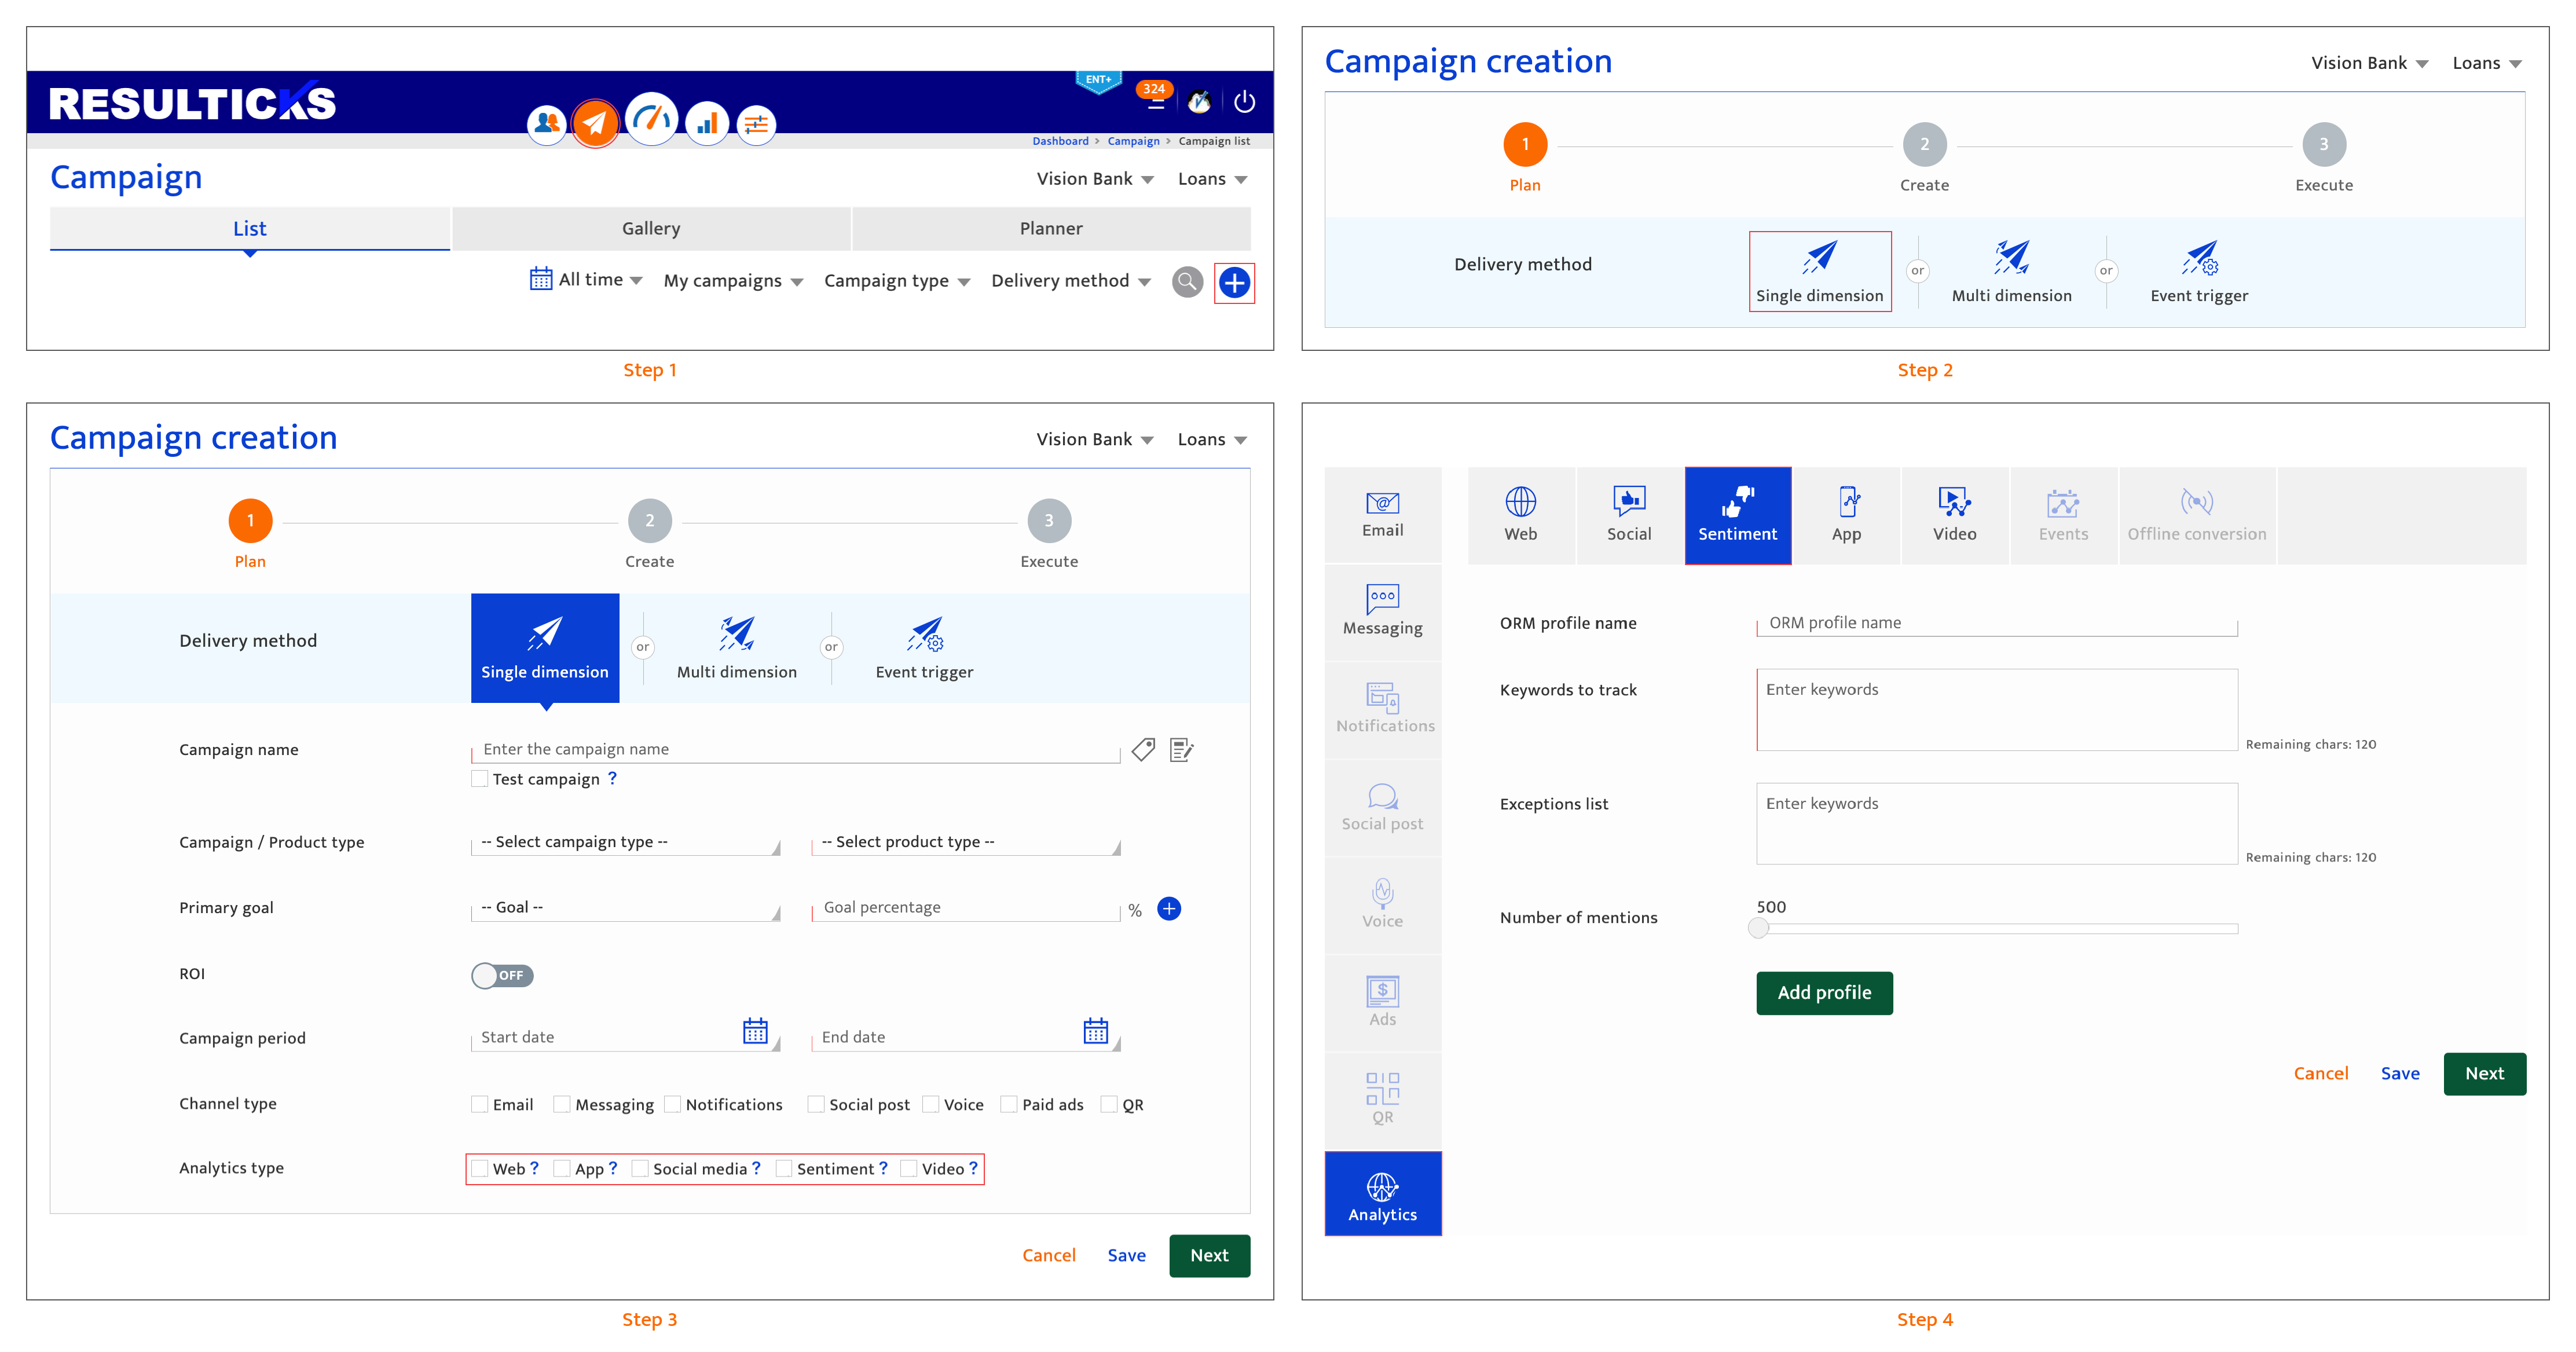
To configure sentiment analysis for a campaign:-
- Access "Add a campaign" through the Campaign module.
- Select Single dimension delivery method.
- Select analytics types in the Campaign plan screen.
- Select the analytics channel type and select Sentiment.
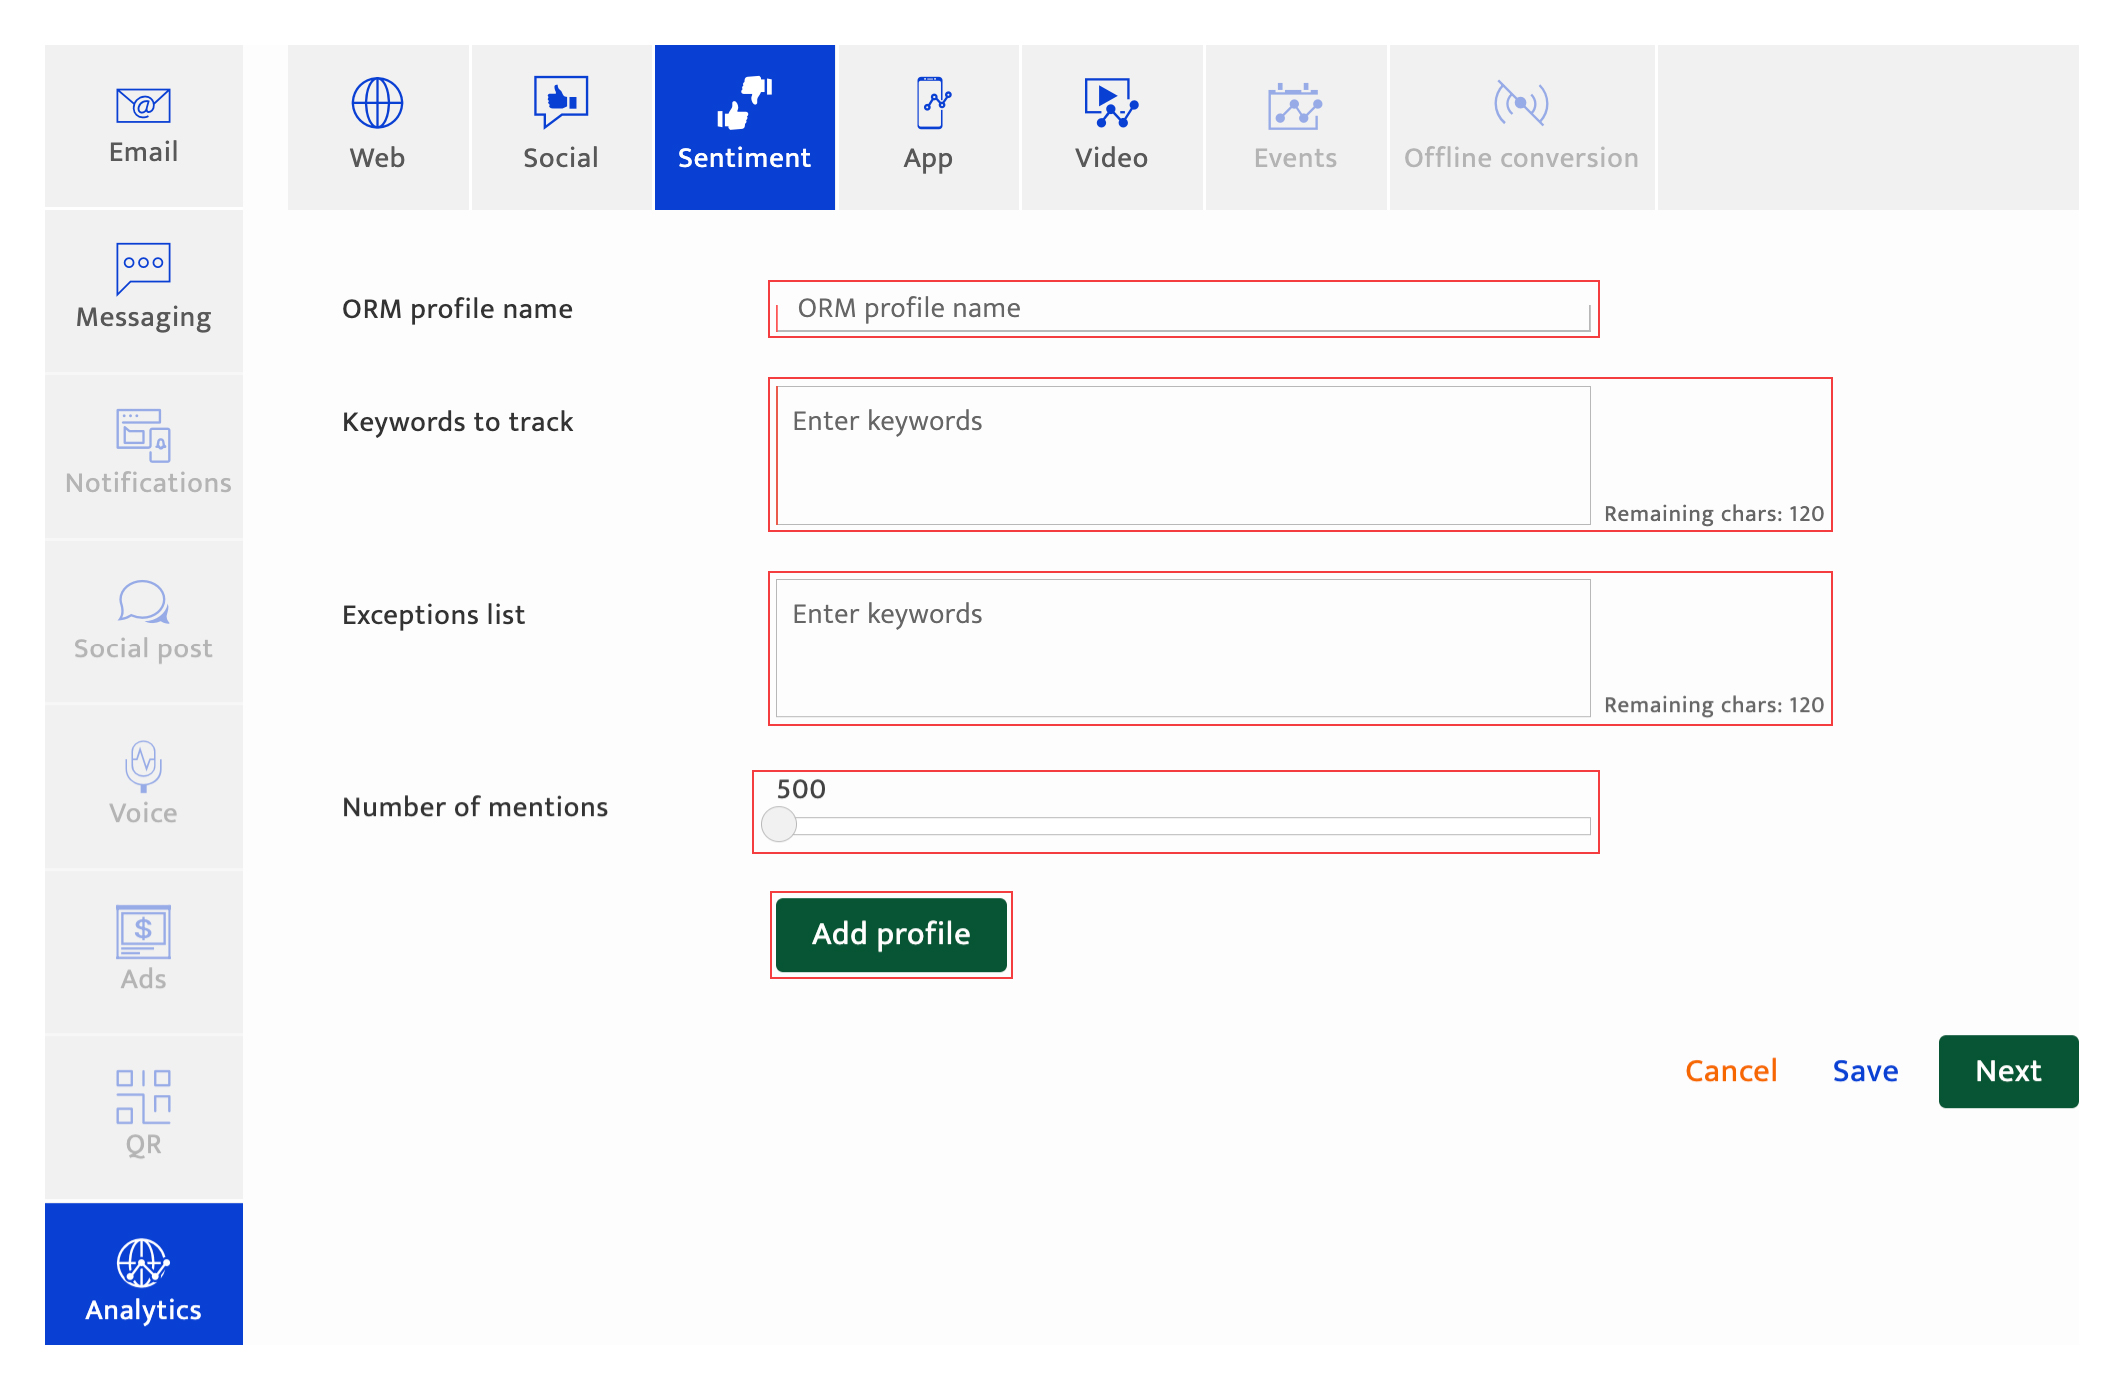
Setting up sentiment analysis#
To set up sentiment analysis, follow these steps:
- Enter an ORM (Online relationship management) profile name. It is used for internal reference purposes. There is a 35-character limit.
- Enter keywords to track for the profile. Enter a comma after each keyword to separate it. For exact matches or phrases, enclose keywords in quotes (e.g. "Saturday"). There is a 120-character limit. The keywords specified will be used to categorize sentiments collated as negative, positive or neutral, using proprietary algorithms.
- Specify an exception list or keywords to exclude from the profile, using the same rules for definition as described above. There is a 120-character limit.
- Set the number of mentions that must be tracked for reporting. The maximum number of mentions allowed is dependent on the type of Resulticks licensing subscribed.
- To generate the ORM report, click "Add profile". The ORM report is available within the Detailed campaign analytics report.
- Proceed to the next step.
There are 4 options to proceed:- Click "Save" to save the current input and return to the Campaign-list. The platform will highlight any missing mandatory information.
The campaign will be saved as "Draft" if it is a new campaign. If the user has been editing a "Draft" or "Scheduled" campaign, the campaign state does not change. - Click "Next" to save the current input and proceed to the next step which is sequenced as follows:
- The platform will highlight any missing mandatory information.
- If there are other analytics types that have been selected during the campaign planning stage, the input screen for the next available analytics type is displayed.
- If setup for all analytics types has been completed, the Campaign execution screen (pre-campaign analytics) is displayed.
- Click "Save" to save the current input and return to the Campaign-list. The platform will highlight any missing mandatory information.
- Click on another channel type. Only channel types selected during the campaign planning stage will be available. Input for the current channel type is discarded unless the user clicks "Save" or "Next".
- Click "Cancel" to return to the Campaign-list screen. Any current input since the last time "Next" button was clicked is discarded.