Content creation for an email campaign#
This section covers the content creation of an email campaign.
For more information on creating an email campaign, see Email campaign creation.
Content creation options#
In general, there are three possible options to create content for an email campaign.

- Text, where you create the content using the text editor. Use this to create content quickly and when there is no need to create a template for future use.
- Import, where you can upload existing content from outside of the Resulticks platform.
- Template, where you use an existing template stored on the Resulticks platform.
Using the text option#
Compose the content in the text box using the following tool options:-
- Select default formats for various sections of the email from the drop-down list. These formats include various headings, paragraphs, and quotations. The formats apply settings to fonts and text placement.
- Bolden, italicize, and/or underline parts of the email you’ve selected.
- Insert a hyperlink by clicking on the hyperlink icon. Input the web address of the landing page, the text of the hyperlink, and the "Tooltip", or pop-up advice or explanation that appears when the receiver moves their cursor over the linked text. There is no character limit on either the hyperlink text or the ToolTip. The user can also set up the link to open in a new window by clicking on Open link in New window.
- Click Insert to complete. In addition to directly deleting the link, another option for removing the hyperlink is to move your click on the hyperlink and select the "Remove hyperlink" icon in the menu.
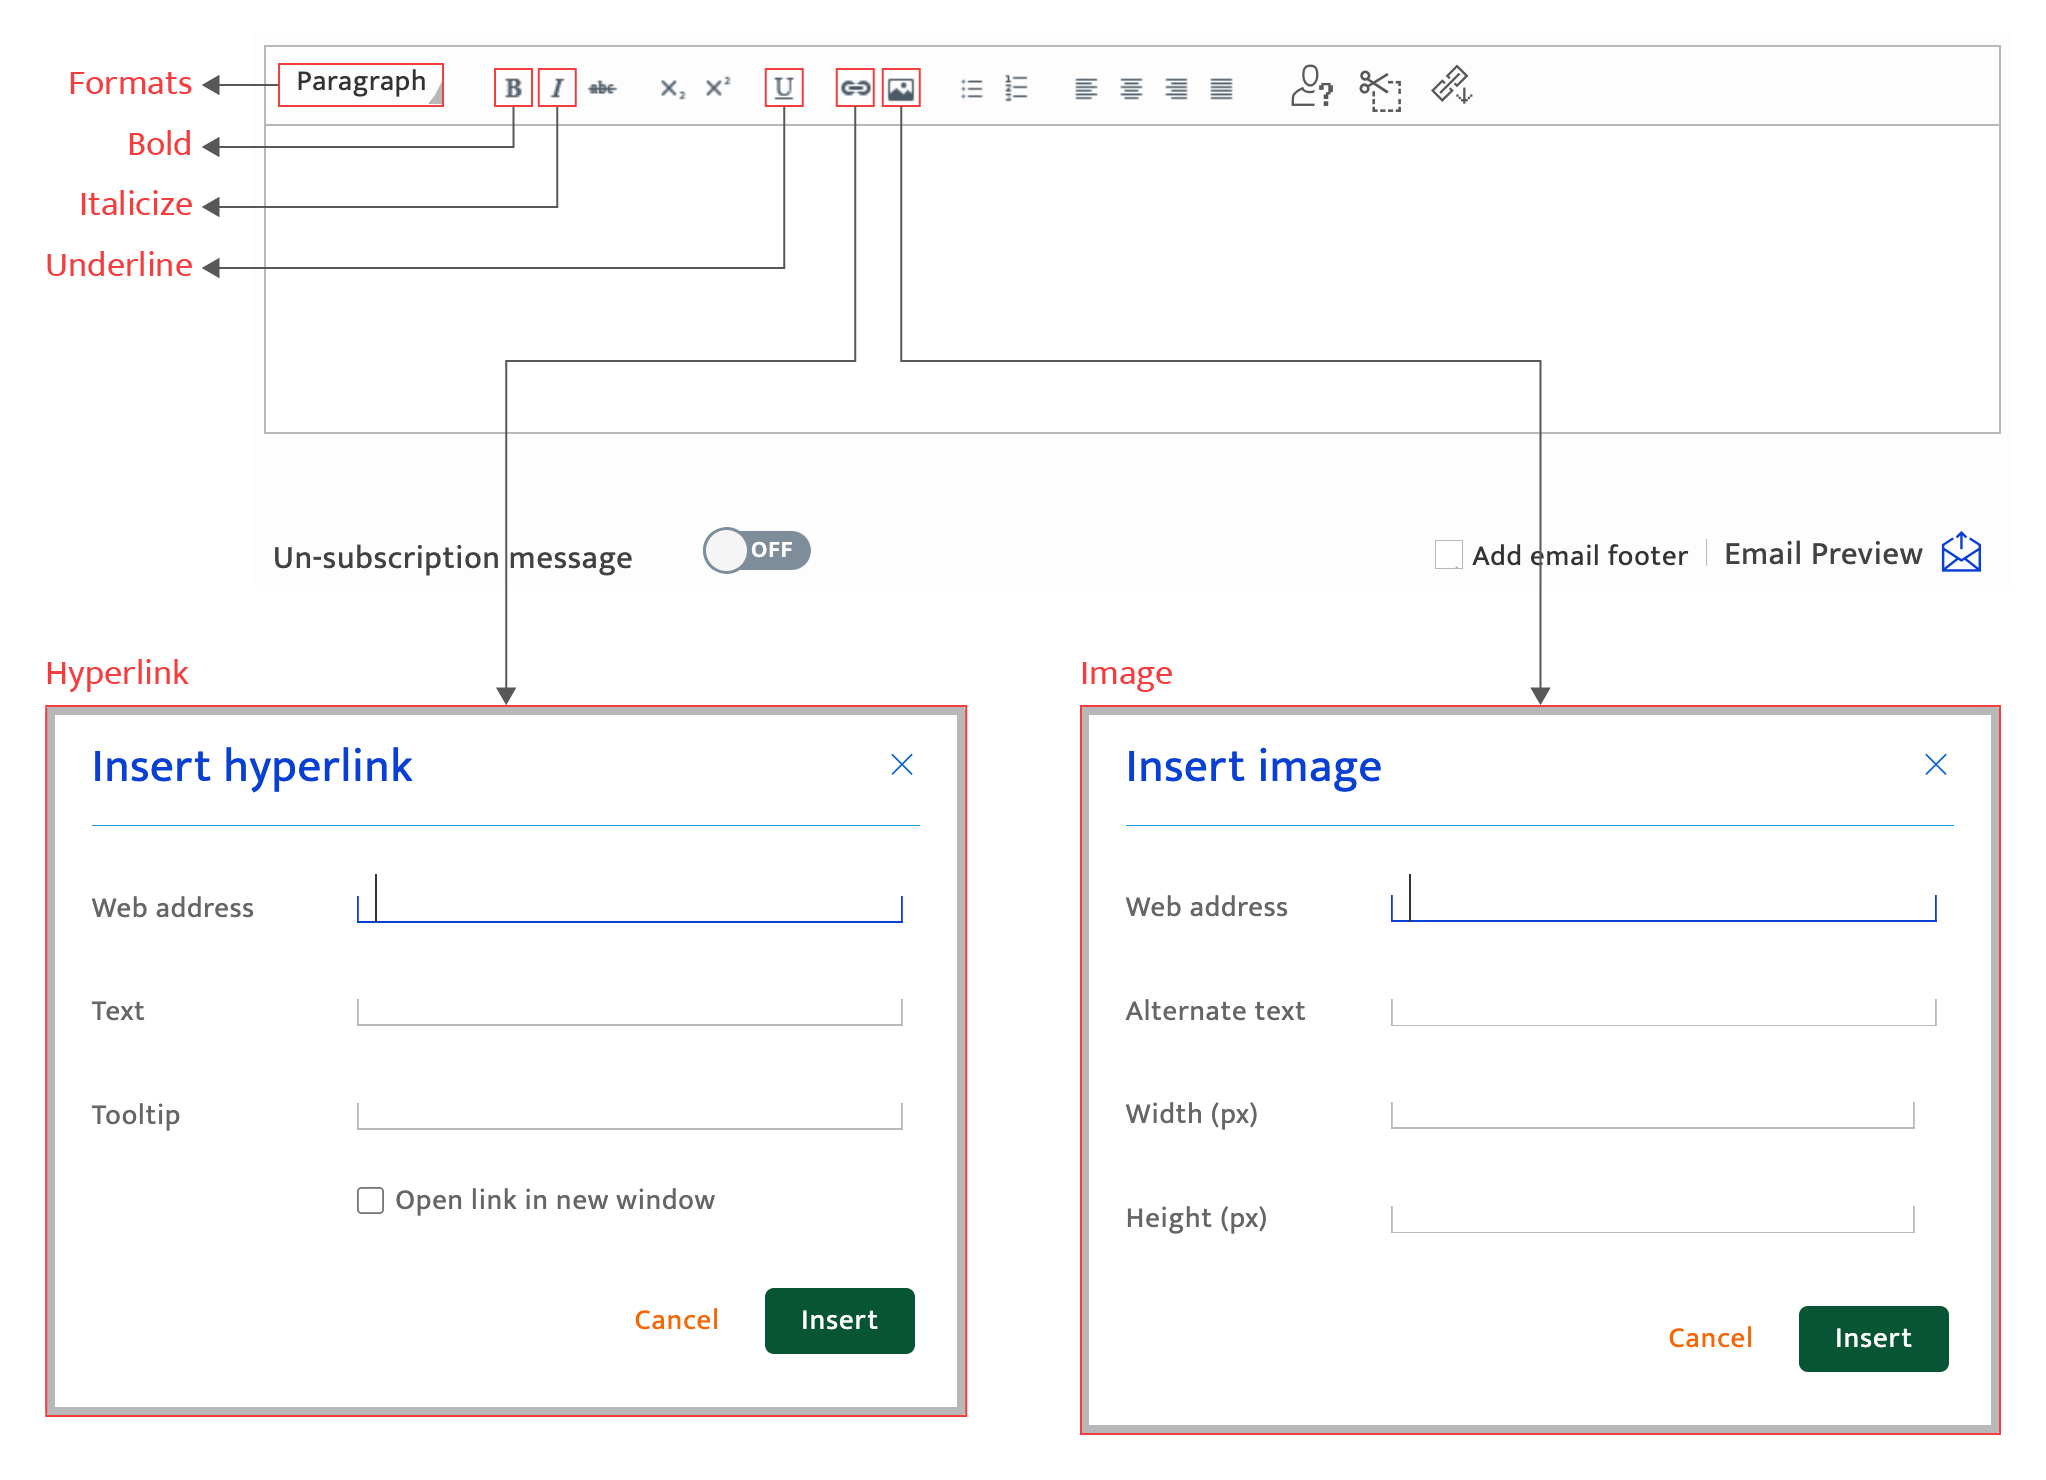
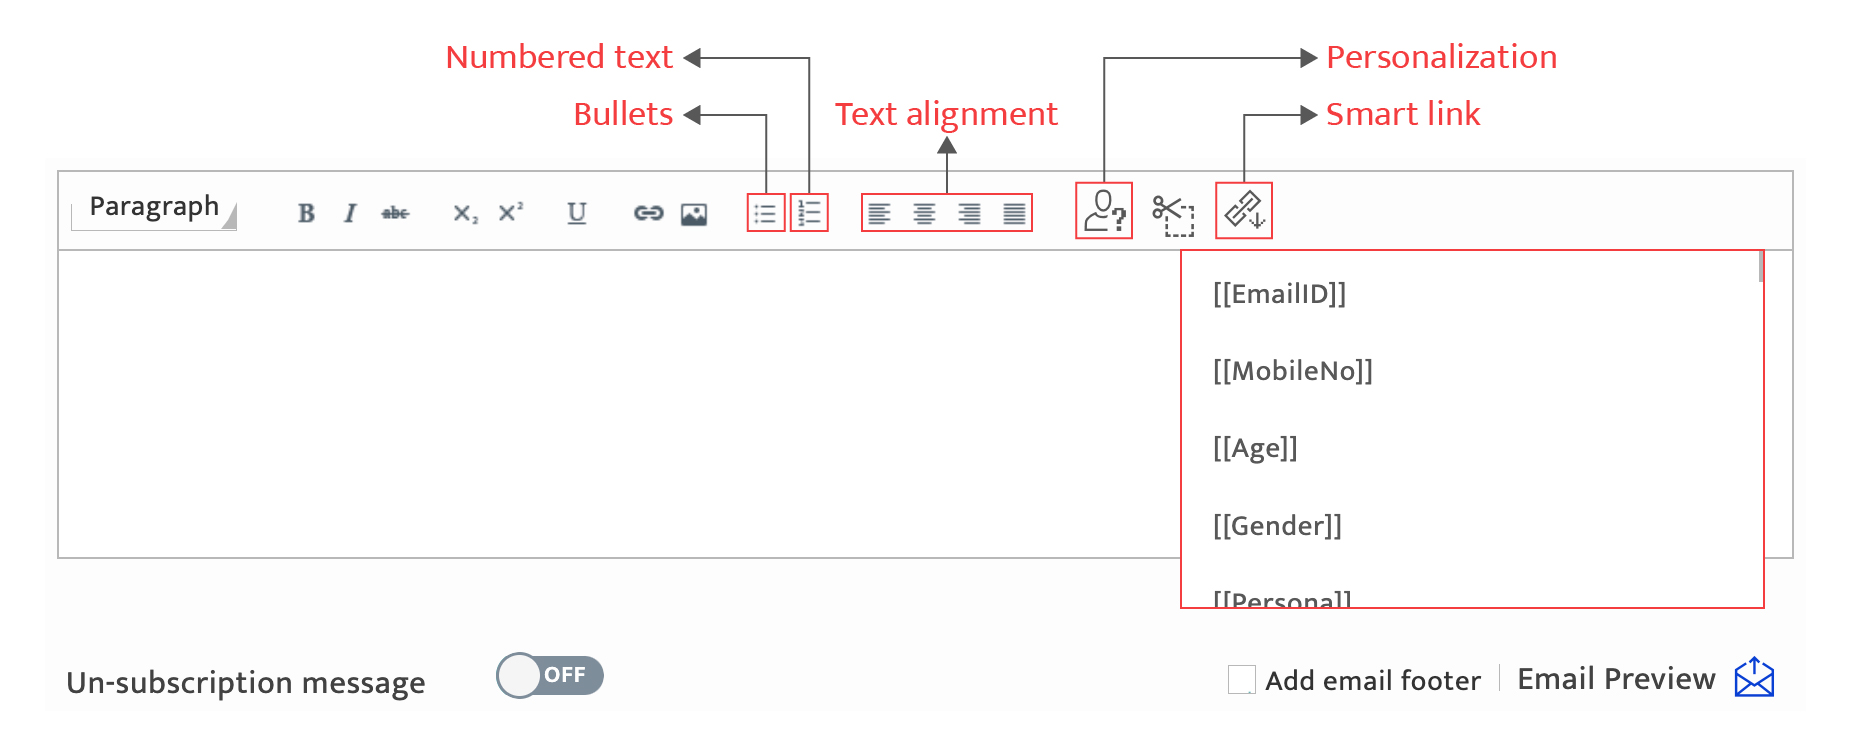
- Insert bullet points and numbered text. The only selected text will be restyled.
- Adjust the alignment of text selected. The options are: Align text left, centre text, align text right, and justify.
- Personalize parts of the email using the attributes available in the drop-down menu, configured in the Data Attributes module under Preferences. Select an attribute and place it in the text.
- Insert the campaign Smart link. For more information on Smart links, see Creating Smart link.
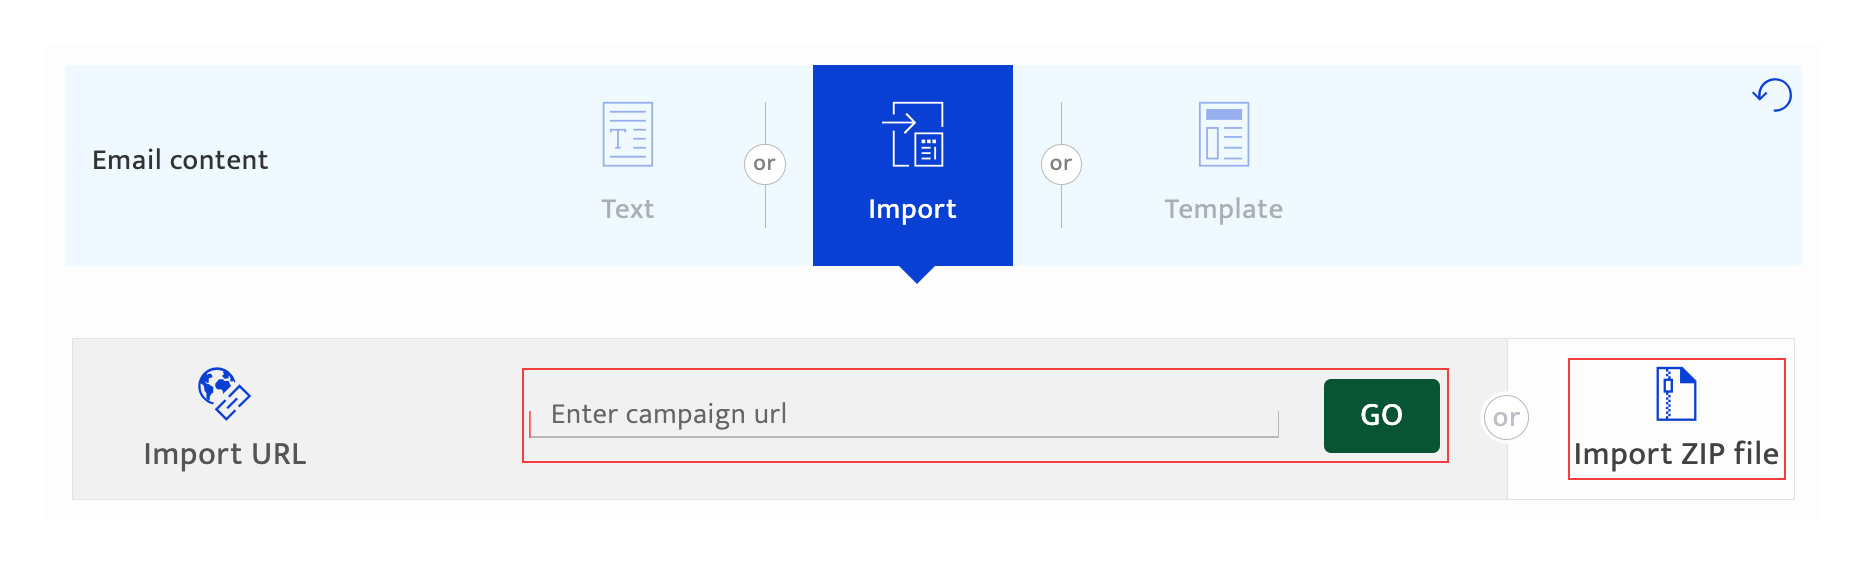
Using the import option#
To import an existing email, here are your two options.
- Enter the URL of the email and click on GO to proceed to the next step. There is no character limit.
- Click on the file icon to browse local storage and upload the correct ZIP file. The file cannot be larger than 2MB.
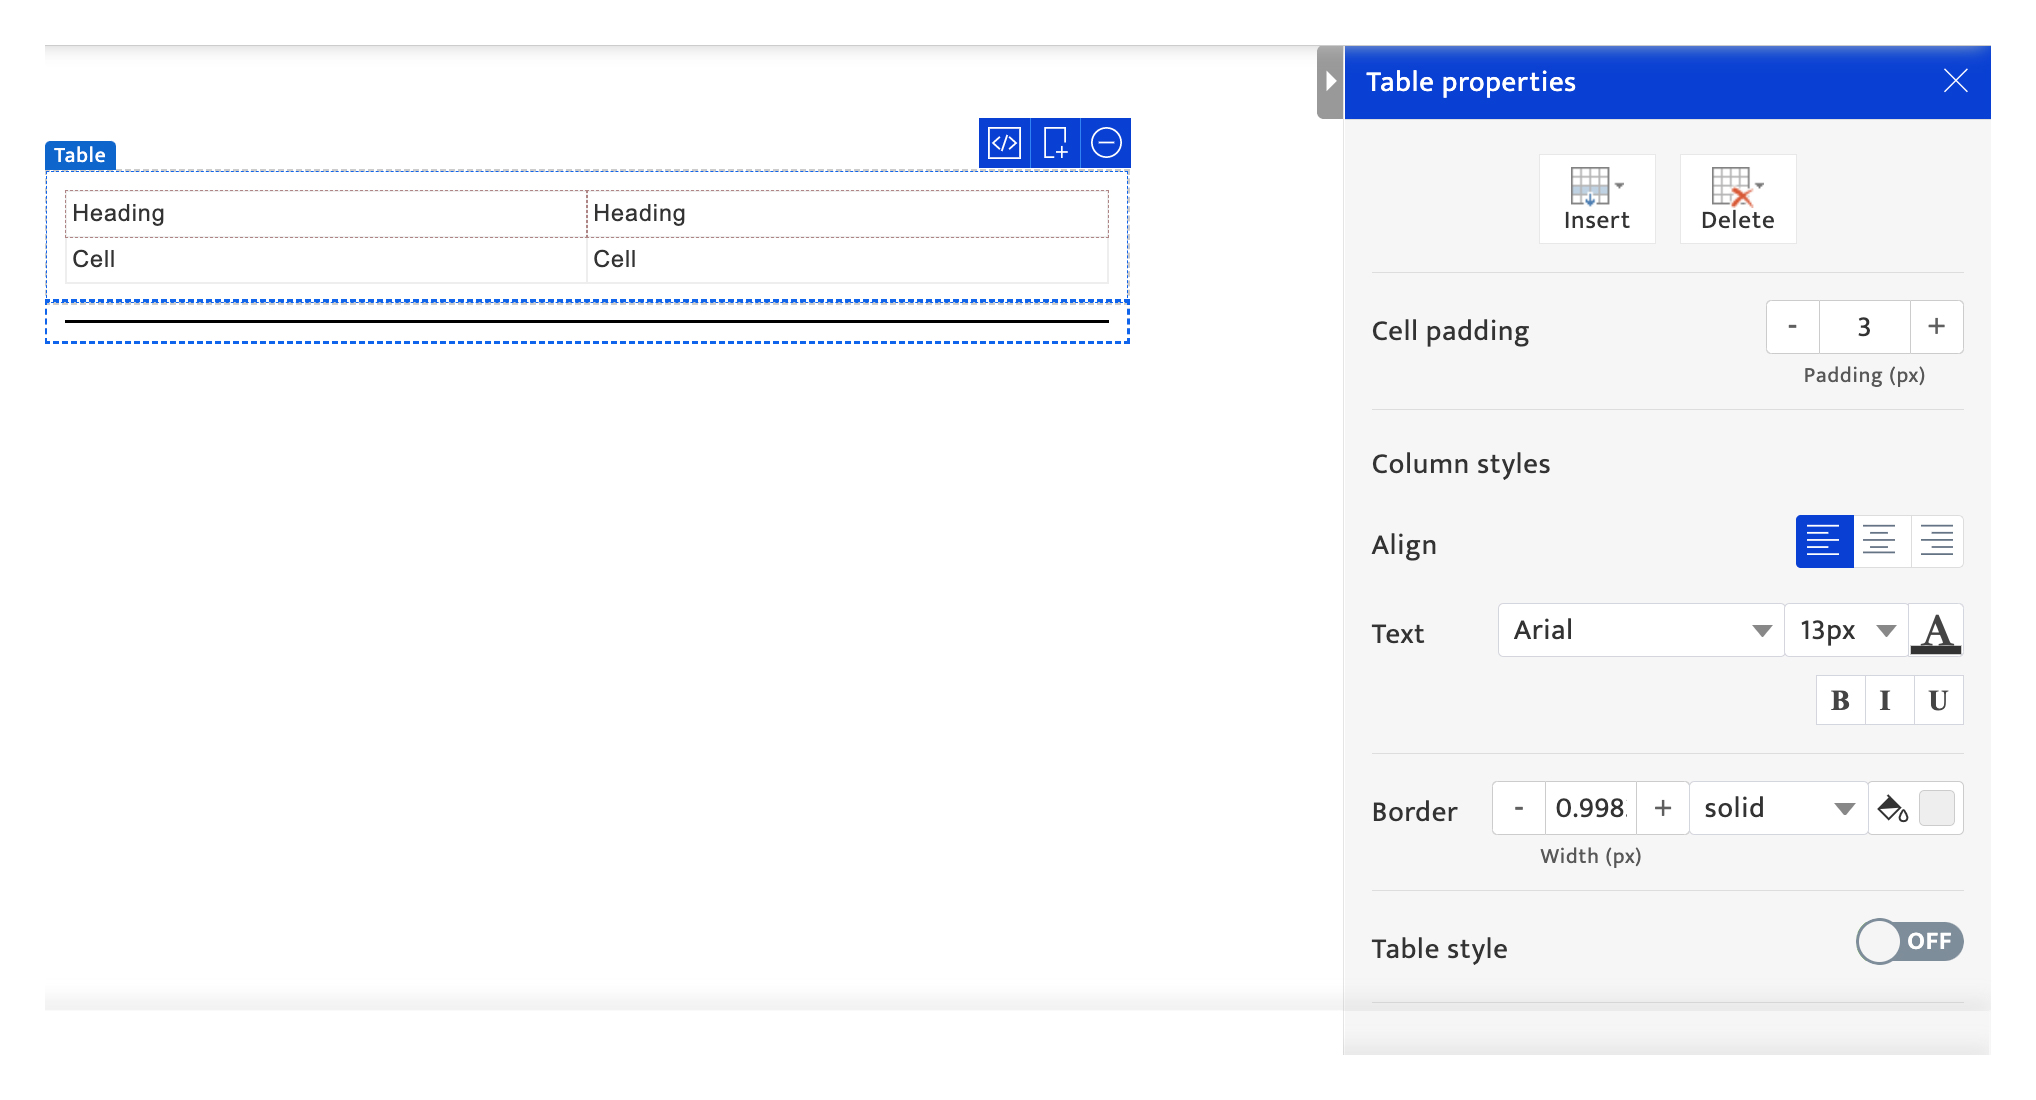
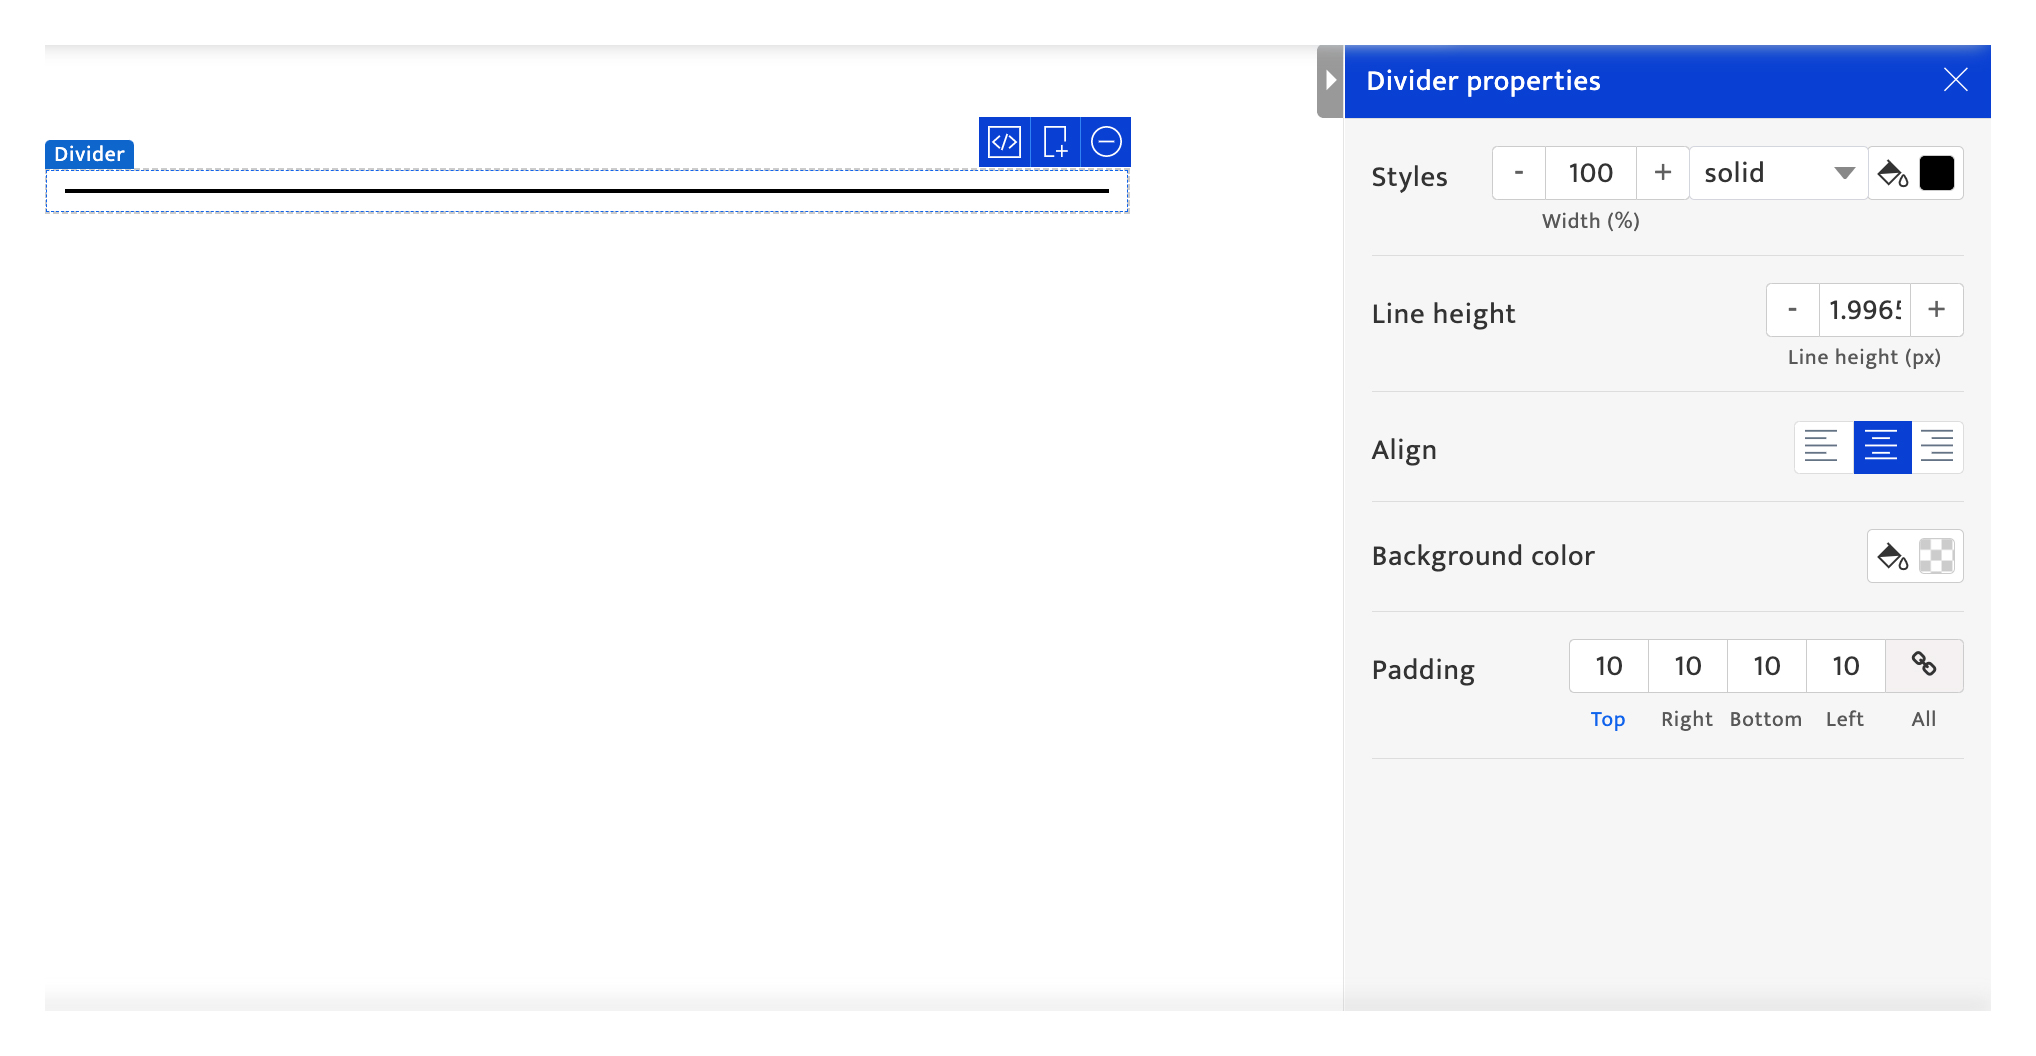
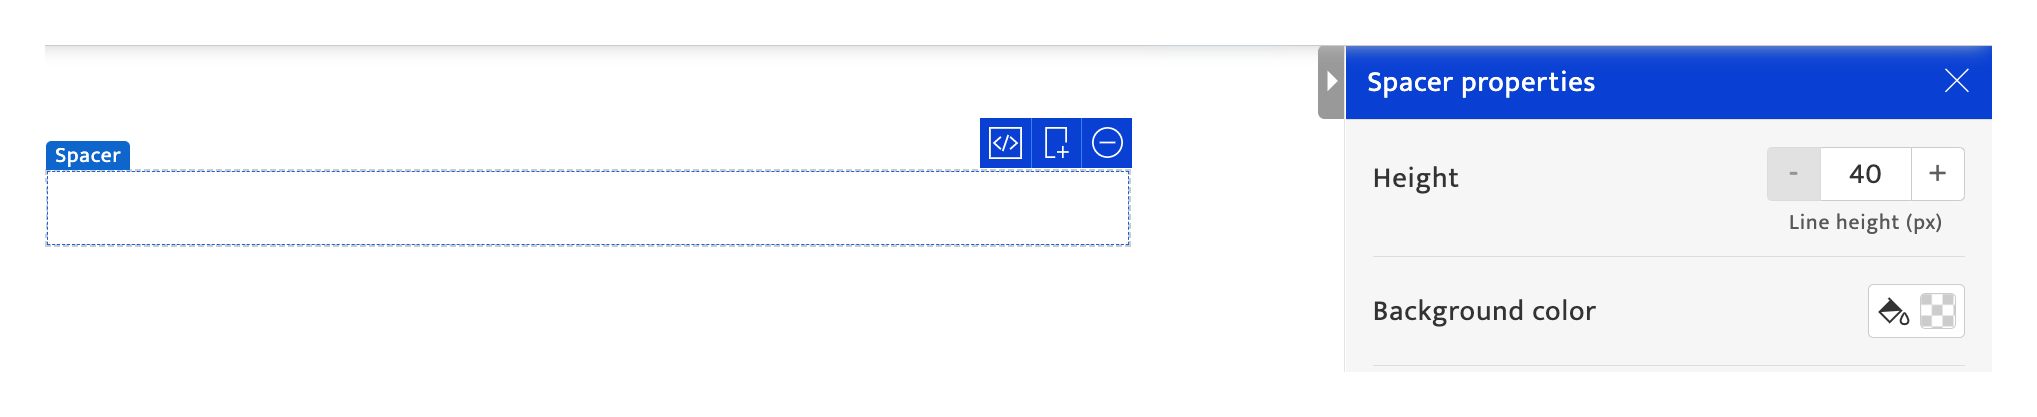
Using the template option#
The email template editor offers these tool options:-
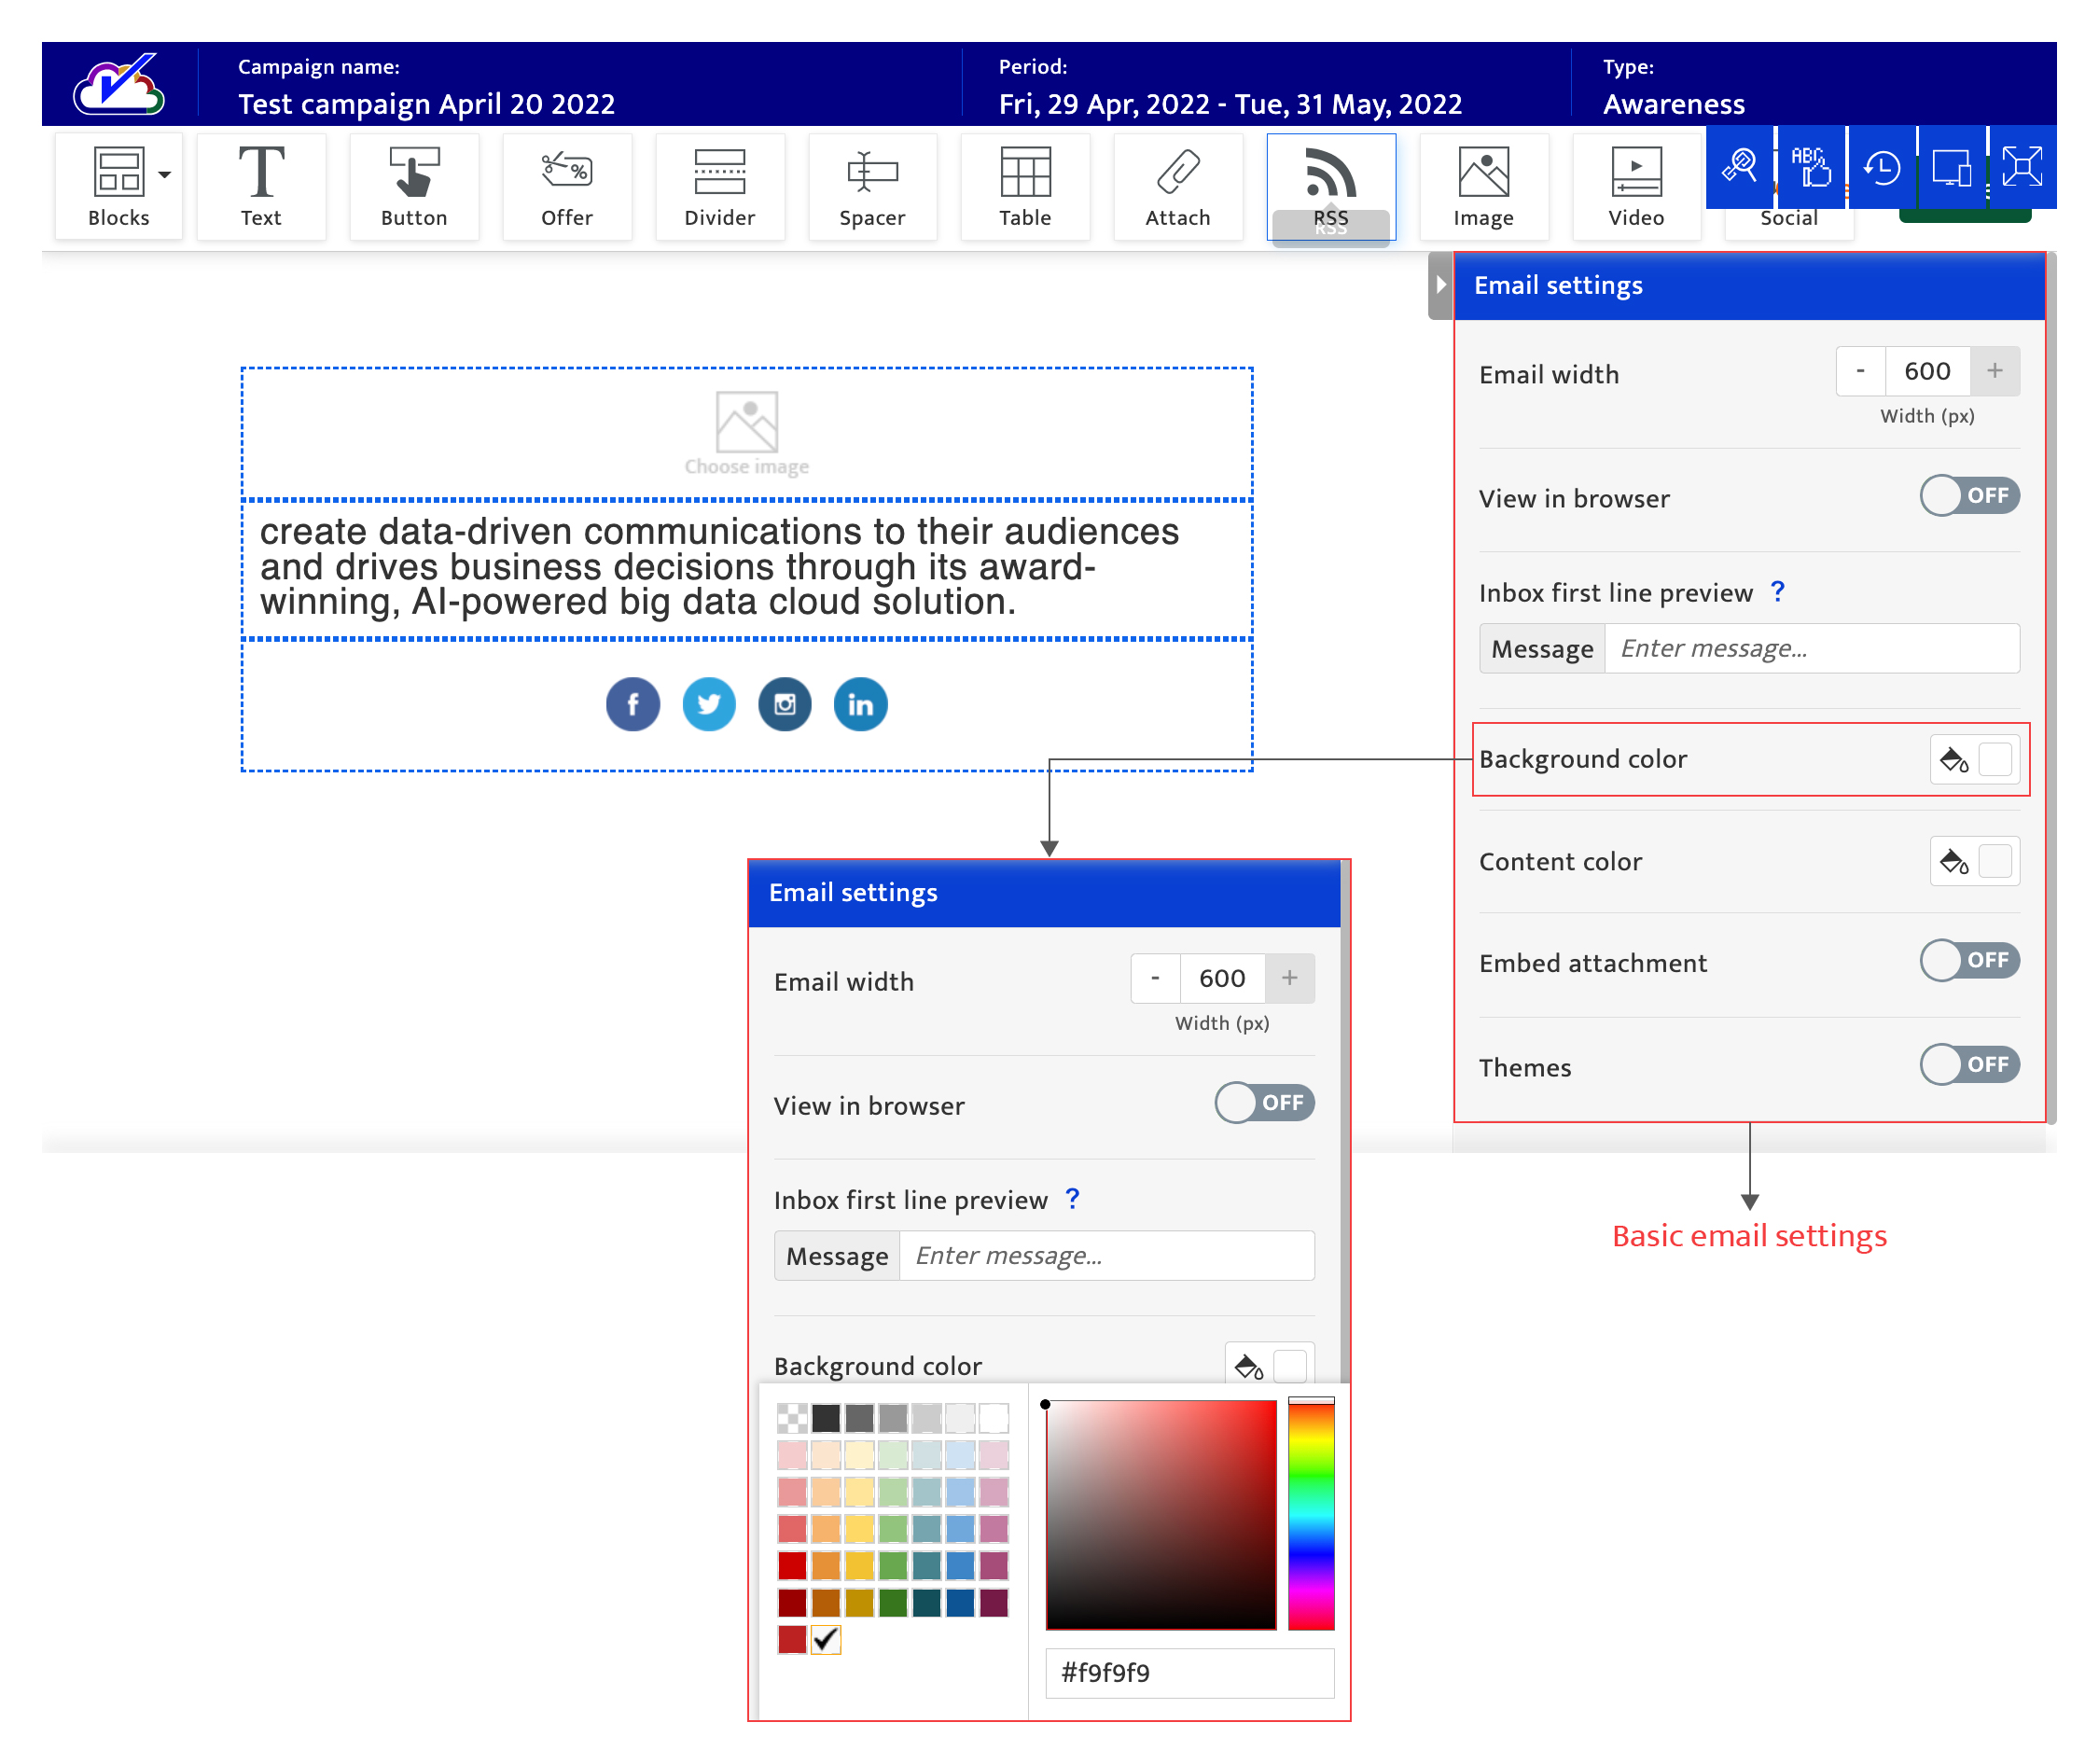
Basic email settings for all the sections/fields
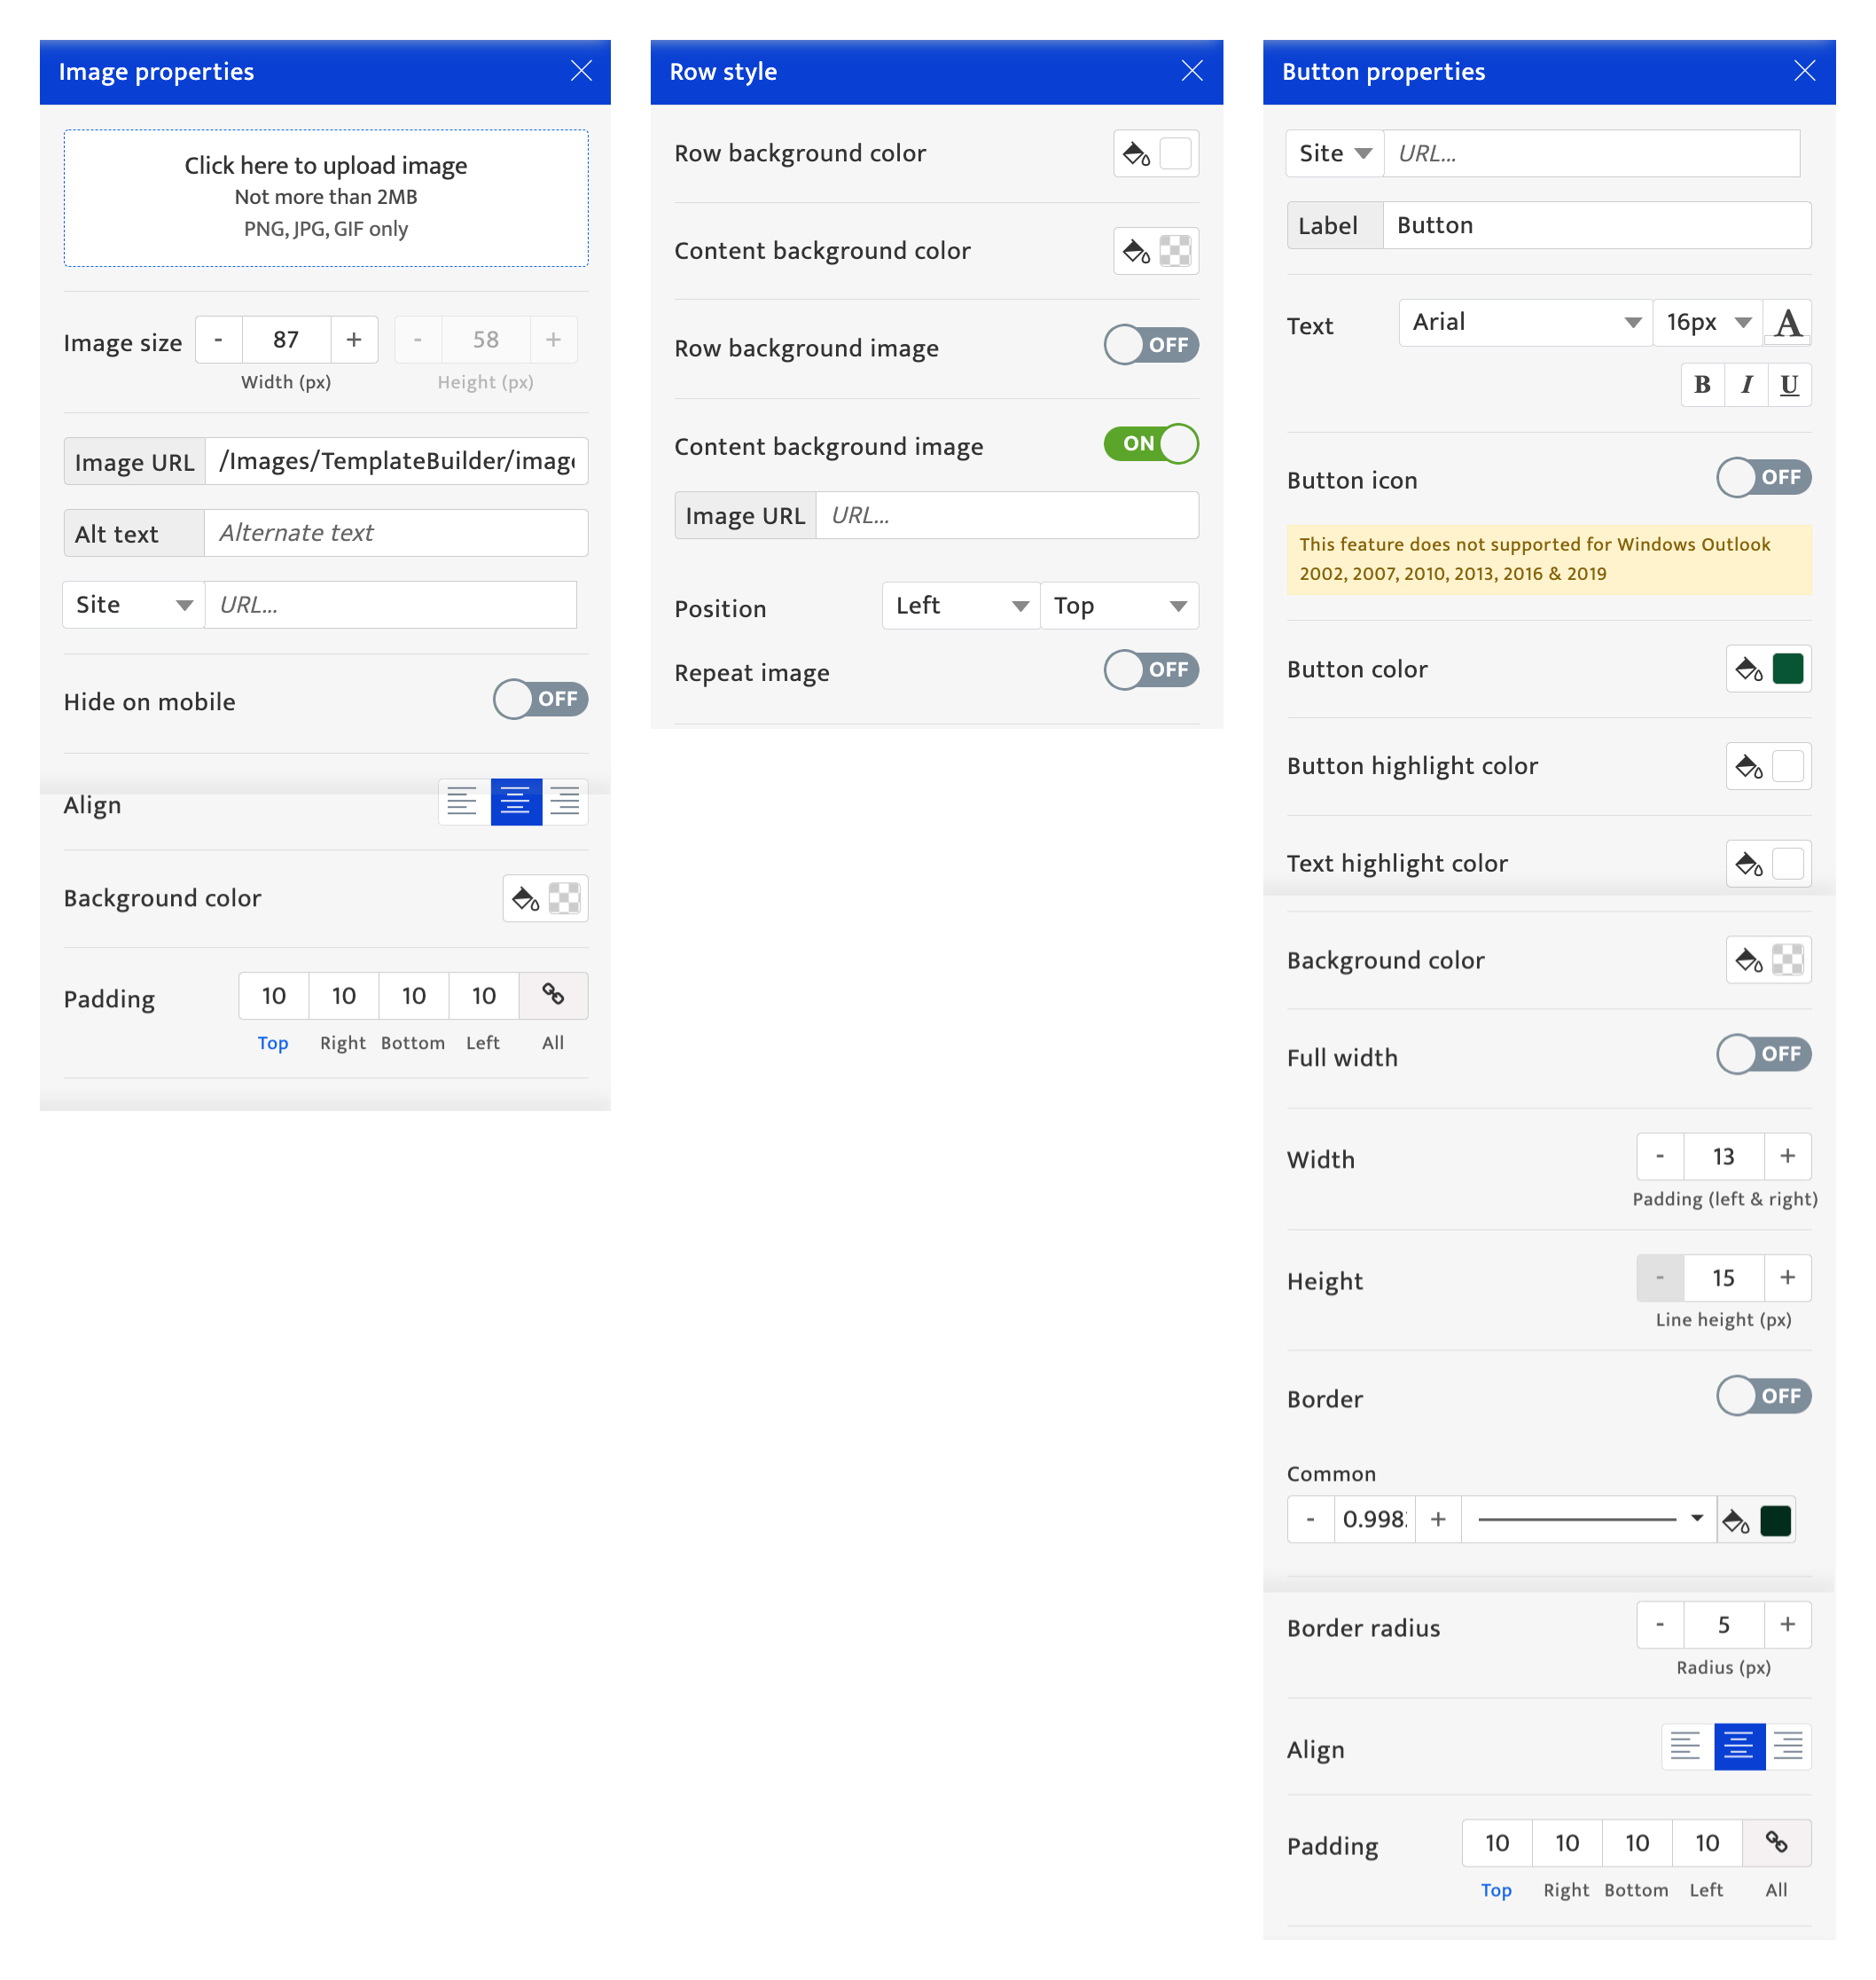
Options to customize elements in the layout selected include:-
- Background color, available to adjust the background color. The user can define their RGB or HSB color code.
- Padding – On/Off option, available to adjust the line spacing of the top, bottom, left, and right of some elements. If the spacing is equal in all four directions then use the center box – the rest will be auto-updated.
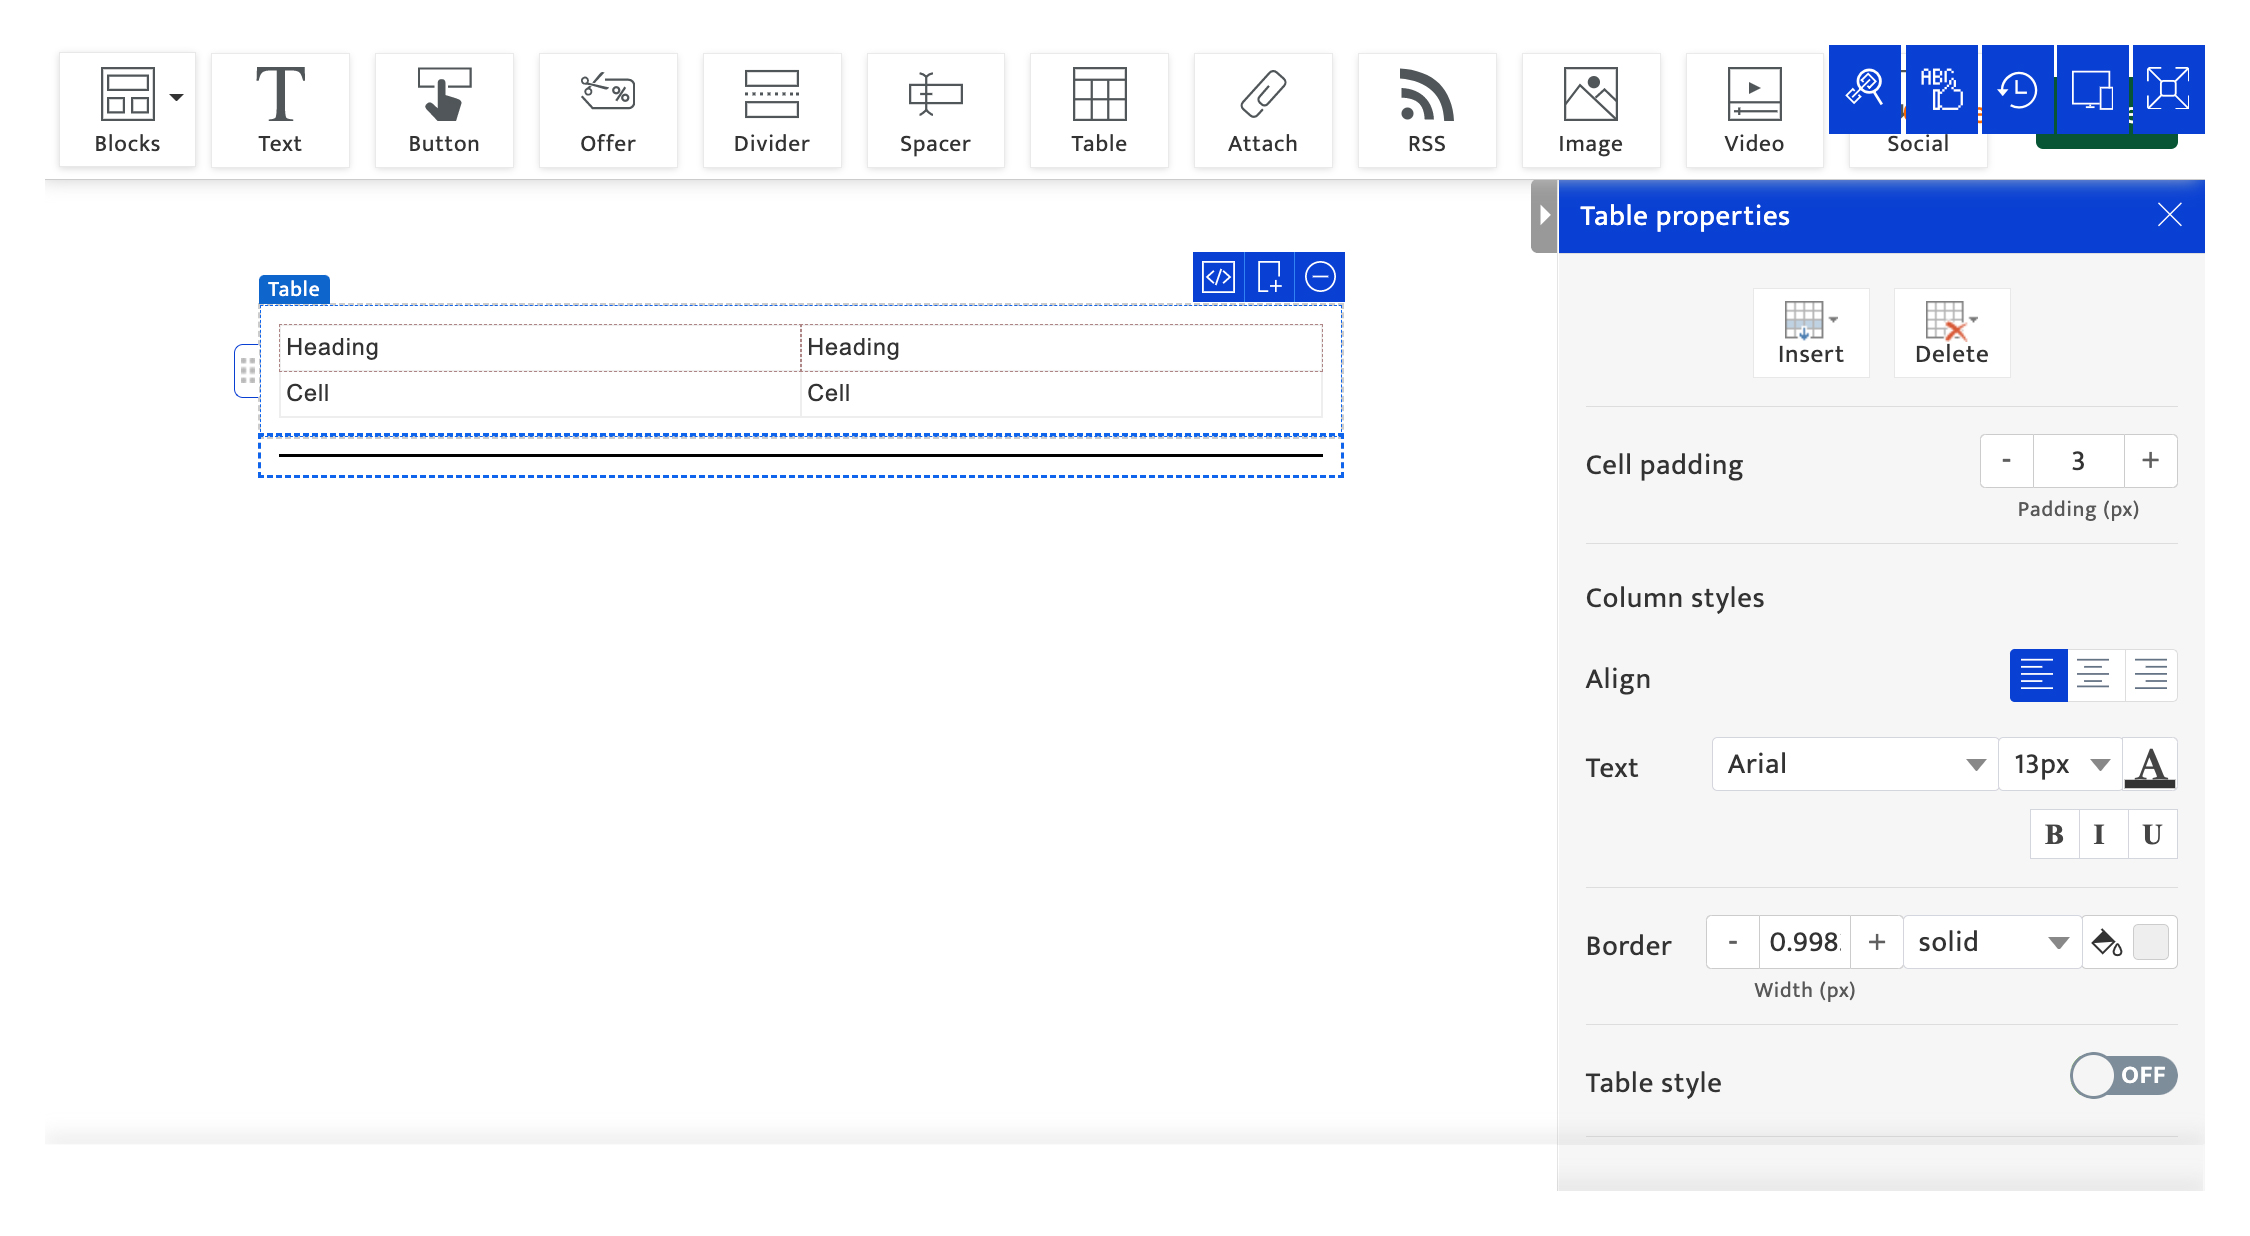
- Border – On/off option, available to adjust the border of the heading. There are different borders available from the drop-down list. Determine the width and color of the border.
- Themes – On/off option, available to adjust the color scheme of the selected element.
- Text alignment, with options to align left, center, right, and justify.
- Links option, to add a link in the element by selecting a link type from the drop-down list. The user can define the link title/tooltip. The user can also choose whether the link should open in a new window.
There are other drag-and-drop tools available in the text editor such as:-
- Typography options include: heading, paragraph, ordered list (numbered), and unordered list (bullet points).
- Text formatting options include: fonts, size, line height (spacing), personalization, formatting, alignment, colours, hyperlinking and emojis.
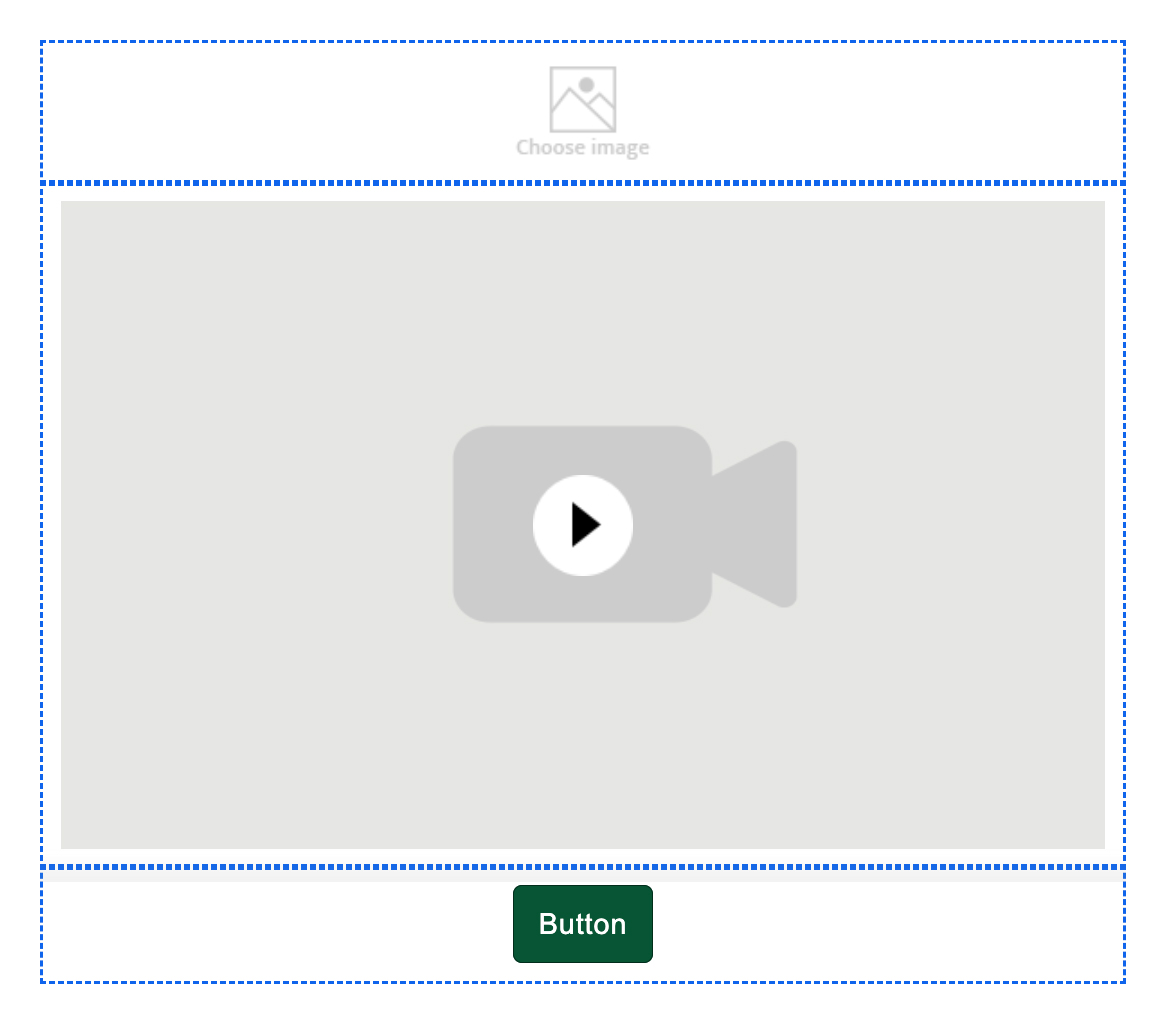
- Layout options include: Multiple layouts such as left to right table, two column text, three column text, two column text with image, three column text with image, divider, spacer, and horizontal menu.
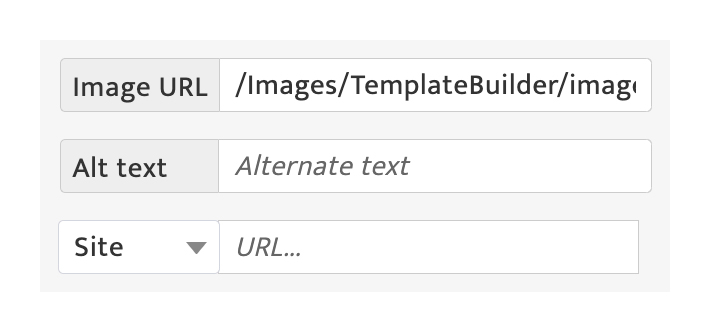
- Upload an image file for the layouts from local storage, by clicking on the image icon. The maximum file size is 2MB, and the image file must be in png, JPG or GIF format.
- Media options include: standard text editor and image style options that are available for all the sections. The user can further adjust the video settings using the options shown below. The alternate text is embedded within the video link and its primarily used for search functionality.
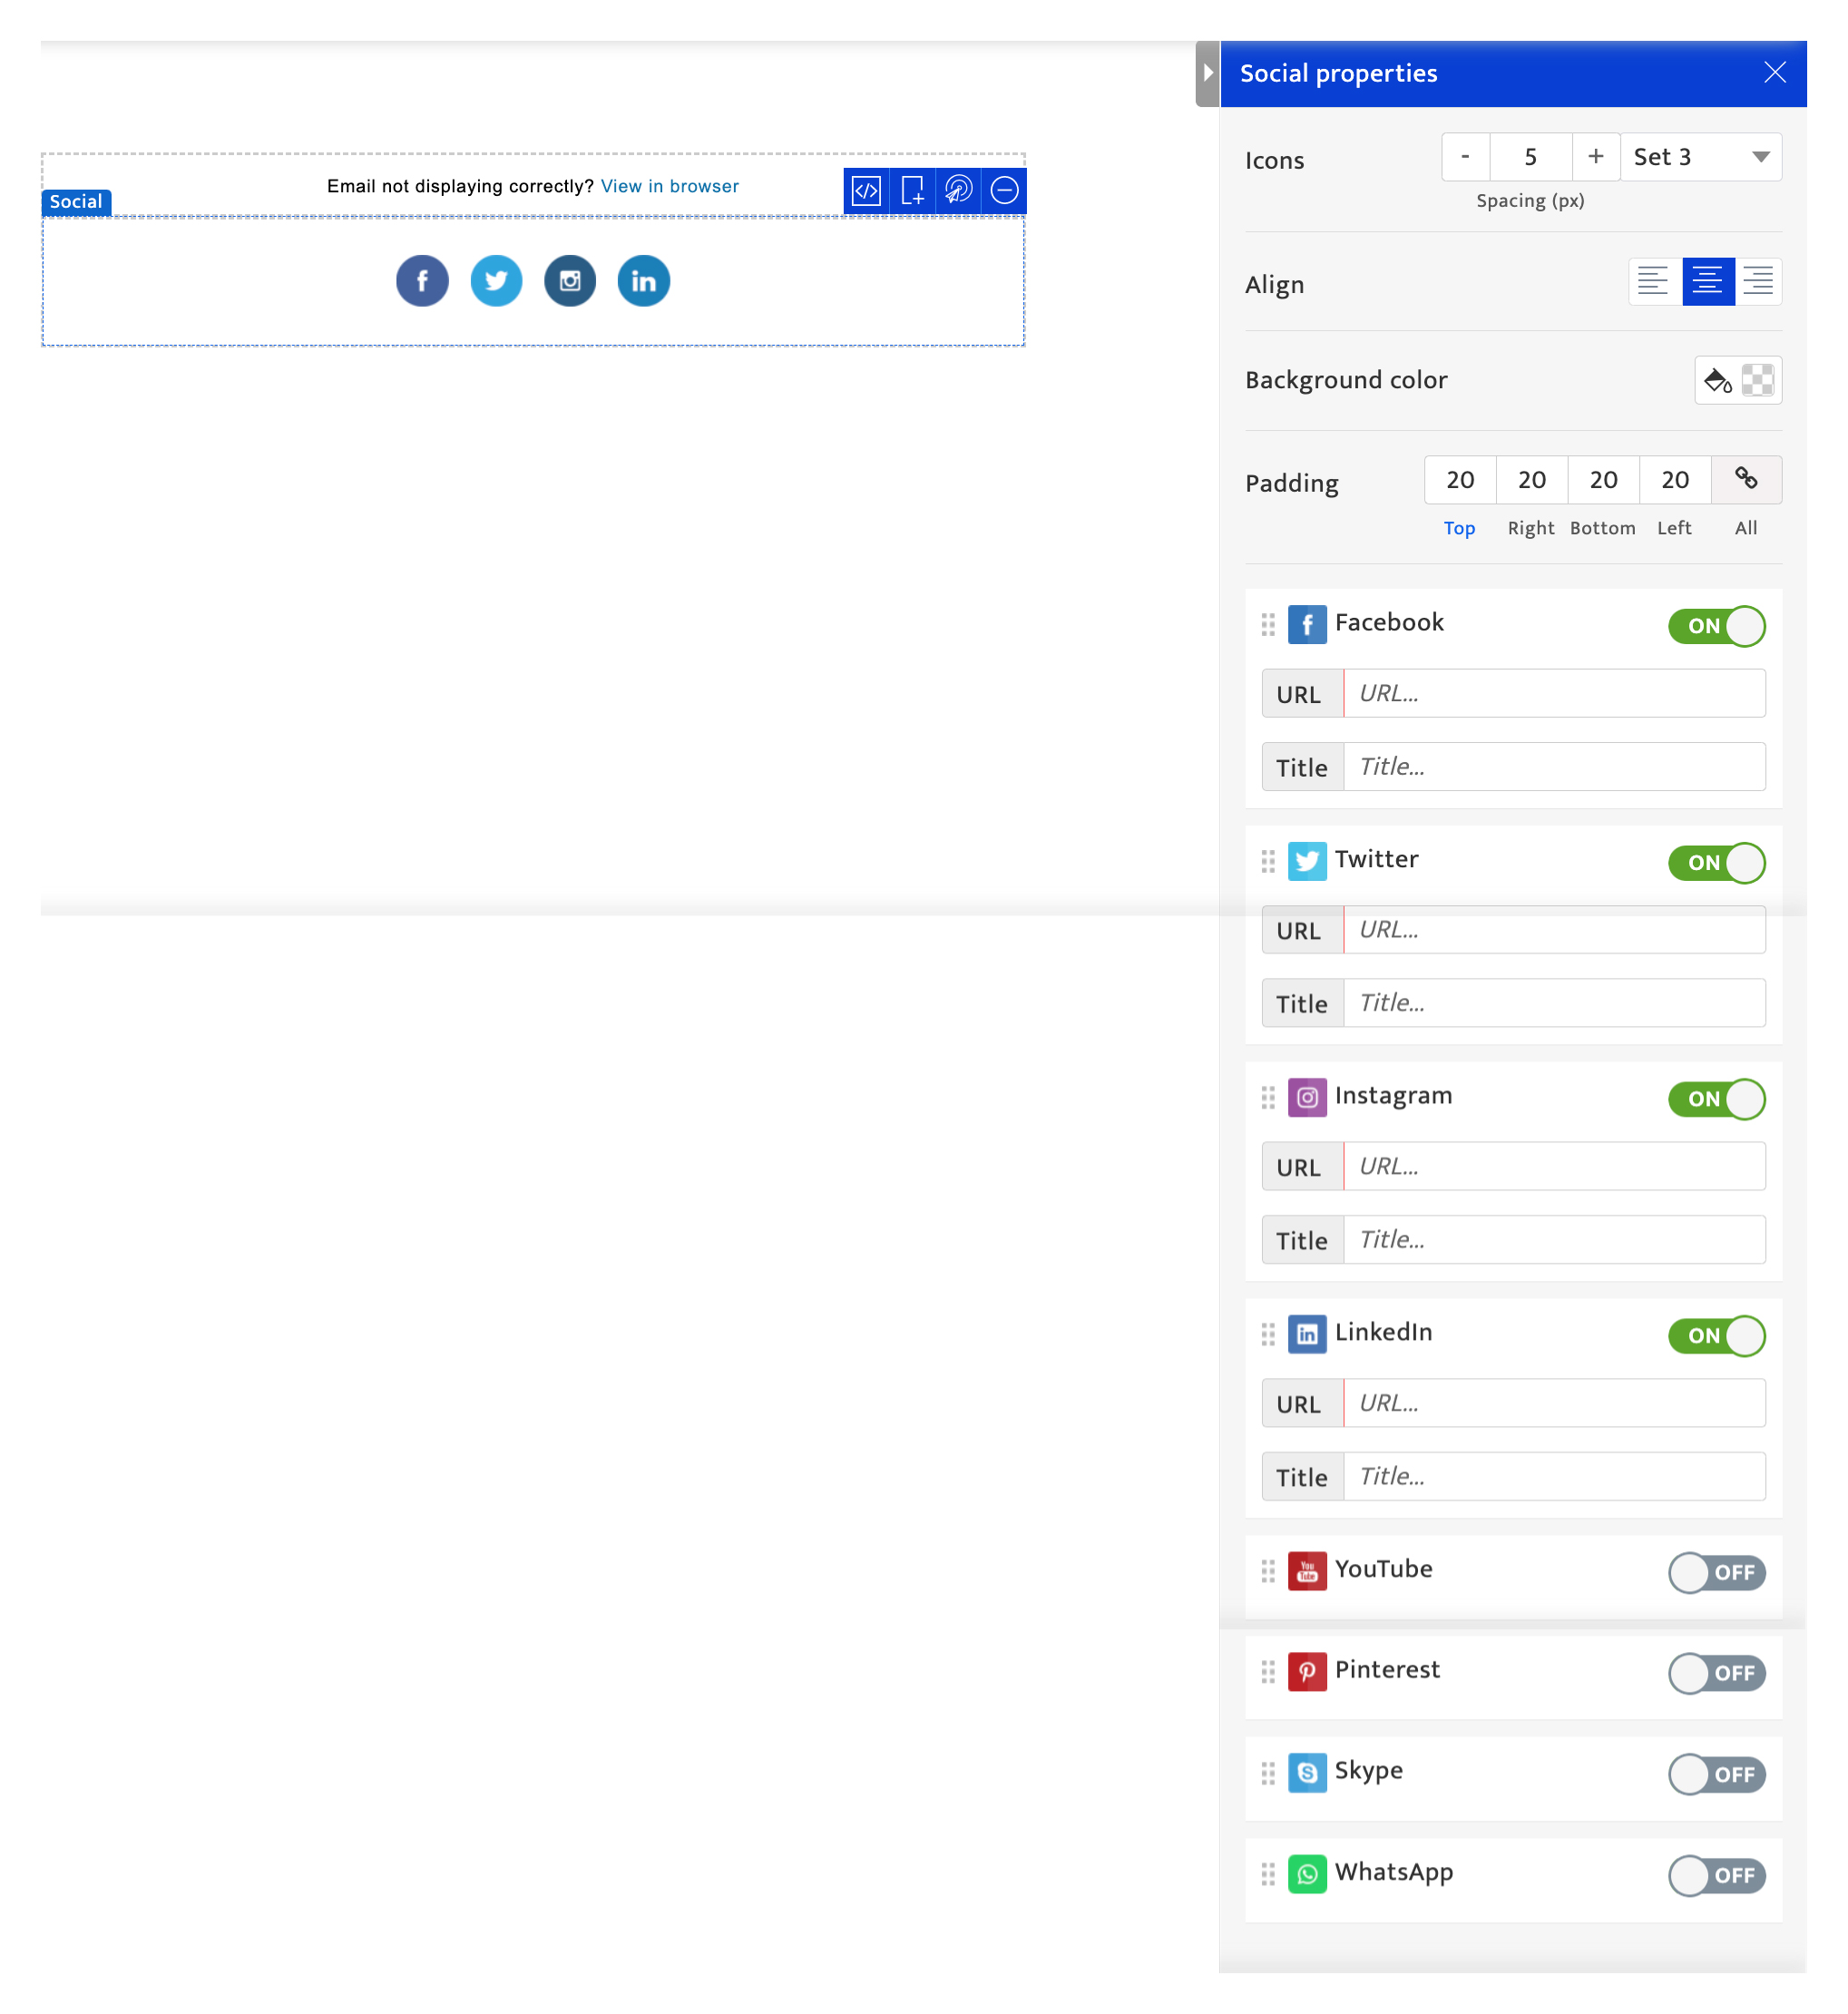
- Social media and footer options include: social follow icons as well as email footer and copyright details.