Classification personalisation
What is it?#
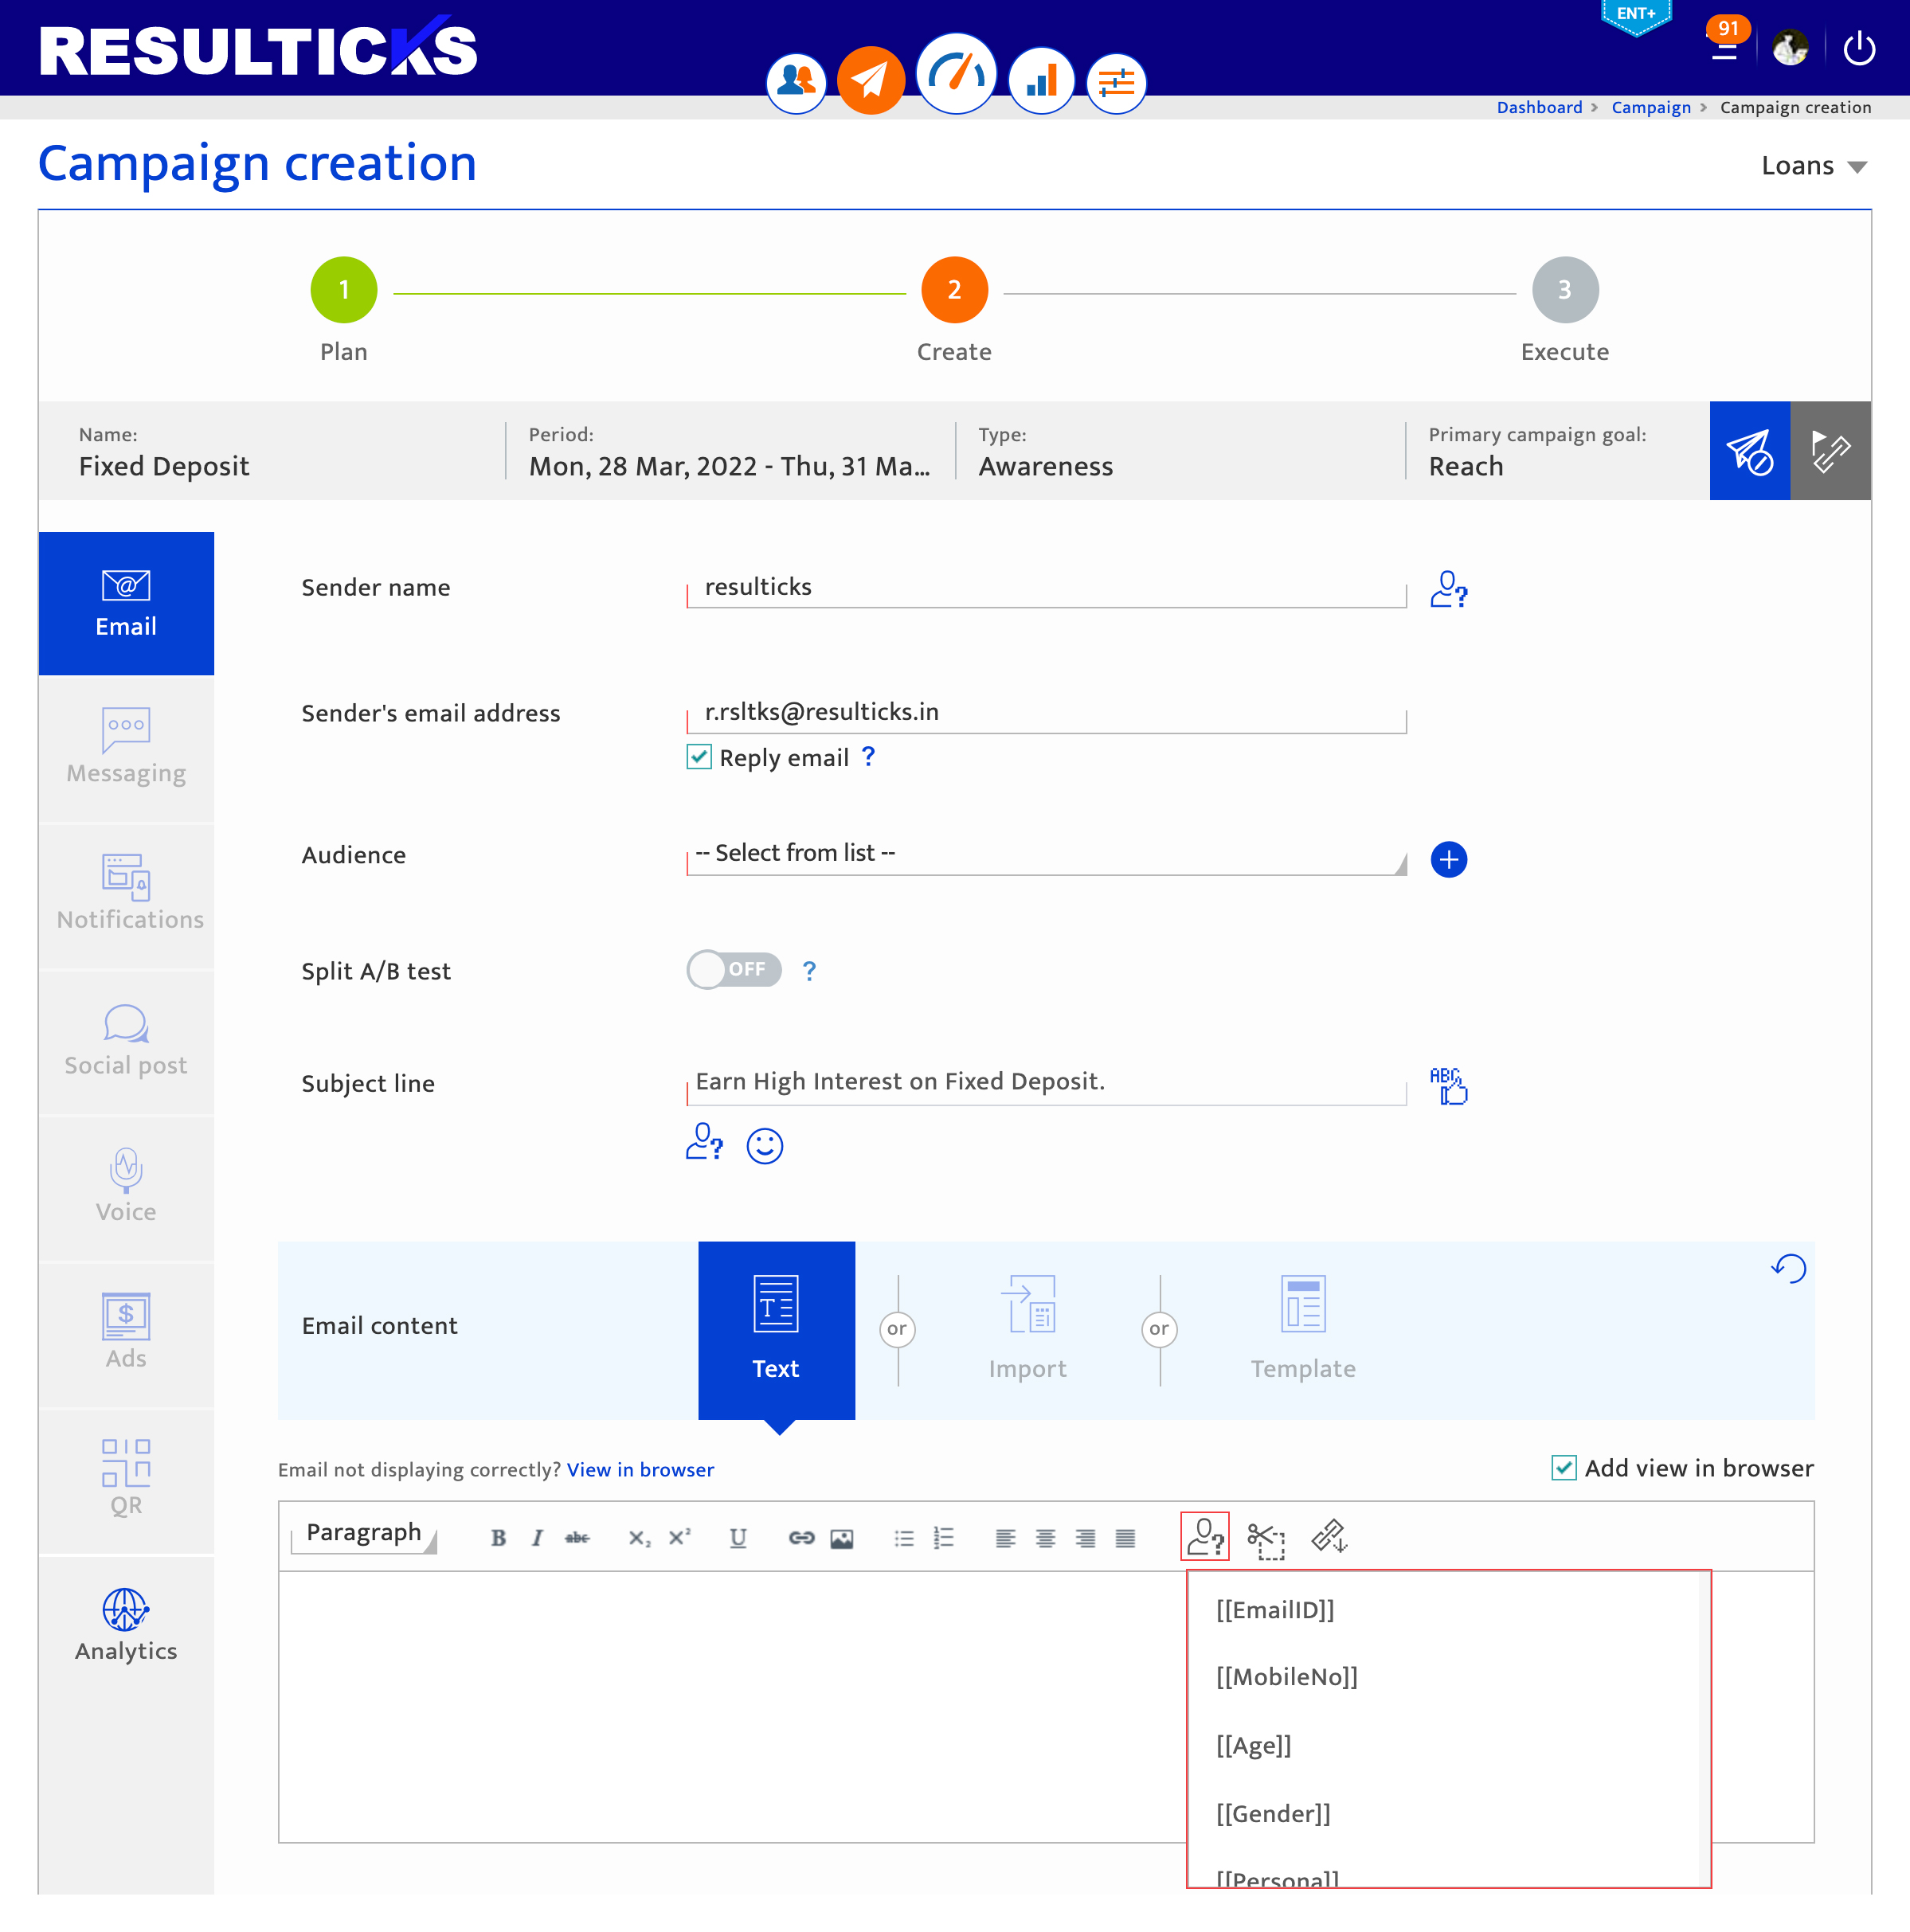
During the campaign content authoring, you can customise your communication to individual audience members by clicking on the personalisation icon highlighted in the screenshot above. You can select an attribute from the list of attributes (the list of attributes available for personalisation listed in the dropdown can be configured under the classifications tab in data attributes) in the dropdown and the value stored for each audience member against this attribute will be automatically inserted into the content at the time of blast.
Making changes and authorization#
Only Super Users, Administrators, and the Key Contact for the account can use this module.
Accessing data attributes#
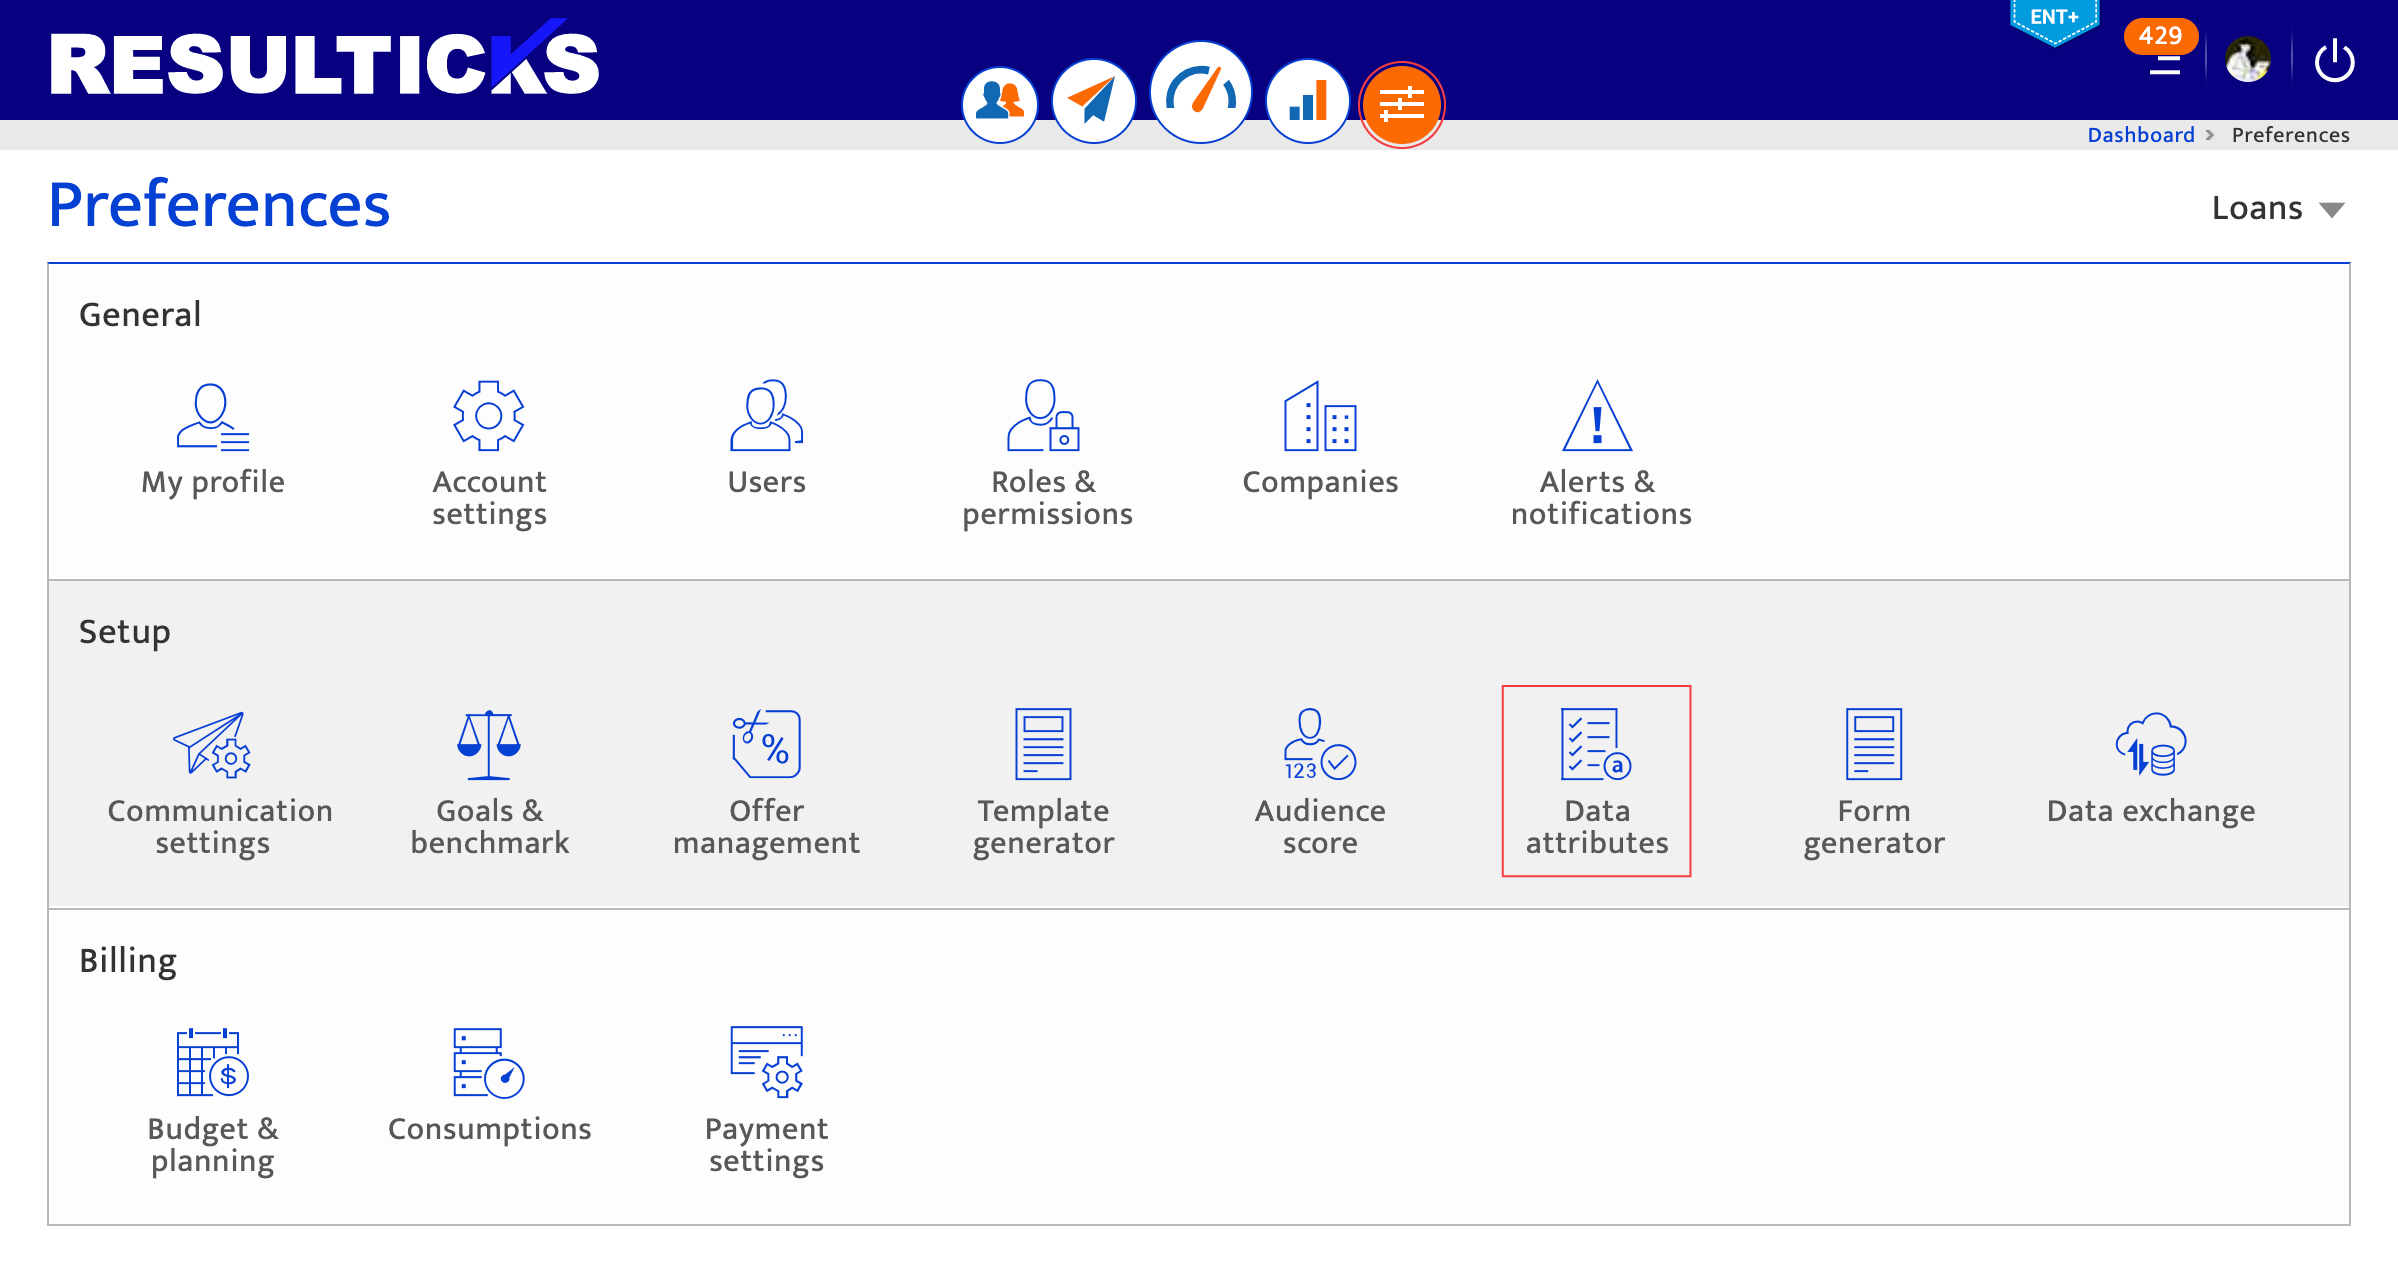
- Select the Preference Module
- Click on Data attribute in setup
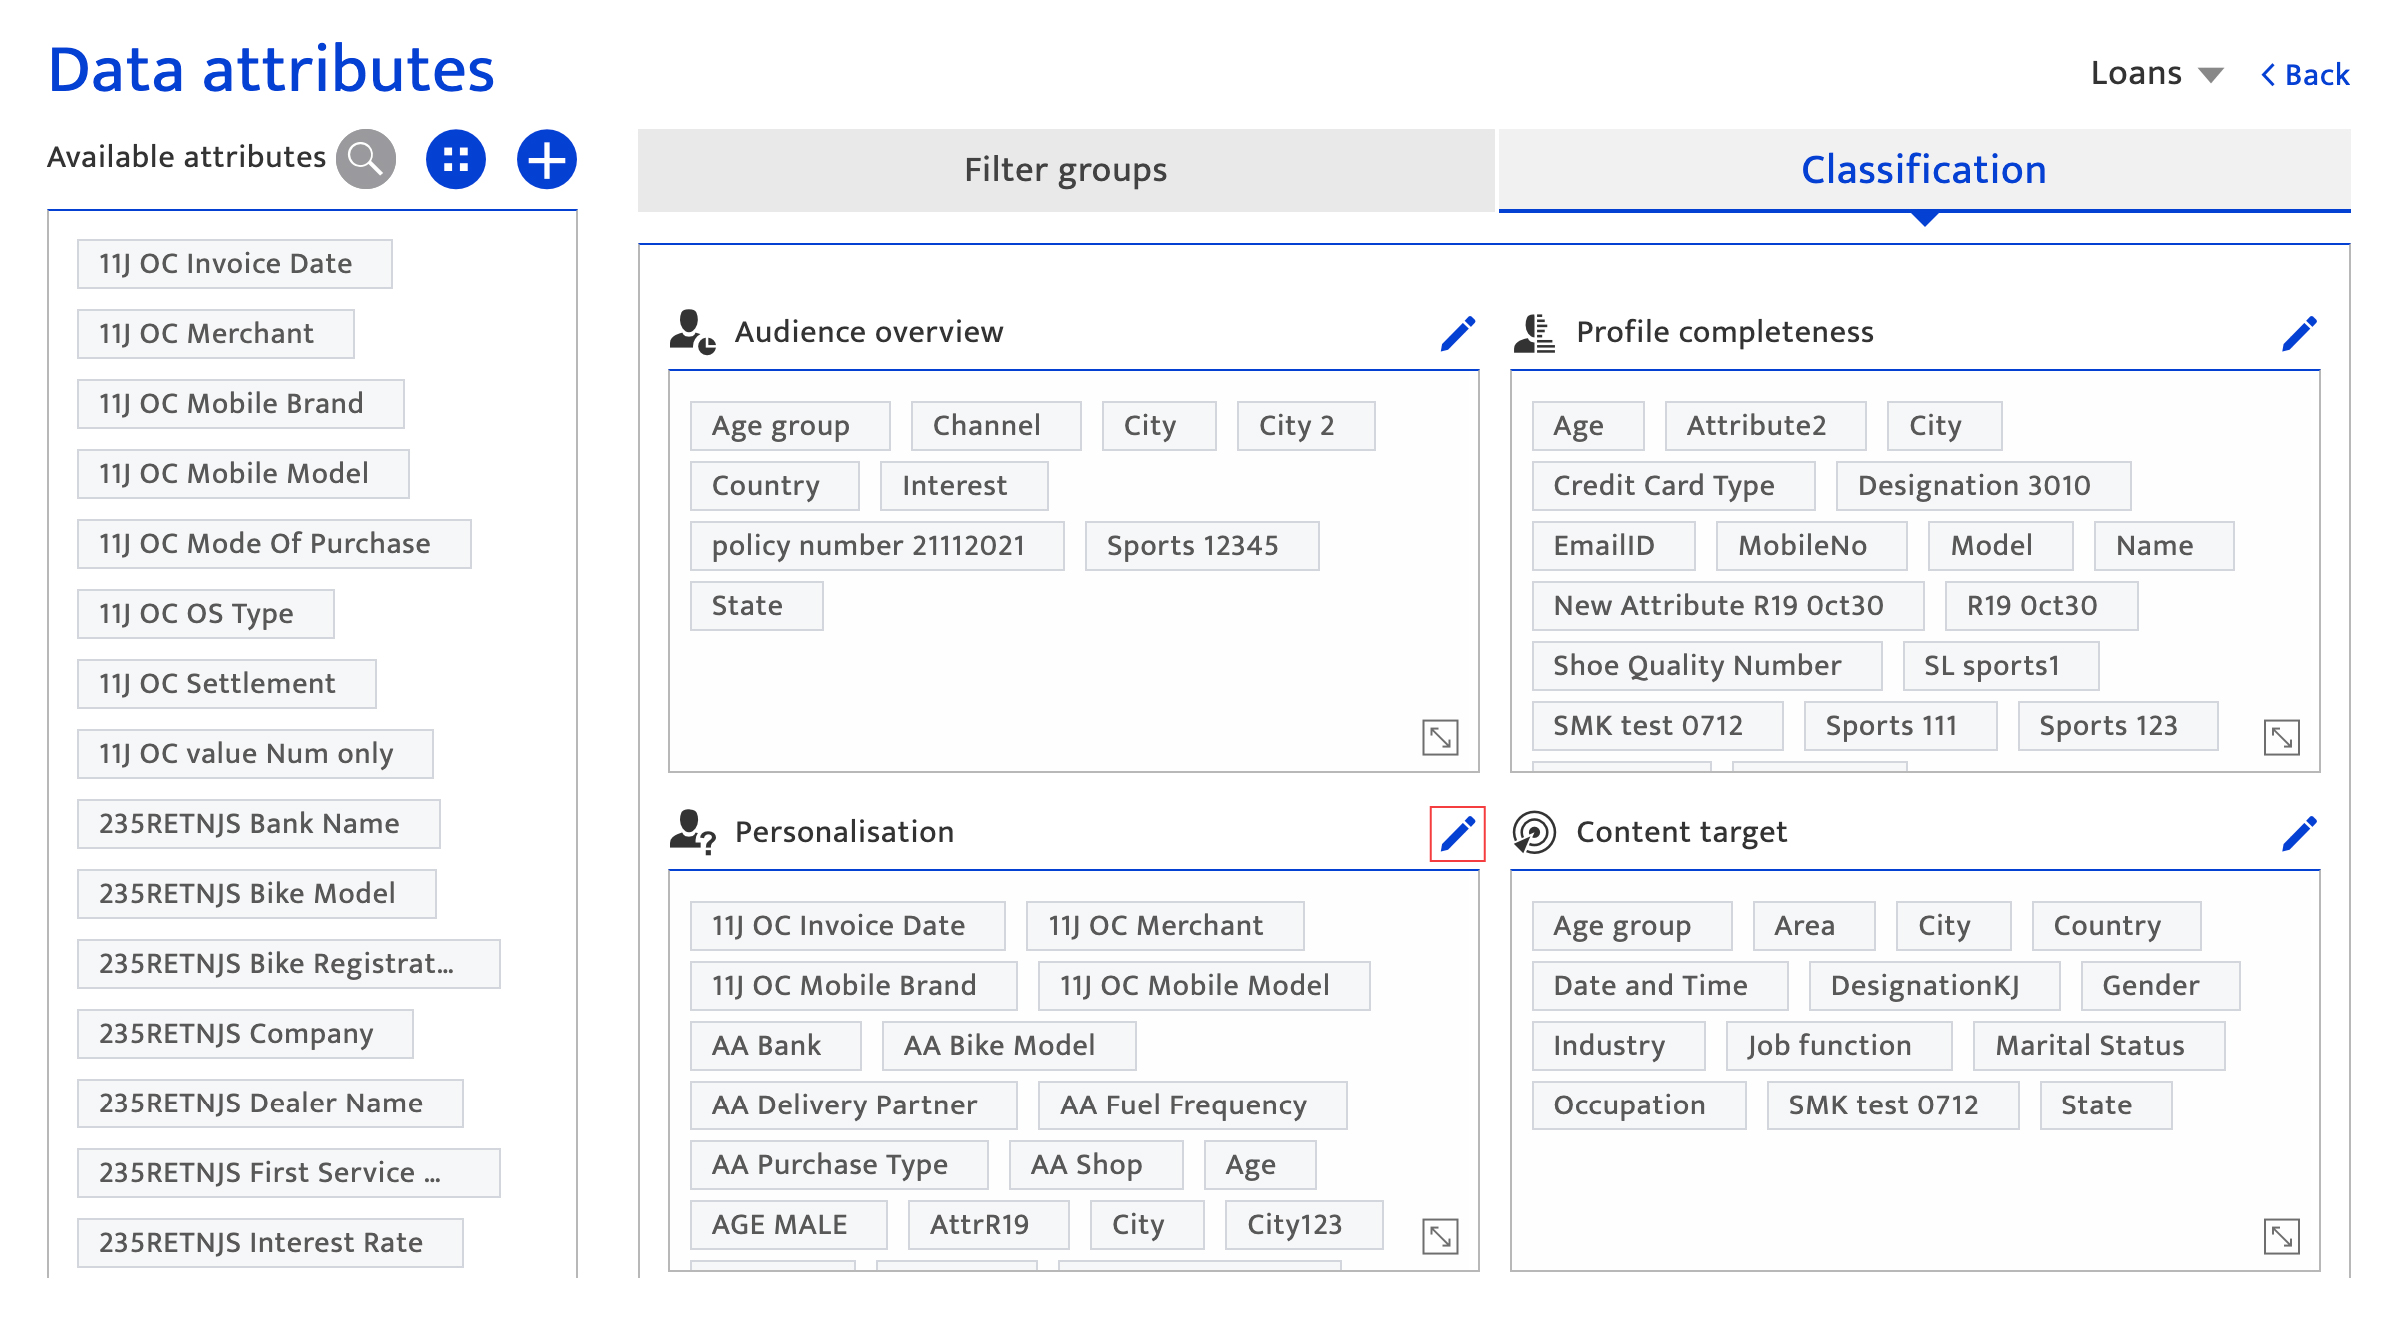
- Click on the classification tab
Editing personalisation#
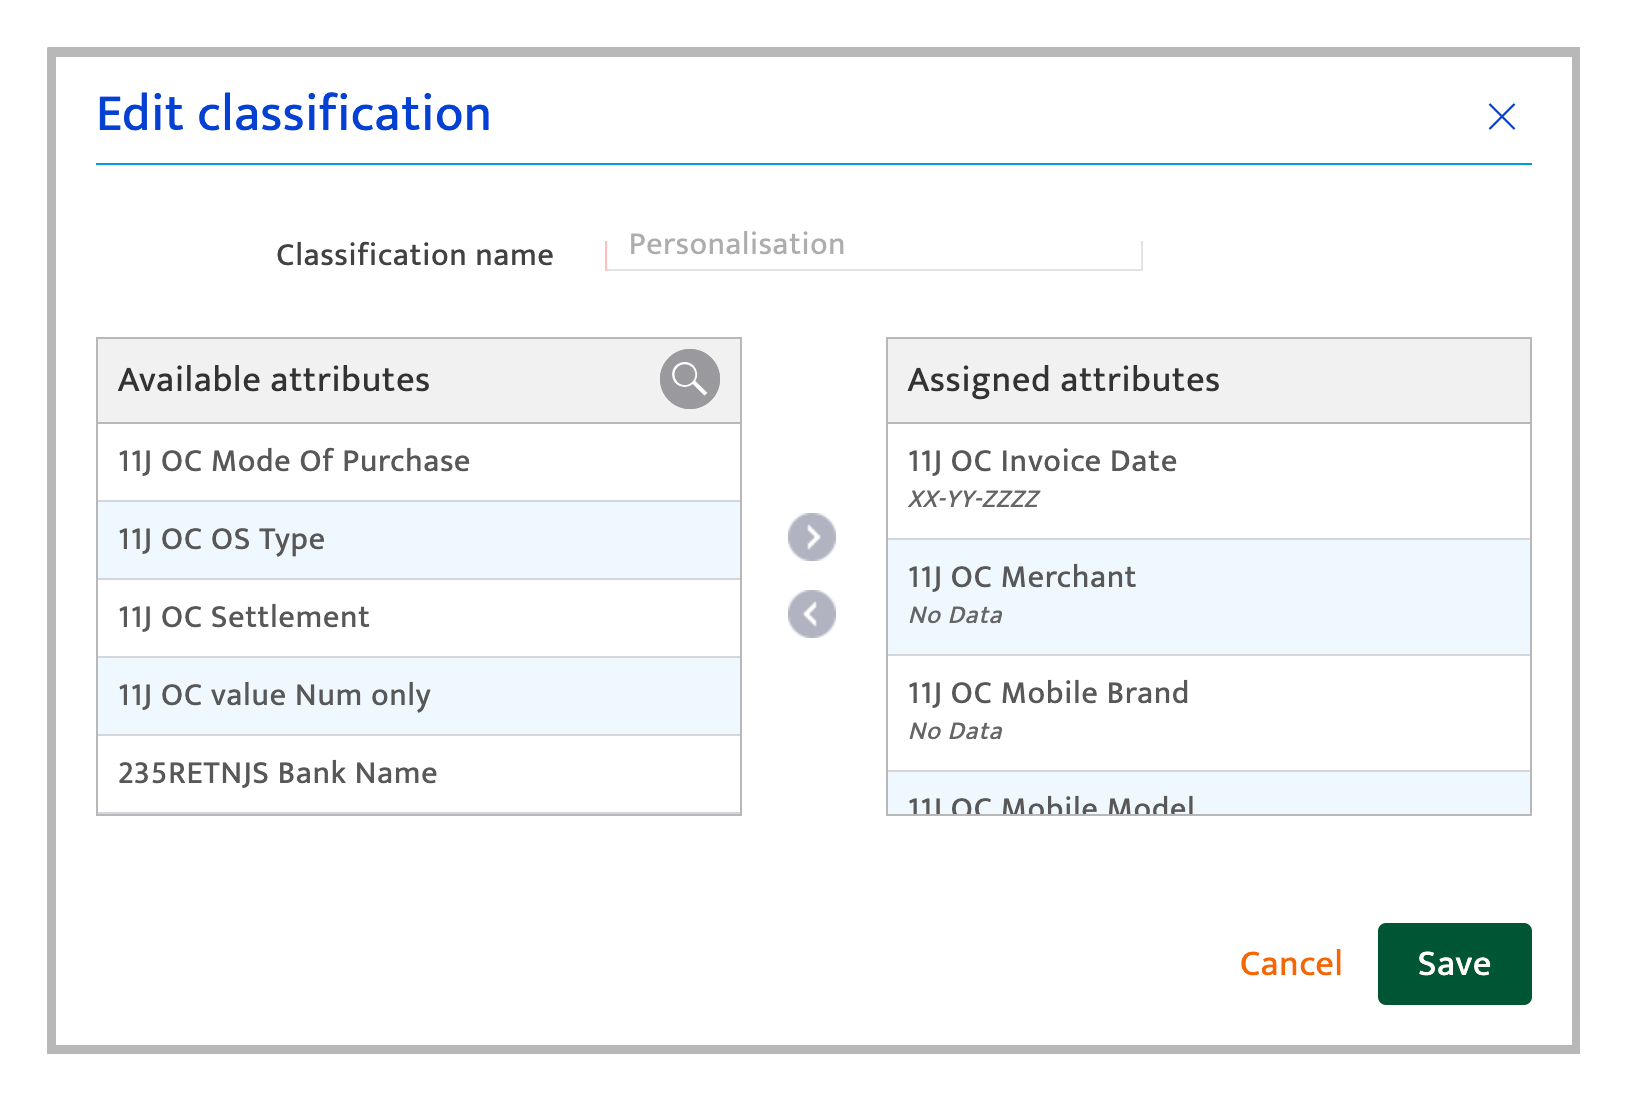
To add or remove attributes available for personalization you must navigate to the classifications tab in the data attributes configuration screen and click on the edit button next to personalisation highlighted.
Then in the edit category pop-up you can add or remove attributes based on what attributes you want to be available for personalisation. Click Save to retain the information. Alternatively, click Cancel to exit.