MDC create
Overview#
This section addresses the creation of a multi-dimension campaign using the drag-and-drop campaign canvas.
Accessing multi-dimension campaign canvas#
To start planning a multi-dimension campaign:
- Click on the campaign icon from the menu at the top of your Resulticks screen.
- Click on the "+" icon in the default Campaign-list tab.
- Select the multi-dimension option.

Complete multi-dimension campaign planning successfully and click the "Next" button at the end to access the campaign canvas.
Exploring the campaign canvas#
A multi-dimension campaign is created using the campaign canvas, which enables flexible campaign design and orchestration of user journeys based on audience.
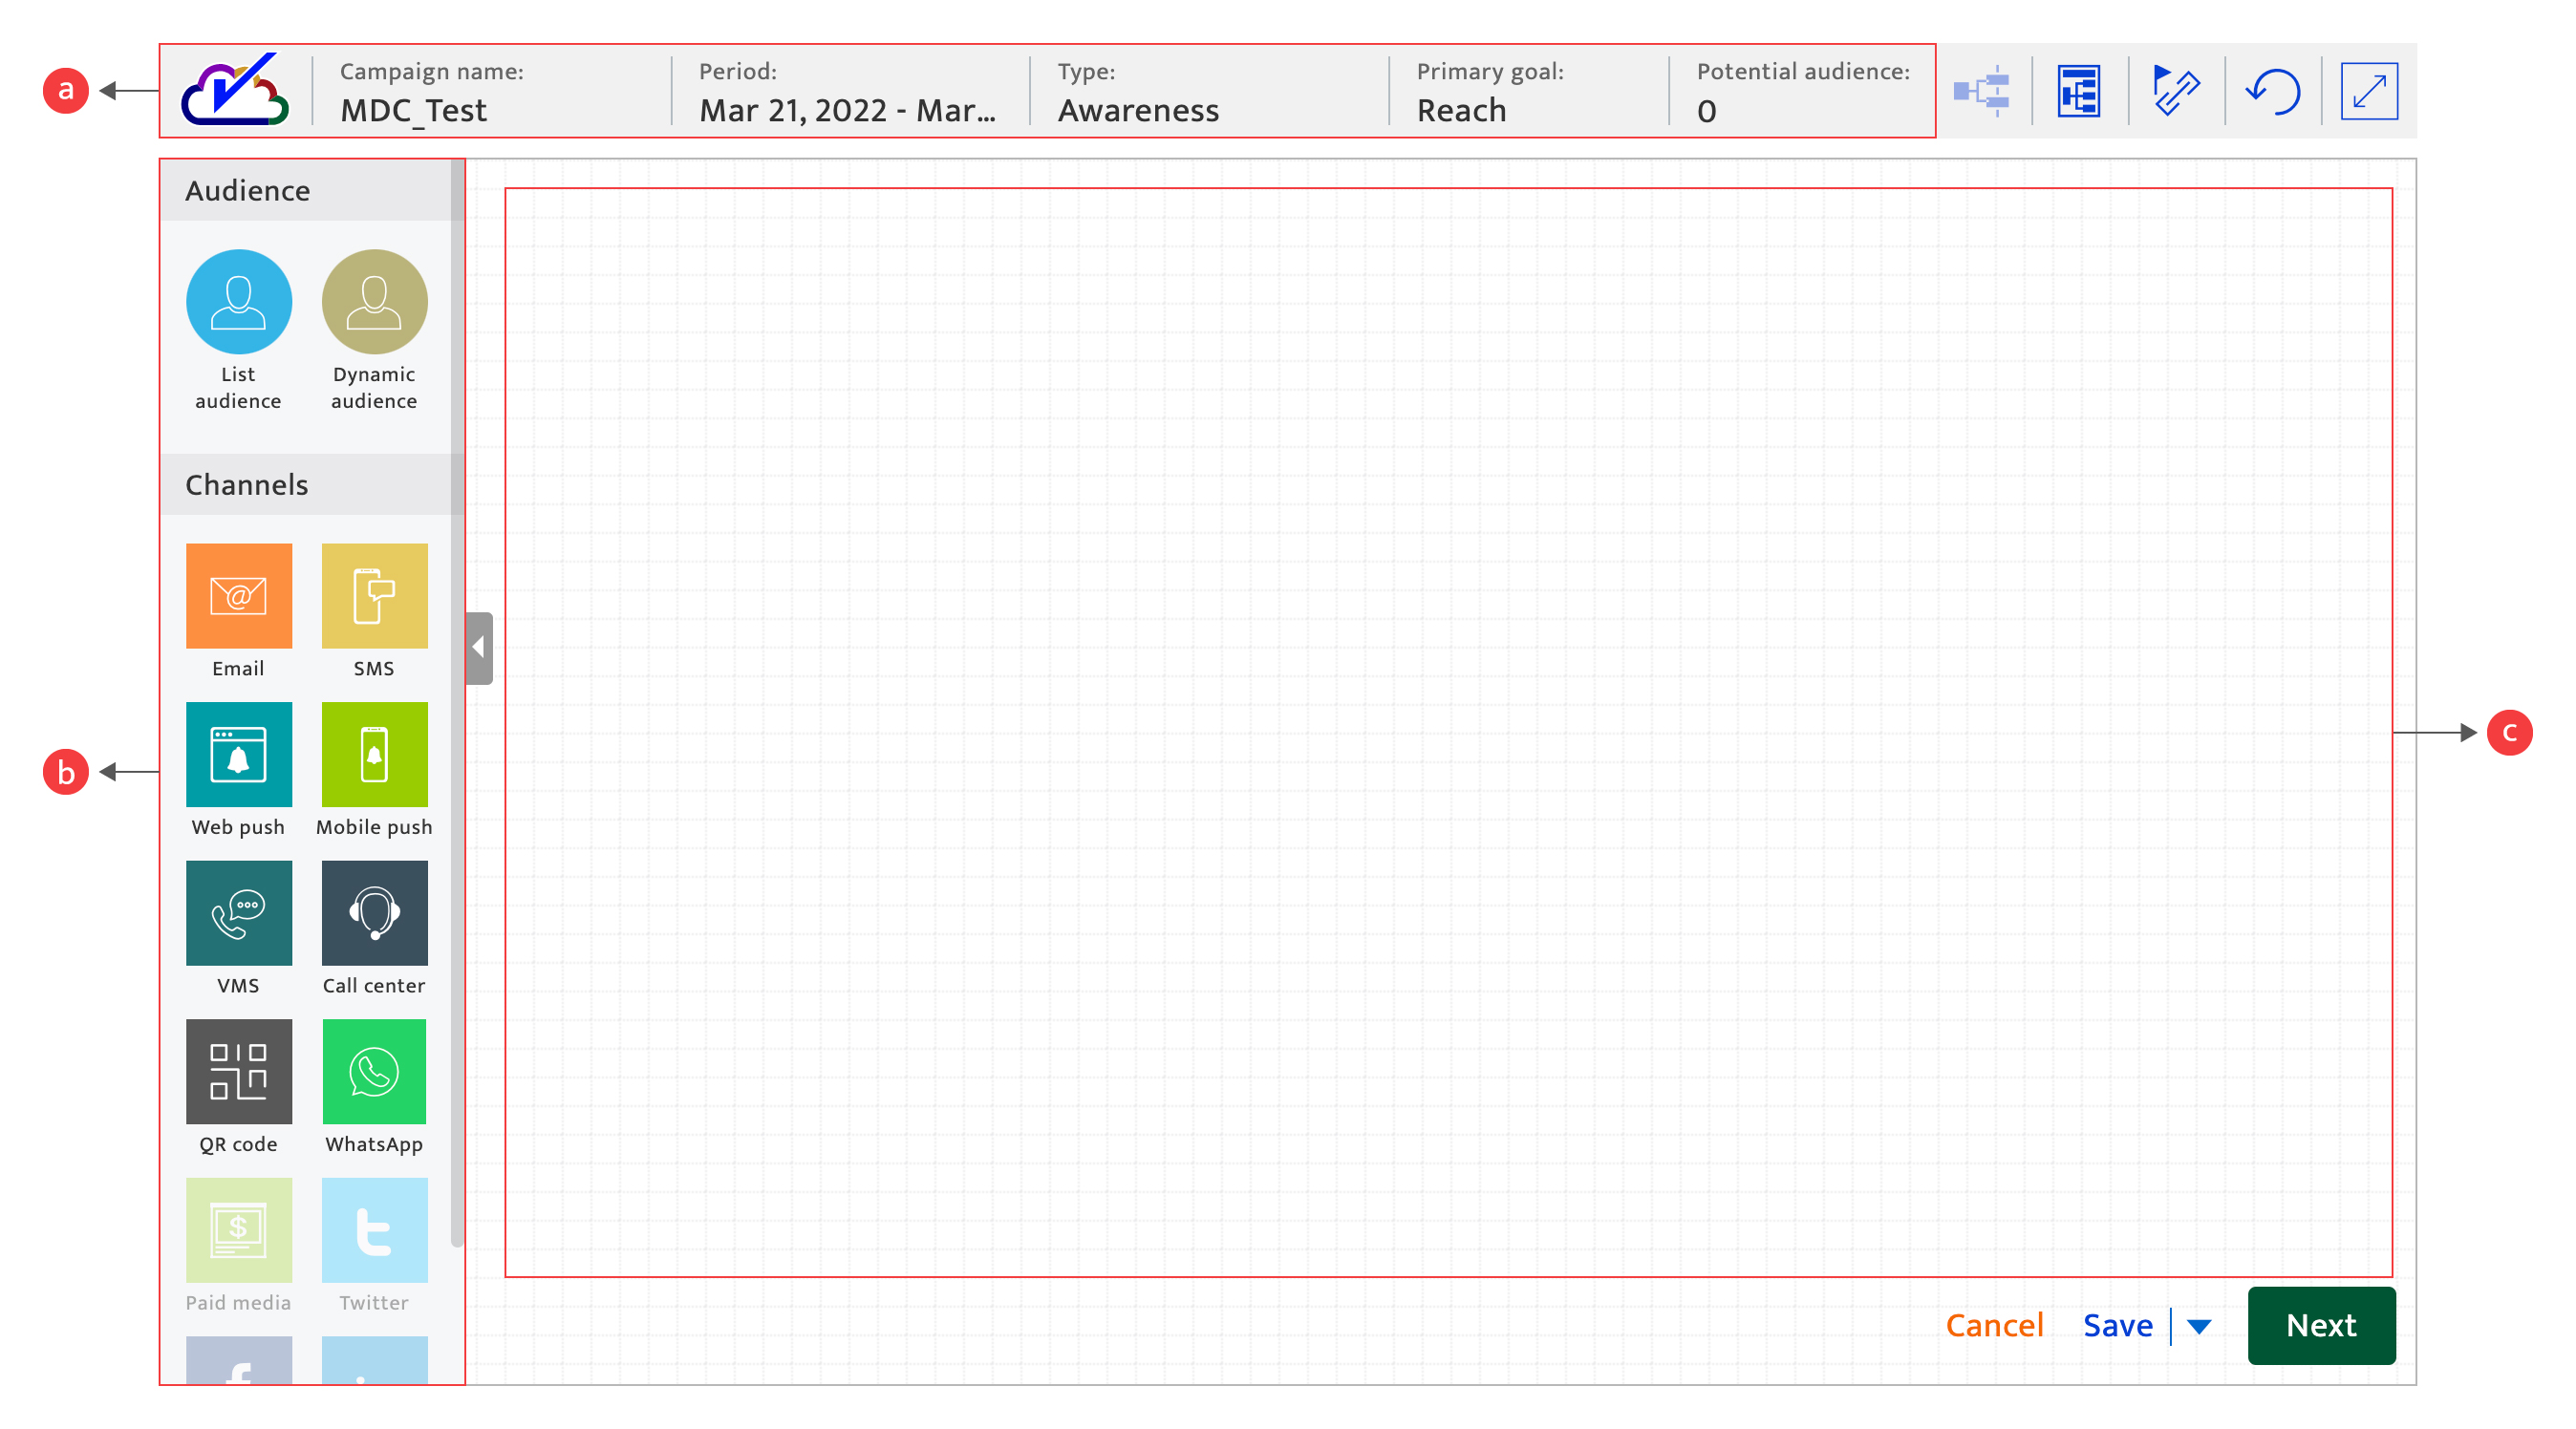
The campaign canvas has three main components:
- Information bar: Displays campaign name, period, campaign type, primary goal, and potential audience size.
- Campaign elements panel: Contains available sources and channels that can be used to orchestrate a campaign.
- The canvas: Use this to arrange campaign elements, define channel-specific content, map out audience pathways, schedule communications, and set communications goals.
Actions on the campaign canvas#
- Drag and drop campaign elements from the panel onto the canvas.
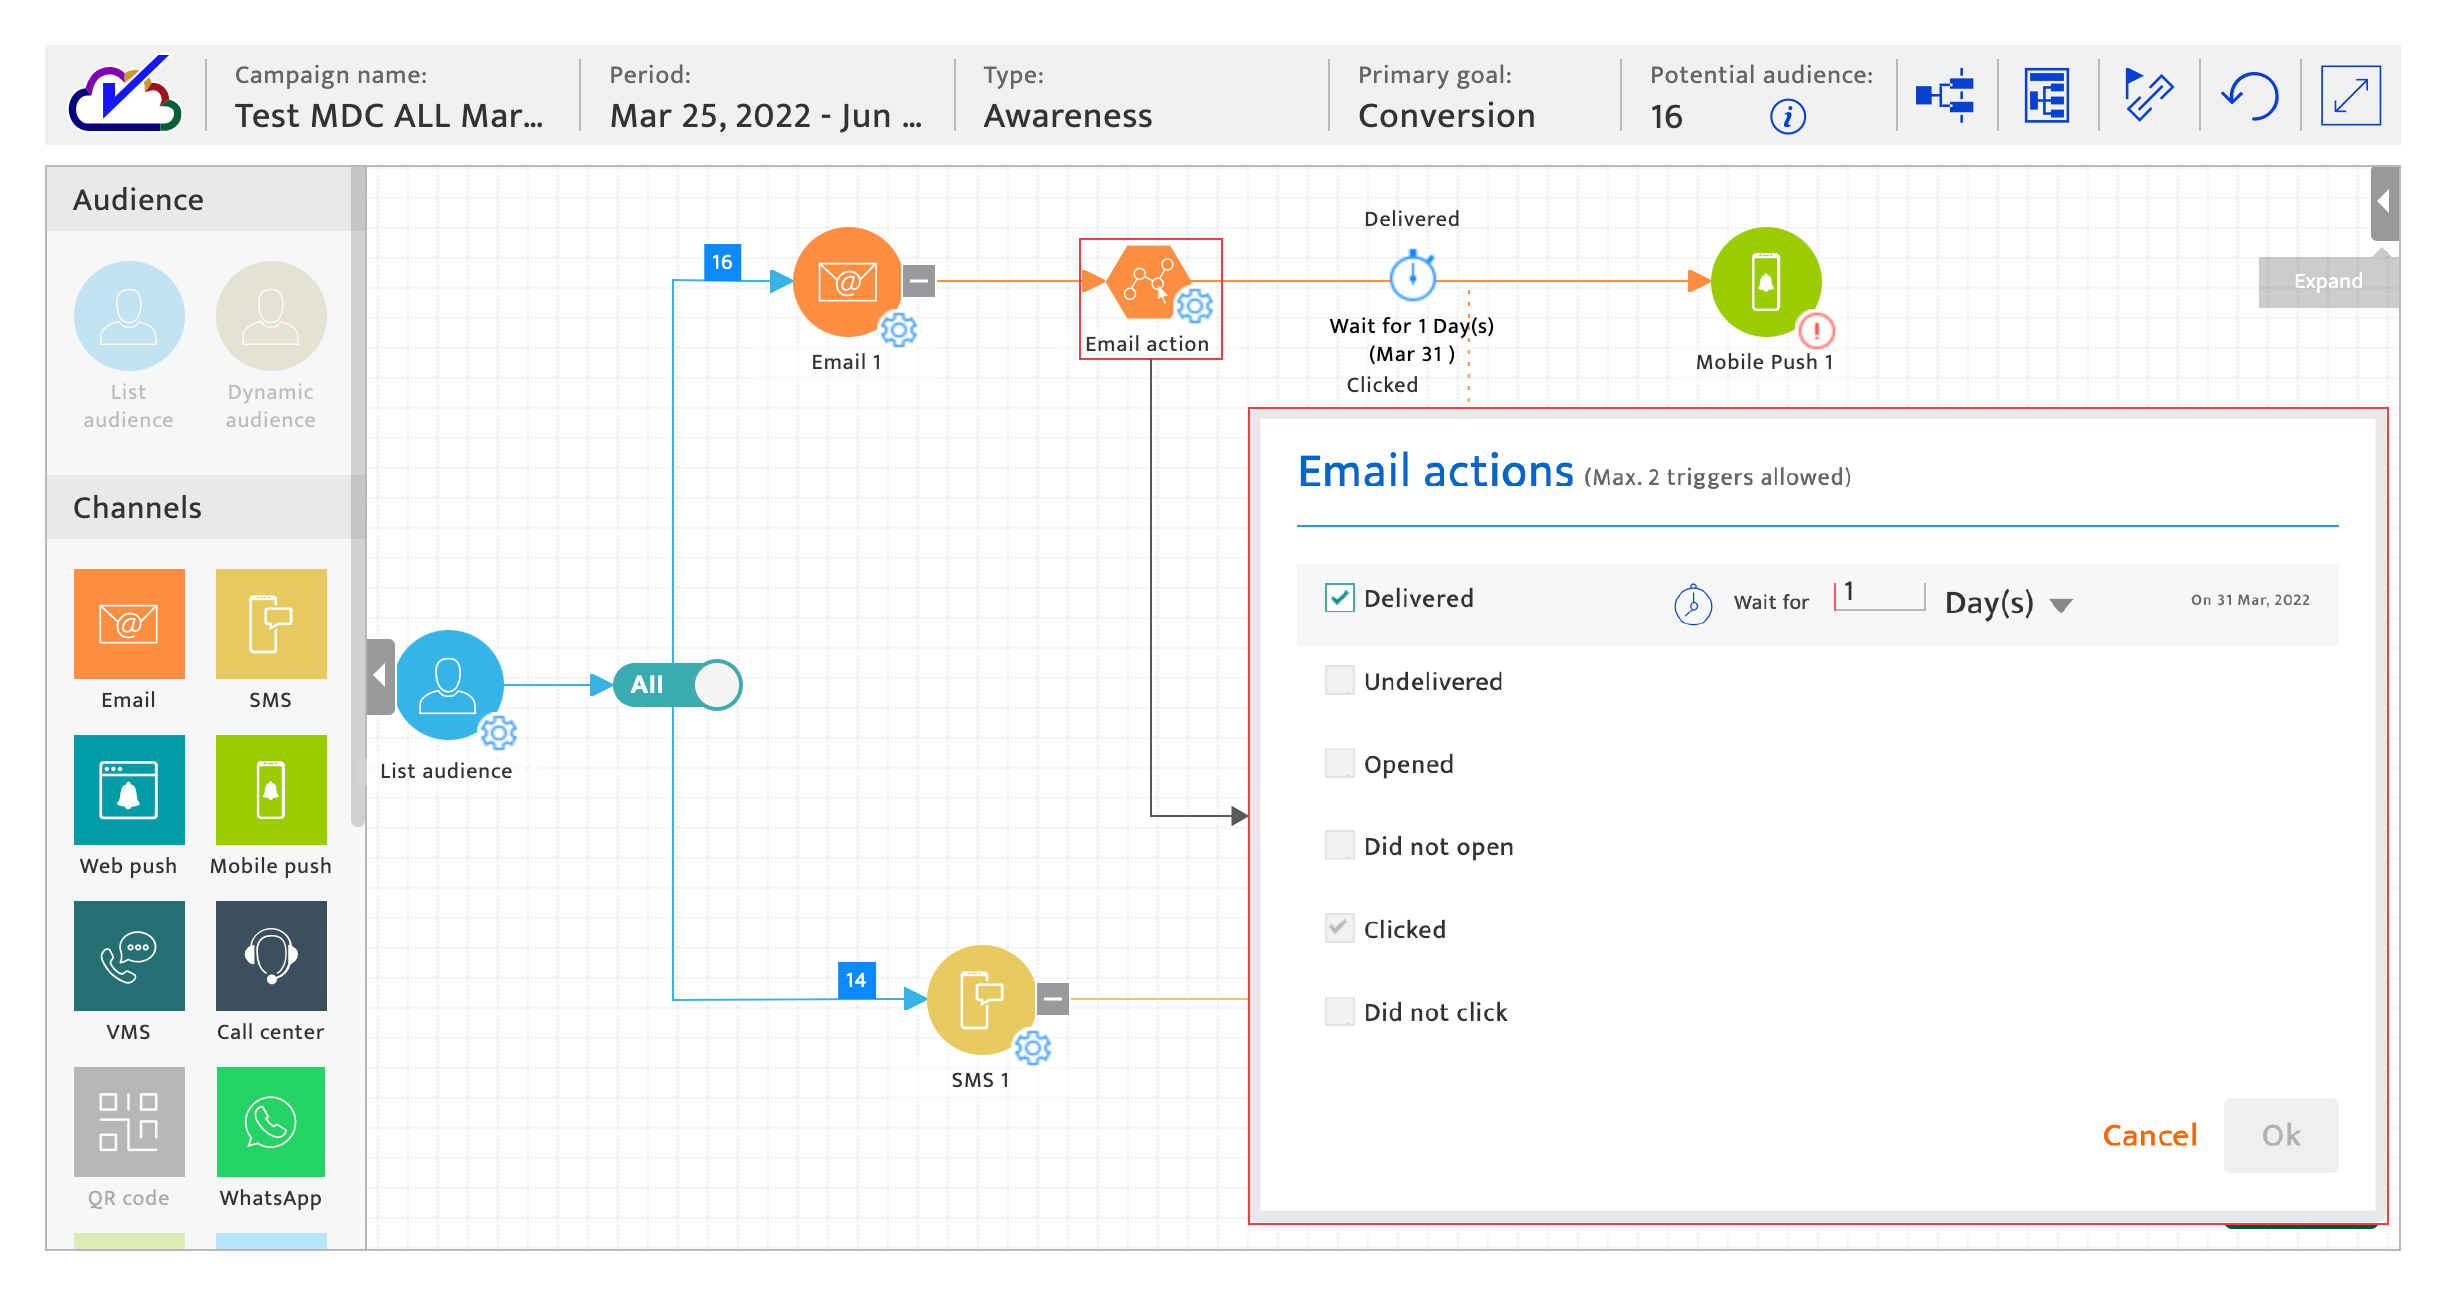
- Click the alert icon to specify the target list (audience source), define content (channel), or set up campaign goal (goals/endpoints). The alert icon will change into a setting icon after the specification. Click the setting icon to update the element.
- Reposition the element by moving it on the canvas. Use this to ensure an easy-to-follow canvas flow.
- Click the delete button to remove an element.
- Switch on/off the toggle to determine how communications in the next step will be delivered. This is only available if multiple channels have been added.
- Select All to deliver communications through all channels in the next step.
- Select Any to deliver communications to individual contacts based on their channel propensity. Fewer communications are sent with this choice, optimizing channel usage.
- Click the caption below each element to edit the name.
Designing a campaign#
To create a multi-dimension campaign with the campaign canvas, use a combination of the following steps:-
- Erase the entire canvas flow by clicking the refresh icon.
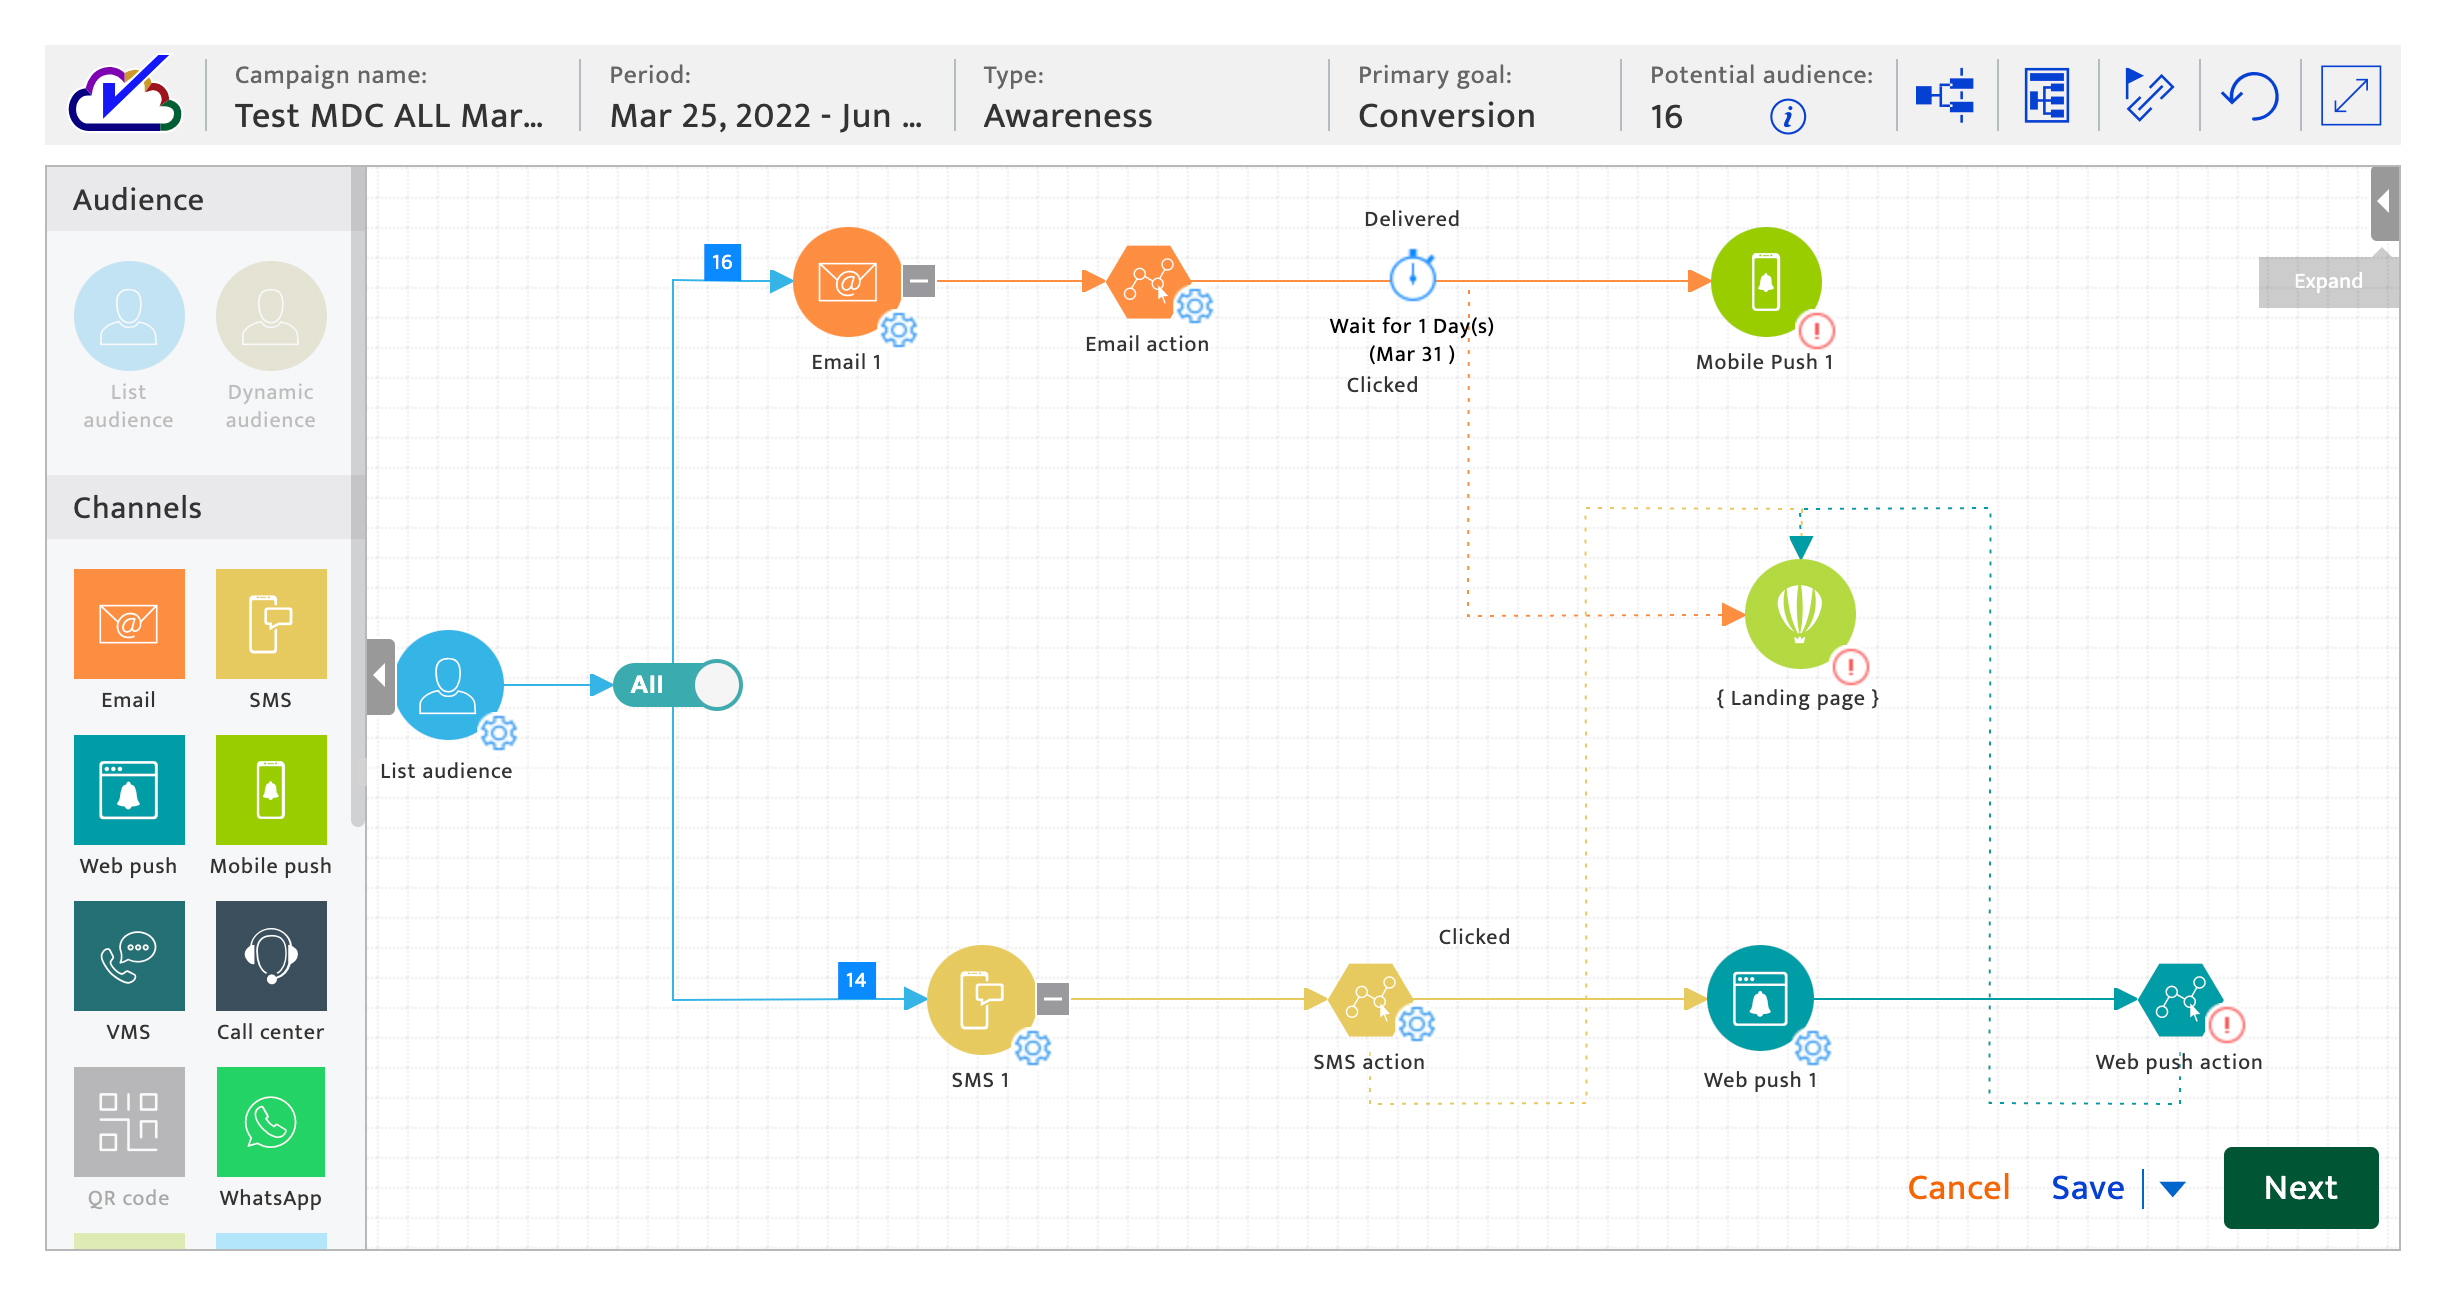
- Select an audience list, which is the same as a target list used in a Single dimension campaign.
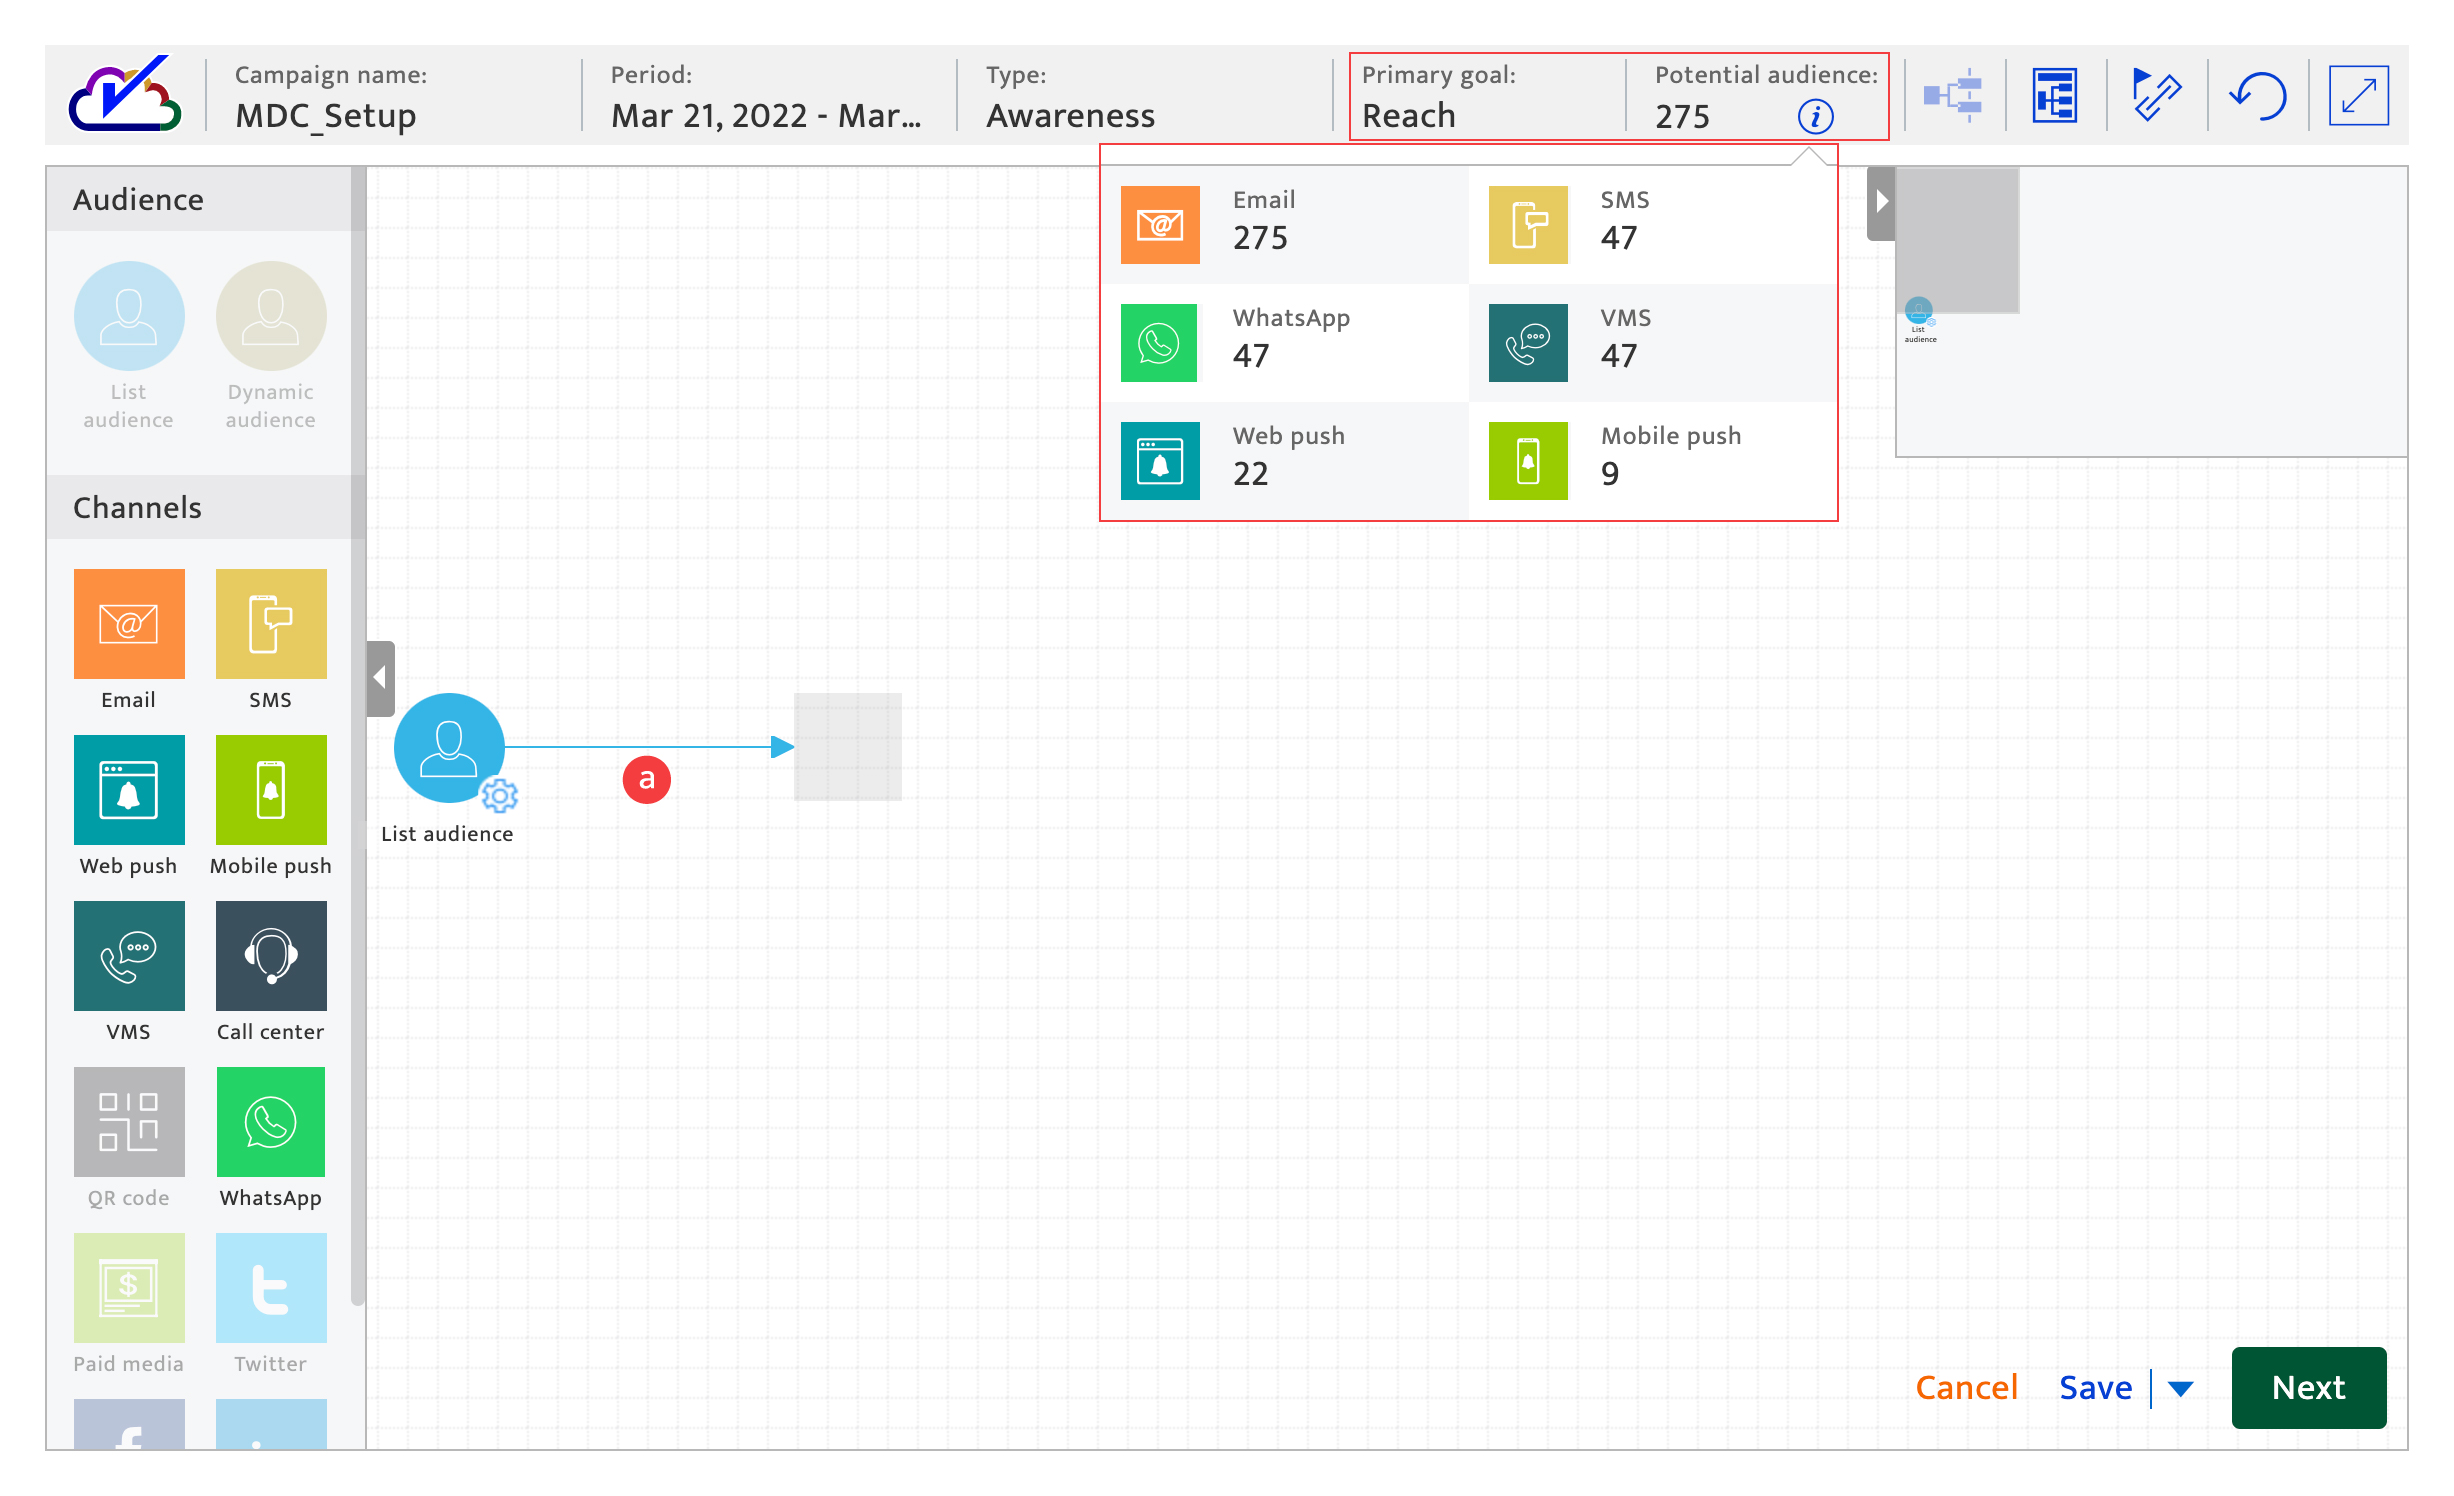
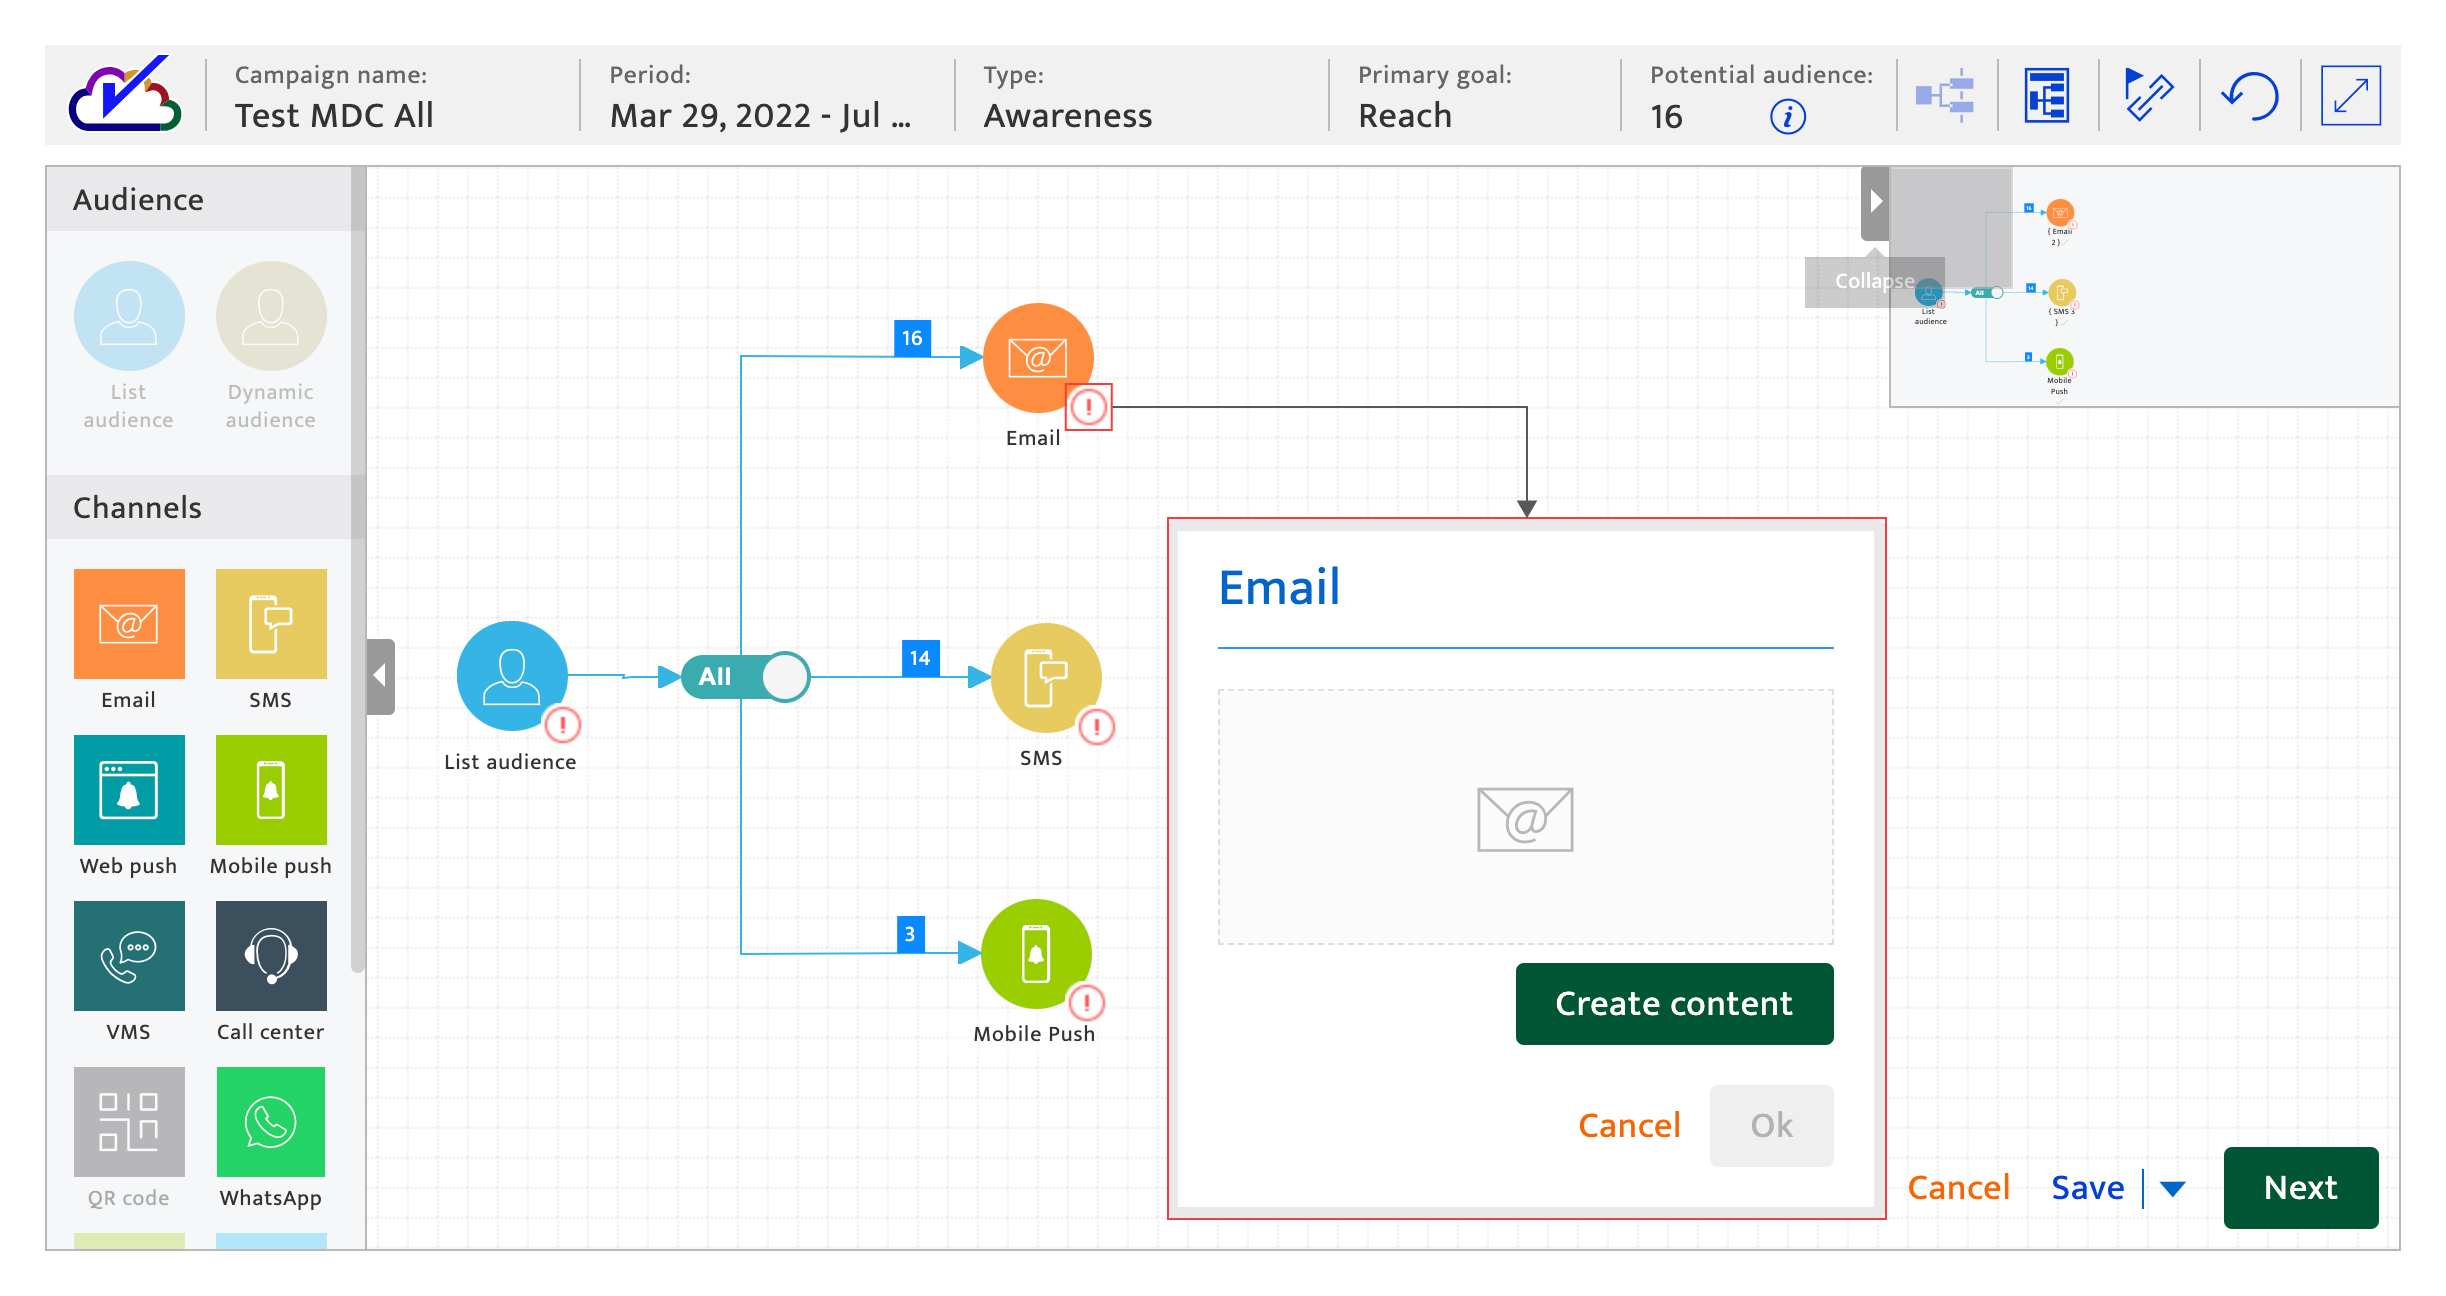
Once selected, the information bar will be updated to reflect the potential audience size of this campaign. Click the information icon to see channels-specific audience sizes. - Select the communication channels for this campaign. An unlimited number of channels can be added to an mdc campaign but the same channel can not be repeated within the same wave.
Click the alert icon to define the content for each channel. For more information on creating campaign content, see the individual campaign creation module.
After defining a channel’s content, an audience action icon will appear.
Note: VMS, Call center and QR can only be configured as the last wave of communications. (No further follow-up communications are possible after these channels.) - Specify the audience action by clicking the alert icon and selecting up to two relevant audience actions. The actions available are pre-defined and specific to each channel. Specify the time delay before the next communication is delivered by entering the value and selecting the preferred delay period—hour or day. Each action creates its own audience pathway, and when performed by a contact, activates the next communication. Note: For SMS follow up actions besides clicked a minimum delay of 2 days must be set in order for the follow up communication to trigger successfully.
- Select the campaign goals/endpoints for the campaign. These will only be available for conversion campaigns. Click the alert icon to configure the goal/endpoint.
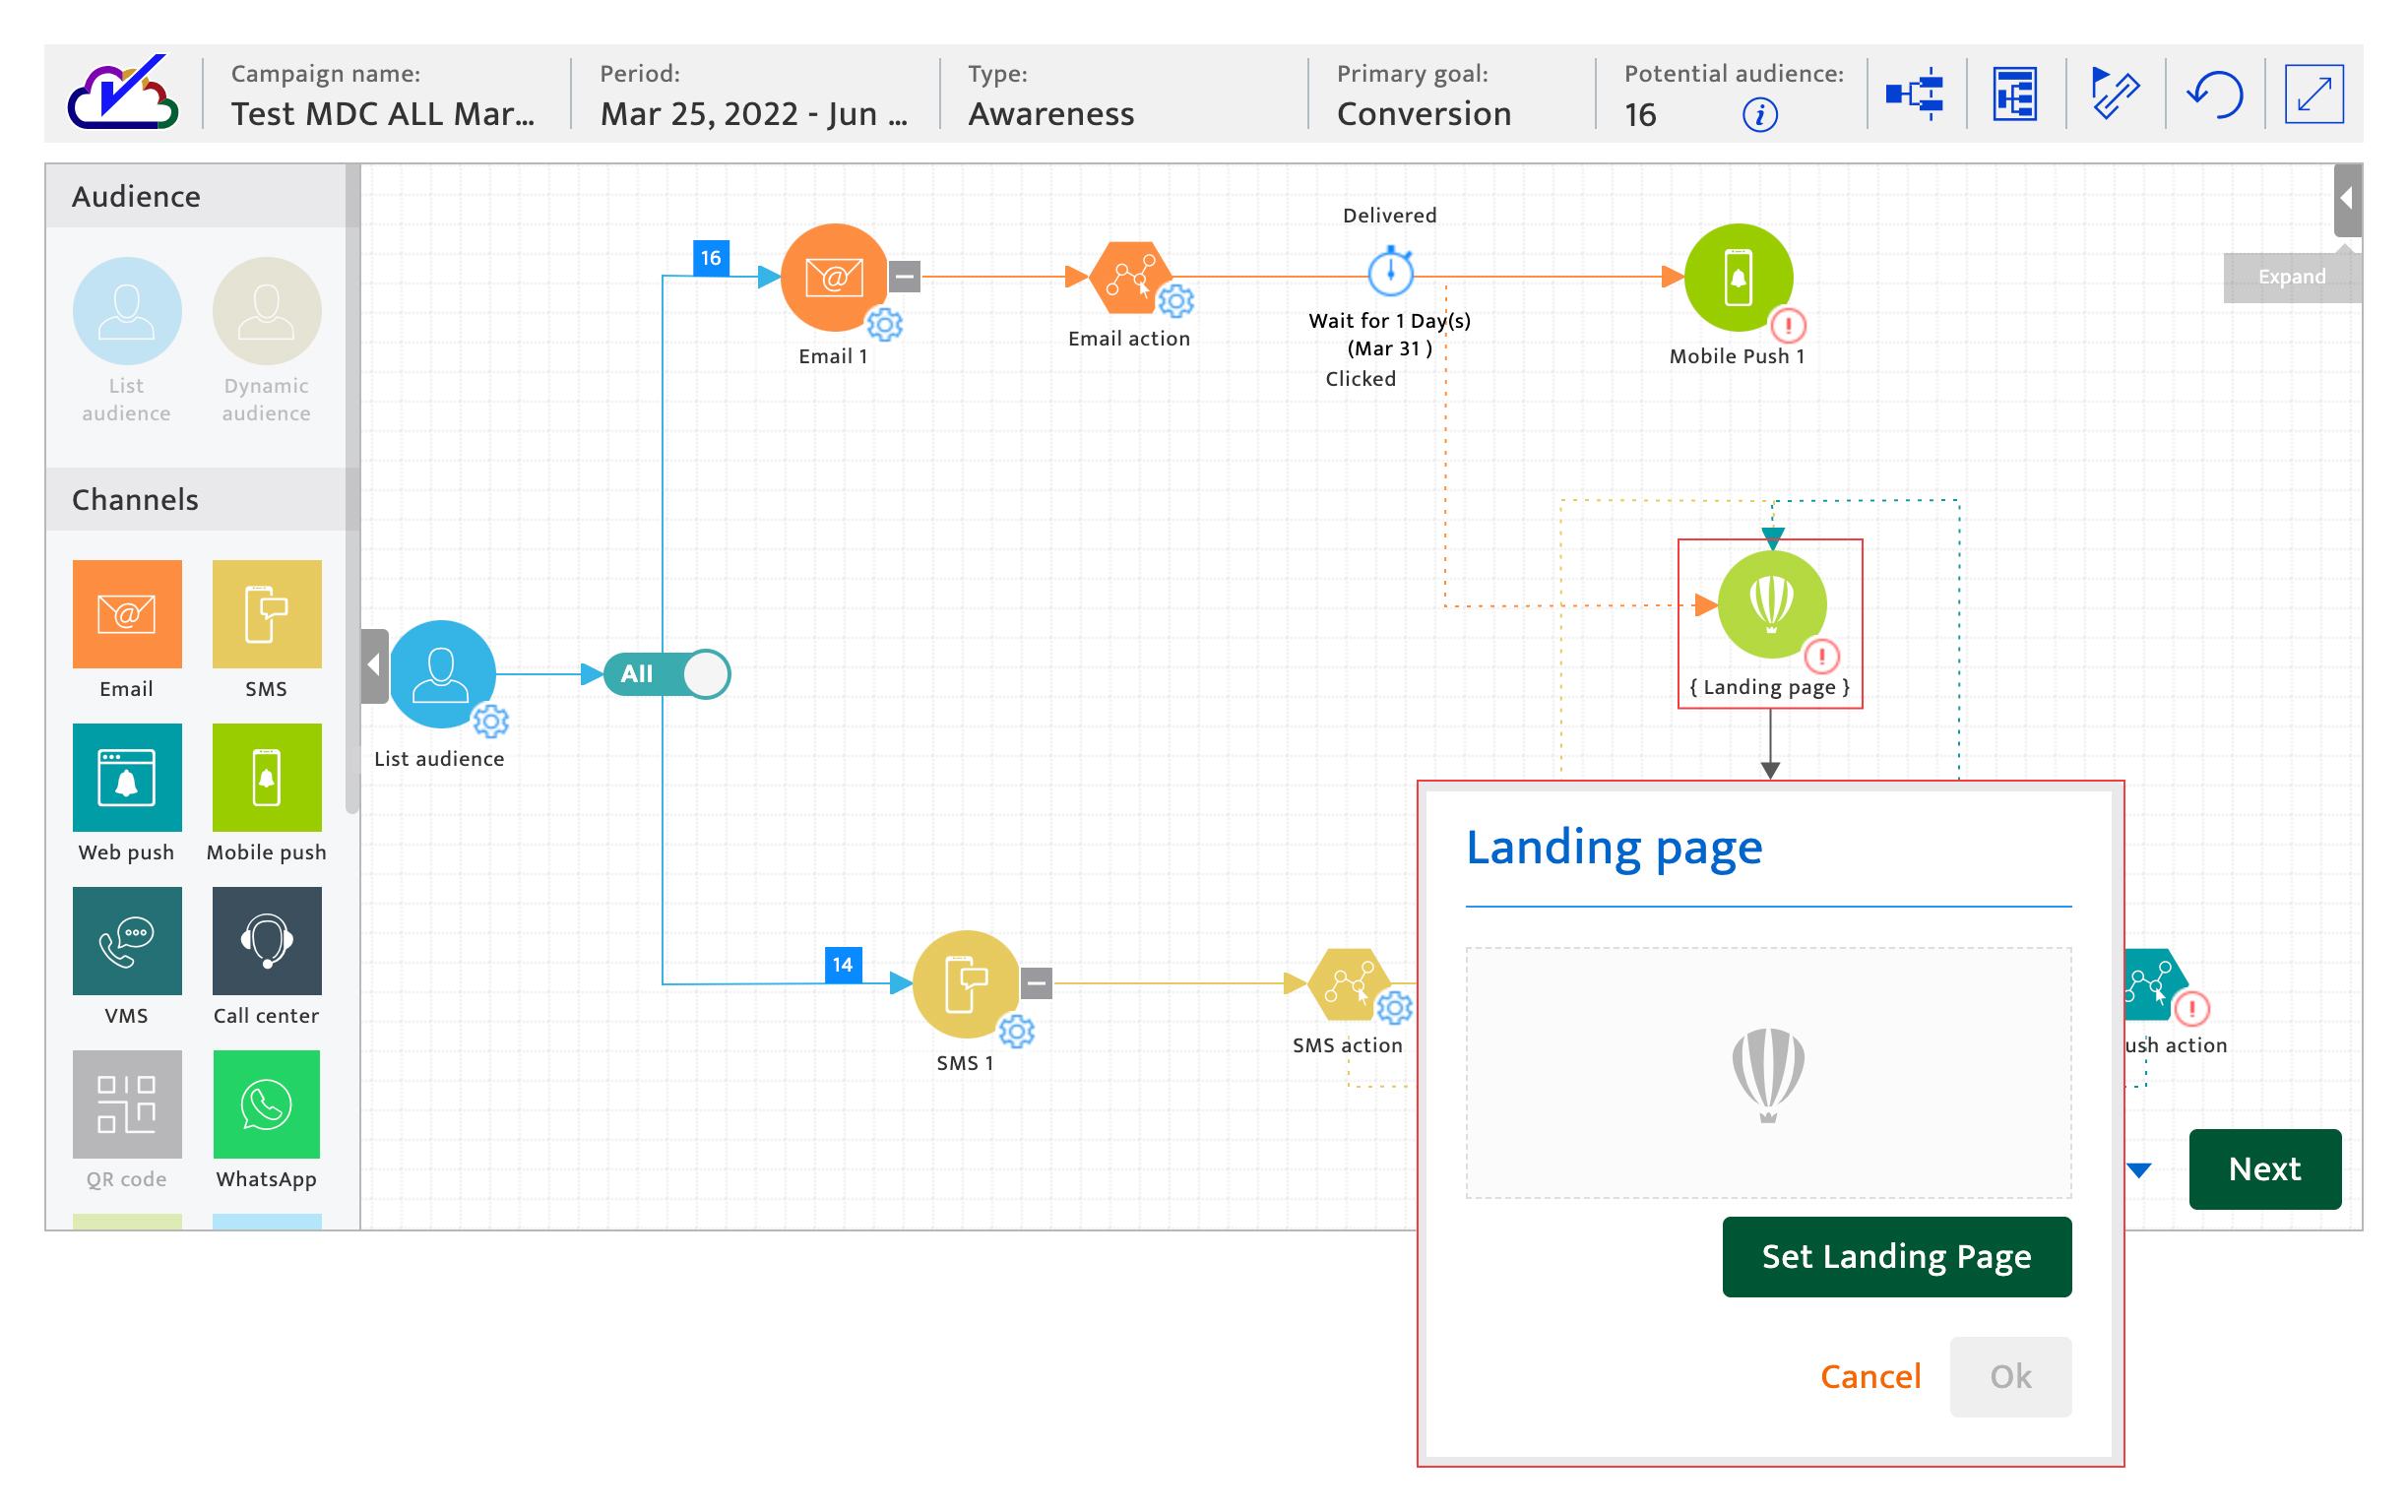
Configure a landing page:-#
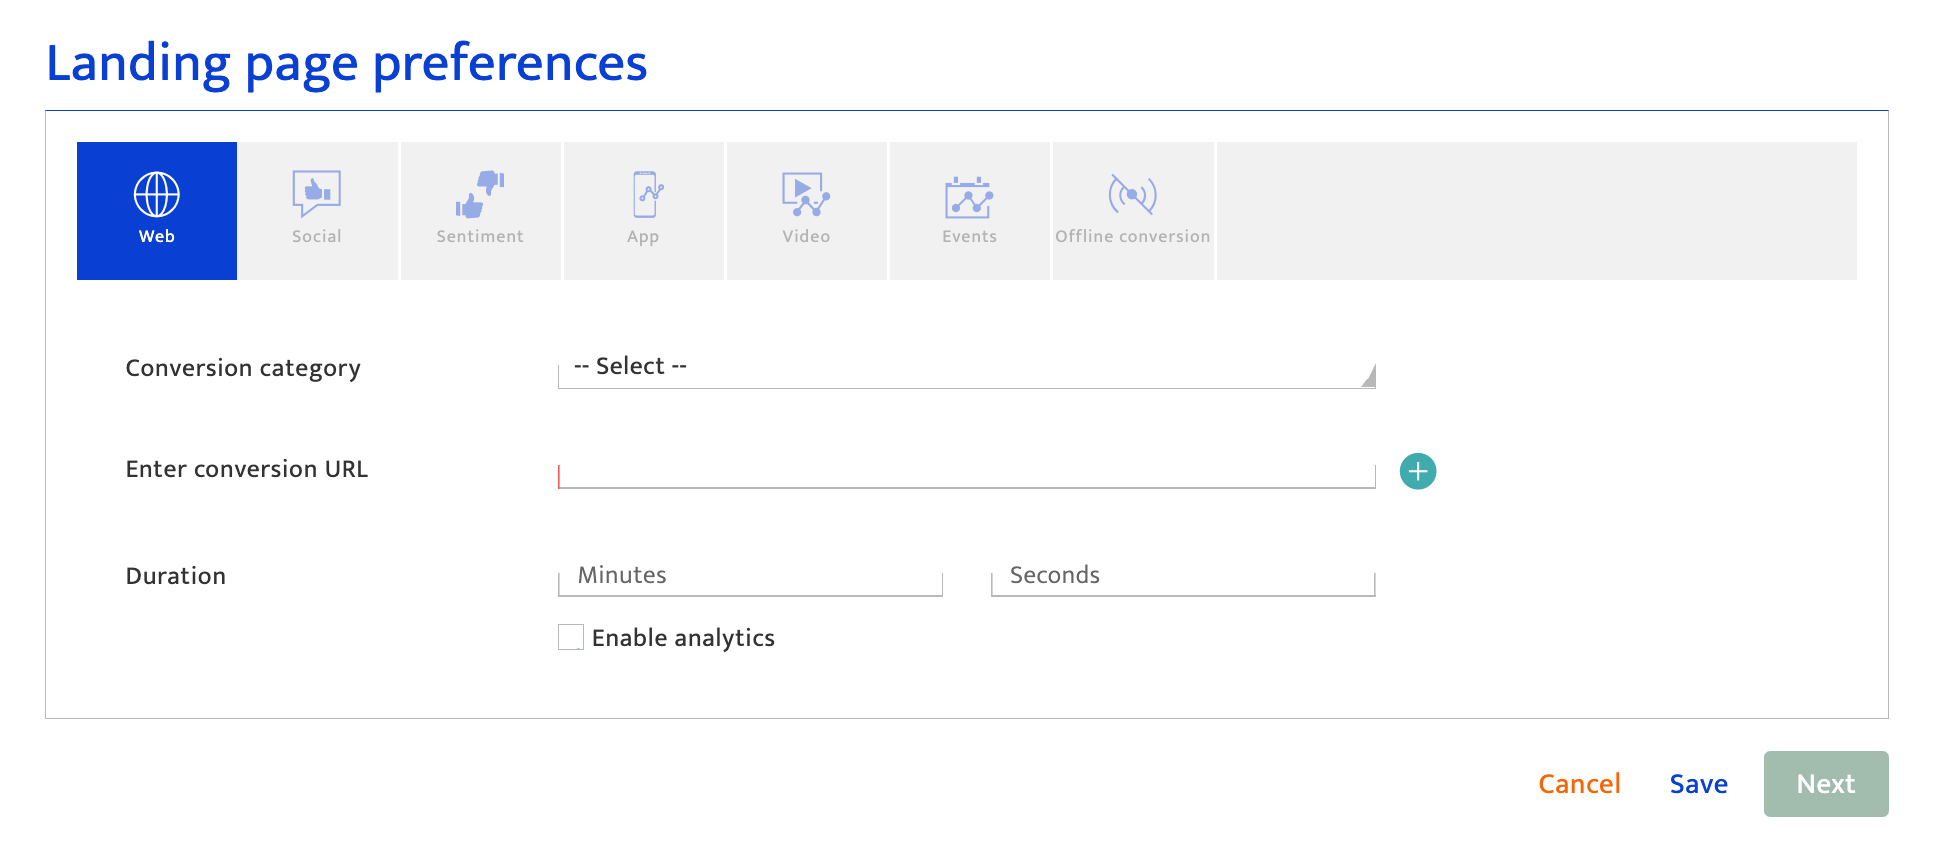
- Select a conversion category. The options are purchase, lead, and signup.
- Select the subscription form from the drop-down list. Only needed for signup.
- Enter the conversion URL. The platform will display the validity of the URL. Click the "+" icon to add a second conversion URL.
- Specify how much time a contact needs to spend on the landing page for a conversion to be counted.
- Tick the checkbox to enable analytics.
Note: For reach and engagement campaigns you can configure upto 5 waves of communication(initial wave + 4 follow up communications) but no landing pages can be configured. For conversion campaigns you can configure upto 3 waves(initial wave + 2 follow up communications) after which you must configure a landing page and based on the actions in the landing page you can configure another 3 levels of follow up communication after which you may configure another landing page after which you may configure one more level of communication.
Proceed to next step#
There are 2 options to proceed:-
- Click "Save" to save the current input and return to the Campaign list. All mandatory fields on the current screen must be completed to save successfully. The platform will highlight any missing mandatory information.
- The campaign will be saved as "Draft" if it is a new campaign. If the user has been editing a "Draft" or "Scheduled" campaign, the campaign state does not change.
- Click "Cancel" to return to the Campaign List screen and discard all current input.