Notification-Mobile (Inbox messaging)
Overview#
A Mobile notification (Inbox messaging) campaign is an easy way to engage first-time and returning customers on mobile applications, direct users to the mobile app and specific app screens, and push relevant communications to specific audience segments. The advantage of these notifications is they are stored in the App inbox until the user decides to access them.
Mobile notification campaign features#
The Mobile notifications features include:
- Content composition using a text editor, templates, or import.
- Sending notifications to users outside as well as inside the app.
- Selecting specific triggers for notification delivery (for event trigger campaigns only)
- Running a test campaign with an approval workflow
- Scheduling within the campaign duration
Authorization and making changes#
Any user with campaign access can set up a single dimension mobile notification campaign.
Accessing mobile notification creation#
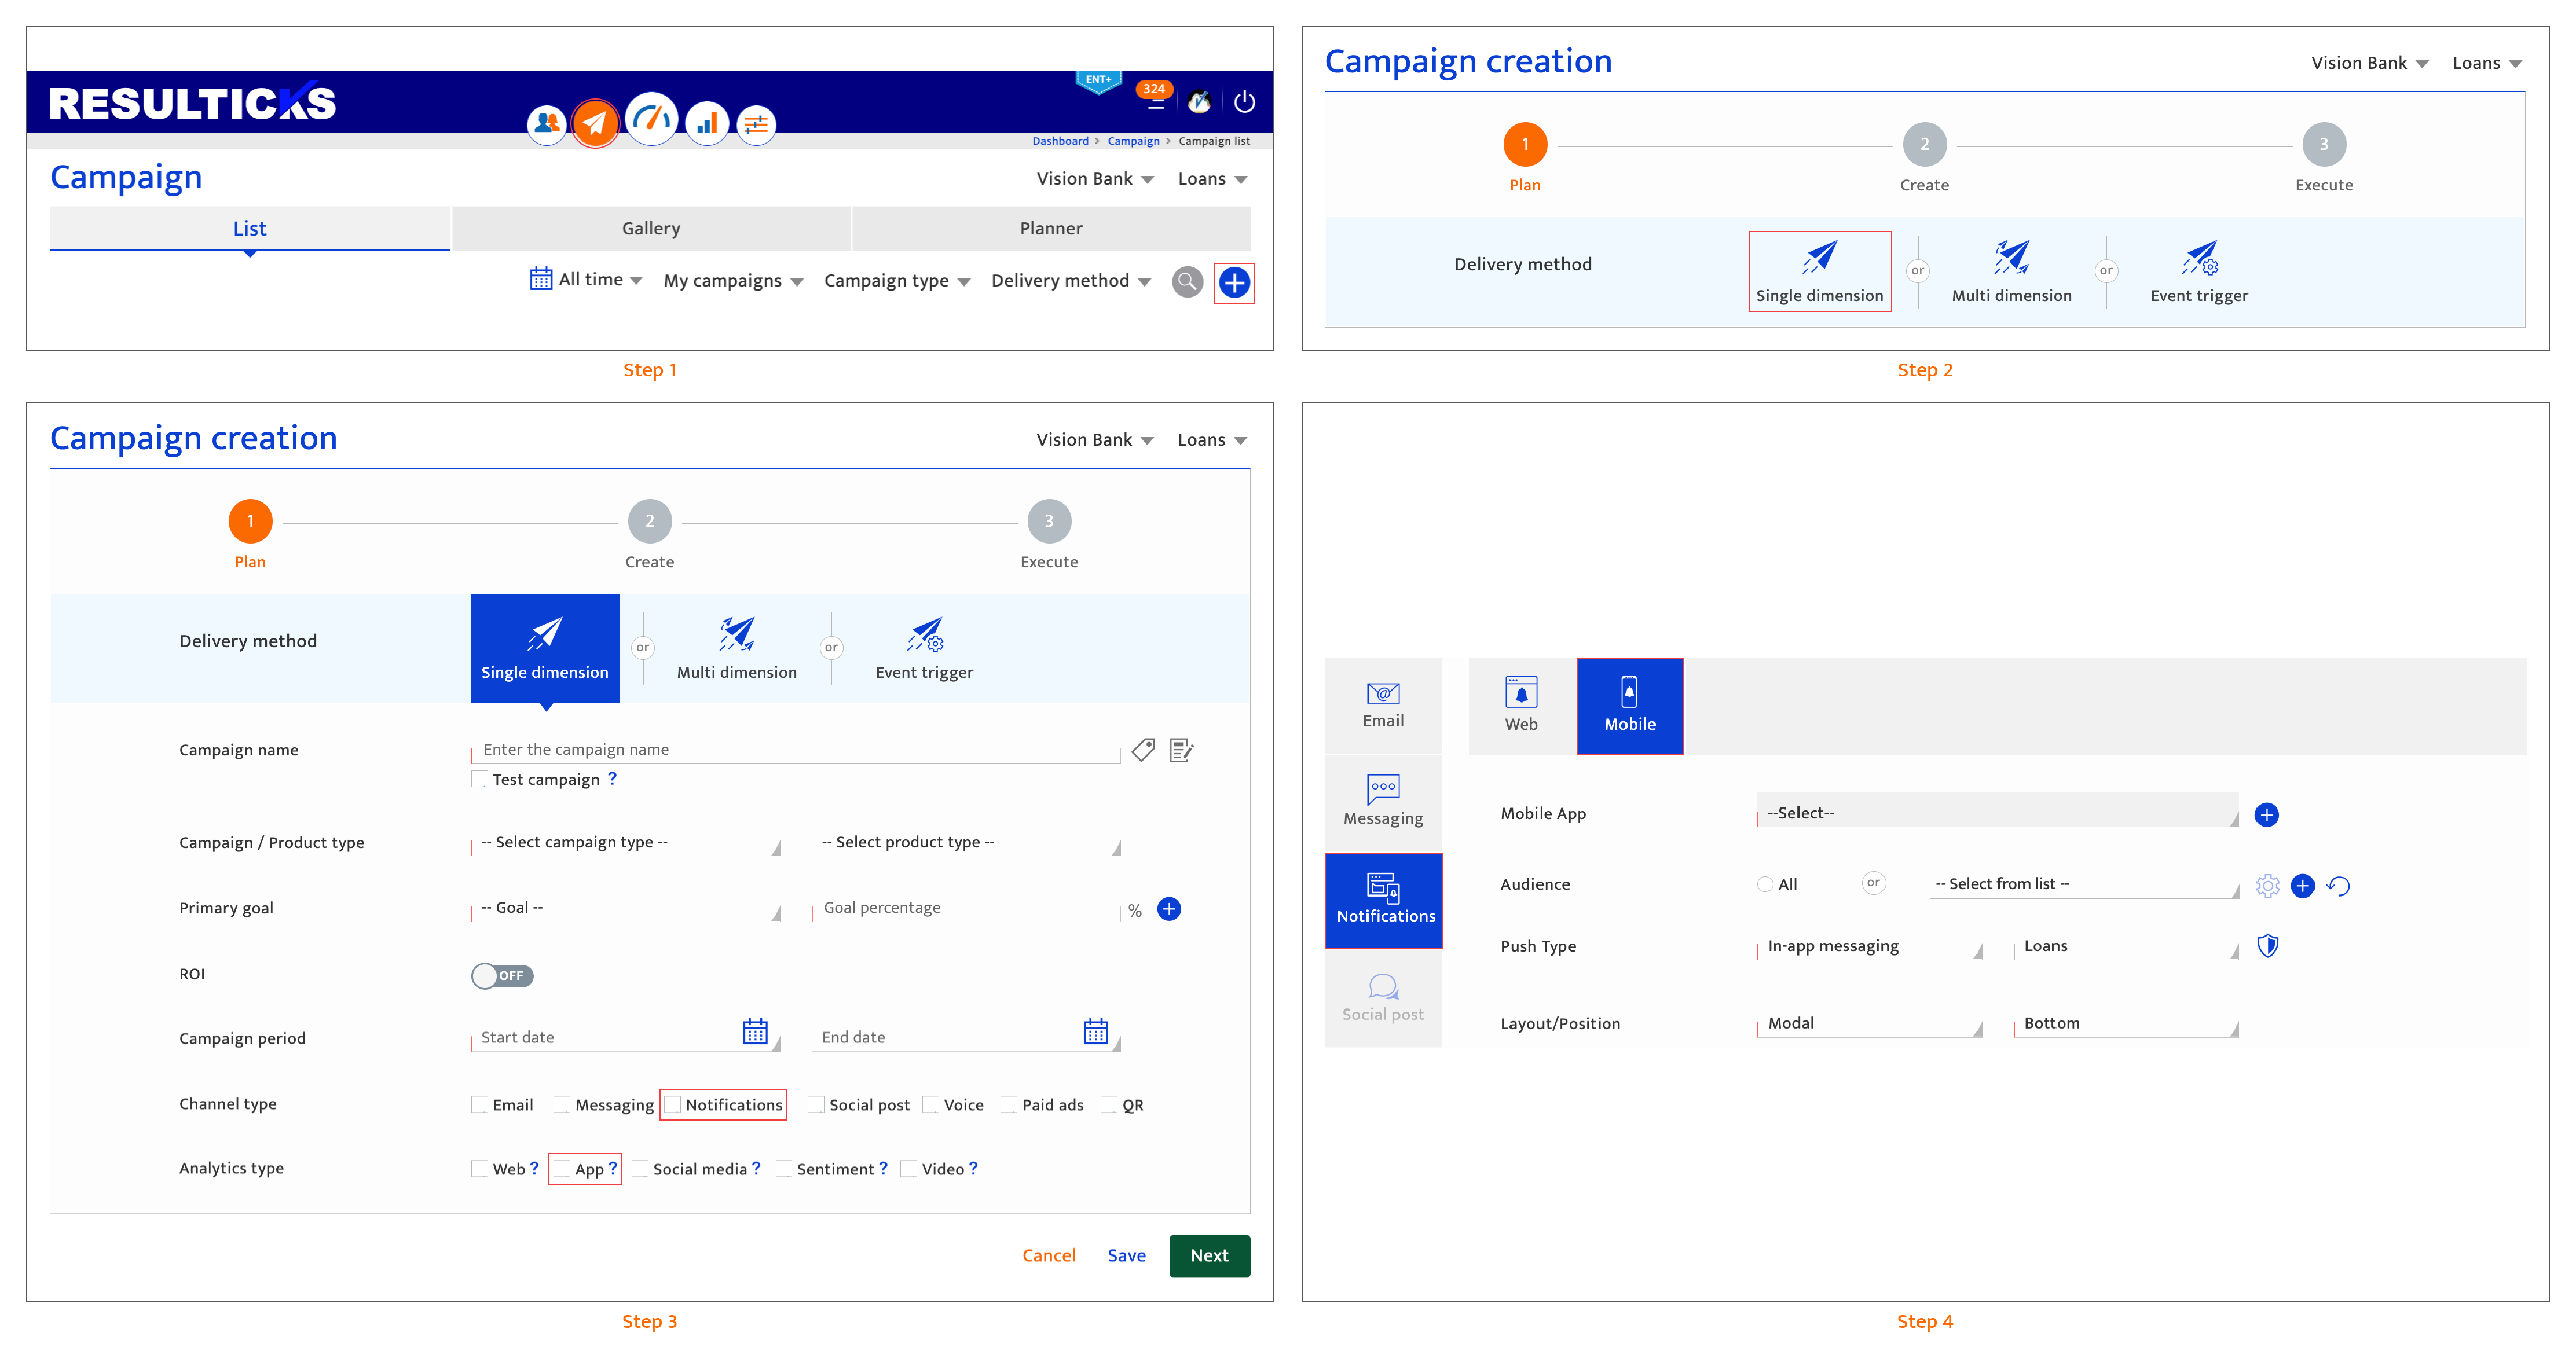
- Select the Campaign module and click on the "+" icon to add a campaign.
- Then select the Single dimension delivery method.
- Select Notifications in the Campaign plan screen.
- Select mobile within the campaign creation section, after clicking Notifications on the left panel.
Creating a mobile notification campaign#
Once the campaign has been planned, create the mobile notification campaign following these steps:
- Select the mobile app where the push notification will be delivered.
- Select the audience by choosing either "All" or specific target lists from the drop-down. Click the Refresh icon to re-select your target list(s).
- Select the audience by choosing either "All" or specific target lists from the drop-down. Click the Refresh icon to re-select your target list(s).
- Select the Delivery type as In-app inbox and inbox classification for the notification from the drop-down. Inbox classification defines the purpose of the notification. Incase of In-app inbox notification the message will be classified in the in-app inbox as per the classification defined.
- Click the shield icon to encrypt the push notification content for additional security.
- Enter title text for the notification. It can be a combination of alphanumeric characters and special characters with a 40-character limit.
- Enter the notification content in the text editor. There is a 140-character limit, including the Smart Link.
- Personalize elements of the content using the attributes from the drop-down list.
- Insert emojis provided by the platform.
- Insert the campaign Smart Link
- Insert an image
- Set notification expiry by turning the switch to "On". Specify the time period from the blast time after which is if the notification is undelivered, it will be deleted.
- Schedule the notification by entering the date and time to send it out. Enter the details in the format displayed or use the icons provided. Amend the time zone by using the pencil icon. The campaign schedule must fall within the campaign duration set when Planning the campaign.
Note that once notification has been scheduled, it cannot be deleted. The user can reschedule it, or they can remove the post by deleting the entire campaign on the campaign listing page. - Proceed to the next stage in the campaign creation process.
There are 4 options to proceed:- Click "Save" to save the current input and return to the Campaign-list. All mandatory fields on the current screen must be completed to save successfully. The platform will highlight any missing mandatory information.
The campaign will be saved as "Draft" if it is a new campaign. If the user has been editing a "Draft" or "Scheduled" campaign, the campaign state does not change. - Click "Next" to save the current input and proceed to the next step which is sequenced as follows:
- All mandatory fields on the current screen must be completed and the platform will highlight any missing mandatory information.
- The input screen for the next channel type selected during the planning step is displayed.
- If setup for all channel and analytics types selected have been completed, the Campaign execution screen (pre-campaign analytics) is displayed.
- Click on another channel type. Only channel types selected during the campaign planning stage will be available. Input for the current channel type is discarded unless the user clicks "Save" or "Next".
- Click "Cancel" to return to the Campaign-list screen. Any current input since the last time the "Next" button was clicked is discarded.
- Click "Save" to save the current input and return to the Campaign-list. All mandatory fields on the current screen must be completed to save successfully. The platform will highlight any missing mandatory information.

