Social media-LinkedIn
What is it?#
As one of the major social media platforms, LinkedIn boasts a substantial user base and is an integral component of most organizations marketing strategies. A LinkedIn campaign allows you to interact with your customers via posts and in many geographies, they enable you to reach a broad audience base.
LinkedIn campaign features#
Resulticks’ LinkedIn campaign module enables:-
- Content customization using a text editor
- Schedule of posts within the campaign duration
- Running a test campaign with an approval workflow
- Setting frequency caps
- Selecting the types of analytics for the campaign
Authorization and making changes#
Setting up a single dimension LinkedIn campaign can be done by a Super User, Administrator, or the Key Contact for the account.
Three-step process#
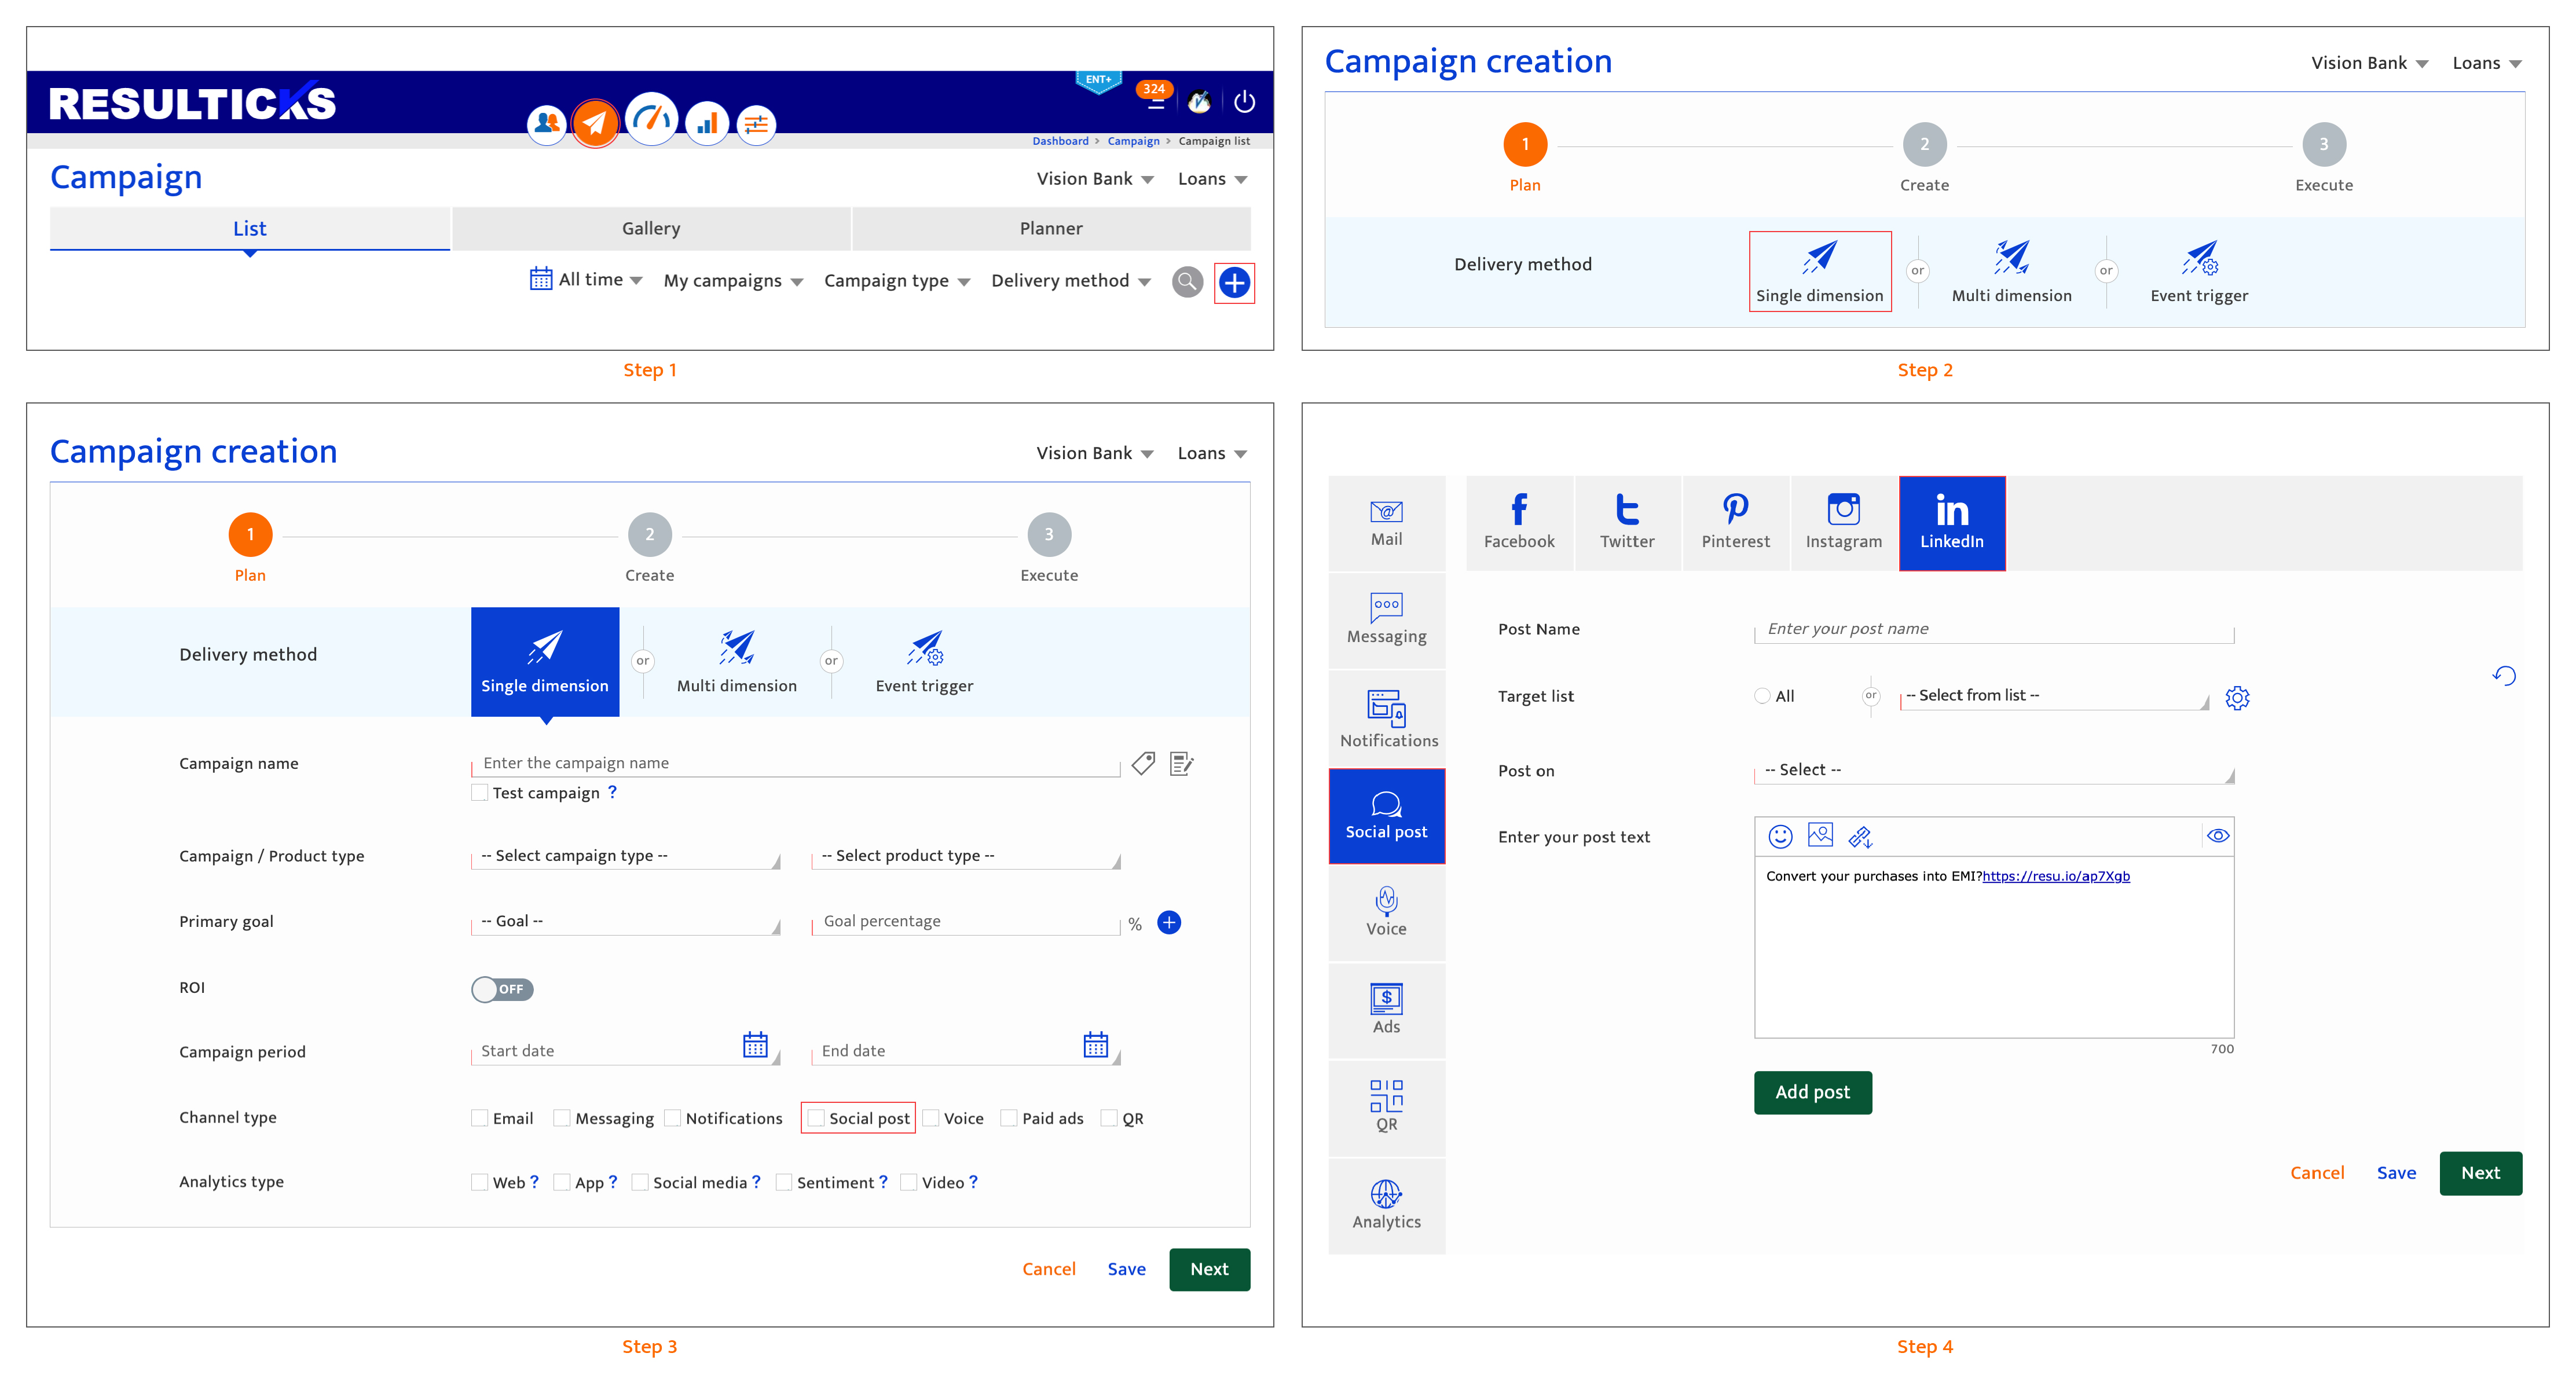
LinkedIn campaigns follow a three-step process in Resulticks.

In this module, we only address Step 2. For step 1, access detailed guidance at Plan a single dimension campaign. For step 3, access detailed guidance at Execute a single dimension campaign.
Accessing LinkedIn campaign creation#
- Select the Campaign module and click on the "+" icon to add a campaign.
- Then select Single dimension delivery method.
- Select Social post in the Campaign plan screen.
- Select LinkedIn within the campaign creation section, after clicking Social post on the left panel.
Creating a LinkedIn campaign#
Once the campaign has been planned, create a LinkedIn campaign following these steps:
- Select a LinkedIn page from the drop-down list. For more information on integrating a LinkedIn account, see the Data Exchange – LinkedIn.
- Define the post name by giving the LinkedIn update a short and easily identifiable name. It can be a combination of alphanumeric characters and special characters with a 50-character limit. The post name will appear above the post in the scheduled posts section.
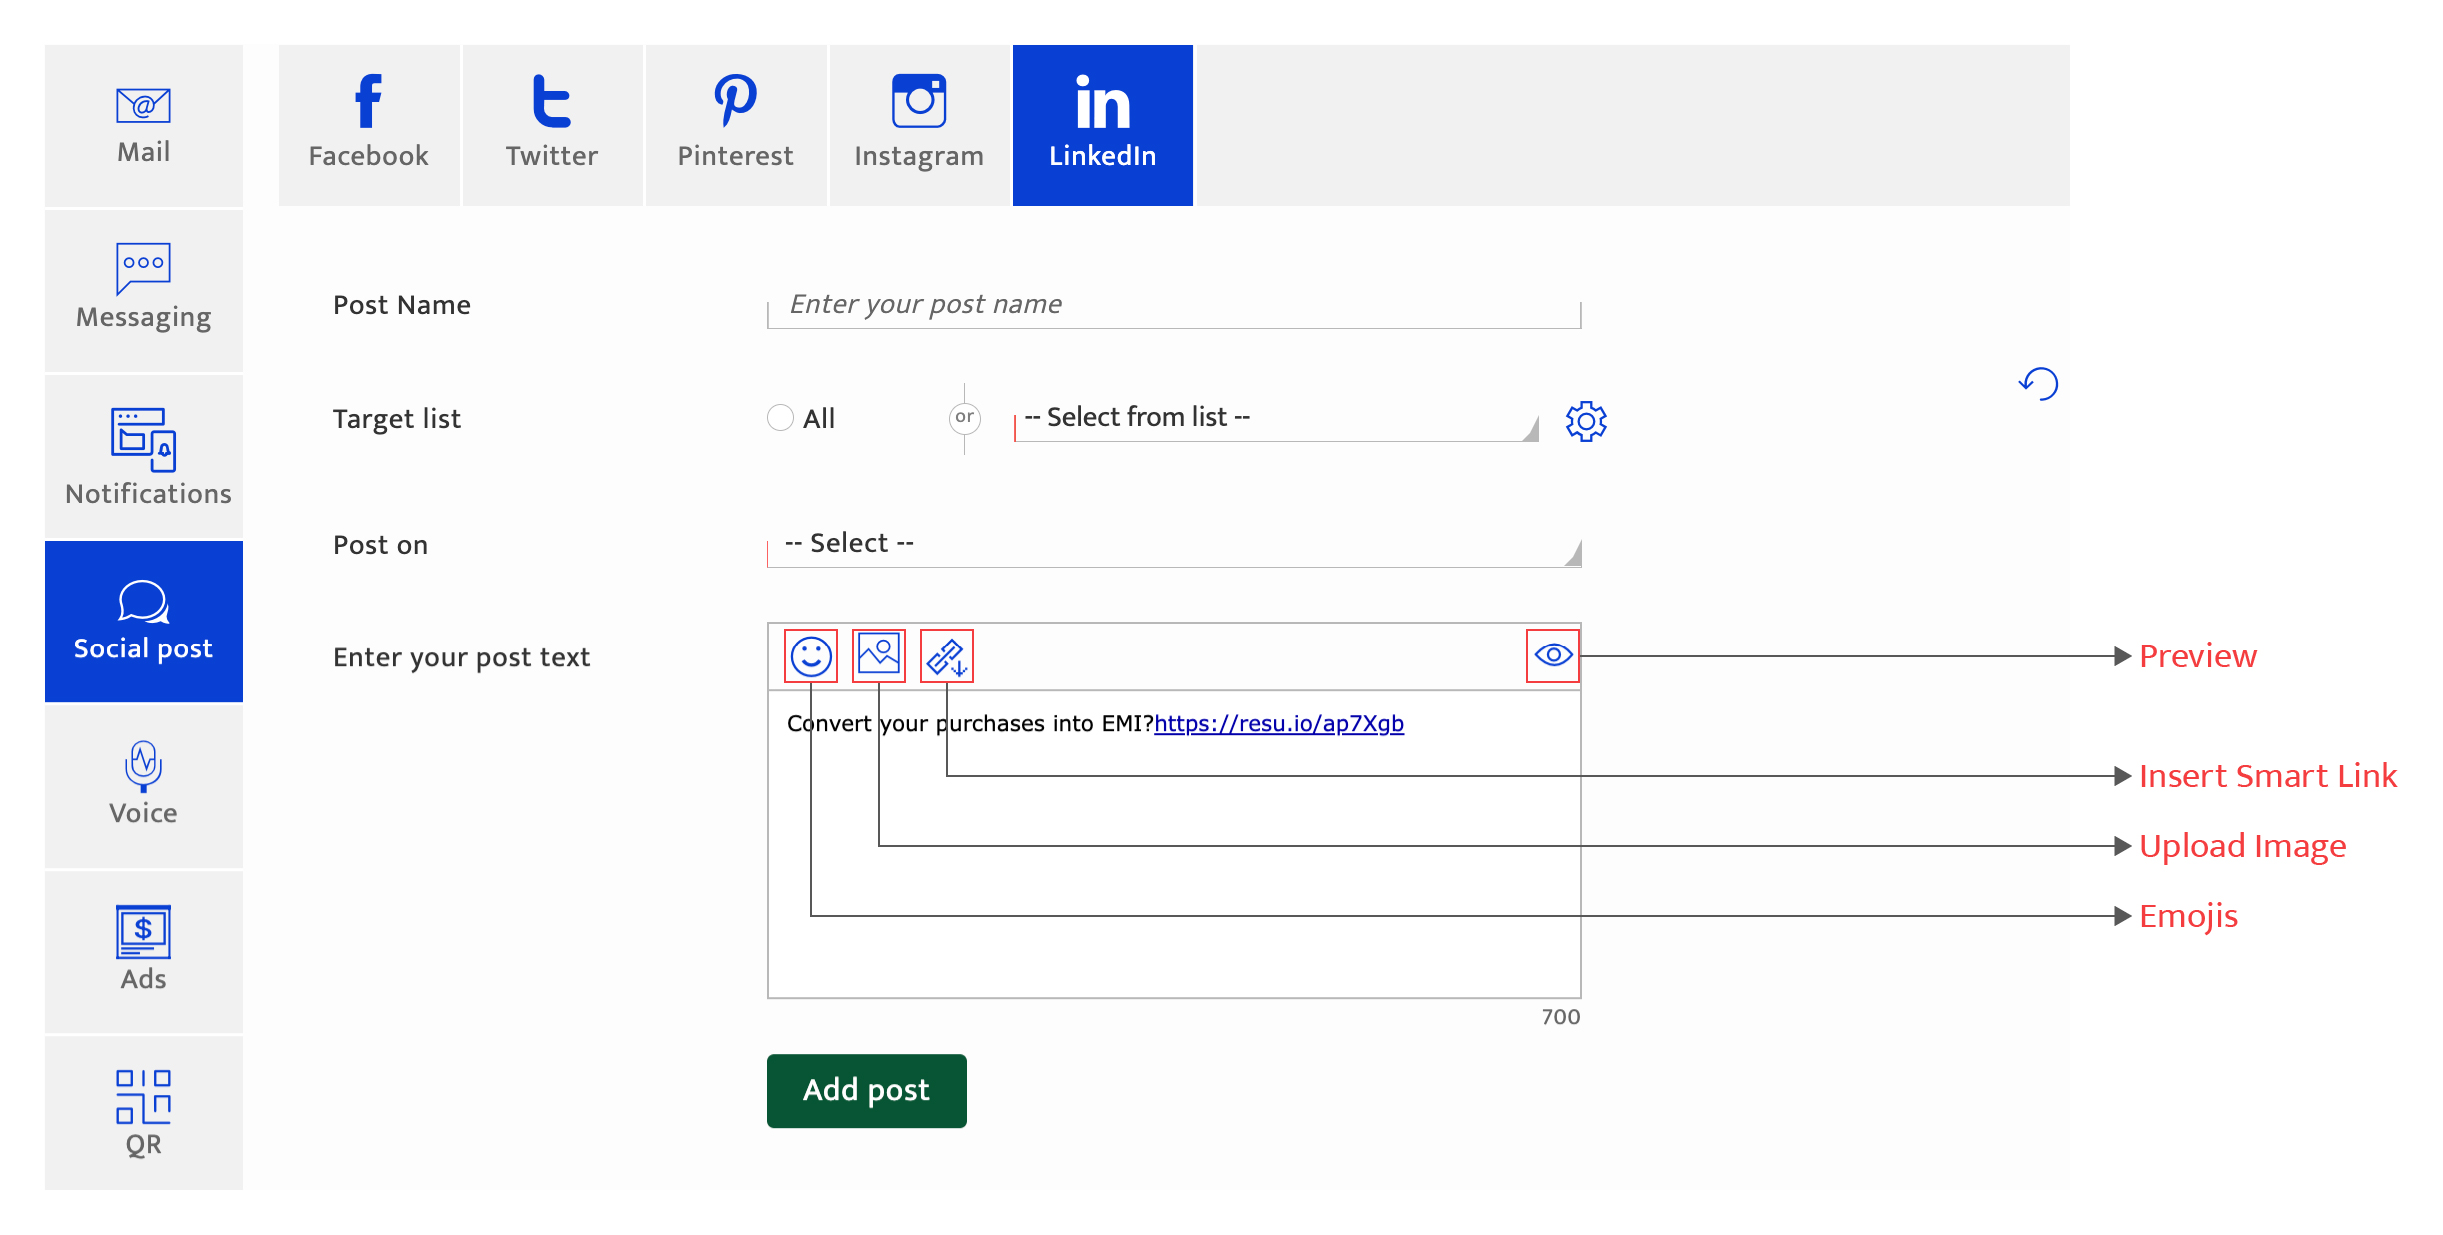
- Enter LinkedIn post content using the text editor with a 700-character limit. The text editor provides the following options:-
- Image: Click this and select an image file to upload. Delete the uploaded image by clicking on the red “Delete” button. The image file can only be a JPG or PGN file, and cannot exceed 2MB in size.
- Smart link: Click the Smart link icon to insert a Smart link into the tweet. A Resulticks Smart link is created by clicking on the Smart link icon in the upper right of the screen. For detailed instructions, see Creating Smart links.
- Preview: Click the preview icon to preview the post.
- Post link. Besides the text box, a URL can be entered as part of the post. If a SmartLink has been created for the campaign, it will automatically appear here. The platform will also verify the validity of the URL.
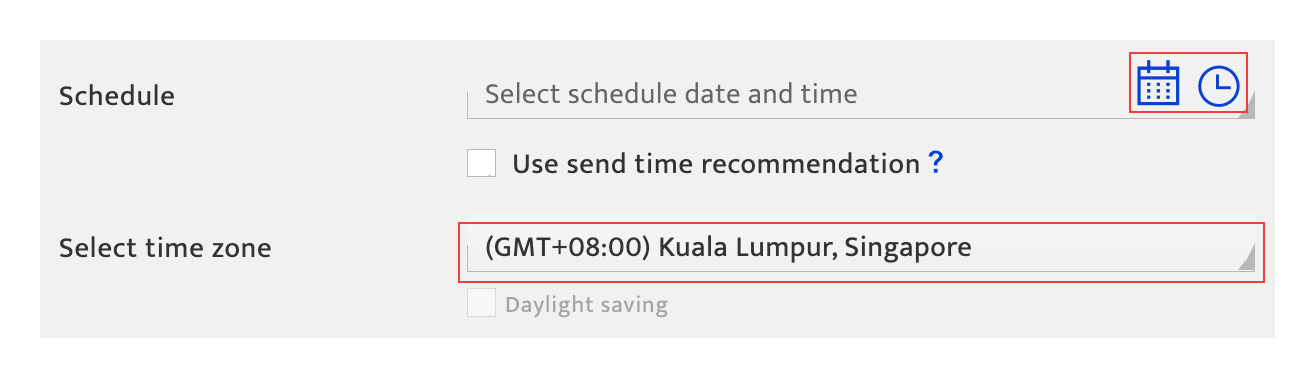
If the URL is valid, a green checkmark will appear. If not, a red x mark will appear instead. - Schedule the post by entering the date and time to send it out. Enter the details in the format displayed or use the icons provided. Amend the time zone by using the pencil icon. The campaign schedule must fall within the campaign duration set when Plan a single dimension campaign.
Note that once a post has been scheduled, it cannot be deleted. The user can reschedule it, or they can remove the post by deleting the entire campaign on the campaign listing page. They can also directly delete the post on LinkedIn. - Tick the request approval checkbox to request approval for the post.
- Enter the email address of the reviewer and click Send. The email can only be sent to one address.
Note that if no email address is entered, no test mail will be sent. If the reviewer approves the post, the user will be notified of approval by email. If no approval is received, the user will not be able to publish the post. - Add this post to the campaign by clicking "Add post". The post will be added to the scheduled posts section below. To create more posts for the campaign, simply repeat the process.
- Proceed to the next steps in the campaign creation process.
- Click "Save" to save the campaign creation progress so far. The user will be returned to the campaign listing page and the campaign will be saved as "Draft".
To return to campaign creation, access the campaign through the Campaign list, click next in the planning step, and then access the relevant channel through the tabs on the campaign creation screen. - Click "Next" to proceed to the next step which is sequenced as follows:
- The next channel within the channel type. For example, if the user is working on a channel within the social post channel type, they will be taken to the next social media channel until the last channel is reached.
- The next channel type selected during the planning step.
- The campaign list, if all channel campaigns have been created and all analytics set up has been completed.
Note that the user will only be taken to the next step once all mandatory input has been completed. The platform will highlight the missing information.
- Click "Save" to save the campaign creation progress so far. The user will be returned to the campaign listing page and the campaign will be saved as "Draft".
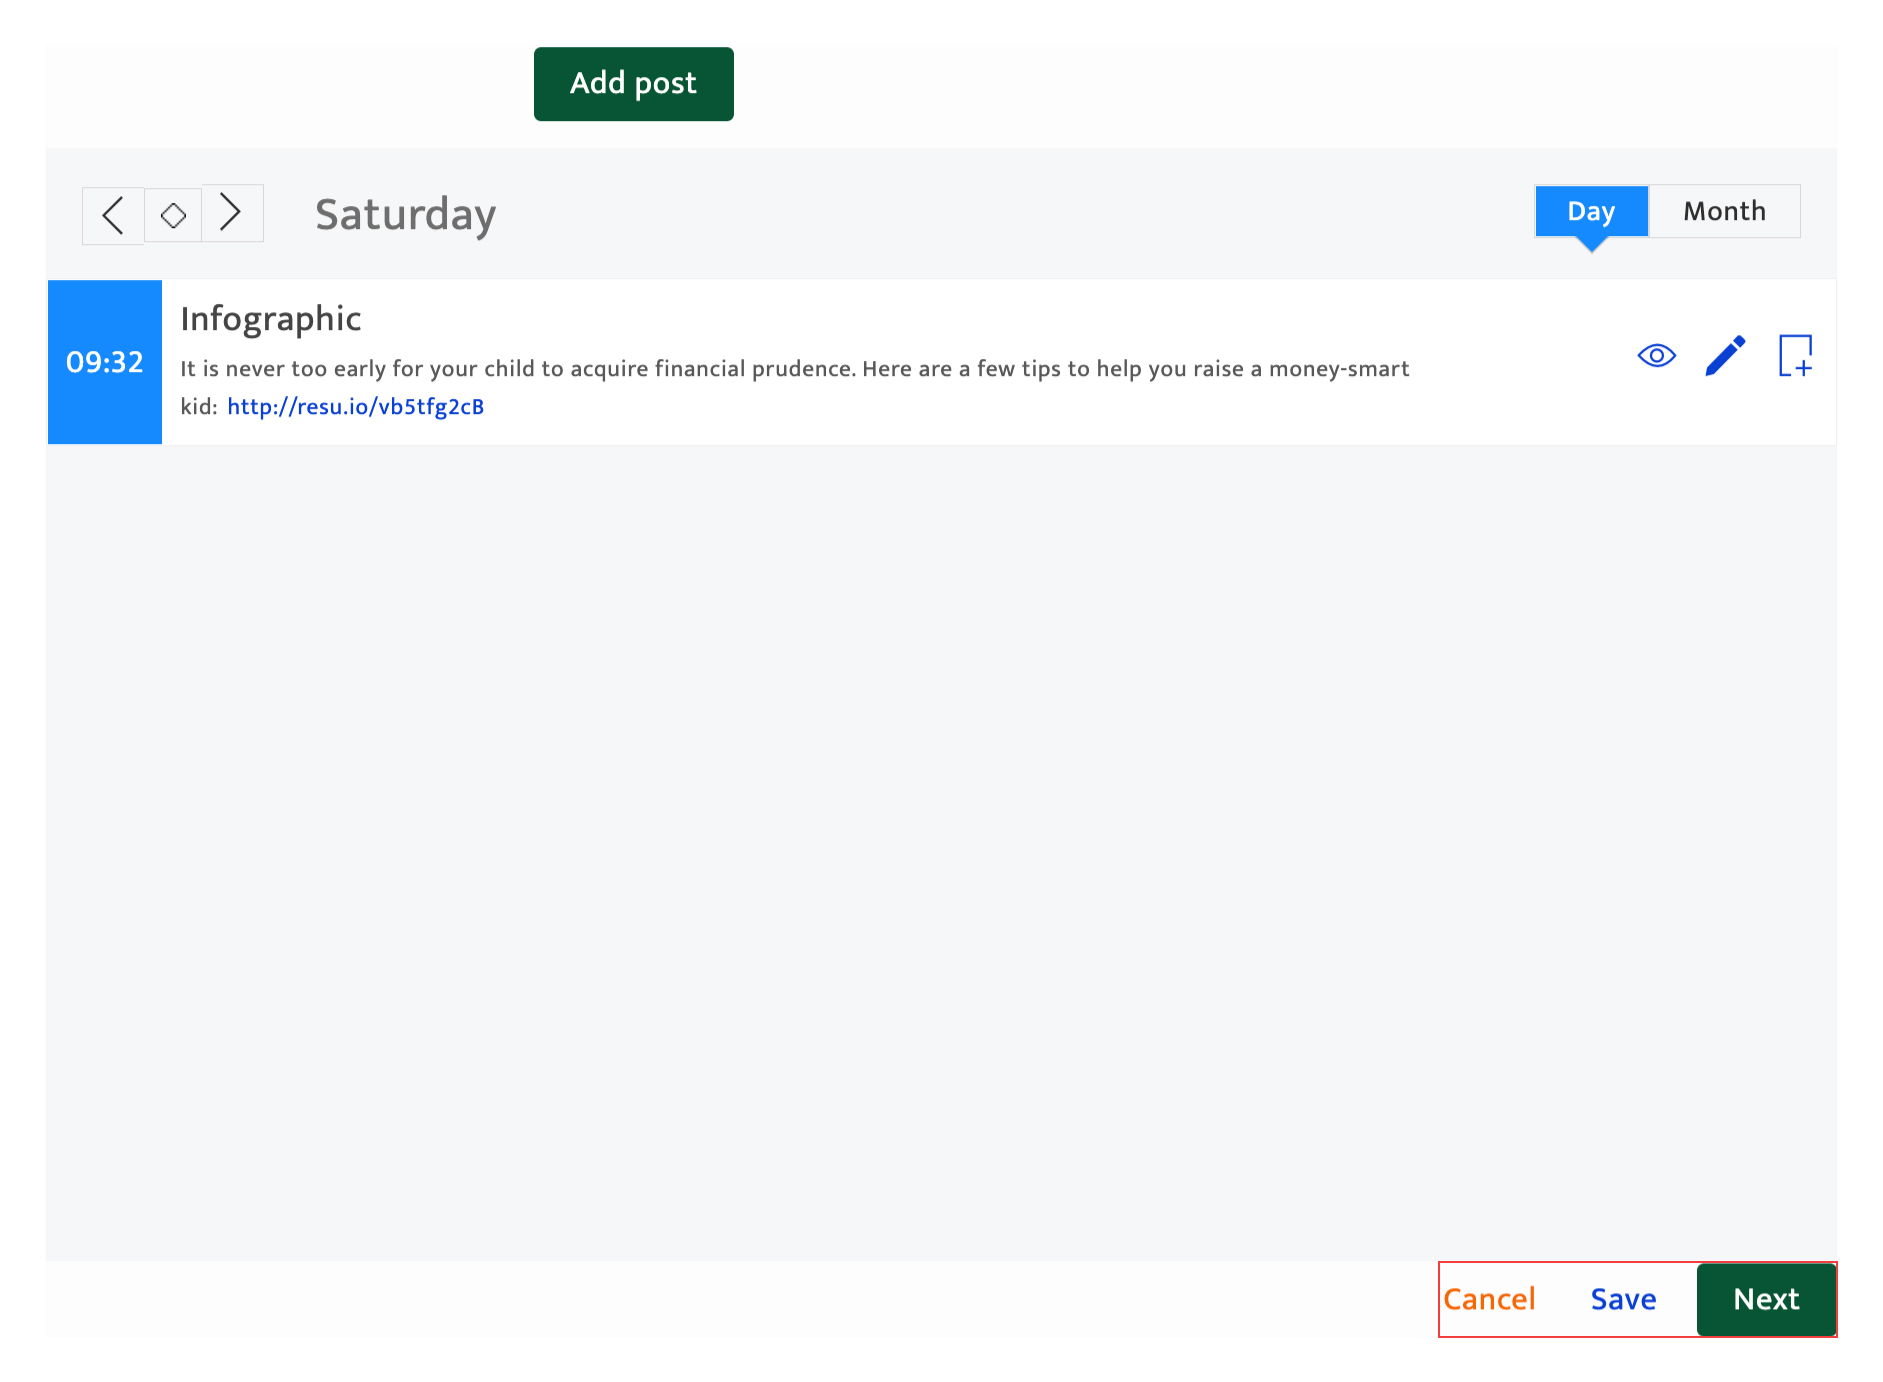
Managing scheduled posts#
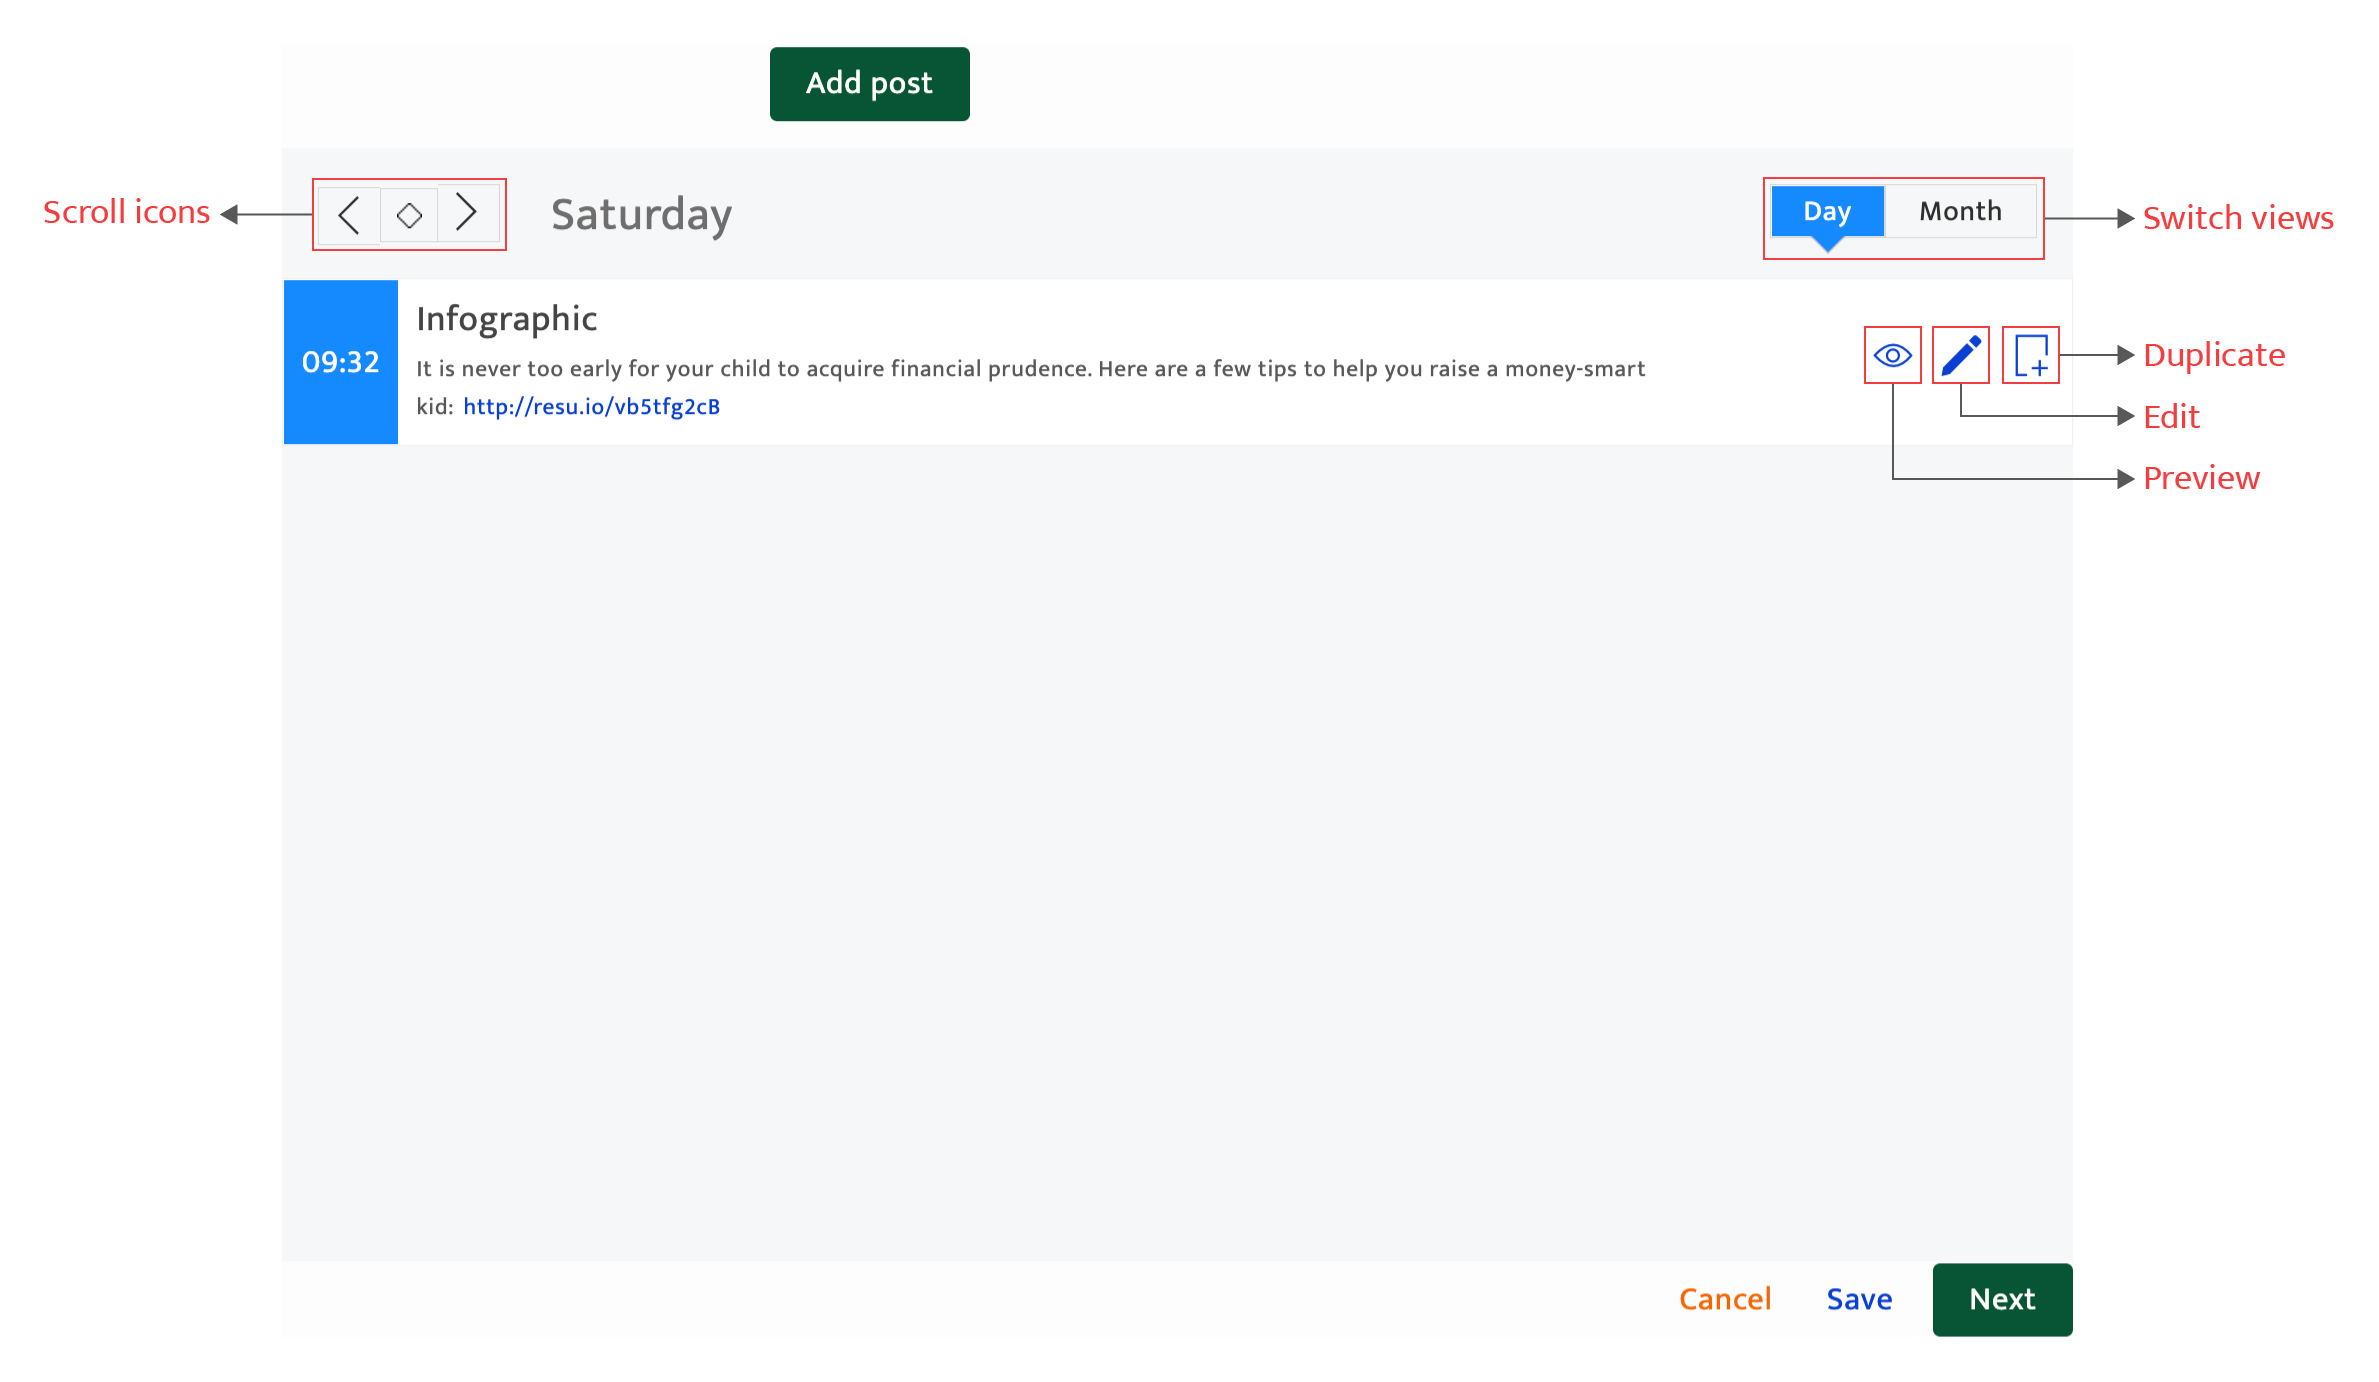
Manage scheduled posts by using the 4 options.
- Browse scheduled posts by scrolling through the months and changing the views between day and month.
- Preview a post. The preview consists of the uploaded image, the post copy, and any links.
- Edit the post. This will allow the user to re-edit the post content and settings.
- Duplicate the post. The post will be duplicated as "Post Name–Copy". This feature can be used to schedule recurring posts within a day/week/month. After duplicating a post, the user has the option to choose a different schedule time.