What is it?#
Even with the advent of new communication channels, Email remains an integral component of most organizations marketing strategies. An email campaign allows you to interact with your audiences via personalized content, and reach a broad audience across many regions.
Email campaign features#
Resulticks email campaign module enables:-
- Personalization of sender name/email, content and subject line
- Content composition using a text editor, template builder or import
- Split A/B testing
- Scheduling within the campaign duration
- Sending a test email with an approval workflow
- Setting unsubscription options
Authorization and making changes#
Setting up a single dimension email campaign can be done by any user with access to campaign creation.
Three-step process#
Email campaigns follow a three-step process in Resulticks.

In this module, we only address Step 2. For step 1, access detailed guidance at Plan a single dimension campaign. For step 3, access detailed guidance at Execute a single dimension campaign
Accessing email campaign creation#
- Select the Campaign module and click on the "+" icon to add a campaign.
- Then select Single dimension delivery method.
- Select Email in the Campaign plan screen.
- Select Email on the left panel.
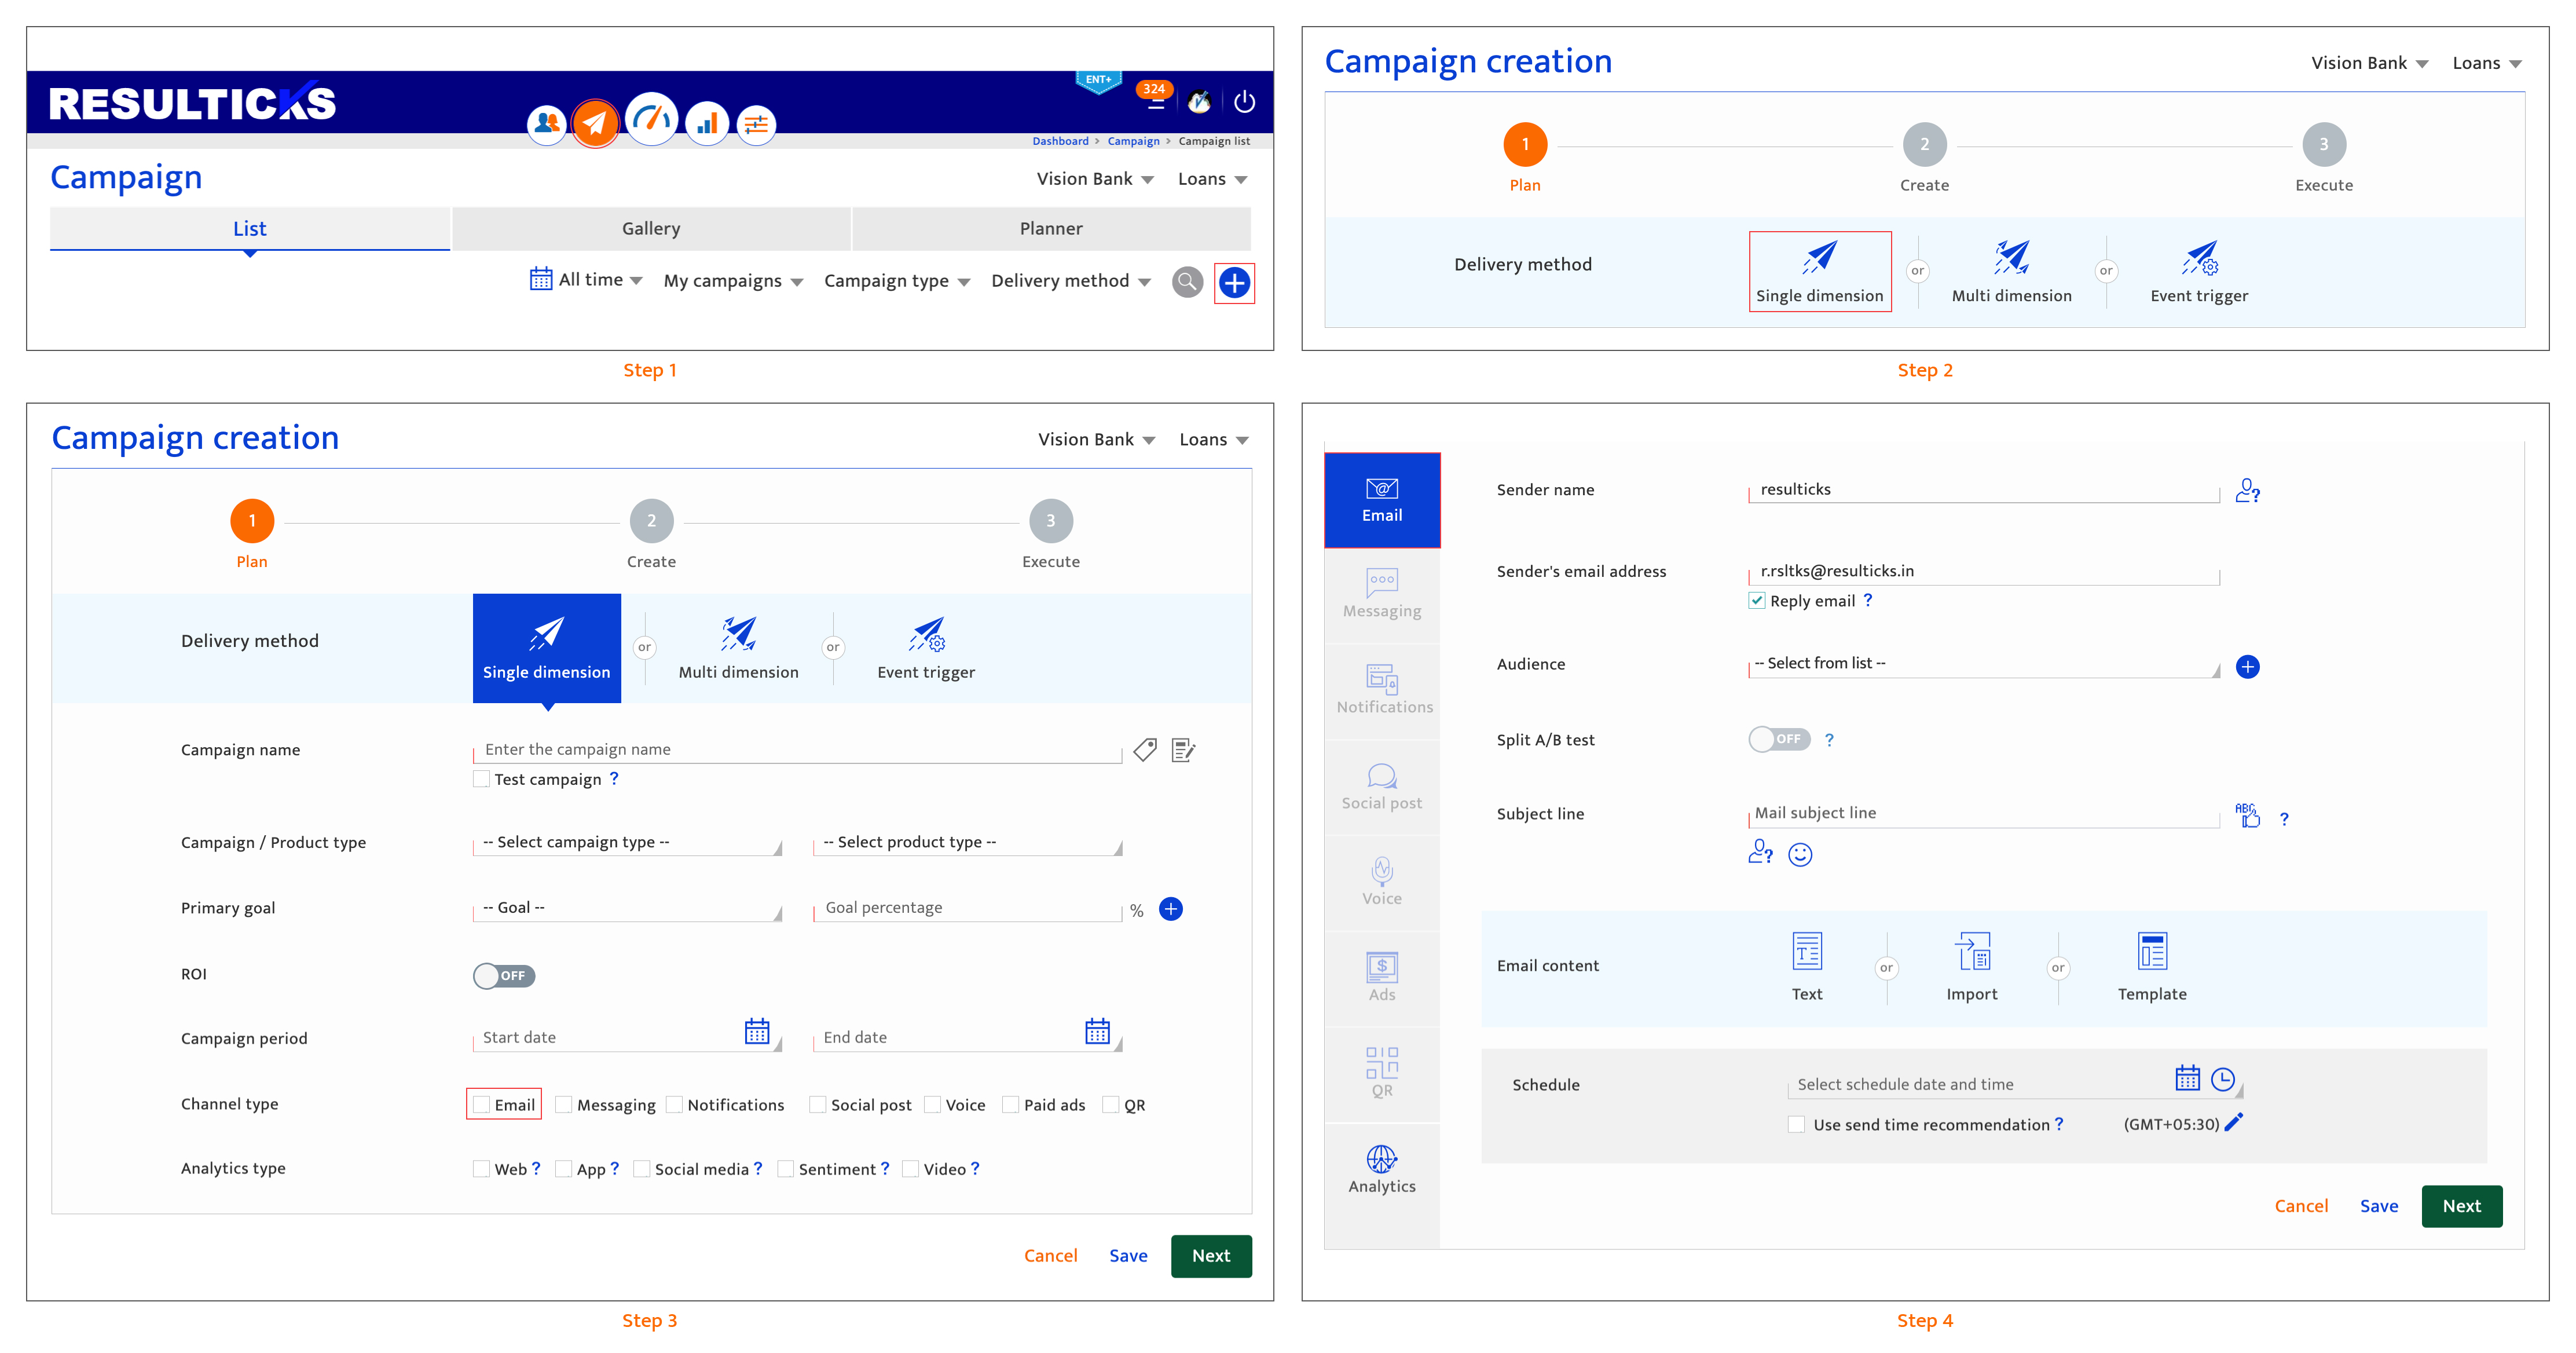
Creating an email campaign#
Once the campaign has been planned, create the email campaign following these steps:-
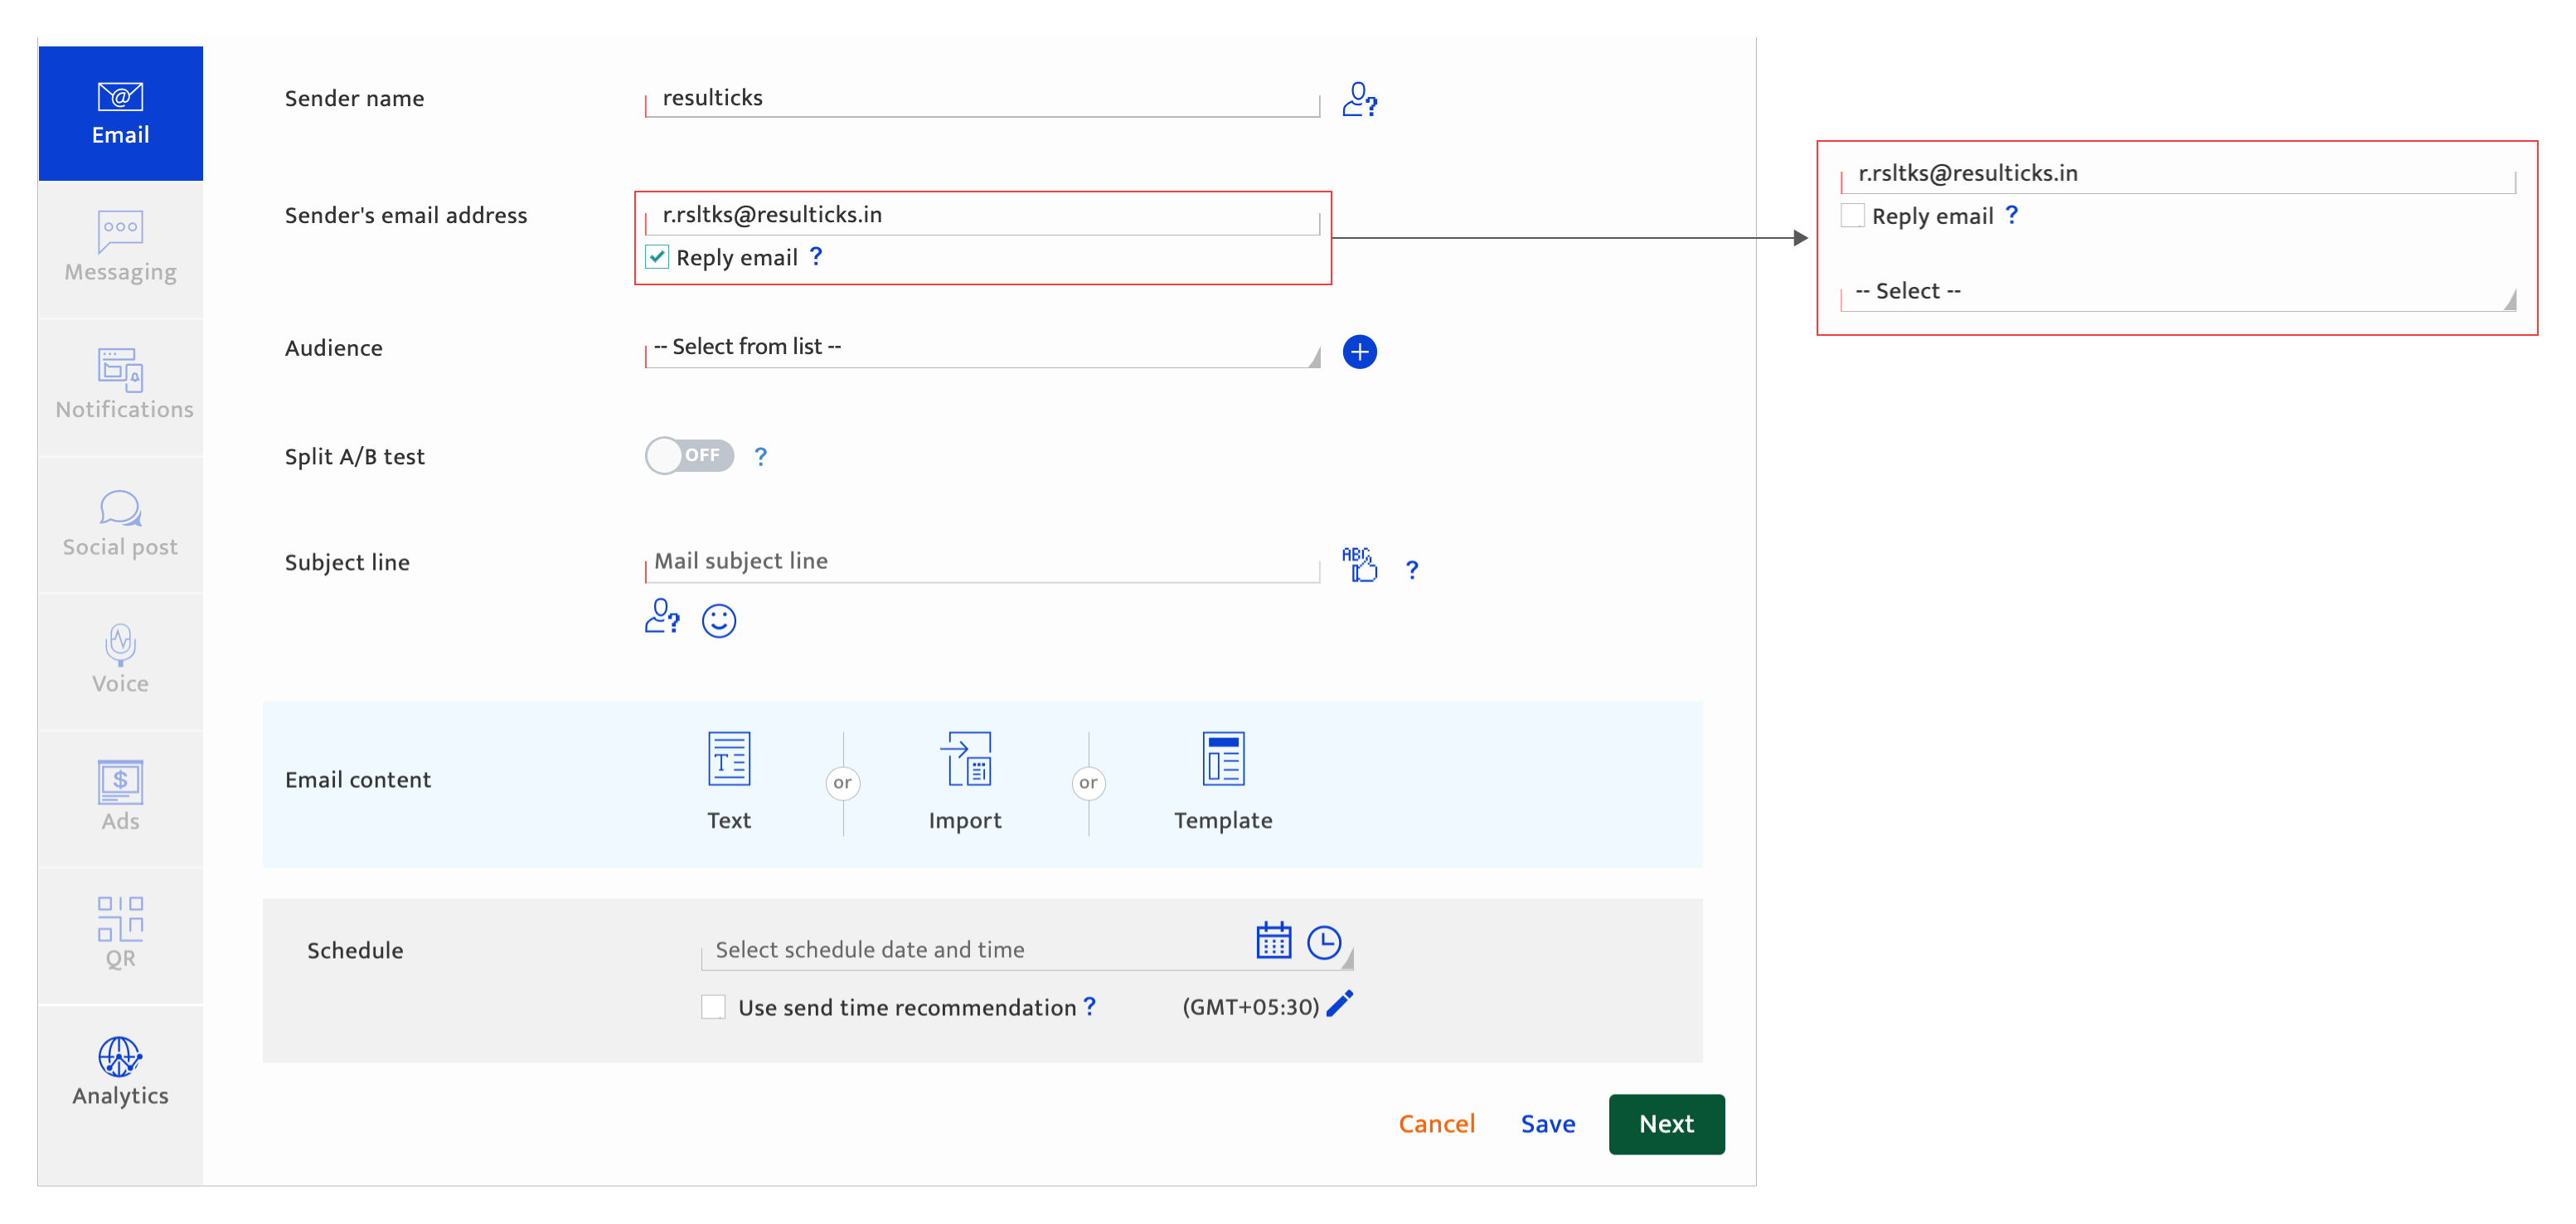
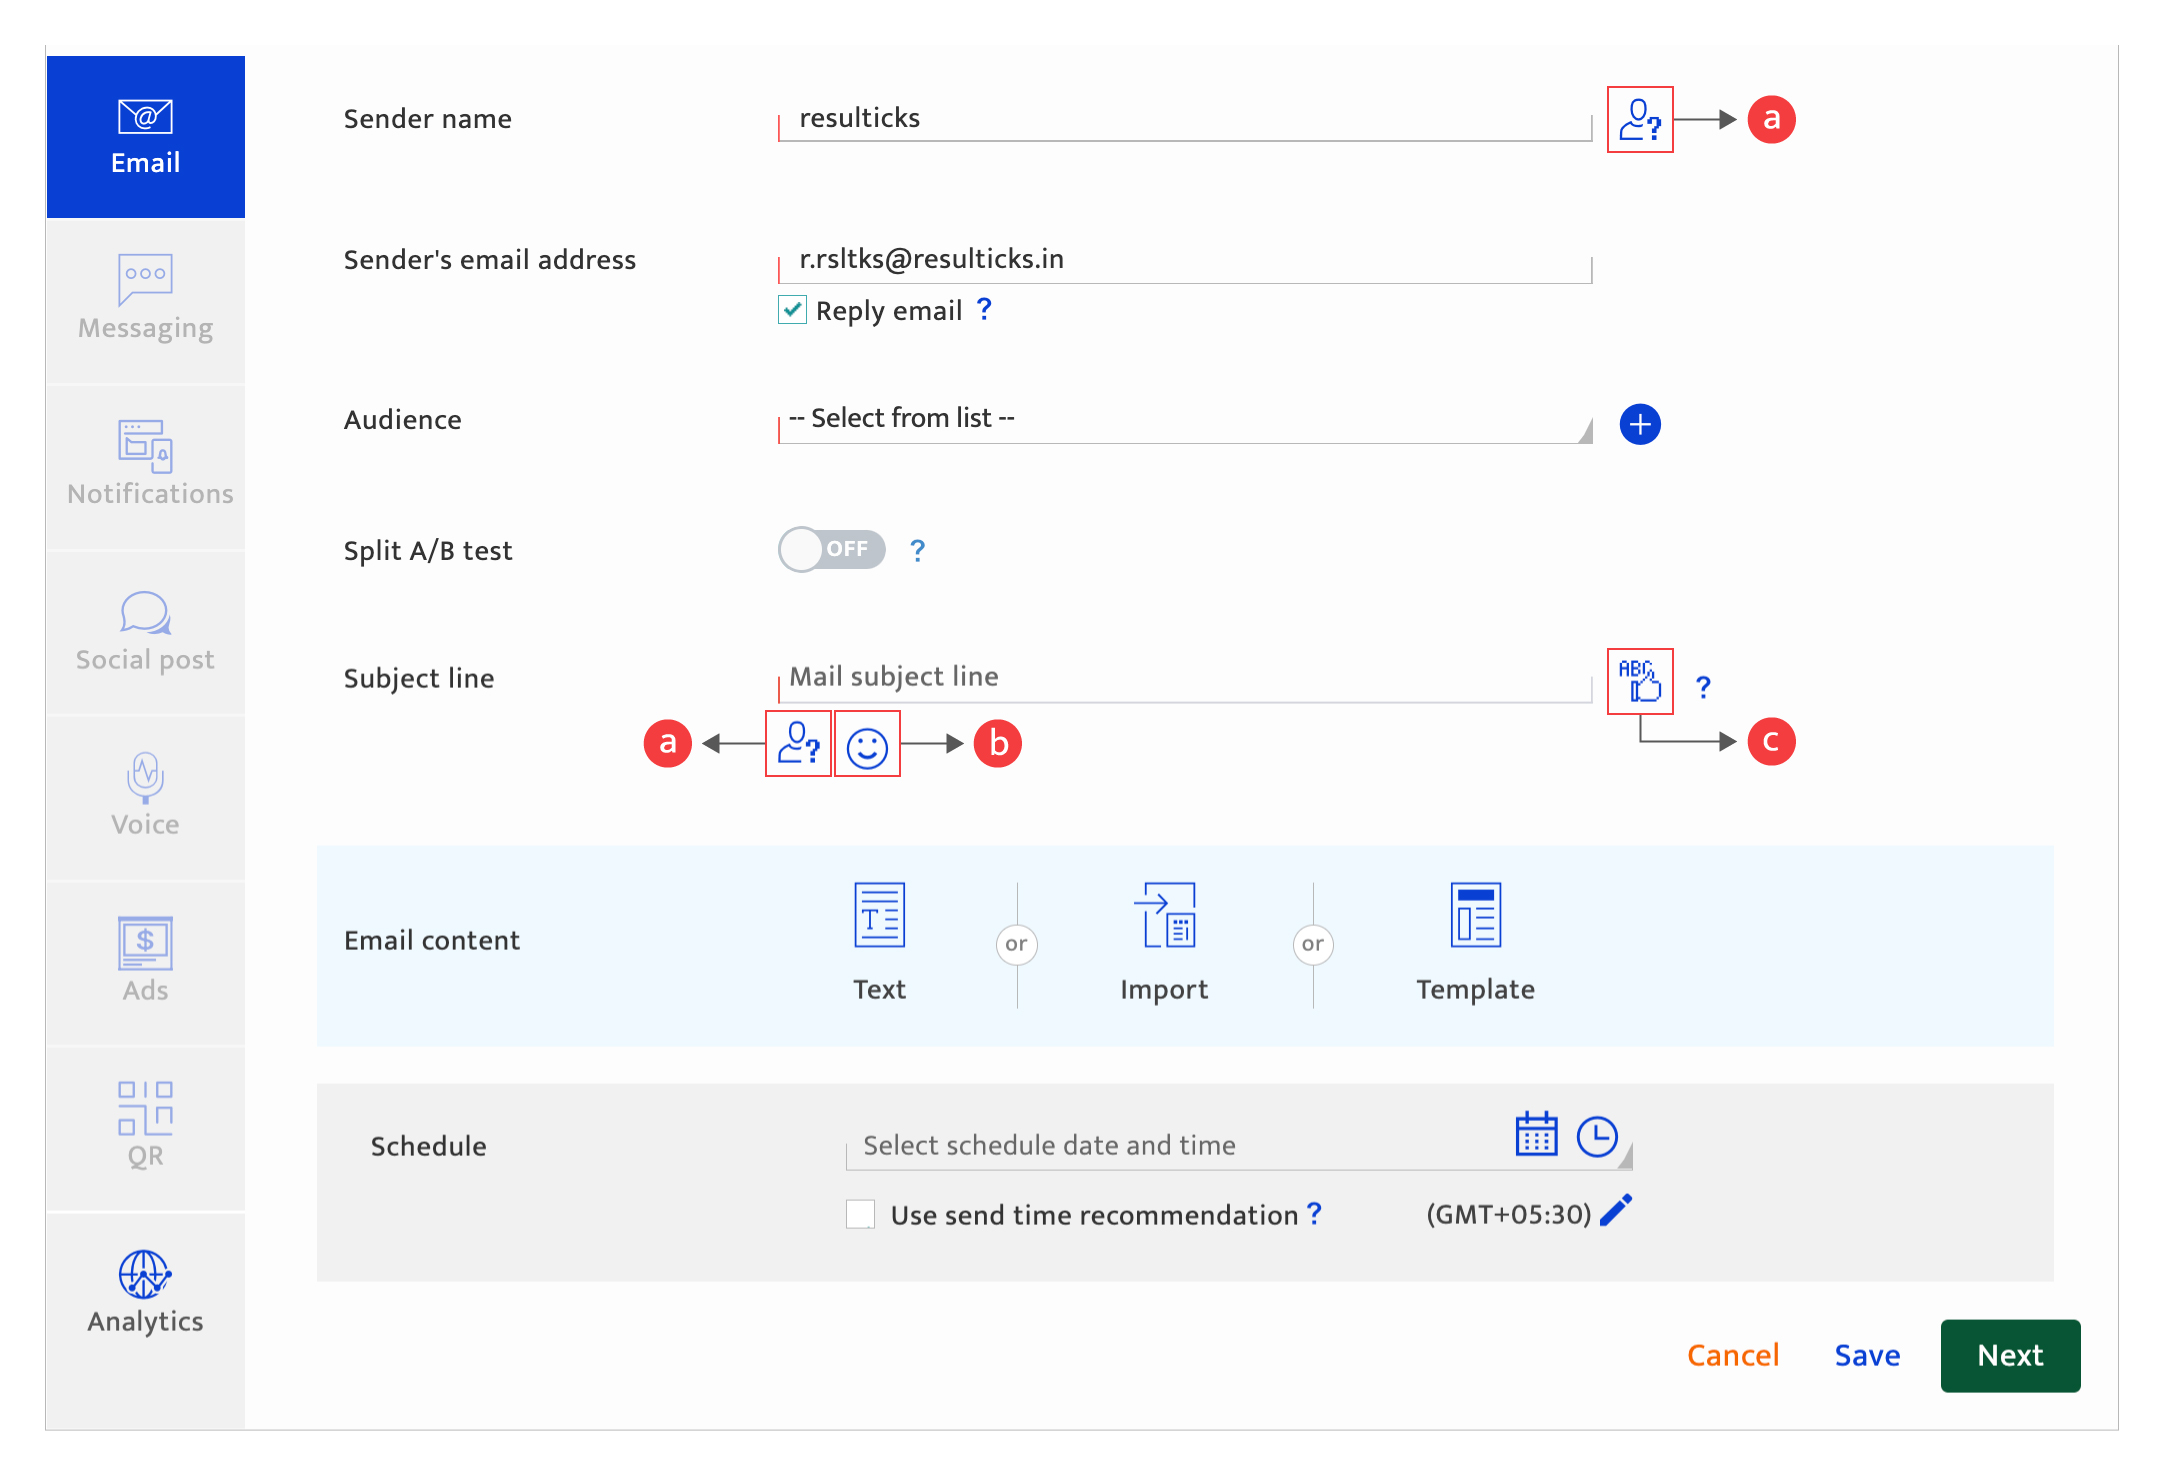
- Enter the sender’s name. There is a no-character limit. Click the Personalize icon to customize the sender’s name.
- Enter the sender’s email address. Click the Personalize icon to customize the email ID. Tick the checkbox below to use this email address as the reply email. If not, select a reply email from the drop-down list.
- Select the target list(s) for the email campaign.
- Click the "+" icon to create a new target list. For more information on creating target lists, see Target lists
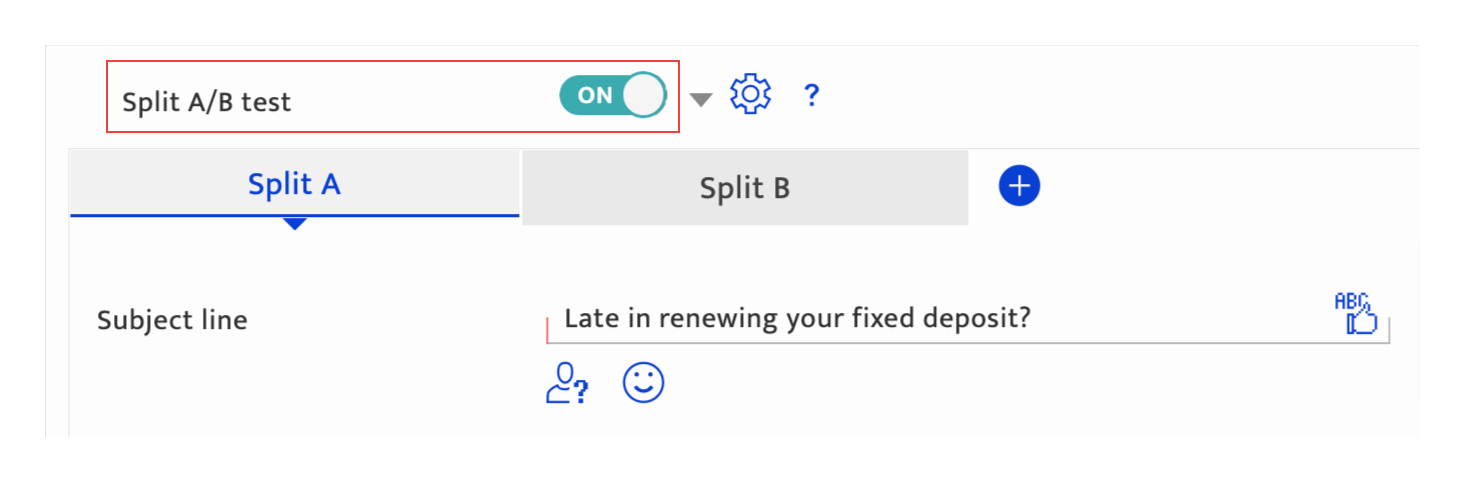
- Switch on/off split A/B testing.
Note that Split A/B testing will be only available if the target list has a minimum audience size of 100. Up to four split testing groups can be added. You can run split tests on either the subject line, content or schedule. - Enter an email subject line, of any length.
- Customize(a) the subject line using the Personalize icon.
- Insert emojis(b) using its icon.
- View the subject line analysis(c) by clicking on the thumb icon.
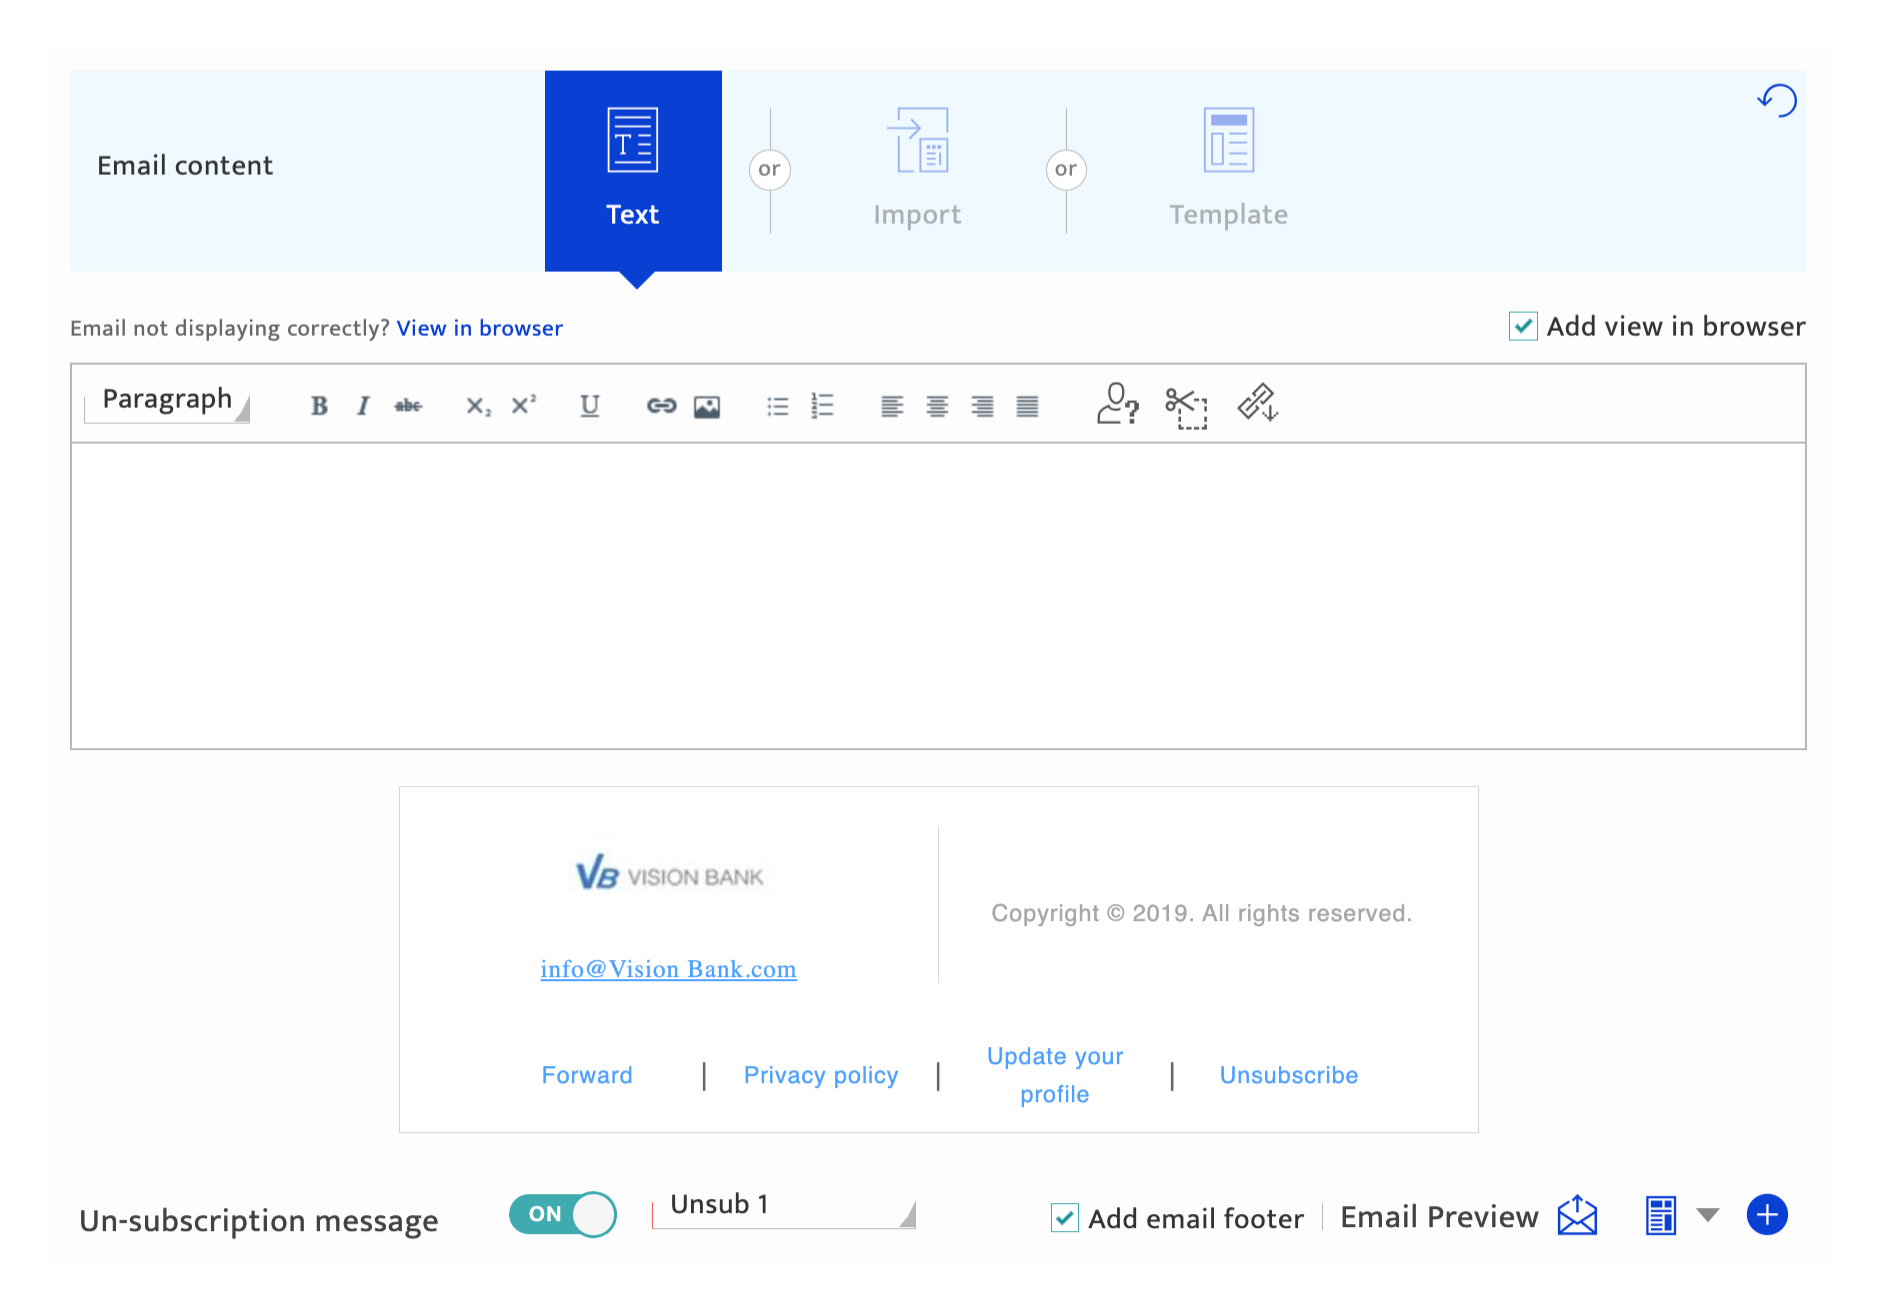
- Select the email content creation option.Text: Create a text-only email using the text editor.
- Create and include a Smart link using the editor.
- Add an unsubscription message to the email from the drop-down list.
- Add an email footer by ticking the email footer checkbox and selecting a suitable footer from the drop-down list, or click the plus button to create a new one. For more information, see Communication settings–Email channel settings
Import: Import an existing email via a URL or ZIP file upload.Template: Select an existing email template or create a new one using the template builder. - Schedule the email campaign. Manually enter the date and time for the email campaign blast or select the date and time using the icons provided. Adjust the time zone if required by using the pencil icon. The schedule date and time must fall within the campaign duration set up on the campaign planning page.
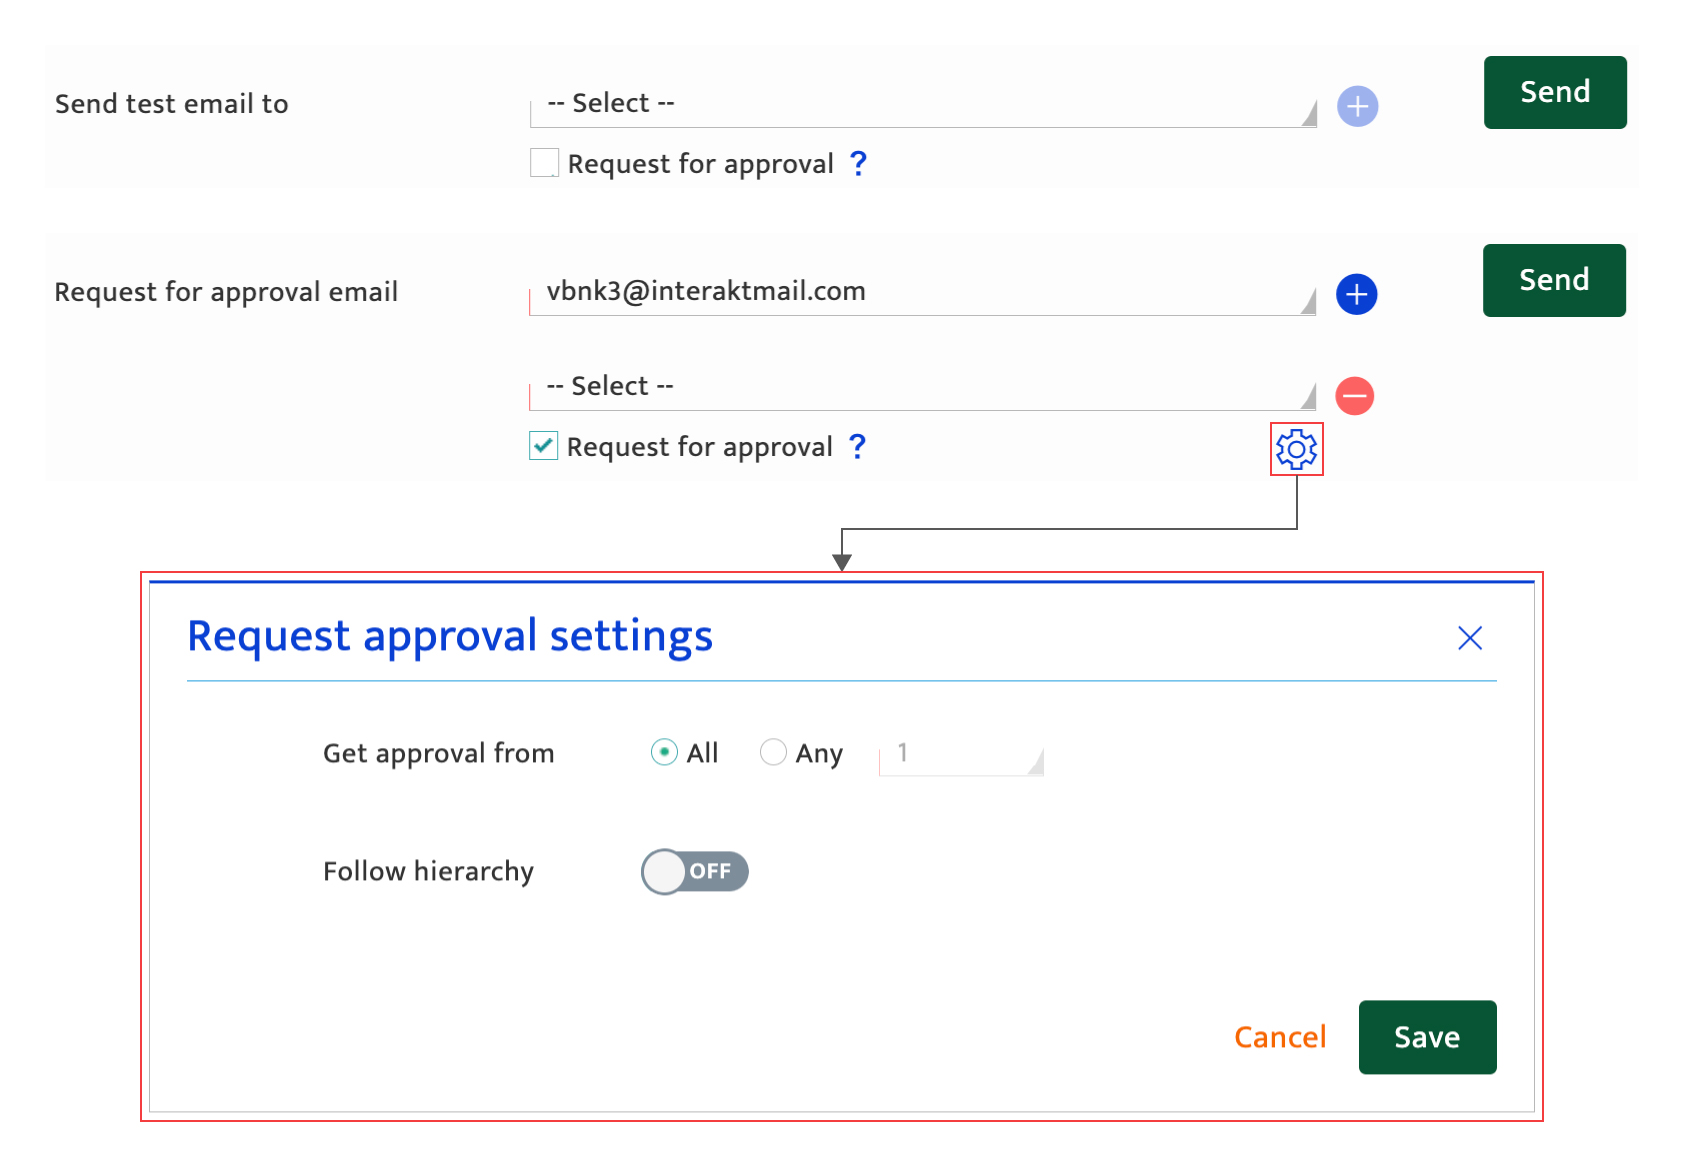
- Send a test email by selecting the recipients’ email id from the drop-down list.
- Tick the request for approval checkbox to make the campaign blast conditional on approval from the recipients of your test email. They will receive a test email with the option to approve.
- Click the plus icon to add additional approvers. A request for approval email can be sent to a maximum of three recipients.
- Click on the Settings icon to set up the approval workflow and conditions.
- Proceed to the next stage in the campaign creation process.
There are 4 options to proceed:- Click "Save" to save the current input and return to the Campaign list All mandatory fields on the current screen must be completed to save successfully. The platform will highlight any missing mandatory information.
The campaign will be saved as "Draft" if it is a new campaign. If the user has been editing a "Draft" or "Scheduled" campaign, the campaign state does not change. - Click "Next" to save the current input and proceed to the next step:
- All mandatory fields on the current screen must be completed and the platform will highlight any missing mandatory information.
- The input screen for the next channel type selected during the planning step is displayed.
- If setup for all channel and analytics types selected have been completed, the Campaign Execution screen (pre-campaign analytics) is displayed.
- Click "Save" to save the current input and return to the Campaign list All mandatory fields on the current screen must be completed to save successfully. The platform will highlight any missing mandatory information.
For more information on creating email content in Resulticks, see Email content creation